

DIY Weather Stripping
Replacing weather stripping on an exterior door is a low cost project that can significantly lower your utility bill. So in this video, we provide a simple way to fix a drafty door.
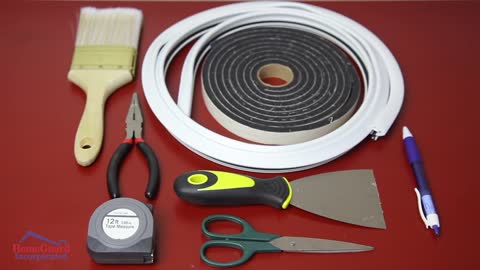
The tools that you may need for this project are: new weather stripping, measuring tape, scissors or a utility knife, dry cloth or paintbrush, a scraper, and pliers.
To start, remove the old weather stripping. You may need to use pliers to pull it away from the frame. Visually inspect the frame, and make sure it clear of any debris before you install the new weather stripping. Measure the length of each side of the frame and cut the new weather stripping accordingly. Two common types of weather stripping are vinyl clad with a spline, and self adhesive foam. For vinyl clad weather stripping, once it is cut to the correct length, push the spline into the slot in the door jam. You may need to use a dull putty knife to push it into place. If you are using self-‐adhesive foam weather stripping, carefully remove the adhesive backing, and firmly push the weather stripping onto the door jam. To test if you have a tight seal, take a piece of paper and close it in the door. If there is resistance, then your seal is good.
Find more HomeGuard DIY Videos and other resources here: https://homeguard.com/resources/
Learn more about HomeGuard's roof, termite, and home inspections services here: https://homeguard.com/
233
views

A Look Inside the Home Fumigation Process
Take a look inside the home fumigation process with HomeGuard Incorporated
114
views
DIY - Finding a Stud
Whenever you’re mounting a TV or large picture, you’ll need to be able to locate a stud in the wall.
In this video, we provide a few different methods to help you do this.
Tools needed for this include: a battery operated stud finder, and a flashlight.
The most reliable way to find a stud in a wall is with a stud finder. Most stud finders have lights as well sounds that cue when it is over a stud. First, hold it flat against the wall and press and hold the calibration button. Wait until the lights are green and there is no beeping. Slowly slide it against the wall. When it starts to beep, that’s the beginning of a stud. And when the beeping stops, you’ve crossed over the stud. Do this a couple of times to confirm it is consistent. Mark the center of the beeps and lights to mark the location of the stud. Generally a stud should be installed every 16 inches.
If you don’t have a a stud finder, take your flashlight and hold it close to the wall. See if you can find where the light changes. You may notice a difference in wall texture as well. These would be the drywall seams, and drywall should be screwed into a stud. To confirm this, go to your baseboards. There should be nail holes, or spots that look like they may have been filled with wood filler in the same line.
Another method for finding a stud is by knocking on the wall. The sound will have a hollow sound where there is not a stud. As you knock over a stud, the sound will become more dense.
Find more HomeGuard DIY Videos and other resources here: https://homeguard.com/resources/
Learn more about HomeGuard's roof, termite, and home inspections services here: https://homeguard.com/
108
views
2
comments
Concrete Crack Repair
If you plan to stay in your home for a long time, preventative maintenance eventually becomes a priority, and one area to look at is the concrete.
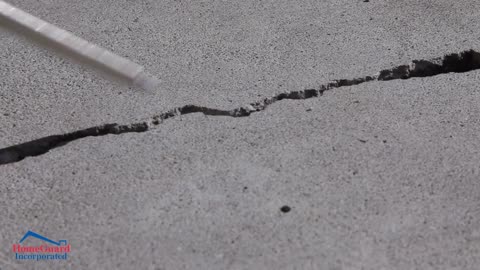
And fixing a small crack in a concrete patio or driveway will prevent further damage. This video will explain how to repair a crack that is less than one inch wide.
The list of equipment needed for concrete repair includes: self leveling concrete repair caulk, a caulk gun, a trowel or screwdriver, a metal brush, and a small air compressor or a wet/dry vacuum.
To start, you will need to clean the area that needs to be repaired. With the trowel or screwdriver, scrape any small pieces of concrete and debris out of the crack. Take the metal brush and brush along the crack to remove the finer pieces. Then use your air compressor or vacuum to remove any remaining dirt or debris. Now that the area is clean, your ready to caulk. Slowly move along the length of the crack as you squeeze the caulk in to the space. If the caulk sinks into the crack, you can go over the spot again so it is level with the patio or driveway. Follow the instructions on the caulk for proper curing times. In most cases, it is 24 hours before you can walk on it, and up to a week before it can be exposed to water.
Find more HomeGuard DIY Videos and other resources here: https://homeguard.com/resources/
Learn more about HomeGuard's roof, termite, and home inspections services here: https://homeguard.com/
91
views

Supplemental Reports
Eric Syren of HomeGuard Incorporated discusses supplemental home inspection reports.
73
views
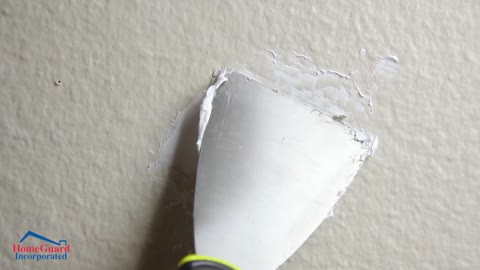
DIY - Repairing a Small Drywall Hole
Repairing small holes in your drywall can be easy. If the hole is too small to stick your thumb in, then some spackle and a spackle knife will do the trick. If your thumb will go in the hole, you should check out the video on repairing a medium sized hole.
To repair a small hole in drywall, you will need some lightweight quick-‐dry spackle, a spackle knife, and a sanding block. When purchasing your spackle, the guide to follow is: the smaller the hole, the lighter weight the spackle needs to be.
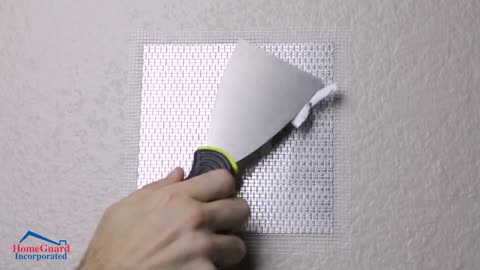
Start by clearing any debris from the hole and sanding it smooth. Take the corner of your spackle knife and get enough spackle to fill the hole, pressing gently onto the wall. Add a little more to your putty knife, smoothing it over the space. You may need to go over the space a few times, but make sure it is a thin layer. Once you have enough spackle and the hole is not noticeable, allow it to dry. Once dry, sand the surface with the sanding block. If necessary, apply a second coat of spackle and repeat the drying and sanding process. Now that its’ dry, It needs to cure. Allow 24 hours before priming and painting.
Find more HomeGuard DIY Videos and other resources here: https://homeguard.com/resources/
Learn more about HomeGuard's roof, termite, and home inspections services here: https://homeguard.com/
99
views
1
comment

Meet HomeGuard Incorporated! California’s Leading Termite, Home, and Roof Inspection Co.
Welcome to HomeGuard Incorporated, California’s largest and most experienced inspection company, with over 700,000 inspections performed. Thank you for taking the time to learn more about us.
I’m Jim Steffenson III, and I would like to introduce HomeGuard. In 1988, my father Jim Steffenson Jr. and his business partner Jim Hessling, saw a need for a quality inspection company that focused on serving the real estate community. They set out to set up HomeGuard as the premier inspection company in California. Now, almost 30 years later, they have achieved their dream. Our seasoned team of highly trained inspectors, has conducted nearly a million inspections, which has made us California’s #1 inspection company.
Rising to #1 did not happen overnight. We built on decades of experience to create a training, working, and reporting process that delivers consistent, trustworthy, and timely reports into the hands of our customers. With visual, non-invasive inspections, we identify hundreds of visual cues on the day of the inspection that could indicate issues with the property and its structure. We receive high marks from customers for presenting these factual findings in a competent, detailed, objective, and professional report. In fact, we have an industry leading 97% customer satisfaction rate, supported by about 5000 completed surveys from home buyers, sellers, and real estate professionals.
HomeGuard is also a pioneer in the field of real estate inspections. We were one of the first to combine in-house termite, home, and roof inspections into one visit for the greater convenience of our customers. We are also early adopters to technology, utilizing our own proprietary software to deliver our inspection reports quickly, even same-day reports if needed to keep your home sale on track.
As leaders in the industry, we keep adding services to support our customers. We offer our own natural hazard disclosure report, and home protection plans offered through our partner company, HomeGuard HomeWarranty Incorporated. And the more you order, the more you save. We give you discounts on the disclosure reports and home warranties when ordered with a home inspection - you maximize value and convenience when ordering multiple services with one company.
Did you know that you can bill the inspection fees, disclosure reports, and home warranties to escrow? This lets you pay for everything at the end of the transaction, so no money is needed up front. Or, when you pay for these services when ordered or upon inspection completion, which is literally savings on top of savings. Great service, ease of ordering, and exceptional value – that is what you receive when choosing HomeGuard Incorporated.
Thank you for considering HomeGuard as your partner for inspections and reports. We look forward to working with you, and contributing our talents to your home purchase or sale. For more information and educational videos, please visit our website at http://www.homeguard.com
56
views

Home Inspections - Preparing Your Client For An Inspection
Eric Syren of HomeGuard Incorporated provides insights on helping realtors to prepare a client for a home inspection.
46
views

HomeGuard Home Inspections & Roof Inspections via Drone
HomeGuard Incorporated is proud to announce our new drone powered roof and home inspection services. Our FAA certified commercial drone pilots are taking to the skies to get a better perspective to provide outstanding, detailed information in your roof and home inspection reports.
35
views

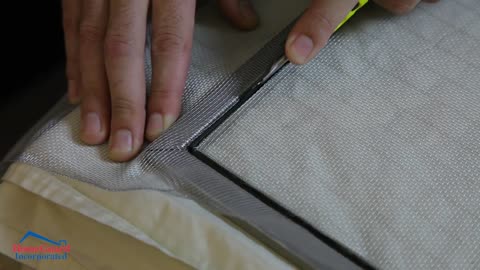
DIY - Unclogging a Slow Drain
Over time, a bathroom sink will become slow to drain, you may want to unclog the u-‐shaped pipe (called the ‘p-‐trap’) under the sink, as well as remove the drain plug to fully clean out the pipe above the trap.
The tools you’ll need for this project are: small and large size buckets, and an old toothbrush.
To start, you’ll need to completely clean out the area under the sink. Next you’ll remove the u-‐shaped pipe (the p-‐trap). Place a small bucket under the p-‐trap, to catch any water that may still be in the drain. There are 2 nuts that attach the trap to the drainpipe. These are usually tightened by hand. However if there is a lot of buildup, you may need an adjustable wrench to loosen them. Loosen the nuts and slowly pull the p-‐trap away from the drain. Be cautious, as any water in the drain will start dripping into the bucket. Clear any visible debris from the drain. Take the clogged p-‐trap to another sink. Clear out and dispose of any clogged pieces, and then scrub the p-‐trap with an old toothbrush and rinse it out well.
Now remove the drain plug from the sink. Unscrew the rod attachment from the back of the drain under the sink. Pull the rod out of the attachment. The drain plug can now be pulled up and out from the sink basin. Look down through the drain. Even though you’ll probably be able to see though, it still may have a lot of hair or particles clogging the drain. With the large bucket under the drain opening, run a gentle stream of water while scrubbing the drain with a toothbrush. Do this from under the pipe as well. Replace the plunger in to the basin, carefully aligning the notched opening to the back of the sink. Insert the rod through the opening of the drain and tighten the nut. Place the cleaned p-‐trap back onto the drain pipes and tighten the nuts. With your hardware reassembled, be sure to check for leaks as you run water into the sink. Your sink should now have no trouble draining.
Find more HomeGuard DIY Videos and other resources here: https://homeguard.com/resources/
Learn more about HomeGuard's roof, termite, and home inspections services here: https://homeguard.com/
50
views
2
comments

DIY - Leaving on Vacation
When you plan to leave your home for more than just a few days, we recommend taking the following steps.
No matter what temperature is expected during your absence, first turn off your main water supply. Then open all faucets and flush all toilets. Put pink or RV antifreeze in drain traps, toilet bowls, showers and tubs, and your dishwasher. Use 1 cup for sinks, and 2 cups for your dishwasher, showers, tubs, toilets bowls and tanks. This will prevent the unpleasant smell associated with sewer gas from entering the home, as well as prevent frozen pipes in case of cold weather. If you have an electric water heater, go to your electrical panel and turn off the breaker for it. We recommend taping this off as a reminder not to turn it on. If you have a gas water heater, turn the valve to the pilot position. Consider setting your thermostat to an energy efficient level. Regardless of temperature, you don’t want to overpay for heating or air conditioning while you are away. If you are leaving for an extended period of time, remove food and ice from your refrigerator and unplug it. This will save you an average of $17 a month on your utility bill. Finally, you can give your home the appearance that someone is still there, by using timed outlets to turn lights on and off. And consider either contacting the post office to have them hold your mail, or as a neighbor to pick up the mail or deliveries. You might also ask them to park in your driveway, or walk through the home once a week.
If you have any questions about the instructions in this video, please call HomeGuard at (855) 331-‐1900.
Find more HomeGuard DIY Videos and other resources here: https://homeguard.com/resources/
Learn more about HomeGuard's roof, termite, and home inspections services here: https://homeguard.com/
38
views

HomeGuard Incorporated Customer Testimonials
Watch and see what people are saying about HomeGuard Incorporated!
Learn more about HomeGuard Incorporated's Termite Inspections https://homeguard.com/services/termite-inspections/
Learn more about HomeGuard Incorporated's Home Inspections https://homeguard.com/services/home-inspections/
Learn more about HomeGuard Incorporated's Roof Inspections https://homeguard.com/services/roof-inspections/
Learn more about HomeGuard Incorporated's Natural Hazard Reports https://homeguard.com/natural-hazard-disclosure-reports/
Learn more about HomeGuard Incorporated's Northen California and Bay Area Service Area https://homeguard.com/service-area/
41
views

Limited Termite Inspection Reports
Eric Syren of HomeGuard Incorporated addresses limited termite inspection reports.
23
views

Wood Destroying Pest and Organisms
Eric Syren of HomeGuard Incorporated sits down to discuss wood destroying pests and organisms from termites to fungi.
9
views

Termite Inspections - Complete Termite Report
Eric Syren of HomeGuard Incorporated discusses what is involved in a complete termite inspection report.
9
views
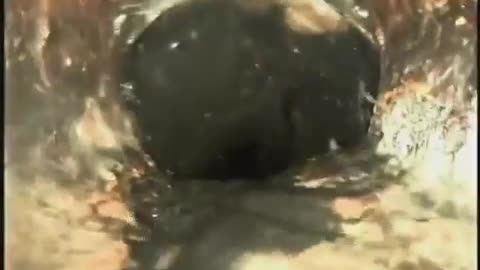
Sewer Lateral Inspection Sample
HomeGuard is now offering sewer lateral inspections in our Southern California markets as an add-on service to a home inspection. We do not offer standalone sewer inspections at this time.
1
view

What to Look For in a San Diego Home
What should buyers be looking for when shopping for a new home in Southern California? Take a walk through a home in San Diego with HomeGuard Incorporated home inspector Brent Cannon and Realtor® Steve Meyers of the San Diego PorchLight Realty Team.
1
view