
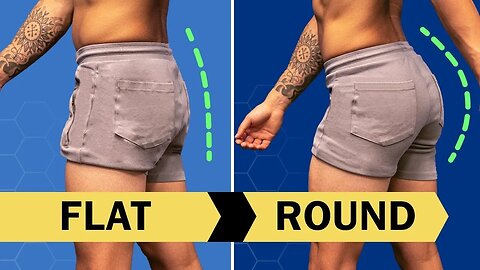
The Best Glutes Workout To Grow Your Flat Butt (GYM OR HOME!)
I’m going to show you a glutes workout with 6 of the best glute exercises to grow your butt. First we’ll go through some of the science behind how to grow the glutes to teach us the 2 muscles to focus on, then we’ll go through all of the butt exercises which you can do at home or at the gym. By the end of this video, you’ll know exactly how to build a bigger bum and your butt is going to be bootyfull.
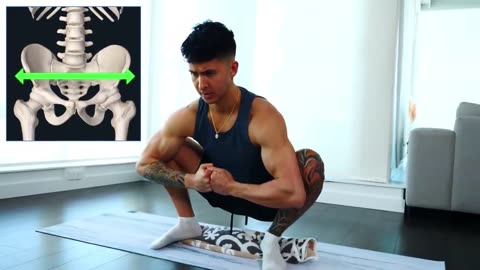
To understand how to build a bigger bum, you first need to know glute anatomy. The glute max is the biggest glute muscle. Its primary function is hip extension. The glute medius is the second biggest glute muscle. This muscle keeps our hips balanced when we move. It also helps with hip abduction.
The deadlift, one of the best glutes exercises around, is going to be our primary heavy exercise for the glute max. First, use a hip-width foot stance with the toes slightly pointed outwards. Squeeze your glutes hard and push your knees out against your elbows. Brace your core, tuck your chin, push your feet through the floor while driving your hips forward to stand up. On the way down, reverse the motion. But only push your hips back as far as they can before your lower back starts to round. Once the bar is just past your knees, squat it down and then reset. If you’re using dumbbells, you’ll want to instead stop just past your knees before coming back up. Perform 3 sets of 6 heavy reps with 3-4 minutes of rest between each set.
Now we’ll move onto bodyweight walking lunges. First, slightly lean your upper body forward while keeping your head in line with your body, and maintain that position as you lunge. Next, instead of simply stepping “up” after each lunge, think about stepping “forward”. At the bottom position of each lunge, take your hands and apply some resistance to guide your front knee inwards. Then, push your knee back against your resisting hand as you stand up. Do 2 sets of 10 reps on each leg with about 2 minutes of rest between each set.
Next, we’re going to focus on the glute medius with a superset to grow the glutes. To perform the first exercise, put a cable setting down to its lowest and connect the strap around your ankle. Don’t have a cable? Set up a band wrapped around both legs or looped around a fixture instead. Grab a pole or any fixture for balance. Keep your torso upright, tuck your chin and brace your core. From here, sweep your heel back but also slightly out to the side at roughly a 30 degree angle. Do 12 reps on one side.
Immediately grab a pair of dumbbells, elevate your back leg, and get into a split stance position. Keep about 80% of your weight in your front leg and the other 20% in the back. Drop your back knee towards the ground. As you lower yourself, keep the shin of your front leg straight up over your foot. At the bottom position, use your front leg to push back up and repeat for a total of 12 reps. Once complete, do the other leg on both exercises to complete your first superset, and then repeat that 2 more times for a total of 3 supersets for each leg.
Another way to stimulate growth is with butt exercises that are most challenging at the top position when the glutes are fully contracted. The gym version is the 45 degree hip extension. First, set up the pad such that it’s just below your hips. Brace your core, tuck your chin, and then bend at your hips to pull yourself down. Squeeze your butt hard to pull yourself up.
The home version will require just a stack of books. Flatten your back against the floor, place one foot up on the stack of books with the other leg straight. From here, push up against the stack of books while raising the opposite leg to 90 degrees. Hold this top position for 1-2 seconds while squeezing the glute of your planted leg hard. Repeat this for 3 sets of 15 reps on each leg.
The Best Glutes Workout
Glute-Focused Deadlift: 3 sets of 6 reps
Glute-Focused Walking Lunges (bodyweight): 2 sets of 10 reps each leg
Superset: 3 sets of 12 reps each leg
Glute Med Kickbacks
RFESS
45° Hip Extension OR Single Leg Elevated Glute Bridge: 3 sets of 15 reps
You can implement this glutes workout once a week or implement these exercises into your other workouts throughout the week if you’d prefer. Either way, I hope you were able to see the importance of carefully selecting your exercises as well as performing them in a way that maximizes growth for the target muscle.
Within our Built With Science programs, we apply that to each and every one of the workouts we provide. To join today, take the analysis quiz to discover which science-based program would be best for you and where your body is currently at below:
https://builtwithscience.com/your-pot...
Subscribe to my channel here:
https://www.youtube.com/jeremyethier/...
Music by:
https://brettjanzen.ca/
brettjanzenmusic@gmail.com
238
views
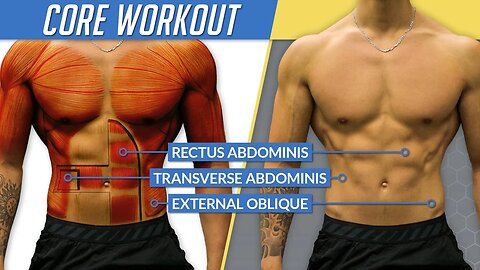
The Best Core Workout For Thicker, Stronger Abs (YOU’RE DOING IT WRONG!)
If your core is weak, then your ability to get stronger on your exercises and your ability to grow the muscles surrounding each of your joints will be negatively impacted. And, as a bonus, it WILL also provide aesthetic benefits (six pack abs!) as well. Regular core strengthening with core strength exercises does actually increase the thickness of the deep abdominal muscles, meaning that they may help make them a little more visible. So, how exactly do we go about training it? Well, that’s exactly what I’ll cover in this video with a full, best core workout (with 5 of the best abs exercises) that you can do right away for a stronger AND better looking midsection.
But before we dive into the best core workout we need to first note that a better approach to train the core would be to use core exercises that challenge the core in every possible way that your core could be challenged in a lift, sport, or just in your daily life. And this can be broken down into 4 categories. Anterior core stability exercises where we train the body to resist excessively arching the lower back (extension). Posterior core stability exercises where we train the body to resist excessively rounding the lower back (flexion). Lateral core stability exercises where we train the body to resist bending to one side. And lastly, rotary core stability exercises where we train the body to resist excessive rotation of the lumbar spine.
The first of the core strength exercises we’ll do here is abdominal bracing. What you want to do is lay on your back with your knees bent. Then from here, you want to take a deep breath into your belly, a deep breath out, and then when you near maximal exhalation brace your core as if you were prepare for a punch to the gut. Continue breathing while holding this contraction. The next exercise, reverse crunches, does a great job of challenging our anterior core stability. What you want to do here is lay with your knees bent either on a bench or on the ground with your arms holding onto something over your head. Here, posteriorly tilt your pelvis and flatten your lower back by applying the abdominal bracing practice we previously went through. Then, lift your knees up to 90 degrees, curl your pelvis up towards your belly button and then slowly come back down.
Next, we’ll challenge our posterior core stability by using an exercise highly recommended for core strengthening, the Bird Dog. For these, we’ll get on all fours with your back neutral, brace the core, and then simply kick one of your legs backwards while raising the opposite arm until they’re both straight. Hold for a second or two here, then come back down and repeat on the other side. Next, we’ll challenge our lateral core stability with suitcase carries, where you hold a kettle bell or dumbbell with one arm and take steps while ensuring that your torso remains upright and shoulders remain level.
Lastly, we’re going to work on our rotary core stability with one of the best abs exercises available: the palloff press. Here we’ll wrap a band around a fixture, take a few steps out laterally, and assume an athletic stance with knees slightly bent, feet at about shoulder width apart, and your core braced. Then, start with your hands close to your sternum, and from there simply extend your arms forward and back while resisting the urge to rotate inwards.
Here’s a breakdown of the full core workout:
Exercise 1: Abdominal Bracing (1-3 sets of 60 second holds)
Exercise 2: Reverse Crunches (2-3 sets of 10-15 reps)
Exercise 3: Bird Dog (2-3 sets of 5 reps each side)
Exercise 4: Suitcase Carries (2-3 sets of 30s carries each side)
Exercise 5: Palloff Press (2-3 sets of 5-10 reps each side)
All in all, it’s important that within your weekly routine, you’re training your core in each of the 4 categories. Although many movements and big lifts in the gym will indirectly train your core in these movement patterns, these additional exercises can help ensure that you are in fact adequately training your core and not overlooking and key muscles. In the long run, this will not only lead to a better looking midsection, but a stronger and more stable one as well. And for a step-by-step program that shows you exactly how to train these important muscles and pairs them with a weekly workout and nutrition plan based on science, so that you lean down and build lean muscle as efficiently and as safely as possible, then simply take the analysis quiz to discover which science-based program would be best for you and where your body is currently at below:
https://builtwithscience.com/bws-free...
DOWNLOAD THE CORE WORKOUT HERE:
https://builtwithscience.com/corework...
MUSIC:
https://soundcloud.com/iamryanlittle
Filmed by: Bruno Martin Del Campo
Subscribe to my channel here:
https://www.youtube.com/jeremyethier/...
100
views
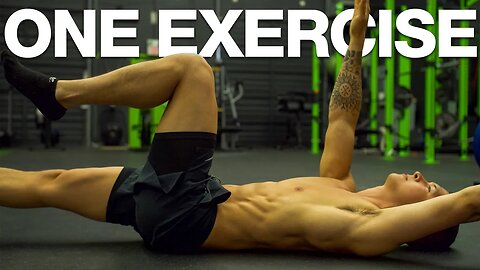
The Best 1-Minute Exercise For Faster Gains (DO THIS PRE-WORKOUT!)
Today I want to talk about the dead bug exercise. One of the best core exercises that just takes 1 minute to do yet, if done before your workouts and consistently over time, can not only help potentially speed up your gains but also help minimize your risk of injury and even potentially alleviate lower back pain. And that’s exactly what I’m going to share with you–how one of the best abs exercises (more specifically, the dead bug core exercise) helps with your core stability training. It does this by training a muscle group that most people just don't train properly.
What exactly is this muscle? Well, it’s the transversus abdominis. This muscle actually sits behind your rectus abdominis and wraps horizontally around your lower abdomen to stabilize your spine almost like a weight belt. But the problem is that this muscle is weak as hell in a lot of people and is one of the most common causes behind strength plateaus in big lifts and even back pain. And the reason why this muscle commonly gets weak is because your typical “abs” exercises like crunches and bicycle kicks just don’t cut it when it comes to this muscle. This muscle is instead best strengthened by using isometric exercises that are built to enhance both muscular endurance and coordination.
What exactly does this look like though? It’s something called the dead bug exercise, which has been shown and used in several studies aiming to improve core stability since it seems to activate the transversus abdominus along with the other core muscles the best. This exercise is what’s termed as an "anti-extension" exercise. The dead bug helps teach you how to move at your extremities without compensating at your spine. Now some of you may have seen this exercise before or even tried it out, but I guarantee that you haven’t done it properly and in a way that actually strengthens the transversus abdominis to the greatest degree.
To start properly executing the dead bug core exercise, simply lay on your back with your knees bent like so. Then, take a deep breath into your belly, a deep breath out, and when your near maximal exhalation draw your belly button into your spine to brace your core and flatten your lower back onto the ground. You want to brace yourself as if someone were about to drop a ball on your stomach. Once you get this down, continue breathing as you maintain the bracing in your core, and then bring your arms straight up and knees bent to 90 degrees. Your lower back should still be flat against the ground and you should still be bracing.
Nail this down for at least 60 seconds. Once you’re ready, you’ll want to slowly progress it for enhanced core stability training. To do so, you can start by again bracing properly and then just bring one arm up at a time. Then, from here you can work your way up to the full dead-bug with the opposite arms and legs being extended simultaneously. And then, from here, you can even move onto something like hollow body holds and even hollow body rocks. You can even experiment with keeping a resistance band under your lower back as you do the movement to ensure you’re keeping it flat against the ground, otherwise it’ll slip out.
Ss for when and how exactly to apply one of the best core exercises available (the dead bug), what I’d recommend is to first pick the progression that best suits your current level of core strength and one that you can do properly for about a minute without absolutely fatiguing yourself. You’ll want to do this as part of your warm up routine shortly before you go into your workout, especially if that workout involves exercises that require a lot of core stability. I’d even recommend if your core is quite weak, to periodically do this exercise between your sets of these exercises just to get your core firing and to further engrain that neurological firing pattern during your movements.
But I hope you were able to see that it’s muscles like these that we tend to unknowingly neglect that very easily start to hinder our progress and put us at a greater risk for injury. Which is why it’s so important that you don’t overlook them in your training. And for a step-by-step program that puts this all together for you by showing you exactly how, and why, to train these overlooked muscles and how to combine them with your main workouts week after week so that you can build muscle as efficiently and as safely as possible, then simply take the analysis quiz below to discover which specific program is best for your body and where it’s currently at:
https://builtwithscience.com/bws-free...
MUSIC:
https://soundcloud.com/iamryanlittle
Subscribe to my channel here:
https://www.youtube.com/jeremyethier/...
Filmed by: Bruno Martin Del Campo
172
views
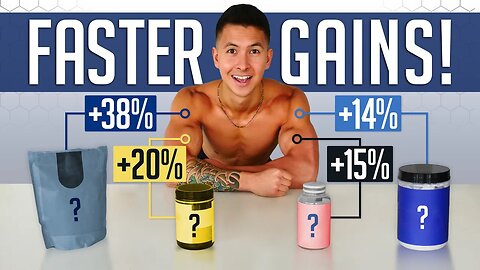
The 4 BEST Supplements To Build Muscle Faster (And How Much They Help) ft. Dr. Brad Schoenfeld
One of the most common questions I get is, ‘What are the best supplements to build muscle? There's a ton of misinformation out there when it comes to the best supplements for muscle building and strength. In this video I'll share the 4 best supplements that are worth considering to build muscle faster.
There are 3 main reasons why whey protein powder can be considered one of the most effective muscle building supplements available. First off, it’s typically very low in fat and carbs and instead very high in protein content, which makes it very calorie and macro friendly when compared to other protein sources. Second, it’s convenient and can be used in many different ways to both save you time and add some more life into your diet. And lastly, it’s actually quite affordable when viewed at a price per gram basis, with the average cost of whey protein being comparable to that of chicken breast. This all just makes it easier for you to consistently reach the optimal daily protein intake that otherwise can be a struggle to hit, which is exactly how protein powder can indirectly speed up your growth.
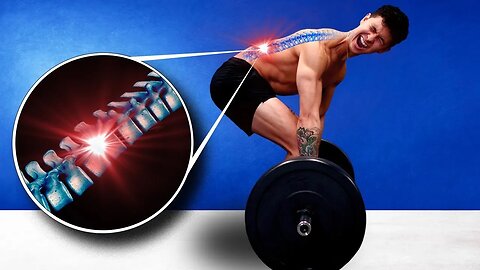
Next is creatine, which, of all the supplements for muscle growth available, is probably the most well researched and science-backed one. Whenever we lift weights we use something called ATP, the main energy source for our muscles. As we lift, we deplete these ATP stores to the point where we can no longer perform anymore reps. This is where creatine comes in. It improves our strength and muscle endurance by facilitating a faster regeneration of ATP and enabling us to perform that extra rep or two or lift slightly more weight during our workouts. There does seem to be quite a bit of variation with regards to the response to creatine, though. Also, note that creatine doesn’t simply do the work for you. The benefits you get from supplementing with it only apply if you’re actually pushing yourself harder in your workouts as a result.
Next is caffeine (pre workout), arguably one of the best muscle building supplements. Caffeine ingestion prior to our workouts not only enhances our muscle contractions, but can also enable us to perform more reps by altering our pain thresholds and our perception of how hard we’re working. That said, those who consume caffeine on a regular basis tend to see somewhat of a blunted response to its ergogenic effects. So, what I’d recommend to avoid developing a caffeine tolerance too quickly. Reserve its use for workouts where you’ll reap the most benefit from it. For example, lower body workouts, early morning workouts, or days where you just need that extra kick.
For the final of the top supplements for building muscle, internationally renowned fitness expert and researcher Dr. Brad Schoenfeld adds beta-alanine to the list. When supplemented, beta-alanine facilitates increases in muscle carnosine levels. Carnosine acts as a hydrogen ion buffer. This is important for activities such as resistance training, sprinting, and other anaerobic forms of exercise, as there is a substantial buildup of lactic acid that occurs, which ultimately impairs performance. The buffering action of carnosine can help to delay fatigue from the associated hydrogen ion accumulation (acidosis) and thus enable performance of additional work (e.g. reps during lifting). It can, therefore, ultimately enhance muscle-building capacity. However, there is a fairly large degree of inter-individual variability.
So, hopefully you now know the answer to ‘What are the best supplements to build muscle?’ and you were able to see that supplements are not magic. You still need to put in the work and even then, they aren’t extremely effective. But, the little boosts you do get from each of these supplements can add up to a meaningful difference overtime, especially when you then pair this with the right training and nutrition program. And for a step-by-step program that uses science to guide you week after week with your training, your nutrition, and even your supplementation, so that you can truly maximize your results, then simply take the analysis quiz to discover which science-based program would be best for you and where your body is currently at below:
https://builtwithscience.com/bws-free...
BRAD SCHOENFELD’S BOOKS:
https://amzn.to/3o3LgQg
Subscribe to my channel here:
https://www.youtube.com/jeremyethier/...
Filmed by: Bruno Martin Del Campo
MUSIC:
https://soundcloud.com/iamryanlittle
108
views
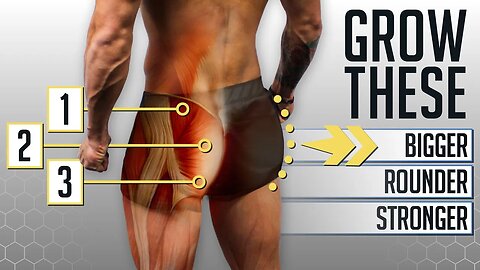
The 4 BEST Glute Exercises For A Nicer Butt (GYM OR HOME!) Ft. Bret Contreras
When it comes to how to grow your glutes, you need to first realize that you can experience much more overall growth and strength in the different glute regions (e.g. gluteus maximus, gluteus medius, and gluteus minimus) by implementing the right variety of glutes exercises in your glute workout. The best glutes exercises and butt exercises will vary individually but generally, to grow the glutes, you’ll want to ensure that you’re training them with at least one exercise from each of the following 4 categories: thrust/bridge exercise; squat/lunge exercise; hinge/pull exercise; abduction movement. To help us out with choosing the respective appropriate exercises, we’ll rely on the expertise of Bret Contreras, aka the Glute Guy. A well known published researcher and author, who initially popularized the hip thrust. Here’s what he recommended.
Going into the first category of a thrust or bridge movement, Bret prefers the hip thrust, with a pause at the top. To really grow the glutes, he advises a horizontal torso at lockout, neutral or posterior tilted hips and squeeze glutes hard, and vertical shins at top. The main thing is avoid overextending and excessive anterior pelvic tilt. A suitable home alternative that Bret recommends would be the single leg hip thrust, with your back resting on a bench, couch, or any elevated platform.
Going into the squat lunge movement for the lower glutes and quads, Bret recommends the walking dumbbell lunge as one of the best glutes exercises. You should take a stride length such that your shin angle at the bottom of movement is just slightly forward so that the front of your knee lines up with the front of your shoes. And you’re going to lean your torso a little bit, but not too much (around ~20 degree torso lean). Also focus on pushing through the heel and avoid letting the hips shoot up. A suitable home alternative would be the deficit reverse lunge, where you elevate your front foot onto any elevated platform.
Next, for the hinge or pull movement for the lower glutes (gluteus maximus) and hamstrings, Bret recommends the 45-degree hyperextension. There are 2 ways to do this exercise. One is the neutral feet, neutral spine. That’s going to work the hamstrings, glutes, and erectors really well. If you’re trying to bias the glutes however, you’ll want to round over at the spine fully. This shuts down the erectors (lower back), which makes it now a pure glutes/hamstring movement. Turning out the feet to 45 degrees also creates higher glutes activation. And as far as alternatives, something like reverse hyperextensions done on a bench or even a countertop would be suitable.
Lastly, we have the abduction movement for the upper glutes (gluteus medius), and Bret recommends the bodyweight side lying hip raise. To do this, start in a side plank position on your elbow with your hips and knees on the ground. Then you push through the grounded knee, push as tall as you can and aim to achieve maximal hip separation. When you’re at the top, drive the hips forward and at the bottom sink the hips back. Another great alternative for this is the seated banded hip abductions. Here you wrap a mini-band around your knees, and perform reps of pushing your knees out by using your upper glutes. Perform 10-15 reps with your back straight up, 10-15 reps with your back bent over, and then another 10-15 reps with a lean back.
Here’s how to grow your glutes with the various recommended exercises mentioned (with sets and reps):
1) Thrust/Bridge Category (Upper & Lower Glutes)
Paused Barbell Hip Thrust: 4 sets of 8 reps (with 3s pause)Alternative = Single Leg Hip Thrust
2) Squat/Lunge Category (Lower Glutes + Quads)
Walking DB Lunge: 3 sets of 20 reps (10 steps each leg)
Alternative = Deficit DB Reverse Lunge
3) Hinge/Pull Category (Lower Glutes + Hamstrings)
DB 45 Degree Hyperextension: 3 sets of 15 reps
Alternative = Reverse Hyperextensions
4) Abduction (Upper Glutes)
Side Lying Hip Raise: 3 sets of 12 reps
Alternative = Seated Banded Hip Abduction
You can add these exercises into your weekly routine as needed, or even perform it as a complete lower body workout on its own. But hopefully you were able to see that to speed up your results and train efficiently, you need to play close attention to both the exercises you include in your routine, but also how you perform them. And for a complete step-by-step science-based program that shows you exactly how to train, eat, and recover week after week to maximize your results, then simply take the analysis quiz to discover which science-based program would be best for you and where your body is currently at below:
https://builtwithscience.com/bws-free...
MUSIC:
https://soundcloud.com/iamryanlittle
Subscribe to my channel here:
https://www.youtube.com/jeremyethier/...
139
views
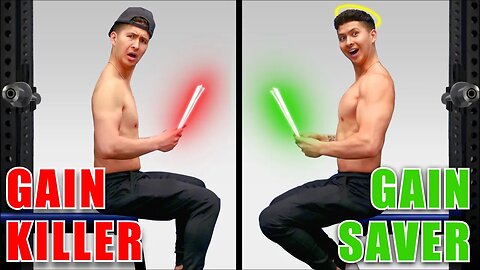
The 3 WORST Workout Routine Mistakes (GAIN KILLERS!)
How many workout routines have you tried? 1? 5? 10? More? But are you again and again left dissatisfied because you see no results from any of these workout routines? Well listen up, because I’m going to show you 3 “gain killers” that your workout routines at the gym are likely guilty of, which causes you to see no muscle growth after, no matter how hard you workout. I’ll also show you how to fix each of these mistakes.
One of the most common gain killers I see is called “HADD”: “Hypertrophic Attention Deficit Disorder.” People who have “HADD” Switch up their exercises too often and have no long-term focus. Here’s the truth: guys who do the same, boring exercises over and over, do them well, and get stronger on them, simply build more muscle than guys who “switch it up” for whatever reason. Why? Well, it’s well known that new exercises cause the most muscle damage, but after a while, you adapt and less damage occurs. So while you may feel a lot more soreness from these “random workouts”, they actually don’t provide as much growth as sticking to the same set exercises and focusing on progressing those with more weight and/or reps over time.
What does this mean for your workout routines? Well, it means that you likely need to do an exercise consistently for at least 2-3 weeks before you can start to really get the best growth possible out of it. In addition, during your workout, at a minimum you should be recording the exercise, sets, reps, and weight that you are using. It’s also a good idea to write down your effort on each set and the settings that you are using on a machine or cable or any modifications you may have made. This allows you to control as many variables as possible such that you can more accurately determine if you actually made progress or not. It also serves as a plan of attack for your next workout.
Gain Killer 2 for workout routines at the gym: “Junk Volume:” Doing more sets than you should do in a single session, rather than doing just enough to maximize growth. But how do you know your limit? Based on the current evidence, as long as sets are being performed to or near failure it seems that the limit is around 10 sets per muscle per workout. This is highly variable, but does suggest that if you greatly exceed this theoretical limit by regularly doing 15-20+ sets for a muscle group in one session, then you are probably doing more harm than good. A practical solution is to distribute that volume into more than one session per week.
Gain killer #3; redundant exercises. If you only have a certain amount of productive sets you can do per workout, then you want to make sure you’re getting the most bang for your buck. Most people workout consistently but see no results because they make the wrong exercise choices for these sets; in other words: they do exercises that do pretty much the exact same thing but just have different names. For example, take these two sample chest workouts. In workout A you do 3 sets of bench press, flat dumbbell press, and a flat machine press. In workout B you do 3 sets of bench press, 3 sets of an incline dumbbell press, and 3 sets of a cable fly. Which one do you think would be a better use of 9 sets?
Well, if you look at workout A, you are actually performing pretty much the same 1 exercise for all 9 sets. Whereas in workout B, you’re working several different parts of the chest with exercises that have varied angles and different resistance profiles. So for the same amount of work, you’d be able to provide much more stimulus to your chest with workout B, and as a result get more gains out of those 9 sets. Meaning, that for your overall workout routine, just think carefully about the chosen exercises you’re using for each muscle. Make sure you include exercises that are biomechanically different and challenge the muscle at different angles and ranges of motion. By doing so, you’ll be able to get more stimulus and more gains for the same amount of work.
Observing no muscle growth after your workout is a sign that you could be doing something wrong. Overall, if you’re going to spend time and effort doing your workouts, it would be in your best interest to ensure that you’re getting the most out of it. What I went through in this video are just a few ways you can do just that. But for a complete, step-by-step science-based program that shows you exactly how to train and how to eat week after week such that with the effort you put in, you’re maximizing the gains you make and fat you lose, then take the analysis quiz to discover which science-based program would be best for you and where your body is currently at below:
https://builtwithscience.com/your-pot...
Subscribe to my channel here:
https://www.youtube.com/jeremyethier/...
Music: brettjanzenmusic@gmail.com
87
views
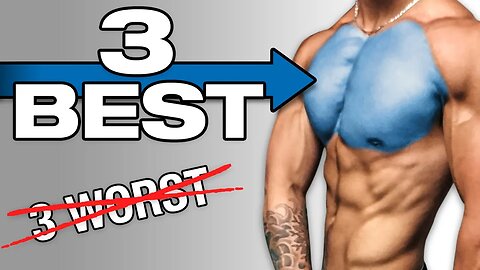
The 3 WORST (And Best) Chest Exercises For Growth
In this video, I'm going to show you 3 common chest exercises that are slowing your gains and the exercises you should be doing instead for a bigger chest. I’m going to give you much more effective options than the common incline bench press, dumbbell fly, and pinch press for chest growth. Start using the best chest exercises we cover in this video for your chest workout and you’ll be able to grow your chest faster than you ever have before.
For a well developed chest, you need to focus on growing the upper chest. It’s what fills out your chest and gives it a proportionate look. One of the most popular upper chest exercises, the incline bench press, may be leaving gains on the table because of the angle of the bench and the angle of your elbows. That’s because, contrary to common practice, to target the upper chest, you don’t need a very high bench angle. So, where does this leave the incline bench press? Unfortunately most incline benches are pre-set, and at too high of an angle at about 30 degrees with some even as high as 45 degrees.
A good alternative for better chest growth is to use a low incline dumbbell press set to roughly 15 degrees. This is generally the first or second notch up on the bench. We’re using dumbbells instead of barbells here because keeping the elbows tucked to 45 degrees as you press helps significantly increases upper chest activity since it better lines up the arms with the fibers of the upper chest. Since with dumbbells you can adjust your wrist position to whatever feels best rather than being locked into the barbell, you’re able to achieve this elbow angle without stressing your joints.
As a fan of Arnold, I used to love the dumbbell fly. It wasn’t until I learned more about the science behind the chest involvement during the dumbbell fly did I realize there was a better option. People often think that the dumbbell fly is one of the best chest exercises around. Admittedly, the dumbbell fly isolates the chest. So, it seems like a great option to build your chest. The downside with this movement however is that it only really works the chest at the bottom part of the movement when your chest is fully stretched and your arms are fully extended to your sides. As soon as you pass this point, your chest becomes less and less involved, which makes the exercise less effective for overall chest growth.
That being said, we still want to do some kind of fly movement in our chest workout. We’re going to do that by making 1 big change to your flyes that will keep constant tension on your chest and work it through its full range of motion. Keep the bench but move it upright and place it between two cables that are set at about the height of your chest. Grab the handles, sit between them, and perform your fly there. If you don’t have cables handy, you can mimic a similar setup by wrapping a band around your hands and performing the dumbbell fly like so. This will help keep a little bit of tension on the chest throughout the whole movement.
One of the most “Instagram famous” chest exercises for a bigger chest is often done by squeezing a weight plate or two dumbbells together while you bring your arms out and in. The general idea is to do this to target more of the inner chest. The problem here is that all the chest is doing is keeping the weights squeezed together. This type of contraction on the chest is what’s called an isometric contraction, which isn’t very effective for building muscle. The front delts and triceps are what’s actually moving the weight out and in, and are benefiting more from this exercise than the chest is.
What can you do instead? A good swap for this exercise is the cross body press using either a machine or a cable. To perform this exercise, you will get set up at a 90 degree angle so that you can push ACROSS your body one arm at a time. If you don’t have a machine handy, you can do the same thing with a cable by putting a handle attachment on and pushing across your body. This can be done with a band as well. This exercise will still allow you to get the same strong activation and squeeze on the chest as you’d get with the pinch press. But by using your chest to push the weight away from you rather than just holding a weight in place, you’ll now be providing your chest with the right type of contraction to grow.
To check out my training programs, take the analysis quiz to discover which science-based program would be best for you and where your body is currently at below:
https://builtwithscience.com/your-pot...
How To Bench Press For Chest Growth:
• How To Bench Press For Chest Growth (...
Why Your Delts Aren't Growing:
• Why Your Delts Aren't Growing (ONE FIX!)
Subscribe to my channel here:
https://www.youtube.com/jeremyethier/...
Music by:
https://brettjanzen.ca/
brettjanzenmusic@gmail.com
84
views
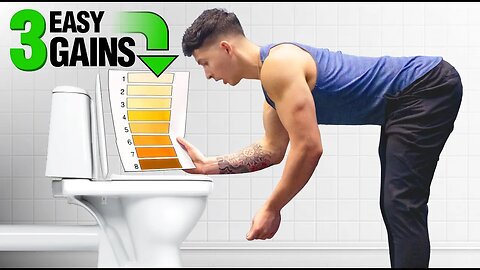
The 3 Easiest Gains You Can Make (Before Lifting)
The colour of YOUR urine. The timing of your cardio. The type of warm up you do. In other words, how much water you drink, whether you do cardio before or after weights, and the number of warm up sets you do before your workout… The state of these 3 things, once again, BEFORE you workout, dictates how effective your workout WILL BE at building muscle. In this video I’ll go through 3 of the common workout mistakes people make before working out. This includes all the best things to do before your workout – plus all the things to never do before a workout – to ensure that you’re getting the best possible gains.
The color of your urine affects muscle growth. It matters because it shows how hydrated you are. Your hydration matters, especially when building muscle, because it will affect your workout performance. Muscle function starts to become impaired with dehydration levels as little as 1%. And with dehydration levels as little as 2%, you’re going to see both decreased performance and motivation in the gym. Meaning that one of the best things to do before your workout, which will help you get an easy bump in your performance, is to simply make an effort to drink enough water before your workout. A good recommendation is to consume at least around 500-600 mL (17 to 20 fl oz) of water an hour or two before your workout, and at least another 500- 600 mL (17 to 20 fl oz) closer beforehand (20-30 minutes). If you’re somebody who works out first thing in the morning, being adequately hydrated before your workout will be even more important for you.
Next, cardio. One of the most common questions I get is ‘Should I do cardio before or after weights?’ Here’s the answer: moving your cardio to after your workout rather than before will help prioritize energy for your weights workout, which is what builds muscle. Although performing cardio burns significantly more calories than lifting does, it can also interfere with your lifting performance. Generally, to avoid any interference, you’re best off separating your resistance training and cardio sessions by several hours or on separate days all together depending on how long and intense those cardio sessions are. Practically though, not everyone has the time to do this. So if you are going to perform cardio and resistance training in the same session, to minimize any negative effect on your weights workout, it’s best that you save cardio for after your weights workout rather than doing it before.
Next, warm ups. Although it’s true that performing too much cardio before a workout can have negative impacts on your performance, one of the things to never do before a workout is to skip out on a proper warm up since that can also hinder performance. What you want to do is just enough to warm up your muscles and joints you’re about to use without using up excess energy that could otherwise be used towards your actual workout. What this means is that for the best results, the general part of your warm up should consist of about 10-15 minutes of low intensity cardio and/or dynamic stretching focused on the muscles you’re about to work. For example, using an elliptical or rowing machine and upper body dynamic stretches is a good choice before an upper body workout, whereas using a spin bike with lower body dynamic stretches like leg swings and deep squats is probably best before a lower body workout.
After the general warm up, it’s best to move onto a specific warm up using warm up sets before moving on to your workout. The best way to do this is by progressively increasing the weight over 2-3 sets for your first exercise for a given muscle group.
Here’s an example:
• Set 1: 50% of your working weight for 10 reps
• Rest 1 minute
• Set 2: 70% of your working weight for 6-8 reps
• Rest 1 minute
• Set 3: 90% of your working weight for 1-2 reps
• Rest 2 minutes
• Begin first working set
Overall guys I hope you were able to see the importance of paying attention to the common workout mistakes that people do before their workout, as that is honestly where most people screw everything up and is why many who train consistently and train hard still struggle to see results. That’s exactly why at Built With Science we’ve created step-by-step programs that not only show you exactly what to do during your workouts, but also shows you exactly how to eat and recover outside of those workouts so that you can build muscle and strip off excess fat in the most efficient way possible. To join today, take the analysis quiz to discover which science-based program would be best for you and where your body is currently at below:
https://builtwithscience.com/bws-free...
Subscribe to my channel here:
https://www.youtube.com/jeremyethier/...
MUSIC: Lakey Inspired
88
views
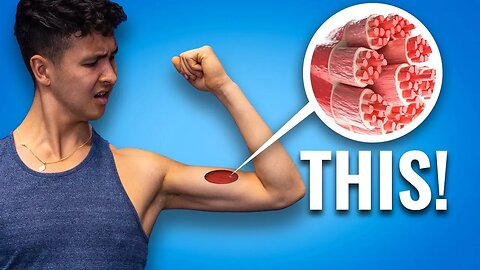
The #1 Reason You're Not Building Muscle (As A Natural)
“Why am I not building muscle?”—have you ever asked that? Well, building muscle is easy…. If you’re a brand new beginner. Past the “newbie gains” stage, building muscle becomes disproportionately harder, especially as a natural. This is why many people, no matter how hard they work in the gym or how well they eat, just seem like they’re not making gains anymore. Unfortunately, you can’t brute force your way past this. Beyond basic fixes like “eat enough food” or “get enough sleep”, you not gaining muscle comes down to 1 reason. Here, I reveal what the no.1 reason why you’re not gaining muscle and how to build muscle by modifying your training to instantly make it far more effective at building muscle (i.e., winning tips to build muscle).
Click below to find a step by step program that uses science to help you build lean muscle and burn off fat:
https://builtwithscience.com/your-pot...
Click below to subscribe for more videos:
https://www.youtube.com/jeremyethier/...
First, we have to understand how a muscle actually grows in order to take advantage of it. Historically, there were 3 mechanisms that everyone conceived as driving muscle growth. However, as more research was conducted over time, it became evident the science and reasoning behind some of these mechanisms was quite flawed. Unfortunately, most people, including many trainers, weren’t made aware of this. As a result, many people still train ineffectively, resulting in them not gaining muscle in the long-term. So what are these 3 mechanisms? And which of them are no longer reliable?
The first mechanism, muscle damage, represents actual damage, known as microtrauma, that training can cause to muscle cells. This damage causes a reactive inflammatory response in the body which can create muscle soreness, and in theory, causes the muscle to grow bigger in response. The second mechanism is called metabolic stress. This mechanism represents the chemical demands placed on your muscles during training. As you work harder and create more and more build up, your muscles become more acidic, creating a burning sensation in your muscles. The hormonal environment and swelling of the muscle caused by this is theorized to cause muscle growth. Thus, explaining the various tips you’ll see on “chasing the pump” to build muscle. The third and final mechanism is mechanical tension. This represents the tension that’s placed on your muscle as it lengthens and then contracts under load. Generally, the heavier the weights you lift and the greater the range of motion you use to lift them, the more mechanical tension is created.
All 3 mechanisms sound great on paper, but recent research has revealed that we’ve been undermining the importance of 1, way overestimated 1, and- well- were totally wrong about the other. Let’s start with muscle damage. As it turns out, research shows that although muscle damage and soreness will be a byproduct of hard training, trying to get more of it does not lead to more growth, and can in fact hinder it. As for metabolic stress, the available research on shorter rest periods, training to failure, and faster lifting tempos suggest that it simply doesn’t seem to be strongly correlated with hypertrophy. Finally, mechanical tension. This mechanism has withstood the test of time and recent research has only served to reiterate that it is the most important driver for muscle growth. So, if you’re not making gains, you’ll want to structure your workouts such that they maximize mechanical tension. There are 4 modifications you could use.
First, don’t prioritize ‘feeling’ like you made progress, prioritize ACTUALLY making progress. You can do this by sticking with the same exercises week to week and slowly adding more weight and reps to them as you get stronger. Second, rest with purpose. Although optimal rest time highly depends on how taxing the exercise is as well as your training status, a good recommendation is to spend at least 1.5-2 minutes of rest between sets for most of your exercises, with 3 minutes of rest being a good idea for heavy compound movements. Third, increasing mechanical tension is NOT just about going from point A to point B or how much weight you can lift. It’s about HOW you lift that weight from point A to point B. Pay attention to proper form rather than let your ego get the best of you. In addition to that, another thing explaining why you’re not gaining muscle is the lack of mind to muscle connection, so be sure to develop that.
Even if you feel stuck right now, thinking, “Why am I not building muscle?”, apply those 4 modifications to your workouts and you’ll very quickly notice the gains picking back up again. That’s the true power of science.
82
views
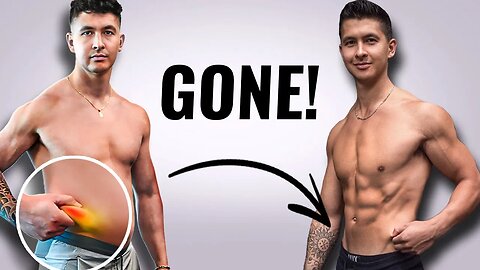
The #1 Method to Lose Love Handles (FOR GOOD!)
Love handles are one of the toughest areas to get rid of. Using the latest science, I’ll show you how to lose love handles (and keep them off) in 5 easy steps. But first, you need to understand how you developed that stubborn fat in the first place - from months and years of overeating. Our bodies prefer to store our excess calories as fat around the abdomen. This is especially true for men as well as women after menopause. Worse, usually, wherever the body stores fat first is where it will lose fat from last. This is what makes belly fat, lower back fat, and those love handles so easy to gain yet so tough to lose. But don’t worry. Love handles are just like any other fat. Use the right approach, and eventually, they will go away. And to lose love handles, we’ll start with the most important step, nutrition.
LINKS:
Calculate how many calories you need to eat to lose love handles:
https://builtwithscience.com/calorie-...
3-Day Full Body Workout Routine:
https://builtwithscience.com/workout-...
https://builtwithscience.com/workout-...
4-Day Upper/Lower Workout Routine:
https://builtwithscience.com/upper-wo...
https://builtwithscience.com/free-low...
6-Day Workout Routine:
https://builtwithscience.com/pushpull...
Click below done-for-you plan that’ll guide you step by step throughout the whole fat loss process:
https://builtwithscience.com/bws-free...
Click below to subscribe for more videos:
https://www.youtube.com/jeremyethier/...
Alright step 1 - nutrition. So while a calorie deficit is needed, it's not actually going to cause much fat loss in your love handles right away. Your body will instead prioritize other areas of your body before stubborn areas like your love handles. This is why you must use a calorie deficit that isn’t too aggressive. For most, a good general target is to aim to lose about a lb of fat a week. But don’t be afraid to take it even slower than this if needed.
So the next two steps cover what exercises you should be doing to lose love handles. First up is lifting weights. This won’t directly help get rid of your love handles, but it will help create the illusion of a smaller waist and less noticeable love handles. Second, lifting weights can help act as a safety guard to prevent fat regain in the future. 3-6 hard sets per muscle per week is likely all you need, with older individuals likely needing the top end of that range.
Alright, step 3. Although you should primarily create a deficit through your diet, you should also aim to increase the calories you burn through exercise. Now, unless you have quite an active job or lifestyle, without any cardio, you’re going to have to eat quite a low amount of calories in order to lose fat. Plus, one unique benefit of cardio is that regardless of if you lose weight or not, it’ll help reduce your visceral fat — the deep dangerous belly fat. This is obviously great for your health but also might even make a small difference with losing love handles by reducing the overall size of your belly.
What I’d recommend is just to start with walking. Track on average how many steps a day you’re currently taking, and aim to bump that up by 2,000 steps a day. Keep doing that until you reach 8,000 to 10,000 steps a day. In addition to that, you can also consider adding some low- to moderate-intensity cardio to your routine. But again, only what you enjoy and can stick to consistently.
However, it’s likely you’ll reach a point where what used to work is no longer working (this is why stubborn fat is so "stubborn"). You’ve reached this point if you haven’t noticed any fat loss or much drop in your body weight for at least 2-3 weeks. When this happens, there's 2 things you can do. The first is to drop your calorie intake. Typically, a decrease of just 100 calories or so per day is all that’s needed. The second is to increase your activity and the average calories you burn every day. This can be as simple as bumping up your daily steps or adding another 20-30 minutes of low- to moderate-intensity cardio into your weekly routine.
Now if you stay consistent with the previous “how to lose love handles” steps, I guarantee you’ll lose your love handles. But honestly, to completely lose your love handles, you have to get very lean. A level of leanness that for most people, including myself, is very difficult to sustain. Believe me, I know we all want to look like all the shredded guys on social media. But most of these guys have incredible genetics, often aren’t natural, and also don’t share with you just how difficult it is to maintain that shape and how low energy it can make you feel day to day. So don’t worry if you still have a little bit of love handles or lower belly fat. Embrace all the progress you’ve already made, take breaks and just maintain whenever you need to, and realize that the extra push to lose that little bit of stubborn fat just might not be worth the trade-off.
43
views

Struggling with Pull Ups- Strengthen These!
One thing I get asked a lot is “how to do more pull ups” or “how to do pull ups if you can’t” in the first place. Although I attribute a lot of my back growth (width and depth) to weighted pull ups, getting to the point where you can start doing weighted pull ups can be difficult. This is because weakness in certain areas of your body can easily inhibit you from progressing and increasing your pull ups or even doing 1 pull up. In this video I’ll be showing you guys 5 essential exercises that will help increase your pullups or help you get your first pull up if you can’t yet, and I’ll provide you with a progression routine that you can use to get more pull-ups overtime. I’ll show you guys how to do pull ups if you can’t and I’ll explain why I think these are the best exercises for pull ups.
If you guys enjoyed the video then don’t forget to give it a like, leave a comment, share it with your friends and subscribe to my channel. I really appreciate the support you’ve all shown me, it helps motivate me to continue doing this and putting out quality videos.
MY PROGRAMS:
https://builtwithscience.com/bws-free...
FOLLOW ME FOR MORE:
https://www.instagram.com/jayethierfit/
https://www.facebook.com/Jeremyethier...
24
views
1
comment
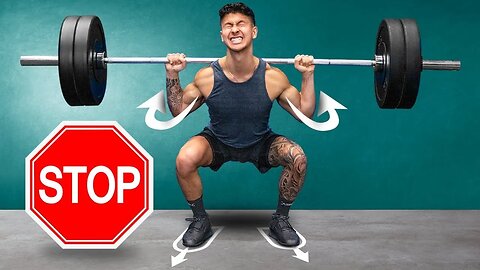
STOP Doing Squats Like This (SAVE YOUR JOINTS!)
Want to keep your joints healthy and maximize your strength? Here are 4 key barbell squat form mistakes that you’re likely making without even realizing it. In this “squat tutorial” video, I dive into what those are, and how to fix them, so you (finally) master the squat technique. By the end of it, you’ll be equipped with the knowledge of proper squat form, enabling you to achieve a safer and stronger squat right away.
The first mistake has to do with your hip structure and how it affects what the optimal foot width and foot positioning is for your squat. To figure out what your optimal stance is, get onto all fours with your hands directly under your shoulders, knees under your hips, and ideally with your feet against a wall. From here, try to sink your hips back into heels as deep as you can without rounding your lower back. Make note of how that feels and how far you could go. Then, play around with it until you find that sweet spot position that feels the best and allows you to get the deepest without rounding at your lower back.
Stand up and make note of how far apart your feet were. Then, either with your bodyweight or under the bar, squat down with your toes and knees straight out and see how that feels. Experiment and find what foot angle feels best and enables you to squat the deepest, which will now be your ideal squat stance.
Next, a common barbell squat form mistake: butt wink. Although it may be fine for some individuals, for others it can put a lot of harmful forces on their spinal discs. So, you’re going to use a screening test created by back pain Dr. Stuart McGill. Do 10 cycles of back extension and flexion with the Olympic barbell — and if there’s pain, butt wink will most likely be an issue for you.
There are two things you can do to minimize butt wink for a “cleaner” squat technique. The first is to simply limit your range of motion. However, oftentimes butt wink is an ankle mobility issue. To improve this, try squatting with your heels on plates or use lifting shoes and see if that helps. If it does, great, continue doing that while working on improving your ankle mobility.
The next mistake covered in this squat tutorial has to do with your feet. Try standing up on one leg with your other knee bent behind you. Are you able to hold this for at least 25 seconds without falling over? Without adequate stability from your feet, your body will seek for it elsewhere, often leading to compensations that can cause excessive stress on the lower back and other areas especially with heavier loads.
To help improve your foot stability, there are two things we can do. First, as per back pain expert Dr. Stuart McGill, the leaning tower drill. The second thing you can do is pay attention to how you distribute your weight as you’re squatting. Before you squat down, grip the floor with your feet and spread your weight across these three points; your heel, and the base of your 1st and 5th toe. Then when you perform your squat, make sure each of these 3 points remain in contact with the ground with the weight distributed evenly among them.
The last mistake has to do with your bar path. A common mistake lifters make is letting their chest fall forward and hips rise up during the ascent. This shifts the bar forward from the mid-line, which can place more stress on the lower back. Although weak quads relative to your glutes may play a role in this, it seems that suboptimal motor recruitment patterns are the main culprit. That means you’ll have to re-learn the squat. The goal is to get your hips and chest rising at the same rate to keep the bar path straight up and down. To accomplish this, for at least a few weeks, swap out your regular sets of squats for double paused squats.
You will likely have to lighten the weight considerably to break out of old habits, but after a few weeks of this, the proper squat form will start to feel more natural and is when you can switch back to regular squats if you wish.
Hopefully you now see the importance of the finer details when it comes to each and every exercise you do. It’s not just about choosing the right exercises but also performing them in a way to get the most out of them while avoiding any potential injury or setbacks down the road. It’s so important that you get this right from the start and it’s why I focus so heavily on that not just within the YouTube videos I put out but especially in the Built With Science programs I offer.
For those who want to maximize your efforts and start transforming your body today, take my analysis quiz to see what step by step program is best for you and your body below:
https://builtwithscience.com/your-pot...
ANKLE MOBILITY DRILLS:
• The PERFECT Mobility Routine To Get Y...
Subscribe to my channel here:
https://www.youtube.com/jeremyethier/...
104
views
STOP Doing Deadlifts Like This (SAVE YOUR SPINE!) ft. Dr. Stuart McGill
If you’ve ever hurt your back deadlifting or are afraid to do deadlifts in fear that you will end up hurting yourself, you’re not alone. There are 5 reasons why injuries are common on the deadlift. I’ll share with you what these reasons are, how to determine the right deadlift form for your body and how to perform this proper deadlift form safely to help you, not hurt you. Learn how to properly deadlift without fearing lower back pain here.
First, the problem with deadlifts is that it’s very easy to lose a neutral spine position – which contributes to injuries. So what can we do about this? Well, today I’ve brought in world renowned back pain expert Dr. Stu McGill, who has studied the science of back pain for over 30 years. The first reason you struggle with proper deadlift form may have to do with your hip structure. Those with deep hip sockets tend to have the most trouble getting into and pulling from the bottom position of a deadlift, especially when using a narrow foot stance. Those with deep hip sockets will thus need to modify their stance.
To find the optimal stance and type of deadlift for you and your hips, get onto all fours with your hands directly under your shoulders, knees under your hips, and ideally with your feet against a wall. Sink your hips back into heels as deep as you can without rounding your lower back. Then, try to find that sweet spot position that feels the best and allows you to get the deepest without rounding at your lower back. Once you’ve found that position, stand up and make note of how far apart your feet were and the angle your knees were turned out at. That will now be the safest deadlift stance for you to use.
Next up: using standard 45-pound weights on each side forces you to have the required range of motion or the right body structure to be able to safely deadlift from that height. Don’t have either? Rather than forcing your body to pull from the ground, find a way to elevate the bar to shorten the range of motion to a level where you can perform the deadlift without compromising on correct form. Then, after a month or so, try lowering it slightly and see how that feels. If that goes well, great, build from there and continue lowering. If that however causes back pain or breaks down your form, then go back to the higher plates.
Third, you need to create what’s called the “lifter’s wedge” to create stiffness before you pull for proper deadlift form. When at bottom position, find a neutral spine and the bring bar as close to shins as you can. Then, think about bending the bar to engage lats/pecs. This will provide the counterbalance needed to “pull” your chest up and hips down, “wedging” yourself between the floor and the bar. You’ll have already performed 95% of the lift. From here, you simply apply 5% more effort by pushing your feet into the ground and bringing the hips through to complete the lift.
Fourth: perfecting your deadlift technique and strengthening your protective back and core muscles takes time and repetition. During this process, many let their ego get in the way and try to lift loads that exceed their ability to maintain a neutral spine and stiffness throughout the pull. So, earn your right to have more weight. Focus on keeping good form, rather than how much weight you’re lifting.
Now, what if you’ve applied everything we went through on deadlift form and are still experiencing lower back pain? Well, if it’s not a sharp shooting pain, your lower back muscles may just be adapting to the exercise. Pay attention to the level of soreness you get after your first few sessions. If it is just a matter of your back muscles adapting, then the soreness you experience after a session will decrease more and more overtime. If it doesn’t or if one day you feel a lot more low back soreness than usual, it’s an indication you’re breaking that neutral spine position during your lift and need to modify your form.
I hope you guys were able to see just how much the details matter for every exercise you do. It not only keeps you healthy and injury free in the long run, but it gets you results faster. And if you’re looking for a program that applies this to transform your specific body safely and effectively with science, then take the analysis quiz to discover which science-based program would be best for you and where your body is currently at below:
https://builtwithscience.com/your-pot...
Big thank you to Dr. Stuart McGill for his help on this video. This man’s knowledge is incredible!
DR. STUART’S BOOKS:
https://www.backfitpro.com/books/gift...
https://www.backfitpro.com/books/ulti...
Subscribe to my channel here:
https://www.youtube.com/jeremyethier/...
100
views
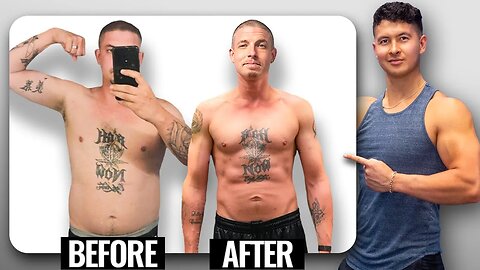
Sean's Eye Opening Transformation (Incredible Story)
Every single month we pick 1 fitness transformation winner from our 2.0 Built With Science programs. Not just someone whose experienced a great body transformation, but someone who embodies the spirit of resilience and determination.
Typically, the winner gets a one-on-one call with me, $1,000 cash, supplements, and more. But after hearing the story behind this month’s winner, Sean, I knew I had to do more.
I felt a personal obligation to share his story with the world and to let him know in person just how damn proud I am of him.
So I got in contact with his best friend who secretly helped me plan a surprise visit at his door.
Sean's story will show you first-hand the power of simply focusing on yourself and overcoming all the BS excuses you tell yourself as to why “you can’t” do something.
He'll also show you the power of focusing on your fitness. His 1 year fat loss transformation was incredible, but it was the momentum it created in his life that truly made all the difference.
I'm beyond proud of him and I'm honored to be able to tell his story.
Start your journey today and join our new 2.0 Built With Science programs here:
https://builtwithscience.com/bws-free...
EDITED BY:
Braeden Ethier
Sean's Instagram:
https://www.instagram.com/sobrien305/
20
views

How to PROPERLY Warm Up Before Weights
In this video I’m going to be covering a upper body and lower body warm up for weights based on what scientific literature has shown to be most effective. I’ll go through the 3 essential parts of a warm up for workouts, and discuss what you should and shouldn’t be doing. The main goal of warm up exercises before a workout is to warm up the muscles to be worked, which helps increase blood flow to the working muscles and can lead to improved strength and performance during your workout. So you want to focus your warm up exercises on the musculature you’ll be training. A few key muscles that people tend to forget to warm up are the rotator cuffs, which is why I’ve included them in my upper body warm up routine. Keep in mind that there are so many different warm up exercises and warm up stretches you can do before your workout. Although I’ve provided a sample upper body warm up and lower body warm up, feel free to swap in exercises that works better for you. Also keep in mind that your warm up will vary for your sport or type of training. This warm up is ideal for general weightlifters, but would likely differ for elite powerlifters and other groups.
If you guys enjoyed the video then don’t forget to give it a like, leave a comment, share it with your friends and subscribe to my channel. I really appreciate the support you’ve all shown me, it helps motivate me to continue doing this and putting out quality videos.
MY SCIENCE-BASED PROGRAMS:
https://builtwithscience.com/bws-free...
FOLLOW ME FOR MORE:
https://www.instagram.com/jayethierfit/
https://www.facebook.com/Jeremyethier...
Studies:
http://journals.lww.com/nsca-jscr/Abs...
https://www.ncbi.nlm.nih.gov/pubmed/2...
https://www.ncbi.nlm.nih.gov/pubmed/1...
https://www.ncbi.nlm.nih.gov/pubmed/2...
http://bjsm.bmj.com/content/early/201...
https://www.ncbi.nlm.nih.gov/pubmed/1...
http://journals.lww.com/nsca-jscr/Abs...
For any questions/inquiries, email me at jeremyethier95@gmail.com
34
views
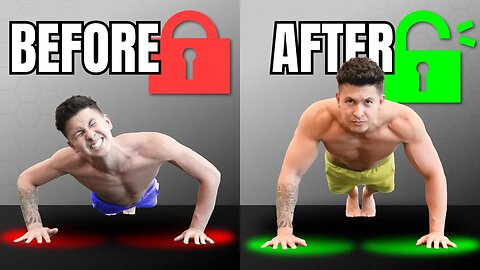
How To Unlock Your Push Up Strength (In 5 Minutes)
If you want to improve your push up form – and do more push ups, this video is for you. We’re going to show you how to (finally) push up properly by covering how you can optimally set up your body position, stabilize that position by activating the right muscles, and finally, combine it with a few modifications (i.e. push up variations) to unlock its maximum potential. After this video, you can be sure to get better push ups. Your push-up strength and the muscle growth you get from performing it will be taken to a whole new level.
First, setup. Getting this right is crucial to if you want to improve your push up form. We’ll start with hand placement. In general, you’d want it such that if you were to look down from an overhead view, your elbows should make an “arrow” shape. To find your sweet spot hand position, lie down on the floor with your hands at the level of your mid-chest. Take a look at your forearm and elbows. Move your hands until you find the hand width where the forearm is positioned directly over the wrists and the elbows are tucked into that arrow position (roughly a 45 to 60 degree angle). Most of you will end up with a hand placement at the mid-chest level and placed just outside the shoulders. Keep your hands on the floor. Then get onto your hands and knees, with your knees right under your hips.
This step is where we’ll focus on turning on several muscles that’ll help better stabilize your body as you perform your push-up, avoiding what’s called “Energy Leaks”. In turn, helping you do more push ups. Start by pushing your knuckle down into the floor and spreading your hands such that there’s space between each of your fingers. This will help us incorporate more of our powerful chest muscles. Next, slide your shoulders down and away from your ears. You should feel your lats turn on as you do this. Then, while maintaining this activation in your lats, push the floor away to open up your shoulder blades to integrate the serratus anterior. At this point, your head will likely be protruding forward. Adjust this by pulling your chin back to draw your head back in line with your body. This helps avoid stressing the neck and also puts our mid-back muscles into a better position for stabilization.
At this point we’re done stabilizing the upper body and are ready to move to the lower body. We’ll start by setting your hips in the right position. To do so, think about tucking your tailbone. Once you’ve made it here, you’re ready to step back. Take a breath in, engage your core, and then extend one leg back. Dig your toes into the floor and squeeze your thigh really tight to fully extend your leg. Hold that, then step the other leg back and squeeze the other thigh tight. Now you know all the basics of how to push up properly.
To perform your push-up, we’re actually going to start by pulling and then pushing. So from the top position we established in step 2, do not just let gravity flop you to the floor. Instead, to get better push ups, think about using your back muscles to pull yourself to the floor as if you were performing a row. Your body will have to travel forward slightly as you do so in order to keep those elbows directly over the wrists like we talked about in step 1. Then, while squeezing your butt and thighs, push away from the floor to the top to open up your shoulder blades again as we did during our setup. At this top position your head, hips, and feet should make one straight line. Maintain this as you proceed to your next reps.
Now that we’ve nailed down your perfect push-up, it’s time to modify it and use the appropriate push up variations based on your current strength level and body type. If you struggle with push-ups and can’t do more than 10 good push-ups, you can either do leg-banded push ups or incline push ups. For those who instead have “mastered” the standard push-up and can perform more than 20 good reps with them, it’s time to increase the difficulty. The most convenient way is to just slow down the reps. Instead of taking 1 second to go down, extend it to 3 seconds. Do the same on the way up. Once that becomes too easy, incorporate a 1-2 second pause at the bottom as well. My personal favorite, however, is banded push-ups.
If you want to maximize your growth and strength, it’s important to apply this same level of detail and execution with all of your exercises, not just your push-up. For a step-by-step program that shows you how to do just that, with in-depth tutorials for each and every exercise included in your program, then take our free quiz below to determine which of our programs are best for you and your goals:
https://builtwithscience.com/your-pot...)
Subscribe to my channel here:
https://www.youtube.com/jeremyethier/...
Music by:
https://brettjanzen.ca/
brettjanzenmusic@gmail.com
66
views
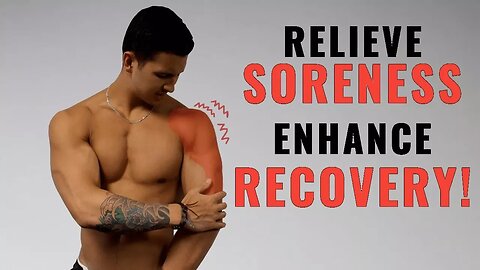
How to Relieve Muscle Soreness and Recover FAST (4 Science-Based Tips)
Muscle soreness (also known as delayed onset muscle soreness or “DOMS”) is something we can all relate to. The sore legs and various other sore muscles we experience after a hard workout can be an uncomfortable feeling. Although this is perfectly normal, sore muscles becomes a problem when it interferes with your muscle recovery. If your muscle soreness after a workout sticks around until your next workout, this is going to negatively impact your workout AND further interfere with the muscle recovery process. Thus, it’s essential that you optimize your muscle recovery after a workout in order to minimize muscle soreness - and no, ice baths or stretching after a workout won't help! In this video I’ll go over 4 science-backed tips to enhance muscle recovery and provide fast muscle soreness relief. I’ll discuss the topics of foam rolling, active recovery (cool downs) and various supplements that have been shown to relieve muscle soreness and enhance muscle recovery.
SCIENCE BASED PROGRAMS:
https://builtwithscience.com/bws-free...
MY FOAM ROLLER RECOMMENDATIONS:
http://amzn.to/2lz9nYi (the one I was using in this video)
http://amzn.to/2lB4duO (a slightly better, more compact one I use)
these are affiliate links and I will receive a portion of the sale through these links – so thank you if you decide to purchase one!
FOLLOW ME ON IG/FB:
INSTAGRAM: https://www.instagram.com/jayethierfit/
FACEBOOK: https://www.facebook.com/Jeremyethier...
WRITTEN ARTICLE (BUILTWITHSCIENCE.COM):
https://builtwithscience.com/reduce-m...
STUDIES:
Soreness interferes w/ workout/recovery:
https://www.ncbi.nlm.nih.gov/pubmed/2...
https://www.ncbi.nlm.nih.gov/pubmed/2...
https://www.ncbi.nlm.nih.gov/pubmed/2...
Ice baths:
https://www.ncbi.nlm.nih.gov/pubmed/2...
https://www.ncbi.nlm.nih.gov/pubmed/2...
https://physoc.onlinelibrary.wiley.co...
Static stretching:
https://www.ncbi.nlm.nih.gov/pmc/arti...
https://www.ncbi.nlm.nih.gov/pubmed/1...
Foam rolling:
https://journals.lww.com/acsm-msse/Fu...
https://www.ncbi.nlm.nih.gov/pubmed/2...
https://www.ncbi.nlm.nih.gov/pubmed/2...
Active recovery:
https://www.ncbi.nlm.nih.gov/pubmed/1...
https://www.ncbi.nlm.nih.gov/pubmed/1...
https://www.ncbi.nlm.nih.gov/pubmed/7...
Omega-3:
https://www.ncbi.nlm.nih.gov/pubmed/2...
https://www.ncbi.nlm.nih.gov/pubmed/1... https://www.ncbi.nlm.nih.gov/pubmed/2... https://www.ncbi.nlm.nih.gov/pubmed/2...
Caffeine:
https://www.ncbi.nlm.nih.gov/pubmed/1... , https://www.ncbi.nlm.nih.gov/pubmed/?...
MUSIC:
https://soundcloud.com/lakeyinspired
Song 1 = Lakey Inspired – “Going Up”
Song 2 = Lakey Inspired – “Better Days”
57
views
How To Unlock Your Mobility in 5 Minutes (DAILY STRETCH)
If we don’t regularly use the full range of motion of our joints through mobility training, we quickly lose our ability to do so. This hurts our full body mobility; the shoulders, hips, back, and ankles just don’t move like they may have used to. So, today, I’ll show you how by focusing on the right areas and the right mobility exercises, you can significantly improve your mobility through just a 5 min stretch routine. Implement this daily stretch routine and you’ll feel better, your lifts will improve, and you’ll likely soon notice an unlocking of tight and sleepy muscles that you may have never even known existed.
First, what makes this 5 min stretch routine so effective? Well, the shorter a stretching routine is, the more likely you’ll be able to stick to it. And second, because this routine is only 5 minutes, we need to make sure it focuses on areas that need the most help. That’s why we picked 3 key areas: the hips, the upper back, and the ankles.
The first move of our daily stretch routine will be used to loosen up the spine and our back muscles in preparation for our next exercises. To perform it, get onto all fours with your knees under your hips and hands under your shoulders. From here, in a gentle motion, round your back up towards the ceiling. As you do this, take a deep breath in while tucking your head down. Then, exhale as you reverse this motion.
The next of our mobility exercises is called the “World’s Greatest Stretch”. Get into a plank position with your hands under your shoulders and feet together. From here, lunge forward by bringing your right foot up as high as you can. Next, take your right hand, place it on your knee and push your knee out and back and then forward and back a few times. Then, try to drop your right elbow as far towards the ground as you can while rotating your upper body down towards the ground. To really open up the mid and upper back, rotate your entire upper body up and to the right and reach your right arm as far overhead as you can. Then, reach back down and repeat this for 5 reps or about 30 seconds in total before switching to the next side.
Up next on our mobility training, the modified Asian squat. First, get a rolled up towel and place your heels on it. From here, using a squat stance which is typically just outside shoulder width, squat down into however deep is comfortable for you. Keep your chest up and try to keep your heels down. From here, place your arms on the inside of your legs and use your elbows to push your knees out. Sit in this position for 30 seconds. For the next 30 seconds, move side to side to stretch out each ankle one at a time.
Next, we’re going to really focus on mobilizing the upper back. Get into a half kneeling position with your right leg bent as close to the wall as you can get it, and your left leg planted forward in a lunge position. Place both arms directly in front of you with your right arm making contact with the wall. From here, push your right hand into the wall as you rotate your upper body to the left, trying to reach your left arm to the other side of the wall. Return to the starting position and then repeat for 30 seconds before switching sides.
The exercise we’ll use are wall slides. To perform it, stand with your back against a wall and contract your abs to flatten your lower back on the wall. Then, slide your arms up and down the wall. To make this easier when starting out, place your feet further away from the wall. Then over time, try to get your feet closer and closer to the wall while trying your best to keep your lower back flat against the wall.
Here is the full 5 minute routine that’ll help with full body mobility:
Exercise 1: Cat Cow (60 seconds)
Exercise 2: World’s Greatest Stretch (30 seconds per side)
Exercise 3: Asian Squat (30 seconds hold, 30 seconds rock side to side)
Exercise 4: Half Kneeling Thoracic Rotations (30 seconds)
Exercise 5: Wall Slides
Focus on doing as many high-quality reps as you can within the 1 minute you have for each exercise. Implement this daily, make an effort to move more, and supplement this with exercises in the gym like split squats and overhead presses that help you actually use your new mobility, and you’ll very quickly notice a massive improvement in how you move and feel. And for a step-by-step program that takes a holistic, science-based approach to transforming your body by focusing not just on your workouts but also on your nutrition, your mobility, and your recovery, simply take our analysis quiz to discover which of our programs are best for you and your body below:
https://builtwithscience.com/your-pot...
MOBILITY ROUTINE PDF DOWNLOAD:
https://builtwithscience.com/dailystr...
Subscribe to my channel here:
https://www.youtube.com/jeremyethier/...
173
views
How to PROPERLY Use Supersets to Maximize Growth (3 Science-Based Tips)
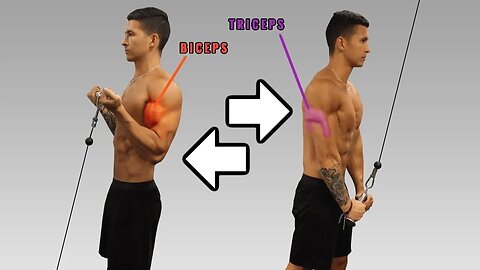
Supersets are often incorporated in workouts to both save time and potentially enhance muscle growth. Now although there’s endless superset workouts you can do (superset workouts for chest, arms, legs, etc.) and several potential benefits of supersets in terms of saving time and enhancing growth, it’s key that you first learn how to do supersets for the best results. But first, let’s explain what supersets are in the first place: a superset involves training two muscles back to back with the use of two different exercises. They’re mainly used to save time, but as you’ll see, “use supersets for muscle growth” may actually hold some truth to it as well – given that you perform your super sets properly. First thing you need to do is use agonist-antagonist supersets. This can be done with an arms superset workout (by supersetting the biceps and triceps), with a chest and back supersets workout, or with a legs superset with the hamstrings and quadriceps. In any case, you’re supersetting two opposing muscle groups which seems to actually enhance performance rather than hinder it. Next, you want to use “staggered rest periods” with your supersets as opposed to immediately going from one exercise to the other. This enables you to still give your muscles adequate rest while still saving time with your supersets workout routine. Lastly, I would avoid supersets on taxing movements like the squat, deadlift, and Olympic lifts. Utilizing supersets on these movements seems to do more harm than good. But all in all, supersets do seem like a viable method to save time while enhancing performance in the process.
JOIN THE WAITING LIST FOR MY PROGRAMS HERE:
https://builtwithscience.com/program-...
MY PROGRAMS:
https://builtwithscience.com/bws-free...
FOLLOW ME ON INSTAGRAM/FACEBOOK:
https://www.instagram.com/jeremyethier/
https://www.facebook.com/Jeremyethier...
LINK TO WRITTEN ARTICLE (BUILTWITHSCIENCE.COM):
https://builtwithscience.com/SUPERSETS/
STUDIES:
Rest periods (2-5 minutes optimal):
https://journals.lww.com/nsca-jscr/Fu... https://www.ncbi.nlm.nih.gov/pubmed/2...
Agonist-antagonist supersets (paired sets):
https://www.ncbi.nlm.nih.gov/pubmed/2...
https://www.ncbi.nlm.nih.gov/pubmed/2... https://www.ncbi.nlm.nih.gov/pubmed/2...
Supersets with squat can be detrimental:
https://www.ncbi.nlm.nih.gov/pubmed/2...
MUSIC:
https://soundcloud.com/lakeyinspired
Song 1: Lakey Inspired – Fast Lane
Song 2: Lakey inspired – Better days
46
views
How To Unf*ck Your Shoulders In 10 Minutes (FOR GOOD!)
Struggling with shoulder pain? Let's take a look at what causes it. The first contributor is the muscle imbalances around your shoulder created as a result of spending a lot of time sedentary in poor positions. The second is what you do during your workouts, where you neglect the rotator cuff and scapular muscles. Combine these two, and shoulder impingement can occur. This can then lead to shoulder pain, especially when lifting your arm overhead or behind your back. The key to shoulder impingement treatment (or preventing this), and just keeping your shoulders healthy in general is quite simple. All it takes is 2 easy steps (that involve exercises and stretches) for some much-needed shoulder pain relief.
The first step for shoulder impingement treatment is to create more space in your shoulder joint to relieve the pinching on your tendon and the pain that you’re feeling. To do so, we need to activate the various muscles you’ve been neglecting and have weakened overtime. The first muscle, the lower traps, can easily be activated and strengthened with a simple bodyweight progression. Level 1 involves first lifting your chest off the ground slightly by using your mid back muscles, raising your arms up while turning your palms out, and then pulling your shoulder blades back and down as these are the two main functions of the lower traps. Hold this position for 10 seconds and then repeat for more reps. Move to the other progressions once you’re ready.
The next thing you want to do to relieve shoulder pain is to strengthen the serratus anterior. We’re going to first focus on activating it. First, assume a wall plank position with your forearms on the wall. Then, think about pulling your shoulder blades down and around your ribs by pushing away from the wall with your forearms. Hold this for 20-30 seconds and then repeat for more reps. Lastly, to strengthen the external rotators, we’ll perform the side lying external rotation. Simple rotate your arm upwards while keeping your elbow pinned to the side.
The next step is to address the root cause of your shoulder impingement, which lie in the various mobility restrictions that were created from a sedentary lifestyle. The two most problematic areas we’ll want to look at are the pecs and the mid-back. When the pecs are tight, they pull our shoulder into this forward rounded position. To help mobilize them, , all you need is a wall or something to prop your elbow against. Keep your elbow at 90 degrees, brace your core, and then lunge forward gently until you feel a stretch in your pecs. Then, slide your arm up and down slowly to stretch out the different fibres and muscles of your chest. Do this for 30-60 seconds and then switch sides.
We’ll then work on the mid-back to continue addressing your shoulder impingement issue with a thoracic extension move. To perform this movement, place your elbows on top of a bench or couch with your hands together. Sit your hips back into your heels and simultaneously drop your chest towards the ground. Hold that bottom position for a few deep breaths before repeating for more reps.
So, as a summary, here’s list of corrective exercises that you’ll want to run through for shoulder pain relief. Do this 2-3 times a day initially.
Part 1:
Lower Traps Exercise Progression: 10 reps with 5-10s pause at top
Serratus Anterior Wall Exercise: 5 reps with 20-30 second holds (progress to sliding version)
Side Lying External Rotation: 15-20 reps (progress to raising arm version)
Part 2:
Pec Stretch: 5-10 reps sliding up/down wall each arm
Thoracic Extensions: 10 reps with 2s pause at bottom
By implementing these two parts, you’ll be able to not only quickly relieve your shoulder but will also be addressing the root cause of the problem. It may sound tedious, but you won’t need to do these every single day indefinitely. If you choose the right exercises to include in your workouts, while making an effort to move more and be mindful of your posture throughout the day, you’ll be able to keep these muscles strengthened and prevent imbalances from occurring without having to do a ton of different corrective exercises every day.
And for a step-by-step program that uses science to show you exactly how to transform your body as efficiently as possible without overlooking key muscles that make all the difference, then simply take the analysis quiz to discover which science-based program would be best for you and where your body is currently at below:
https://builtwithscience.com/bws-free...
Subscribe to my channel here:
https://www.youtube.com/jeremyethier/...
MOBILITY VIDEO:
• The PERFECT Mobility Routine To Get Y...
MUSIC: https://soundcloud.com/iamryanlittle
50
views
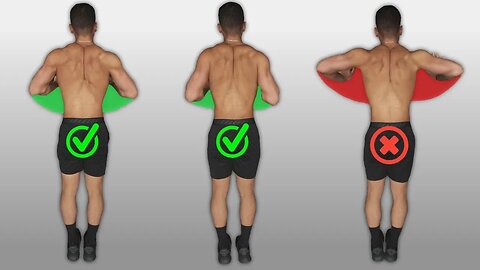
Push-Ups- How To Use Them To Build Muscle (4 Science-Based Tips)
The pushup is one of the best bodyweight exercises for the upper body. And not only is the push up extremely convenient to incorporate, but for untrained individuals at least, it’s been shown in the literature to provide size and strength gains that are comparable to that of the barbell bench. Simply meaning that pushups and the right pushup variations are an effective exercise you should definitely be incorporating into either your bodyweight workout routine or to compliment your existing weightlifting workouts. But, it’s vital that you do so correctly in order to maximize the effectiveness of this exercise. And in this video, I’ll show you the best way to do pushups and the proper way to do pushups to build muscle.
The first thing you want to do is choose the right variations. There’s pushups for chest, pushups for shoulders, pushups for triceps, and more. Typically, with regards to pushups for a bigger chest, people opt for the wide grip pushup with the elbows flared to best hit the chest. But, research actually shows that a narrow grip pushup (diamond pushups) best activates both the chest and the triceps with the shoulder-width pushup being an effective option as well. Thus, these are two great options to incorporate and progress overtime. Pushups for triceps can be achieved by doing them on a medicine ball or an unstable surface and are thus good variations to incorporate if you wanted to prioritize the triceps more.
More important than the variation you choose however is pushup progressions. You need to ensure you’re progressing your pushups overtime if you want to build muscle. This can be done with banded pushups, adding weight, slowing the tempo, doing more reps, pause pushups, and more.
Next, you need to ensure you’re exerting enough effort during your pushup sets. Research shows that similar muscle growth can be achieved with low load movements like the pushup and high load movements like the bench press. But, the catch is that your low load movements (e.g. pushups) need to be taken close to or to failure. This ensures that your muscle fibers are adequately stimulated and that your muscles have enough stimulus for growth.
Lastly, you need to implement your pushup workout correctly into your current routine. If you perform bodyweight workouts, then pick 3-4 pushup variations and progress these overtime. If you perform weights workouts, then pick 1-2 pushup variations and perform them as finishing movements towards the end of your workouts. And lastly, if for some reason you don’t have access to a gym on chest day, then you can do pushups as a suitable alternative.
If you want to see the best results then it’s vital that you not only choose the right exercises and variations, but that you also implement and progress them correctly within your routine. And this is exactly what my Built With Science programs do. They’re designed to be an all-in-one evidence-based program that optimizes all your training variables AND nutrition such that you’re able to progress as quickly as possible.
To get started, simply take my starting-point analysis tool further below to find which program is best for you:
https://builtwithscience.com/bws-free...
WRITTEN ARTICLE:
https://builtwithscience.com/build-mu...
FOLLOW ME ON INSTAGRAM & FACEBOOK:
https://www.instagram.com/jeremyethier/
https://www.facebook.com/Jeremyethier...
FILMED + MOTION GRAPHIC EDITING DONE BY:
Abdo Megahid
Vimeo: https://www.vimeo.com/abdohmegahed
Facebook: https://www.facebook.com/abdohmegahid
Instagram: @abdohmegahed
IDEA FOR THUMBNAIL CREDIT:
https://www.instagram.com/pheasyque/
STUDIES:
Pushups vs bench press muscle growth & strength:
https://www.ncbi.nlm.nih.gov/pmc/arti...
Pushup variations comparison:
https://www.ncbi.nlm.nih.gov/pmc/arti...
https://www.ncbi.nlm.nih.gov/pmc/arti...
Low load vs high load:
https://www.ncbi.nlm.nih.gov/pubmed/2...
60
views
How To PROPERLY Use Cheat Meals To Lose Fat Faster (3 Science-Based Tips)
Cheat meals can help boost your fat loss results as opposed to hinder them. How? And how does The Rock incorporate his cheat meals? Well, first off and arguably most importantly is the psychological benefit having cheat meals while cutting provide. You’ll exhibit long-term adherence and enjoyment to your diet when you have these planned ‘refeed day’ to work towards in your workout meal plan and look forward to. Second, the temporary increase in calories and carbs by adding a cheat meal into your meal plan to get ripped has been shown to lead to better appetite suppression, higher energy expenditure, and increased performance in the following days. So how can you now go about incorporating cheat days into your plan properly?
First, plan this cheat meal into your weekly diet. In my opinion, the best way to do this is by allocating one day of the week to be what’s called a re-feed day. This is simply a day where you take a “break” from your diet by now eating at your maintenance calories or at a slight surplus. If you wanted to really indulge, then you can make more room for it by eating a little less on the days leading up to it and saving most of your calories for it. That said, be aware of how quickly your calories can add up during your cheat meals.
Next, let’s talk about the actual composition of your cheat meals. Compared to fat and protein, carbs not only have the greatest impact on boosting your leptin levels which as discussed earlier can help with appetite suppression and increasing your energy expenditure when dieting, but they will also best help refill your muscle glycogen to create more muscle fullness and potentially augment your performance and the anabolic response you experience in your following workouts. Also, in the event that you do splurge on your calories and overeat quite a bit, you’d save 0.1 lbs of fat from being put on for every lb of weight that you gain from overeating if you were to do so primarily with carbs, compared to fats. Interestingly, overeating with predominantly protein actually results in the least amount of added fat gain when compared to carbs and fats. Meaning that if you’re going to splurge and overeat, doing so with carbs and ideally protein-rich foods has the greatest likelihood of minimizing fat gain.
And lastly, it’s important that you don’t turn your cheat meal into a cheat day, and then turn cheat days into a cheat week, and then fail to ever get back on track. To prevent this, take the word “cheat meal” out of your vocabulary. I use it in this video just because it’s a commonly understood term, but the very word itself has some negative connotations and guilt associated with it. Instead, name it a “planned indulgence” or “calculated splurge” or “celebration meal” for example, because it’s not a meal that you should feel bad or guilty about at all. Secondly, if all week you’re struggling with cravings and all you can think about is your upcoming cheat meal and “reward” for your diet, then what this implies is that your current diet just isn’t sustainable. You need to consider re-structuring your diet such that you’re not completely depriving yourself. Otherwise, you’re just setting yourself up for failure in the long run.
Be strategic with your planned indulgences if you choose to include cheat meals while cutting, but enjoy yourselves and remember that at the end of the day what’s most important is the calorie deficit that you create over time and your long-term adherence to that. Which is why it’s vital that you set up your diet based on what will enable you to accomplish those two factors most effectively. And if you do get off track, don’t beat yourself up. Get back on the saddle and take it day by day. And for an easy to follow science based program that sets everything up for you, such that you know exactly how to train AND what to eat week after week without depriving yourself of the foods you love, so that you can lean down and burn off fat most effectively with science, then simply take the analysis quiz below to discover which specific program is best for you:
https://builtwithscience.com/bws-free...
Filmed by: Bruno Martin Del Campo
MUSIC:
soundcloud.com/lakeyinspired
STUDIES:
PSYCHOLOGICAL BENEFIT
https://www.sciencedirect.com/science...
LONG-TERM DIETING EFFECTS
https://www.ncbi.nlm.nih.gov/pubmed/2...
https://www.ncbi.nlm.nih.gov/pmc/arti...
PHYSIOLOGICAL BENEFITS
https://www.ncbi.nlm.nih.gov/pubmed/1...
https://www.ncbi.nlm.nih.gov/pubmed/1...
CALORIE ADD-UP
https://www.ncbi.nlm.nih.gov/pmc/arti...
HIGH CARB BENEFITS
https://www.ncbi.nlm.nih.gov/pmc/arti...
https://www.ncbi.nlm.nih.gov/pubmed/7...
HIGH PROTEIN BENEFIT
https://www.ncbi.nlm.nih.gov/pubmed/6...
58
views
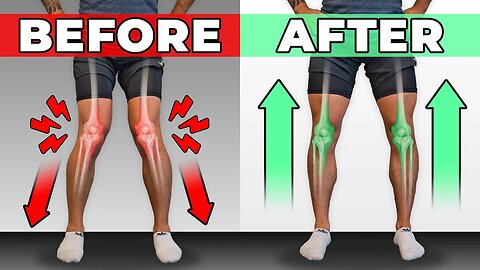
How To Unf-ck Your Knees in 10 Minutes_Day (CORRECTIVE ROUTINE)
Struggling with weak knees? I’m going to show you how to fix knee pain and protect your knees for good with a 10-minute corrective routine packed full of knee strengthening exercises. We’ll go through a few tests to figure out what causes your knee pain and/or soreness, use those results to determine the appropriate knee mobility and stability exercises for your body, and combine this all into a 10-minute routine with instructions on how and when to implement it.
Let’s do some ankle and hip tests to reveal the cause of your knee pain. The first test is for ankle stiffness. Take your shoes off, find a wall, and kneel in front of it. Make a thumb and fist with your hand. That’s the distance you want between your big toe and the wall. From here, push your knee forward to try to touch your wall with your knee. Repeat this on both sides. To pass (all 4 are required for a pass):
1) Knee touches wall
2) Knee and hips don’t rotate in/out
3) Heel stays on ground
4) Both sides are within one inch of each other
The hip test we’ll be doing looks at internal rotation. Lie on your back with your knees up and legs bent at 90 degrees. While keeping your knees in place, kick out your feet to the sides as far as they can go. Take a look and note down if both sides are even or if one side is tighter and can’t get the foot out as far as the other side. Once you complete these 2 tests, note down your results. They’re key to knowing which knee strengthening exercises you need to do.
First, we’ll use your test results to determine what knee mobility exercises you should focus on. So, if you failed the ankle test, add the combat stretch to your routine. Take a half kneeling lunge position, straighten up your hips, and drive your front knee forward over your toe. As you do so, think about pulling yourself forward by driving your toes up to your shin. Go as far as you can without your heel lifting off. Hold this end position for 5 seconds, then repeat for 5-10 more repetitions. Start with your more restricted side before switching to the other side. If you have a band, put your leg up on a platform and wrap a band on top of your ankle pulling from the back as you perform the stretch.
And if you found an imbalance in the hips internal rotation test, add the following stretch. Sit on your butt with your arms supporting you upright and legs out in a wide stance. Point your toes up to activate muscles that will help avoid aggravating your knee during the stretch. From here, drive your knee towards the floor until you feel a stretch. Hold that for a few seconds, then switch from side to side for about 5-10 reps each. If you have a band available, we can do an even more effective stretch. Wrap the band around a low fixture and loop it around the hip of your more restricted side so it’s pulling you back. Get down on your hands and knees, kick the foot of your banded leg out, and then sit your butt back into your heels. From here, if you can, come down to your forearms. Rock back and forth for about 5-10 reps and gradually kick your leg further out for a deeper stretch. Repeat on the other side.
Now your body is ready for the stability exercises. The first move – hip airplanes – will help further open up your hips but now while strengthening your weak glute muscles. The next move, the Eccentric Goblet Squat, also works on your glutes, but by focusing on the downward part of the movement, will prevent weak knees and improve your knee health as well. The last exercise is called an isometric, where the body doesn’t move but the muscles around the knees are contracting. It will help both provide instant relief to your knee pain or discomfort so that you can train afterwards, and thickens the tendons around your knee to keep them healthy. And it’s none other than the wall squat.
Alright, you now know how to fix your knee pain! To implement this 10-minute routine for the best results, perform it consistently 2-3 times a week. You can even use it as a warm up routine right before your lower body workouts. Although eventually the mobility exercises may not be necessary once your imbalances are fixed, the stability exercises are great moves to permanently integrate into your routine to prevent knee soreness and protect your knee long term.
10-Minute Corrective Routine
Mobility:
Ankle Stretch: 2 sets of 5-10 reps each side
Hip Stretch: 2 sets of 5-10 reps each side
Stability:
Hip Airplanes: 2 sets of 10 reps each side
Eccentric Goblet Squat: 2 sets of 5 reps
Wall Squat: 2 sets of 20s holds
To check out my training programs, you can take our free quiz to find the best plan for your body below:
https://builtwithscience.com/your-pot...)
Subscribe to my channel here:
https://www.youtube.com/jeremyethier/...
Music by:
https://brettjanzen.ca/
brettjanzenmusic@gmail.com
300
views
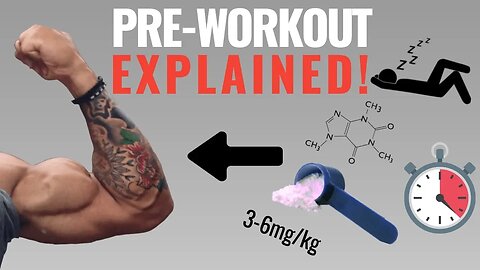
Pre-Workout Supplements- How To PROPERLY Use It To Boost Performance (Avoid Side Effects!)
When it comes to which supplements to take and the best workout supplements that are backed by evidence – pre workouts are definitely a top choice. But although pre workouts supplements are one of the most popular workout supplements within the fitness industry, most people just don’t use it in a way that maximizes its effectiveness while minimizing any potential side effects. For example: how often you take your pre-workout, how much you take, and when you take it are all important factors that will affect how well the supplement will benefit your workouts. Luckily, in this video I’ll discuss exactly how to take pre workout and how to use pre workout in order to maximize its beneficial effects in a safe manner.
VIEW MY PROGRAMS HERE:
https://builtwithscience.com/bws-free...
SHOP MY RESISTANCE BANDS HERE:
https://shop.builtwithscience.com/col...
FOLLOW ME ON INSTAGRAM & FACEBOOK:
https://www.instagram.com/jeremyethier/
https://www.facebook.com/Jeremyethier...
MUSIC:
https://soundcloud.com/lakeyinspired
STUDIES:
Pre-workout benefits:
https://www.ncbi.nlm.nih.gov/pmc/arti...
https://www.ncbi.nlm.nih.gov/pmc/arti...
https://www.ncbi.nlm.nih.gov/pubmed/2...
Pre-workout tolerance:
https://www.ncbi.nlm.nih.gov/pmc/arti... https://www.ncbi.nlm.nih.gov/pubmed/2...
https://www.ncbi.nlm.nih.gov/pubmed/1...
Pre-workout upper vs lower body effects:
https://www.ncbi.nlm.nih.gov/pubmed/2... https://www.ncbi.nlm.nih.gov/pubmed/2...
Habitual caffeine dose:
https://www.ncbi.nlm.nih.gov/pubmed/1...
39
views
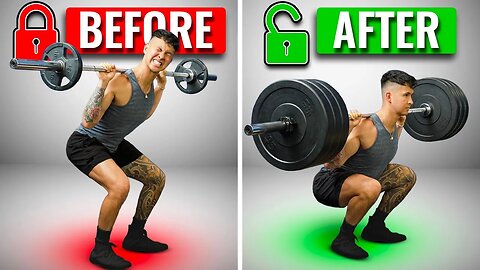
How to PROPERLY Squat for Growth (4 Easy Steps)
The squat is the KING...of poorly performed exercises. Get your barbell squat technique wrong and instead of growing nice quads and glutes, you’ll feel aches and pains in your knees, hips, back, and even shoulders. But if you want to learn how to squat properly or how to do a squat, follow these 4 easy steps and I guarantee you’ll get your back squat form perfect.
Step 1: Setup. Your anatomy will determine what your perfect squat form looks like. Let’s start with your foot stance. Hold a light weight at your chest, set your feet hip width apart, and squat down. See how that feels and note how low you could get. Widen it by an inch or two and compare. Keep going till you find what feels best and enables you to squat the lowest. As for your foot angle, most people’s joints will feel better with their toes pointed out slightly, so don’t force yourself to keep them straight. And the wider the stance you use, the more your toes will have to turn out.
Next, it’s time to grab the bar. Set your feet under the bar, half squat to get under it, and then place the bar on your upper back. Right onto the meat of your traps. Next, grip the bar with your hands as narrow as possible without pain in your wrists, shoulders, or elbows. Then, walk it out by extending your legs to lift it out of the rack and then taking three careful steps back. Lastly, to keep you balanced as you squat, spread your weight evenly over your foot by making sure each foot has three solid points of contact with the ground - your big toe, your pinky toe, and your heel.
Step 2: Create whole body tension. You need to first activate several key muscles that will protect your back and keep you strong as you perform your squats. Start with the lower body. Screw your feet into the ground as if you were trying to touch your heels together. Then, level your pelvis with the floor by tilting it back as if it was a bowl of water and you were trying to prevent it from spilling. Lock this in by squeezing your inner thighs, glutes, and quads. For the upper body, pull your elbows forward under the bar and pull the bar down into your meaty upper traps. This helps activate your lats and keeps your upper back stable. Finally, take a deep 360 breath into your waist then brace your core.
Step 3: Descent. Pull yourself down into the squat using your hamstrings. Let your butt drop down between your heels and push your knees out in the same direction as your toes. Keep your upper back tight by pulling the bar down and continue lowering as deep as you comfortably can. Squat down to at least somewhere close to parallel. But if towards the bottom of your squat your upper body falls forward, or your heels come off the ground, or your lower back rounds excessively into “butt wink”, these are all signs you’re not yet ready to go that deep. There are 2 reasons for this. The most common reason is limited ankle mobility. In this case, try elevating your heels onto weight plates and see if that helps with your squat technique. The other reason is a weak core and glutes. In this case, you can try out a more stable exercise like smith machine squats before progressing to the barbell.
But once you can get deep enough, you may notice your knees end up over your toes. As long as your knees don’t cave in or out and instead push out in the same direction as your toes, letting your knees go over your toes is perfectly fine. But, once you reach the bottom position, to maximize growth DO NOT let gravity drop you into that last inch or two. Research suggests this is the most important part of the movement for growth. So force your muscles to work by controlling the weight down and pausing for half a second at the bottom before moving onto the final step...
... but if you've found this tutorial useful so far, then consider joining one of our step by step programs that take care of all the guess for you. We show you what exercises to do, and how to do them based on your body. You can take the quiz below to find the best program for you and your body:
https://builtwithscience.com/quiz-pri...
The final step of learning how to squat properly (step 4): ascent. We want the chest and hips to rise at the same rate. To do this, drive up out of the bottom by pushing the floor away and thinking about driving your traps up against the bar. Continue pushing down against the floor and getting tall until your legs are fully extended. But as you come to the top, avoid letting out a big exhale. Instead, maximize the pressure in your abdomen to protect your back by keeping your lips held tighter together as you breathe out, to gradually let air out. Then, take another deep 360 breath in, brace, and repeat another rep.
Click below to subscribe for more videos:
https://www.youtube.com/jeremyethier/...
79
views