
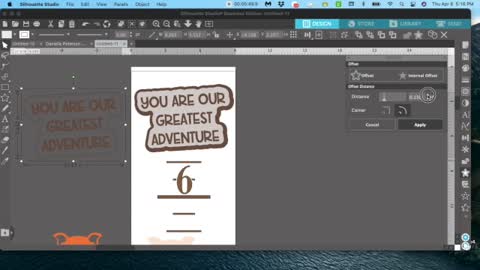
How to Make G'ma Macs Simply Delicious Pasta Pepperoni Salad
Pasta Pepperoni has been in the Peterson household for over three decades! Thank you G’ma Mac for giving us this recipe! Bonus, if you want to make a lower carb version, substitute you choice of pasta with baked spaghetti squash!
let’s get started with our Pasta Pepperoni
This hand-me-down recipe is one of my personal favorites and it’s super easy.
While the pot of water is coming to boil to cook the pasta, I prep the veggies and pepperoni.
For this dish I like to use either Penne or Mostaccioli Pasta.
And when cooking pasta for the Pasta Pepperoni Salad, I usually cook it a minute or two less than what the directions call for.
So if it states, “cook 10-12 minutes”, I’ll usually cook it for 8 minutes.
I like my pasta ‘al-dente”.
PREPPING OUR VEGGIES FOR PASTA PEPPERONI
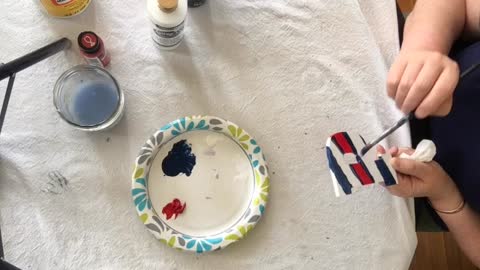
For the Pasta Pepperoni, I like slicing my veggies and pepperoni lengthwise so I have similar sizes compared to the pasta.
In fact, the reason why I started slicing the pepperoni, my kiddos used to steal them out of the bowl! I am serious, those stinkers!
I slice my black olives also, why? I honestly can’t tell you.
Yes you can use the sliced black olives if you choose.
Set the black olives aside until later.
While the pasta is cooking, I turn the heat on the veggie mixture on low and cover with a lid.
Once the pasta is cooked, I add to the veggie mixture, and stir together.
Then I add about a cup of heavy cream or whole milk to the mixture and black olives and stir together.
SERVING OUR PASTA PEPPERONI
I love serving Pasta Pepperoni with parmesan cheese and garlic bread.
Otherwise this is also perfect as a side dish too.
Check it my video shorts below!
64
views

How I Personalized those Unfinished Wood Signs from Hobby Lobby
Do you ever check out those unfinished wood signs at Hobby Lobby and wonder what to do? When I first saw these beaded white signs, I was hoping these weren’t a short lived product and I bought a few on the spot. I’ve added transfers to them and stenciled them but this one I think really stands out. Check out how I deconstruct it and completely change the look!
Supplies I Used for my unfinished wood signs
White Beveled Beaded Wood Wall Decor from Hobby Lobby
Jute rope, scissors, 2 paper plates, scotch tape or large eyed needle
Dixie Belle Products: Caviar, Cotton, Coffee Bean, Mud Puddle and White Lightning
Join MPD Tribe and get access to my library of free cut files including Bless This Home from this project!
PREPPING MY UNFINISHED WOOD SIGNS
Before I get started, I remove the wooden beads from my unfinished wood sign.
I used scissors to cut the knots from behind and I place the beads in a safe place.
Normally I don’t use the same jute rope string since the rope is cut pretty tight and I have trouble retying a knot so I use new jute rope later.
As always, we need to start with a clean surface.
Any fingerprints or dirt will prevent any paint from sticking to the surface they are painted on.
My favorite product to use is Dixie Belle’s White Lightning. I mixed a small amount, approximately a tablespoon in a spray bottle and use this for small projects.
Once the project is clean, make sure to use a clean wet cloth to wipe off any White Lightning residue.
And now we are ready to start!
PAINTING MY UNFINISHED WOOD SIGNS
First I divided my wood beads into two groups and placed them on two different paper plates.
On one plate I added a very small amount of Coffee bean, maybe 2 teaspoons worth.
You can always add more paint as you go, once the paint was on the plate, I swirled my plate around to cover the beads.
I kept swirling until the paint was dry on the beads.
The next plate I added Mud Puddle and repeated the same process.
Check out my video short below to see my process.
This way of painting beads if very satisfying, my version of a fidget spinner.
If you check out my YouTube channel I have two more videos on painting wood beads also.
I choose to use Dixie Belle paint for these beads because the paint contains sealer in it.
This will provide extra protection for my painted beads, but we are not done yet!
When the beads were good and dry, I then placed all the beads on one plate and added a small amount of Cotton to the plate and repeated the process.
Why? Because I wanted a speckled look to my wooden beads!
STENCILING MY UNFINISHED WOOD SIGNS
I love these unfinished wood signs and I have been using them in other projects.
Check out my other White Beveled Beaded Wood Wall Decor to see how I personalized them.
I have several blog post and videos on how to stencil on different mediums, click here to check this out!
Once I have my design figured out on my Silhouette Cameo software and cut using contact paper, click here to see how, it’s time to start stenciling.
I used Caviar first to burnish the stencil to help prevent bleeds.
Once this was dry I then used Cotton over my stencil.
Before the Cotton was dry, I pulled my stencil up slowly and carefully to prevent the paint from being pulled up.
Usually I wait until the paint is dry and then lightly sand it before pulling up the stencil, but we have a lot of humidity here in Iowa so I’ve found pulling it up when still wet works best for me.
Once completely dry, you can use your favorite sealer, or you can leave unfinished for a chalkboard look, which is what I choose to do this time.
ASSEMBLING MY UNFINISHED WOOD SIGNS
Now it’s time to reassemble my unfinished wood sign.
I grabbed my role of jute rope, added scotch tape tightly to the end.
Then I threaded the just rope from the backside up, then I started adding the wood beads back onto the rope.
I alternated the dark brown/white and medium brown/white speckled beads until they were all threaded on the jute rope.
Then I pushed the jute rope down into he other side of the sign and tied two knots on each side and then cut the excess jute rope.
That is it!
157
views
How I Up-cycled My Hobby Lobby Clearance Decor
Check out my new to me up-cycled decor! I found this piece at Hobby Lobby over a year ago marked down 90%! To be honest, I wasn’t really crazy about it but it was less than $3 and I was in that mood! LOL! And now I am so thrilled I didn’t pass this gem up!
Supplies I Used for my Up-cycled Decor
Decor of your choice
Dixie Belle Products: Cotton, White Lightning
Painters tape, small to medium paint brush
PREPPING MY UP-CYCLED
Prepping my up-cycled clearance decor was a little bit of a challenge.
If you notice there are three clear bottles hanging from jute rope, and I can only tie simple knots.
Plus the bottle needed a cleaning after sitting in my craft closet for over a year.
I carefully loosened the rope around the bottles and took them to kitchen to wash them.
Then I used painters tape and carefully taped around the rope where they were close to any wood.
I was also careful not to loose my loops in the jute rope where my bottles would fit in and hang.
Once I had those taped, I carefully wiped down all the wood to remove any fingerprints or dirt so my paint would adhere to the surface
PAINTING MY UP-CYCLED DECOR
This was the fun part,
I decided to go with Dixie Belle’s Cotton, their white-white paint.
Currently the wall decor had a yellowish tint to it that I do not like, it also was distressed along the edges but I decided to go with a cleaner look.
I grabbed my square artist brush, really any smaller to medium size brush will do and I started painting my up-cycled wall decor.
Once she was all dry, I decided not to seal her.
Technically with Dixie Belle, sealer is not required since there is sealer in their paint products.
I loved the matte look just as is!
Next I grabbed my three clear bottles and carefully put them back in the jute rope loops and tighten them up.
I used the knot on the top of the box to pull up the rope and readjust how the bottle hung.
For the final touch for my up-cycled clearance decor I added my favorite faux flower from Mustard Seed here in Albia and she was perfect!
44
views

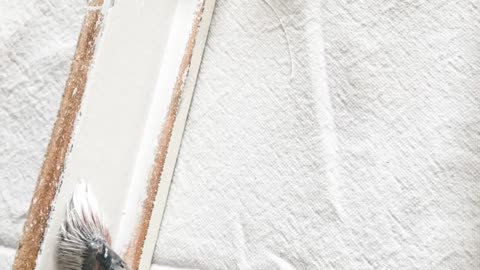
How I Upcycled my Mother's Day Vase
Check out my upcycled vase! I got a beautiful bouquet of flowers for Mother’s Day from my son, Dalton and his girlfriend Hannah. I love the shape of this vase so much, I decided to switch it up so I can use it in my home decor!
Supplies I Used for my Upcycled Vase
Vase or vases of you choice
Dixie Belle Products: Slick Stick, Sea Spray, Cotton
Sherwin Williams: Indigo Batik
Paper plate, paper bowl, plastic disposable bowl, tongue depressor, old paint brush
PREPPING MY UPCYCLED VASE
Before I got started, I made sure my vase was clean.
Any oils from our hands or fingers can prevent primer or paint products from adhering to any surface we are painting.
When my soon-to-be upcycled vase was clean and dry, I started painting on slick stick.
Slick stick is Dixie Belle’s primer for slick surfaces.
I painted on two coats, letting each coat dry for a couple of hours in between and then over night after the second coat.
Now it’s time to do some mixing and painting!
PAINTING MY UPCYCLED VASE
I knew I wanted to add some texture to my upcycled vase.
Dixie Belle’s Sea Spray added to Cotton, is the perfect way to accomplish this.
The directions are to mix 2 scoops of Sea Spray for 8 ounces of paint.
I used about 2 to 3 ounces of Cotton paint and mixed the Sea Spray in until I got a nice mixture when it wasn’t runny, but stuck to my tongue depressor.
Check out my video below to see how I did this!
Then I used both my tongue depressor and an old paint brush to paint this mixture on my vase.
I used my paint brush to pounce the mixture on also to add more texture.
Once it was all covered, I let this dry overnight.
I went over the vase lightly with my 220 grit sand block to knock of any areas that were too rough.
Then I went over the vase one more time and pounced on one more coat of Cotton Dixie Belle Paint.
DIPPING MY UPCYCLED VASE
This took a little planning, I grabbed an old plastic container my vase would fit in to dip.
Also, I grabbed a paper place and paper bowl to set my vase on after I dipped so she could dry.
If you are going to do more than one vase at a time, I would have a paper plate and bowl combo for each vase.
I ended up using some sample Sherwin Williams paint I had on hand for the bottom layer of my upcycled vase.
In the bowl, I poured my paint until it was between 1/2 to 3/4 full.
Then I grabbed my upcycled vase and set her down in the bowl with paint.
Carefully I lifted her up and let the paint drip off and then I set her on my paper plate/bowl combo and let her dry.
I occasionally went back with a paper towel and wiped off the drip area underneath, just in case any drips didn’t dry on the vase itself.
And that was it!
She is now sitting on my mantle with some pretty faux flowers and fits right in with my home decor.
Don’t forget to check out my short video below!
63
views
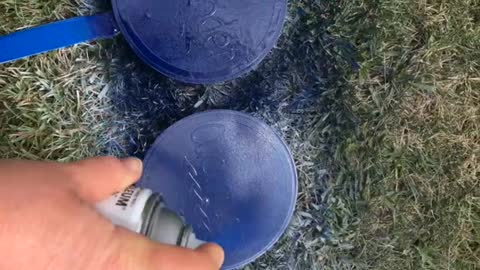
My Dollar Tree Garden Stakes
Garden Stakes! I love my new garden stakes. My only regret, I didn’t grab more of these when they were in stock! Just a little painters tape, spray paint and something to stencil with and we can personalize these however we want!
Supplies I Used for my Dollar Tree Garden STakes
4 Round Dollar Tree signs on a stake. These garden stakes measures 7″ diameter and were a dollar each!
Outdoor Spray Paint: Rust-oleum White and Navy Blue
Painters Tape, Dental pick
PREPPING MY GARDEN STAKES
Before I started I made sure the signs were clean and then I taped the jute rope loops to the back of the garden stakes so they were out of the way.
Then I taped the stakes to protect them from the spray paint and took them outside.
My favorite large piece of cardboard to spray paint on was missing, thanks to my hubby, so I found an out of the way place in my backyard.
Of course, my hubby spotted the area when he got home from work.
I sprayed two coats of white paint over the round garden stakes, letting them dry in between each coat.
Once dry, I brought them back in the house and started working on making my garden stake stencils.
STENCILING MY GARDEN STAKES
Did you know I have a free growing library for those who join my MPD Tribe?
I put these Garden Stake designs in the library in a new column, marked “Summertime”.
To join, click here.
I used the PVPP method to craft these garden stakes.
Paint, Vinyl, Paint, Peel. Click here to see my other projects I used this method with!
If you don’t have your own personal cutter, you could always use vinyl decals from the scrap book section also.
Once the stencils are in place on my four garden stakes, I took them back outside.
I picked Navy Blue, because that is the color I had on hand.
A few years ago, I turned two pallets into outdoor flags, so I keep this color on hand to freshening those signs up.
This color only took one coat, I went over them just enough to cover the entire surface.
As soon as my garden stakes were dry I took them back inside.
I grabbed my favorite dental pick and started pulling the stencils off.
Since I used outdoor spray paint for my Dollar Tree Garden Stakes I didn’t seal them, just took them outside the placed them in my garden!
And that’s it!
I image I’ll need to refresh these every year or two, so I’ll keep you updated on how long they last! Make sure to check out my Short YouTube video!
92
views
Check Out My Hello Baby Growth Charts
Here is my Hello Baby Growth Chart! Have you noticed a theme? Each Hello Baby transfer comes with cute critters and flowers that are perfect to decorate a nursery. But they are also perfect personalizing signs!
Supplies I Used for my Hello Baby Growth Chart
1″ x 10″ x 72″ Pine board, painted in your choice of background color.
Dixie Belle Products: Cotton, Dried Sage (#1 growth chart background), Vintage Duck Egg (#2 growth chart background), Palmetto (leaves), Chocolate, Mud Puddle and Satin Clear Coat
DIY Paint: Fancy Farmgirl and Apothecary also for leaves.
1 Hello Baby Transfer, specifically the animals, by ReDesign with Prima
Round artist paint brush, large paint brush (I used an old one) and mister bottle (optional)
PREPPING MY HELLO BABY GROWTH CHART
I had a vision of neutral themed growth charts with flowing branches with leaves and cute forrest animals.
To begin with, I painted the first growth chart background in Dried Sage.
Then with a large paint brush I lightly pounced Dixie Belles Cotton in random patterns and used my mister.
I misted these areas with water to break up the paint and give a “cloudy” or blurred effect.
This pattern was repeated until the entire board had the effect I liked.
Then I painted the second board background in Vintage Duck Egg and repeated the same steps.
When these were all dry, I prepared to stencil the growth chart measurements.
STENCILING MY HELLO BABY GROWTH CHART
Next I used my Silhouette Cameo 3 to cut my growth chart stencil.
If you join MPD tribe the basic Growth Chart cut file, is in the MPD Library free for your use.
To see how I apply these long stencils, check out my Woodland Growth Chart Blog.
Once I burnished the stencil with the same background paint, I then used Mud Puddle to paint the measurements and numbers on the growth chart.
Here in Iowa, things are a little humid.
So to help prevent pulling paint off when removing the stencil, I carefully removed the stencil with the paint still wet.
If you do this, go slow so the paint does splatter onto the board below.
When this is all dry, we can start adding those cute transfers!
APPLYING TRANSFERS TO THE BIRTH STAT SIGNS
Before we get started, to get more ideas on how to apply transfers, check out these blog posts!
I had all my animals from the Hello Baby transfer cut apart from each other.
Just to get an idea where I wanted these animal transfers, I just moved these around until I liked what I saw.
Then I removed the backing, grabbed my favorite squeegee and started applying them.
ADDING DETAILS TO THE HELLO BABY GROWTH CHART
I decided once I had the animal transfers applied, I wanted the measurements and numbers a darker color.
So I grabbed my round brush, Dixie Belle’s Chocolate and a small glass of water.
The Chocolate paint was watered down and I painted over the measurement and numbers.
I love how this gave them a water-colored effect.
Keep your boards flat after painting with water until it dries, or you may have color running where you don’t want it!
PAINTING THE LEAVES FOR MY HELLO BABY GROWTH CHART
Then came my multi-colored leaves.
If you check out my short video below, you’ll see how I painted my leaves.
I even slowed it down, in part of the video so you could get a better look!
Basically I paint a squiggly ovals.
And the best part, there are no mistakes!
Don’t forget to layer the colors to add a little depth.
And once you have these all painted and they are dry, add three coats of your sealer.
That’s it!
64
views

How I Made these Adorable Birth Stat Signs
These are my first Birth Stat Signs! I was so excited when I was asked to make my version of these and when I saw these adorable unfinished wood signs at Hobby Lobby, my wheels started spinning!
Supplies I Used for these birth stat signs
2 White Beveled Beaded Wood Wall Decor
Dixie Belle Products: Cotton, Soft Pink, Peony and Satin Clear Coat
1 Hello Baby Transfer, specifically the flowers, by ReDesign with Prima
Jute Rope
STENCILING THE BIRTH STAT SIGNS
Before I got started, I removed the wood beads and string from the signs and put the beads in a safe place to reattach later.
Then, I flipped the signs over and added my special touch to the backside.
This Spring, I was inspired to add a start adding a little prayer on the backside of my personal requests.
Some are stenciled on, sometimes I apply them as vinyl decals.
For this particular project, I used my Silhouette Cameo 3 to cut this design and used clear duck contact paper as transfer tape to apply the decals to the backside.
Click here for more details on how to apply vinyl decals.
Once this decals were applied, I used some Mod Podge to apply my business card and also seal the vinyl decals in place.
Next, I turned my sign back over and applied one coat of Cotton over the entire sign.
When this was dry, I grabbed my stencils I designed and applied them onto the signs.
For more ideas and blog post on how to use contact paper as stencils and painting signs, click here.
Now the pink was another matter!
We had the flower transfers figured out and Dixie Belle’s Soft Pink matched wonderfully with one of the flowers, but I was worried it was going to be too light.
So we decided to do a little paint mixing.
For these Birth Stat signs, I mixed a little Dixie Belle’s Peony to Soft Pink.
It was about 1/4 Peony to 3/4 Soft Pink blended together.
I painted them on, and since it’s pretty humid here in Iowa, I pulled the stencil before the paint had time to dry.
When pulling the stencil “wet”, as always, do it slowly to help prevent splattering wet paint on the board.
APPLYING TRANSFERS TO THE BIRTH STAT SIGNS
Once the paint is dry, I was ready to add the flower transfers to the Birth Stat signs.
Before we get started, to get more ideas on how to apply transfers, check out these blog posts!
These are so easy to apply, once you have an idea where you want them to be applied, take the backing off, line them up where you want them.
And put them in place.
Pretty much, once you lay them down you’re committed to that area.
Grab the squeegee the transfers come with and start pressing or rubbing the transfers on.
I’ll start pulling up one layer to see how well it’s adhered, if part of it pulls up, lay it back down and keep rubbing your squeegee over it until it’s adhered.
When the transfers were all applied, I applied three coats of Satin sealer over the signs.
I think with transfers, satin sealer works best since the transfers have a little shine to them also.
And once I grabbed some new jute rope, I threaded them back through the holes of the sign and reapplied the beads and tied the ends in a double knot to secure.
That’s it!
53
views
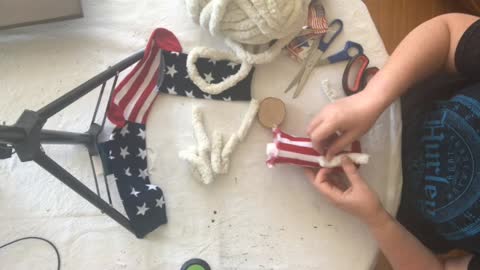
Check Out My Patriotic Gnome
Are you ready to make a Patriotic Gnome? I am! I can not believe how easy these are to make! Let’s dig in!
Supplies I Used for my PATRIOTIC Gnome
Styrofoam cone: Dollar Tree is my source!
Fabric: I used one Patriotic sock I found at Hobby Lobby
Hot Glue gun and glue
Scissors
Wood bead: for nose, click here to see how I painted my wood beads.
Chunky yarn: I had some cream-white yarn on hand from Hobby Lobby
Medium birch discs: this is optional
Embellishments: I used Patriotic cupcake toppers (flag and stars) as embellishments
ASSEMBLING MY PATRIOTIC GNOME
To start with I grabbed one of my patriotic socks and used my good scissors to cut straight across at the ankle and then again straight across at the foot.
I have a short video below you can watch to see what I mean.
Next I choose the foot part of the sock to cover my base.
I inserted the cone in, I should have added some glue at the base of the cone to secure the sock.. Next time!
Then I glued on a birch disc to the bottom of the gnome to be the base of my Patriotic Gnome.
Next I estimated how long I wanted my Gnome beard and started cutting yarn strips.
I glued five pieces to the cone, then I glued the wood bead in the middle for the nose.
Then I roughly measured a piece of yarn to go over the nose and beard as the Gnomes eyebrows.
I then decided I wanted a fuller beard, so I cut a few more strips of yarn and glued them on top of the first layer of yarn.
Finally the hat!
I grabbed the other part of the sock and placed it on the gnome, and to cinch or close the top of the hat, I rolled it down once and then applied some glue inside and pressed the top of the hat together until the glue set.
Then I grabbed a cupcake flag on a pick and glued it so it looked the my Patriotic Gnome was holding it.
Finally I glued some metallic stars on the hat for a special touch.
AND THAT IS IT!
100
views

How I Made These Patriotic Cupcakes!
Faux patriotic cupcakes? Yep! And maybe a few faux mug toppers for my mini Rae Dunn Mugs also! I found some cute embellishments in the Fourth of July section at Hobby Lobby and had some fun!
Supplies I Used for my PATRIOTIC CUPCAKES
Lightweight Spackling or Plaster
Optional 1.3″ Styrofoam balls
Disposable pastry bags
Optional: narrow drinking glass or glass jar
Plastic wrap
Tongue depressor to stir
Cupcake liners, cupcake pan, favorite coffee mug or mugs if you want to make mug toppers
Embellishments: straws, sprinkles, small decorative of your choice.
Molds (optional) for faux waffles or graham crackers and brown hot glue sticks and hot glue gun.
ASSEMBLING MY FAUX PATRIOTIC CUPCAKES
The main thing stressed when making this project, is sticking with the lightweight plaster.
If it’s not lightweight, the plaster will settle and flatten too much.
My last faux mug toppers, I added a little white paint to my plaster, this time I didn’t and I thought these looked great also!
Click here to see my Christmas Mug Toppers.
LET’S GET STARTED!
After cutting a small hole in my disposable pastry bag, I placed this inside an old measure cup.
Next I filled this pastry bag full of plaster and squeezed out the air.
Then I placed three cupcake liners in the cupcake pan.
Next time I won’t set these beside each other, this way I can be more generous with the plaster without worrying about them running into each other.
TOPPING OFF THE PATRIOTIC CUPCAKES
I placed a small dollop of plaster at the bottom of the cupcake liner, then placed my styrofoam ball in the dollop of plaster.
Then I started squeezing plaster around in side the cupcake liner.
I repeated this for all three faux cupcakes.
And then I ran out of time and plaster in my pastry bag, which wasn’t that big of a deal.
So at this point, my plaster was about level with the cupcake liners.
The next day, these were mostly hardened and with a new bag of plaster in a new disposable pastry bag, I then did my best “frosting” the cupcakes.
When I was in high school, I worked at the local ice cream hangout.
I prided myself on how well my ice cream cones looked, so I decided with these cupcakes, I would try the same “technique”.
Hmmmm.
This “technique” I just held the pastry bag over the top of the cupcake and squeezed while the plaster pushed down and made the first top layer.
When this was covered, I lifted my hand up a little and continued to squeeze for the second and third layer.
It was an interesting experiment.
The first two turned out pretty good, the third one, I swirled the plaster around in a circle.
Looking back, I probably should have added more plaster to my pastry bag, as I was running out, it got a little big awkward.
DECORATING MY PATRIOTIC CUPCAKES
Then I grabbed my embellishments, straws, flag and stars on picks, and sprinkles.
I tried “sealing” the sprinkles with hairspray so the colors wouldn’t bleed when they hit the semi-damp plaster.
This did not work as I intended but the colors on the cupcakes are pretty and patriotic!
MAKING MY PATRIOTIC FAUX MUG TOPPERS
I had some leftover plaster, so I made a few patriotic faux mug toppers.
First, I placed some saran plastic wrap loosely over the top of my favorite mini Rae Dunn mugs.
Then I placed a styrofoam ball onto the plastic wrap.
I wanted this styrofoam ball to be partially inside the mini mugs.
Later when they are dry, they will help keep my mug toppers in place and not slide off the mugs.
The plastic wrap also helps protect the mugs from the plaster while the plaster is damp.
I then started swirling the plaster in a circle until I had a nice dollop on top and then decorated with some leftover embellishments.
Once the plaster is dry, I removed the Saran plastic wrap.
Check out my video below, I’ll show you how I made some faux graham crackers and waffles with melted brown hot glue.
Also, the filling for those faux graham crackers? More plaster!
AND THAT IS IT!
158
views

How I Made This Adorable Forrest Themed Growth Chart
I LOVE how this Forrest themed growth chart turned out! This is the second time I’ve done a mountain view in the background and this was even easier than the first time! All I needed was a pencil, a picture of mountains and a little imagination! Let’s get started!
Supplies I Used for my forrest Themed Growth Chart
1″ x 10″ x 72″ Pine Board, sanded and clean
Dixie Belle Paints: (from top of the forrest growth chart to bottom) Haint Blue, Cotton, Savannah Mist, Dusty Blue, Yankee Blue, Midnight Sky. I used Hurricane Gray mixed with Midnight Sky for the Forrest animals.
Dixie Belle Sealer in Flat
Sandpaper or sand block
Paint brushes: I used regular artist brushes, fan brush and my favorite large round watercolor brush.
acrylic ruler, pencil
Contact paper to make my stencils in my Silhouette Cameo 3
DESIGNING OUR FORREST GROWTH CHART
Grab a sharp pencil, maybe a picture of a mountain scene and lets get started!
I started towards the top, drawing a silhouette of mountains, and worked my way down the growth chart.
As I drew a jagged mountain shape, when I came down to the next level, my goal was to make sure the shape did not mimic the mountain shape above.
Also, as I worked my way down, the mountains shapes were getting spaced a little farther apart from the previously drawn mountains.
And yes, I used my eraser to go back and erase certain lines and add a hill there or adjust the hill elsewhere.
This is super forgiving!
Then I grabbed my favorite watercolor paint brush and start painting!
PAINTING THE FORREST GROWTH CHART
This is pretty much “painting within the lines”.
But much more forgiving, because I intentionally painted the lines here and there where I feel it may look best, or even when I messed up and just went over a little too far.
In the supply section, I listed the colors in order that I painted the background.
Haint Blue for the sky, Cotton for the top mountain tops and so on!
The last two rows were supposed to be more mountains but I decided to turn them into Evergreen trees with my fan brush.
Check out my short video below to see how I did this!
PAST GROWTH CHARTS
Each growth chart I do, is my favorite and this Forrest Growth Chart is no exception!
Technically, this growth chart would have looked great without the forrest animals too!
Just a thought!
For my first take on doing some free-hand painting, check out my Whimsy Growth Chart.
And my recent Woodland Growth Chart, click here!
Also, these blogs go into more detail on how I laid out the stencils for a long project and how I layer stencils to get a different look!
I hope you enjoy these examples and I hope I inspired you to create too!
83
views
How I Made my Patriotic Sign
DIY patriotic sign, what better way to get your American pride home decor started and get a little paint therapy too! All we need are a few supplies and we are ready to go!
Supplies I Used for my Patriotic Sign
Unfinished wood alphabet letter
Unfinished wood sign
Paint: Titanium white, Navy Blue, Lipstick Red
Round watercolor brush.
Scrapbook paper of your choice
Hot Glue gun and glue, Mod Podge
Scissors
PREPPING MY PATRIOTIC SIGN
To begin my project, I grabbed my letter and painted two coats of white.
While that was drying, I grabbed my scrapbook paper and roughly measured and cut the rectangle.
You can see in my YouTube video below, how I did the rough measuring.
I then liberally applied my Mod Podge on the board and decoupaged the scrapbook paper in place.
Now I always get inpatient during this step, once the paper is in place it’s best to wait until the paper is dry and then you can apply more Mod Podge as a sealer over it.
Once again, I didn’t wait and I had some bubbles pop up.
Thankfully they weren’t too noticeable!
PAINTING MY LETTER
Next I turned my attention back to my letter.
Now, with the scrapbook paper I had chosen, a solid colored letter would have looked great.
But I was in the mood to paint, and I did just that!
I grabbed my Blue and Red paint and started having fun!
Before I was done I even managed to add my version of stars.
HOW I PAINTED MY STARS
I used the end of my paint brush, dipped it in white and made a dot on my letter.
Then I used my brush to gently push the paint from the dot in five directions to make my star.
It worked!
ASSEMBLING MY PATRIOTIC SIGN
When the paint was all dry, I grabbed my favorite hot glue gun.
I applied a liberal amount to the backside and glued my letter in place.
And that is it!
26
views
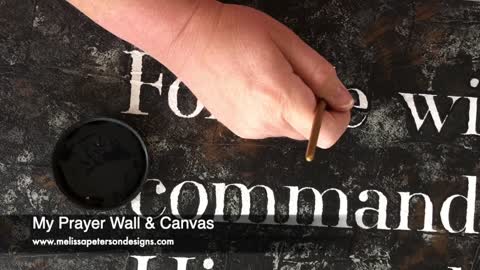
My Prayer Wall & Canvas
My Prayer Wall & Canvas was a project from the heart. I was sitting at my dining room table looking at my stairway and I was inspired to add prayers to my walls before starting my painting project! And then it morphed into an accent wall with the plans of stenciling Psalm 91:11 when I was done.
Supplies I Used
Sherwin Williams Poppy Seed: I used this as my base coat on my Prayer Wall. Really you can use any black or dark grey paint.
Dixie Belle’s Caviar, Hurricane Gray, Driftwood, Cotton, Bronze Patina Paint, Clear Coat in Flat
Brayer Roller
Paper plate, cheap chip brushes (optional)
24″ x 24″ Grandeur Collection Canvas
Joint Compound
Spatula or Putty Knife
220 Grit Sandblock
Paint brushes
Optional Wall Decor: natural rustic flower wood wall decor, white rustic flower wood wall decor, distressed white flower wood wall decor, white rustic flower wood wall decor, natural rustic flower wood wall decor
3M Command Strips
Pencil (preferably). I used a permanent marker on my wall to write my prayers requests on, I DO NOT recommend as this will normally bleed through your paint.
Prayer Canvas
Technically, this is two projects in one, BUT, they are done very similarly.
The Prayer Canvas has one extra step, and it starts at the beginning with joint compound.
For the prayer wall, no joint compound was used, so wait until the next step.
I apply a thin layer of joint compound over the entire canvas surface, pushing it into the weave of the fabric.
Once the entire surface is covered, I then make a “stair step” pattern.
When I have the pattern I like, I let this dry for a full 24 hours.
TAKE YOUR CANVAS OUTSIDE
I take the canvas outside and sand over the joint compound with my 220 grit sand block.
This essentially just knocks the peaks off of the dried joint compound and this step is VERY dusty, which is why we do this outside.
LET’S PAINT!
Clean off the dust with a dry rag and then grab your darkest paint color, I used Dixie Belle’s Caviar.
I paint the entire surface of the canvas including the sides.
Typically I do one coat, later I will do a second coat once I have the top side done.
HOW TO PAINT WITHOUT A PAINT BRUSH!
For my Prayer Wall & Canvas, I wanted to use my Distressed Technique.
I do not use a paint brush, but instead a brayer roller and a paper plate.
This technique is pretty much what I did on my Prayer Wall also.
For my Distressed canvases I have done so far, I tend to stick with similar colors and use a light, medium and dark color.
I love the looks of black, grays, and white.
For an added wow factor, I added touches of Dixie Belle’s Bronze Patina and I loved how this turned out!
Other combinations I’ve used and love is white, gray and blues.
LET’S GET STARTED ON OUR PRAYER CANVAS
Since we already have our Canvas painted in Caviar, I grabbed Hurricane Gray and poured about a tablespoon onto a paper plate.
Grab our brayer roller and roll it across the paint, I pretty much covered the entire roller.
Then, I roll this across my canvas.
I picked a pattern and criss crossed this going down and moved across the Canvas repeating this same pattern.
Then I flip the canvas so the sides, is now the bottom and top.
Once this layer of paint is dry, I pour a tablespoon of Driftwood on the same paper plate and repeat the same process, then flip the canvas again.
THE REASON WHY I FLIP MY CANVAS?
I do not want any noticeable patterns showing.
Next I go back to Caviar, flip my canvas again and repeat!
These steps on my Prayer Canvas can be repeated again until I get the look I like.
During this whole time, I do not wash my brayer brush.
The previous dried on paint, just adds more texture as we go through our steps.
ADDING PATINA TO MY PRAYER CANVAS AND PRAYER WALL
For the final touch, I then grabbed my cheap chip brush and Dixie Belle’s Bronze Patina.
This doesn’t take much paint at all either.
I use my paper plate to off load any patina paint that is on my chip brush and lightly dab in random place across my canvas.
Then I grab the brayer brush and roll over the Bronze Patina.
If I have an area that has too much patina, I can always go back once this is dry and lightly dab a little caviar over it and roll with the brayer brush to break up any areas.
Once this is all dry, I paint on a medium coat of Dixie Belle’s sealer in Flat.
Since there is a lot of texture, I tend to cross-hatch the sealer to get the sealer onto the entire surface and crevices.
When this is dry, we can move on to stenciling our canvas!
STENCILING OUR PRAYER CANVAS
I have a full blog post on how I make my stencils from contact paper and how I apply them to my signs.
For the full instructions click here.
But!
I have many other projects where I show you how to stencil, so if you want to get a better idea on how this is done, click here!
Once your stencil is applied, this is where I veer off a little from my normal stenciling routine.
I do not burnish my stencils on canvases, normally.
Especially when they have texture.
The purpose of burnishing is to help the stencil adhere to the surface but with this added texture, I think it will be too much of a headache.
Grab a couple of paint brushes, I prefer a small round and small flat square or angle brush.
PAINTING OUR PRAYER CANVAS
Since my canvas is a combination of black and grays, I picked Dixie Belle’s Cotton or white for the lettering.
Next I grabbed my paint, a damp paper towel, and two brushes.
Instead of pouncing our paint on over the stencil like we normally do, I go across each letter and outline inside the stencil with the round brush.
I save the round brush for the thinner letters and the flat brush for the bigger letters where I can paint more space without risking bleeds.
This step is a little time consuming but so worth it!
Once you have painted all the letters and remove the stencils, it’s time to do the clean up!
You will have some bleeds but we can fix them later after the paint is dry.
To fix my “boo-boo’s” or bleeds, I grab my caviar.
Or grab the same color as your base paint, and a clean small round brush and we will lightly brush the Caviar paint over the bleed areas only.
OUTLINING THE LETTERS
Now on mine, I had some areas, that didn’t have bleeds but because of the light background I went ahead and outlined part of the letter anyways to make it stand out better.
I really love how this turned out!
Once this is done, it’s time to clean up the sides of our canvas.
Remember, we only painted one coat on the sides in the beginning.
I didn’t do a second coat yet because of the all the layers of paint we were adding, in case any got along the sides and messed them up.
Once the second coat of caviar is painted around the sides and dry, we can add a final coat of Dixie Belle’s sealer in Flat on the canvas.
Just so you know, I did not seal the paint on my Prayer Wall.
Dixie Belle’s Chalk Mineral Paint has sealer in it and will cure in 30 days!
I now have my prayer canvas hanging on my prayer wall with two nails surrounded by my favorite wood flowers I found at Hobby Lobby!
Using 3M Command Strips, I hung my wood flowers around the Prayer Canvas.
There will be more flowers added in the future as I collect them!
Let me know what you think, and I hope I inspired you to get creative and plan an accent wall or even a prayer wall for your own home!
Speaking of accent walls, did you see my faux shiplap accent wall I did this Spring?
177
views
1
comment
My Spring Gnome
I absolutely LOVE my Spring Gnome! I knew what I wanted him to look like, but while I was crafting, I wasn’t sure it was working out! But I am happily surprised!
Supplies I Used for my Spring Gnome
Styrofoam cone: Dollar Tree is my source!
Rope Braid: once again Dollar Tree, and you’ll find then close to the styrofoam cone.
Fabric: of your choice, I found this cute bumble bee skirt at Dollar Tree
Hot Glue gun and glue
Scissors
Wood bead: for nose, click here to see how I painted my wood beads.
Chunky yarn: I had some cream-white yarn on hand from Hobby Lobby
Medium birch discs: this is optional
Embellishments: I used three paper sunflowers I had on hand.
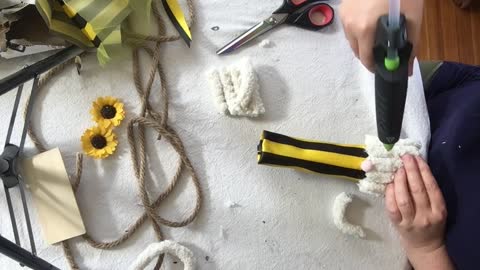
ASSEMBLING MY SPRING GNOME
I knew on my recent trip to Dollar Tree, I wanted to make Spring Gnome, in a sort of beehive style.
Dollar Tree had most of my supplies; styrofoam cone, rope, and even the cute bumble bee skirt I used for fabric I found by the register!
The remaining supplies, I had on hand.
LET’S GET STARTED
First, I had to be careful using hot glue on my styrofoam cone, I was worried it would melt.
So, I cut the fabric I had in approximately 12″ x 12″ “square”.
A very rough square.
Since it was wrinkled, I ironed it and then I wrapped it around the cone and glued it in place.
Once that was done, I measured how long I wanted my “chunky yarn beard” and cut about 12 strips.
They ended up being about 5″ long.
When I was done, I realized I probably added to many, I’ll know better next time.
Next time, I’ll have my bottom row of five pieces of yarn and then add three pieces on top to make a “fluffy” chunky yarn beard.
Once the yarn was glued in place, I grabbed my speckled painted wood bead for the nose and glued that in place.
Click here to see how I paint wood beads, with one color and then two colors to make a speckled effect.
For the final piece, I added one chunky yarn over the top of the nose as the eyebrows.
So in all, we’ll need nine pieces of chunky yarn for the beard and uni-brow.
MY SPRING GNOME STOCKING HAT
Now here comes the fun part.
I now grabbed the rope, started wrapping and gluing the rope in a circular fashion working my way up the cone.
Be careful not to burn your fingers as your gluing, craft sticks or tongue depressors helps but I always forget them!
Once I reached the top, I made sure to glue the ends down and then I grabbed my paper flowers and glued them randomly in place on the hat as an embellishment.
For the final impromptu piece, I decided to glue a medium birch disc to the bottom of my Spring Gnome as a stand.
Since I used a styrofoam cone, this was pretty lightweight and this helps add height and a stable base so it doesn’t tip over.
And that is it!
I can not wait to do this again and try the “chunky yarn beard” again, I loved how this turned out!
56
views
My DIY Mini Wooden Risers
I love risers! I’ve made risers (runners) before but never small ones I could use in my tiered trays or other small scaled decorating. Check out how easy these are to put together!
Supplies I Used for my DIY Wooden risers
E6000 craft glue
Hot Glue gun and glue
Dixie Belle Black Wax and clean rag
American white acrylic craft paint
Paper plate
FIRST RISER: BIRCH
1 birch coaster approximately 4″ in diameter
3 or 4 medium birch discs
SECOND RISER: RECTANGLE
2 plywood rectangles
Wooden beads: I used leftover beads from a unfinished sign for this riser
4 doll pin stands
THIRD RISER: ROUND
2 plywood circles
Wooden beads:
4 medium birch discs
I love Brooke Riley of ReFabbed crafts, style and personality!
And I hope someday to get to meet her.
But to be honest, I try so hard to stay away from other crafters, because I want to come up with my own ideas!
However, when I saw this, I had to give it a try and then I thought, I can put my own twist on it!
Be sure to check out Brooke’s version and let her know I sent ya! Click here!
MY BIRCH WOODEN RISER
This riser has to be the easiest of them all!
Once I found the diameter of birch cutout I wanted to use, I looked through my birch discs and found three of similar heights, (next time I’ll try four).
I grabbed my E6000 glue, applied a small dollop on the bottom of each birch disc, then added a small amount of hot glue.
Then I glued each one in place and flipped them over and set a jar of paint on the riser until the glue cured!
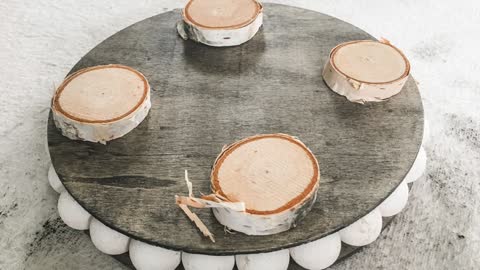
MY RECTANGLE WOODEN RISER
I think this rectangle wooden riser is my favorite!
Before we get started, I placed enough wood beads to complete this riser on a paper plate and squirted almost one tablespoon of paint over them.
I then swirled the plate around, essentially painting the beads!
You gotta check out my blog post on how I came up with this last year, click here!
While these are drying, time to “stain” the wood.
The small rectangle shape will decorate well on both my tiered trays or mantle.
I grabbed my favorite Dixie Belle black wax and clean rag, rubbed the black wax over both pieces of plywood (both sides) and the four doll pin stands.
A great bonus “staining” with wax, over time it will cure and essentially seal the wood.
Once the boards and doll pins are stained it’s time to assemble.
For the sake of neatness, once I had my beads laid out the way I wanted them, I hot glued them in place on the bottom layer.
To apply the second board, I did apply E6000 and then also hot glue and essentially sandwiched them together.
Final step, gluing the doll pins stands on the bottom of the riser.
While the glue cured, I placed something semi-heavy on top.
MY ROUND WOODEN RISER
Now I think you’re getting the idea on how this riser will go together!
This riser is assembled the same way as the rectangle riser.
But instead of doll pin stands for the risers legs, I used four birch discs!
And that is how I made my mini wooden risers!
Let me know what you think and I hope you give this craft a try!
109
views
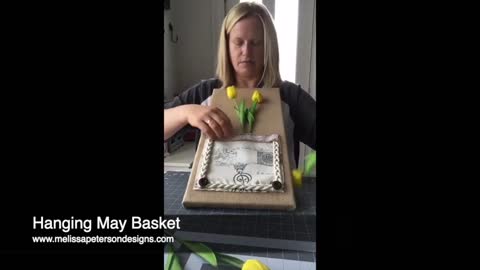
Hanging May Basket
May baskets were a tradition growing up with me and my cousins next door. We made them from paper crafts and filled them with whatever flowers we found outside. Usually they were filled with dandelions and we ran around our neighborhood giving them as gifts!
Supplies I Used
Master Touch Burlap Blank Canvas 8 x 16 from Hobby Lobby
Fabric or large ribbon of your choice: I cut my piece just shy of 8″ x 8″
Assortment of embellishments: I used cream braided rope from Hobby Lobby as my main embellishments plus a burlap/lace ribbon and two buttons.
Hot glue and glue gun and E6000 flexible glue
Assortment of faux flowers of your choice.
Ding Dong Ditching
We then delivered our May baskets to our neighbors, rang the door bell and ran away as fast as we could!
MAKING A HANGING MAY BASKET
Time to make our home decor version of a May Basket!
To start with I roughly measured my fabric to see how I wanted this to lay on my burlap canvas.
I measured a rough 7 to 8″ square and cut the fabric.
Then I pulled the loose threads out of the fabric for a rustic look.
Next, I grabbed my braided rope and measured by placing the rope over my fabric square.
I did this for the bottom and along each side of my fabric square making sure to leave some fabric showing on the outside of the rope.
Next, hot glue these in place where you want them on your fabric.
For the top of the square, I wanted to use a burlap and lace ribbon.
I measured and cut this ribbon so it would fit across the top including the braided rope.
Glue this in place with your hot glue gun.
Now we are ready to apply our fabric basket to the canvas.
Flip your fabric square over, apply a line of E6000 glue to the two sides and bottom of the square.
Next apply hot glue along the E6000 glue.
The hot glue will cool quicker than the E6000 glue and will hold our May Basket in place while the E6000 glue cures.
As soon as I applied my fabric down on the canvas, I flipped the canvas over and so I could apply pressure while the hot glue cooled to this area without stretching the canvas.
Finally, I flipped my wall decor back over and I added two decorate bottoms to the bottom corners of my May basket pocket for an extra special touch.
That is it!
DECORATING OUR HANGING MAY BASKET
It’s time to decorate our May Basket with flowers!
I decided not to glue any flowers in my Hanging May Basket so I can leave this wall decor up year round if I choose and switch out the flowers according to the season or Holidays.
52
views
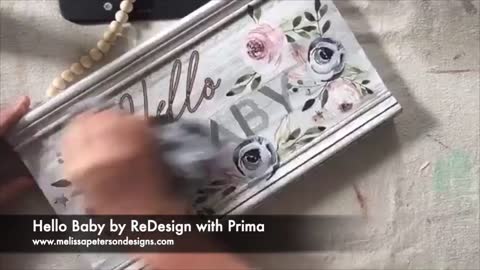
Hello Baby by reDesign with Prima | Melissa Peterson Designs
Hello baby! My top 2 favorite transfers are from ReDesign with Prima are America and Hello Baby! Check out how I took an unfinished wood sign from Hobby Lobby and dressed it up with this adorable Hello Baby transfer and a little Dixie Belle’s VooDoo Gel Stain in Black Smoke!
Supplies I Used
Unfinished Wood Sign of your choice, I used White Beveled Beaded Wood Wall Decor
Hello Baby transfer from ReDesign with Prima
Dixie Belle’s Clear Coat in Flat.
VoodooGel stand in Black Magic by Dixie Belle
My two favorite transfers are from ReDesign with Prima are America and Hello Baby!
Click here to see how I turned the America transfer into a beautiful rustic sign.
Just for the record, I was in Hobby Lobby’s unfinished wood section and came across this adorable white sign with beads hanger!
So far I can not find this unfinished sign online BUT I will keep looking since I hope to nab some more for future projects!
In the meantime, feel free to find a board or an unfinished sign you’d like to dress up and lets get started!
CREATING OUR HELLO BABY DECOR!
Before getting started with our new sign, make sure she is good and clean.
I prefer to use Dixie Belles’ White Lightning to clean my projects, click here to see how I use this product!
Next, grab your Hello Baby transfers from ReDesign with Prima.
I picked out the flower transfers available in this design, and with scissors cut around them plus the words “Hello” and “Baby”.
Next I worked on placement.
For a more thorough blog post on how to apply transfers you can click here.
Otherwise, just know that transfers comes in three layers usually, The white backing, the design or transfer itself and the clear plastic film on top.
Once I had an idea on where I wanted everything to lay I started pulling the back off the flowers first and applying.
Position the design where you want it.
Be careful not to touch the transfer on the project until you are ready to commit to where it will lay.
Once you do, put it on and start rubbing.
Each transfer comes with it’s own stick, I start rubbing the transfer and slowly pull up on an edge to see where it’s applied.
If the transfer pulls up a little, push it back down and keep rubbing.
Some lay down really easy, others take a little more time and elbow grease.
Once you have the clear plastic film completely removed and your transfer is on your project, use a clean towel or rag and rub over your sign.
This will help push the transfer down onto your project for a better adherence.
Don’t be afraid of overlapping some of your transfers, it’s ok!
PROTECTING OUR HELLO BABY
Now it’s time to seal our sign.
I use Dixie Belles’ sealer and for this project I used their Flat sealer for minimal shine.
Apply a coat of sealer, let dry.
Once it’s dry, you can add a second coat again.
When this is dry, if you like the fresh clean look, your sign is done!
But, if you like the aged look, keep reading!
Adding an aged touch to your projects is easy and my first go to is usually using black or brown water-based wax by Dixie Belle.
But this time I wanted to use something else, VooDoo Gel Stain Black Magic by Dixie Belle.
Once my sign was sealed and cured, I used damp clean rag and squirted a little Black Magic on the rag and then started wiping across the sign.
I then used a separate area of the rag and wiped away some of the stain back off of the sign.
You can repeat this process again if you want a darker look.
Once this is dry, add another coat of sealer and you are done!
That’s it!
104
views
How I Created this Unique Guest Book
PREPPING THE “GUEST BOOK”
Once I brought home the Galvanized Metal Letter from Hobby Lobby, I cleaned all the surfaces.
I keep a bottle of White Lighting and water mixed up in a spray bottle for small projects.
For a small spray bottle I put in about 1/2 tablespoon of white lighting and then fill the bottle with water and mix well.
I’ll either spray the project or my cleaning rag, wipe down really well and then use another clean damp rag to wipe off any of the residue left behind.
Once the surface is dry, I grab my craft brush and start painting the surface with Slick Stick.
I use Dixie Belle’s slick stick on any surface that is non-porous or I’m concerned paint may have trouble adhering too.
Once the first coat is on and completely dry, I’ll add a second coat and let it dry then I usually wait a day before moving on to painting!
PAINTING THE “GUEST BOOK”
This project is going to be a guest book for a young mans’ graduation party and mom wanted this one done in black and she wanted a soccer ball added.
Since I decided to add the soccer ball in the PVPP method, I painted the metal letter in white or Dixie Belle’s cotton first.
PVPP is an acronym for Paint, Vinyl, Paint, Peel
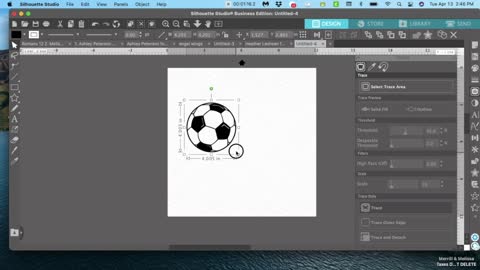
ADDING THE SOCCER BALL PER PVPP
Once the white (Cotton) coat is completely dry, I used my Silhouette Cameo to cut a 4″ soccer ball design.
I actually cut two designs side by side, just in case I messed up and weeded the wrong part of the stencil.
Next I applied the stencil to the “guest book”, making sure there were no areas of the stencil not adhered to the metal.
Then I grabbed a clean craft brush and my Caviar paint.
I carefully painted over the stencil the first coat, while this was drying I started painting the remainder of the letter in cross-hatch pattern.
Cross hatching in painting is moving your brush in a criss-cross pattern. .
When the first coat of Caviar was dry, I went back and repeated the process, so the galvanized letter had two coat of paint.
Once dry, I used my 220 grit sandblock and lightly sanded over the stencil and the letter.
Then I carefully removed the stencil and with a small detail brush I painted over any areas that bled through, sometimes that happens.
SEALING THE “GUEST BOOK”
When it comes to sealing, when I paint with white, red or black paints I usually (not always) wait one day.
This is just a personal preference, I just want to make sure the paint is good and dry and won’t smear when the sealer is being applied.
Just as with my canvases I paint in my distressed style, I also applied the sealer in a cross hatch pattern.
Why? I liked the look.
When painting on slick surfaces sometimes brush strokes are hard to avoid and for some reason this give the finish a nice muted or matte look that I wanted!
Once she is cured, she is ready to be signed by friends and family with a white permanent marker!
And that is it!
31
views
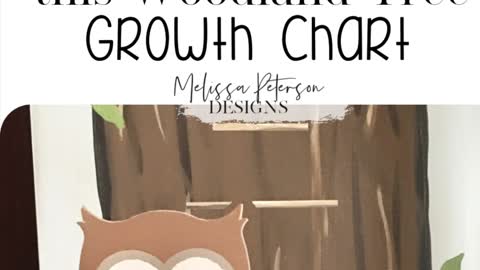
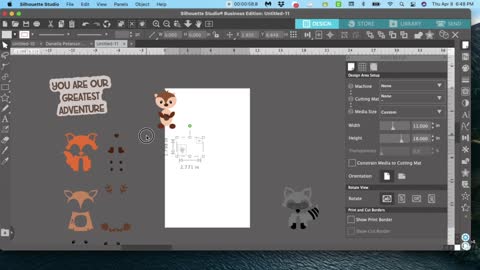
Final: How I Painted this Woodland Tree Growth Chart
I had a blast painting this Woodland Tree Growth Chart! Part stenciling, part free-hand, oh my! Let me show you how I, with the help of my daughter, put this all together!
Supplies I Used for the Woodland Growth Chart
1″ x 10″ x 72″ Pine Board, sanded and clean
Dixie Belle Paints: Haint Blue, Coffee Bean, Caviar, Putty, Fluff, Driftwood, Palmetto, Rebel Yellow, Terracotta, Rustic Red.
DIY Paints: Monets Garden, Fancy Farmgirl
Mod Podge
Sandpaper or sand block.
Paint brushes: I used regular artist brushes and my favorite large round watercolor brush.
acrylic ruler, pencil
Contact paper to make my stencils in my Silhouette Cameo 3
Growth Chart cut file (minus woodland animal): click here to join MPD tribe for access to this design on others in my free library.
Woodland Animals: set of four, owl.
PREPPING THE GROWTH CHART
My daughter and I came up with a vision of a woodland growth chart and she wanted a sky blue background.
For the sky like color, we went with Haint blue by Dixie Belle.
One of my idiosyncrasies, is to paint, seal and apply the hanger to the backside of my personalized signs, first.
I applied two coats and sealed the backside with Dixie Belle’s Flat sealer.
Before I was finished I added a special touch to the back, Psalm 91:11.
A few days later, I flipped her over and painted two coats of Haint blue to the front side.
DRAWING AND PLACEMENT OF THE WOODLAND TREE
Our woodland tree has a faux sign hanging on it, so I set up my design to cut the top of the overall design to help with the placement of this on the board.
My board is approximately 9″ x 72″ long, so in my Silhouette design program, I made a rectangle using one of the shape tools and with these same measurements.
After I had added the growth chart measurements to the design, I figured the placements of the tree sign, plus the five woodland animals.
I then figured out how to divide this into two separate stencils.
The first stencil is where the top of the tree is that includes the sign, the bottom stencil includes the growth measurements and woodland animal.
I cut my first stencil, weeded the outline of the sign and placed this on the top of my pine board, then I grabbed my pencil and traced around the inside of the tree sign.
Next I removed the stencil.
Now I’m ready to work on a rough draft of my tree.
I grabbed my acrylic ruler and measured 2″ in at the bottom but then moved my ruler in 1/8″ and used my pencil to draw and line along the ruler.
Repeat this process on the other side of the board and this will be the base or bottom or the tree.
Next, I grabbed my ruler and lined it up with the pencil marking, then brought the top of the ruler 1/8″ in and again marked it with the pencil I kept repeating this process until I reached my tree sign outline and also above the tree sign.
Finally, I marked where I wanted the woodland branches to be and penciled then in.
PAINTING MY WOODLAND TREE
I started painting the tree in Dixie Belle’s Coffee Bean.
When this was dry, I grabbed my round watercolor brush and some water and Dixie Belles Caviar.
In a disposable bowl, I watered the paint down a little and outlined the woodland tree, I also added some vertical lines, inside the tree.
Next i grabbed Dixie Belle’s Putty with a little water to use as highlights on the tree.
All these highlights and lowlights were random going vertically along the woodland tree to represent bark.
When this step was completed, I added two coats of sealer and let my project set until the next day.
STENCILING THE WOODLAND TREE MEASUREMENTS & ANIMALS
Now it’s time to cut the bottom portion of the long rectangle stencil that includes the growth measurements and the base of the woodland animals.
Each Woodland animal will be painted in layers, and this first stencil will only include the very bottom layer of each animal.
Once the stencil is prepped, cut and weeded, I use the hinge method to apply this to the pine board.
APPLYING THE WOODLAND STENCIL
Next I grab my transfer tape, which is about 12″ x 18″ and apply it to the very bottom part of the stencil,
I lay the stencil on top of the board where I want the stencil to be placed, grab two small strips of painters tape and tack the stencil to the board just above the transfer tape.
Then I removed the backing, only where the transfer tape is applied, cut the backing off and then apply it to the board.
I removed the transfer tape carefully and then worked my way up the stencil in the same manner until the stencil is all applied to the woodland growth chart.
Once the stencil is applied, I burnished with Mod Podge to help prevent any paint bleeds.
PAINTING THE WOODLAND ANIMALS
The raccoon base cutout, I painted in Dixie Belle’s Driftwood.
Next I painted the other four animal base cutouts in Dixie Belle’s Putty.
Then I painted the measurements and numbers in Putty also.
I decided before I removed the stencil to add some highlights and lowlights to the measurements with Dixie Belles Fluff and Caviar.
Once the paint was all dry, I lightly sanded the stencil with my 220 grit sand block before removing the stencil carefully to avoid pulling any paint.
LETTERING THE WOODLAND TREE SIGN USING PVPP METHOD
This method is very simple.
As you can see below in the pic how I weeded my stencil for this part of the Woodland tree sign.
Once I applied this with transfer tape, I grabbed my Dixie Belle Putty and painted in vertical strokes.
Before this layer was dry, I added some watered down Fluff to give it a streaky or aged wood look.
When this area was dry, I lightly sanded with a 220 grit sand block before slowly removing the stencils.
Click here and here for more examples of how I use the PVPP method.
ADDING LEAVES TO THE WOODLAND GROWTH CHART
These are so easy, especially with my large round watercoloring brush.
For the leaves I used Palmetto, Monets Garden and Fancy Farmgirl
I started with the dark greens first and then the light ones.
My leaves are basically oval shapes and I use the end of my brush to start the end of each leaf.
My daughter came over to help finish this growth chart and took over the task of painting the remaining leaves.
I had her practice on a plain sheet of paper first, the trick it to make sure your brush is loaded with enough paint.
After about four tries, she was good to go! And she did a GREAT job!
PAINTING THE WOODLAND ANIMALS
I like using contact paper for my stencil material with my Silhouette.
Before we get started, I have a quick video showing you how I set up my SVG designs in Silhouette to cut my stencils on 12″ x 18″.
To keep my stencils straight, or to help me from getting confused, I worked with two animals at a time, and I made sure to label each stencil with a pen, the animal names.
I have another blog post on how I layered the stencils to paint certain cartoon characters, click here to get a better idea of how it’s done.
Now you don’t have to use the color of paints I used, or even mix paint like I did.
PAINTING THE FOX
The fox’s head and body were approximately two parts Terracotta to one part Coffee Bean.
And the fox’s nose and feet were Coffee bean and the eyes were Caviar then Fluff.
PAINTING THE DEER
While baby deer’s body was Putty and the antlers were Coffee Bean, along with the eyes being the same as the fox, Caviar and Fluff.
PAINTING THE OWL
The Owl was two parts Coffee Bean and one part Terracotta. This leftover mixture was also used to paint the squirrel’s nut.
Back to the owl, the wings were equal parts Coffee bean and Caviar and the feet were Rebel Yellow.
PAINTING THE SQUIRREL
The squirrel was equal parts Terracotta and Coffee Bean, but the squirrels hands and feet were equal parts Rustic Red and Coffee bean.
For the nut, I used some of the leftover paint mixture from the Owl for the bottom portion and Coffee Bean for the top portion.
PAINTING THE RACCOON
Finally, the raccoon’s base was Driftwood, so I mixed equal parts Driftwood with Caviar to paint the body.
Then I added a little more Caviar to this same mixture to paint the raccoons mask, for his feet, stripes and nose I used straight Caviar.
The key to painting or stenciling in layers, is to make sure the previous layer is good and dry before adding the next stencil on top of it.
FINISHING OUR WOODLAND GROWTH CHART
When everything was all painted and dry I lightly sanded the woodland growth chart and added three coats of Dixie Belle’s Flat sealer.
282
views
Part 2: How I Painted this Woodland Tree Growth Chart
I had a blast painting this Woodland Tree Growth Chart! Part stenciling, part free-hand, oh my! Let me show you how I, with the help of my daughter, put this all together!
Supplies I Used for the Woodland Growth Chart
1″ x 10″ x 72″ Pine Board, sanded and clean
Dixie Belle Paints: Haint Blue, Coffee Bean, Caviar, Putty, Fluff, Driftwood, Palmetto, Rebel Yellow, Terracotta, Rustic Red.
DIY Paints: Monets Garden, Fancy Farmgirl
Mod Podge
Sandpaper or sand block.
Paint brushes: I used regular artist brushes and my favorite large round watercolor brush.
acrylic ruler, pencil
Contact paper to make my stencils in my Silhouette Cameo 3
Growth Chart cut file (minus woodland animal): click here to join MPD tribe for access to this design on others in my free library.
Woodland Animals: set of four, owl.
PREPPING THE GROWTH CHART
My daughter and I came up with a vision of a woodland growth chart and she wanted a sky blue background.
For the sky like color, we went with Haint blue by Dixie Belle.
One of my idiosyncrasies, is to paint, seal and apply the hanger to the backside of my personalized signs, first.
I applied two coats and sealed the backside with Dixie Belle’s Flat sealer.
Before I was finished I added a special touch to the back, Psalm 91:11.
A few days later, I flipped her over and painted two coats of Haint blue to the front side.
DRAWING AND PLACEMENT OF THE WOODLAND TREE
Our woodland tree has a faux sign hanging on it, so I set up my design to cut the top of the overall design to help with the placement of this on the board.
My board is approximately 9″ x 72″ long, so in my Silhouette design program, I made a rectangle using one of the shape tools and with these same measurements.
After I had added the growth chart measurements to the design, I figured the placements of the tree sign, plus the five woodland animals.
I then figured out how to divide this into two separate stencils.
The first stencil is where the top of the tree is that includes the sign, the bottom stencil includes the growth measurements and woodland animal.
I cut my first stencil, weeded the outline of the sign and placed this on the top of my pine board, then I grabbed my pencil and traced around the inside of the tree sign.
Next I removed the stencil.
Now I’m ready to work on a rough draft of my tree.
I grabbed my acrylic ruler and measured 2″ in at the bottom but then moved my ruler in 1/8″ and used my pencil to draw and line along the ruler.
Repeat this process on the other side of the board and this will be the base or bottom or the tree.
Next, I grabbed my ruler and lined it up with the pencil marking, then brought the top of the ruler 1/8″ in and again marked it with the pencil I kept repeating this process until I reached my tree sign outline and also above the tree sign.
Finally, I marked where I wanted the woodland branches to be and penciled then in.
PAINTING MY WOODLAND TREE
I started painting the tree in Dixie Belle’s Coffee Bean.
When this was dry, I grabbed my round watercolor brush and some water and Dixie Belles Caviar.
In a disposable bowl, I watered the paint down a little and outlined the woodland tree, I also added some vertical lines, inside the tree.
Next i grabbed Dixie Belle’s Putty with a little water to use as highlights on the tree.
All these highlights and lowlights were random going vertically along the woodland tree to represent bark.
When this step was completed, I added two coats of sealer and let my project set until the next day.
STENCILING THE WOODLAND TREE MEASUREMENTS & ANIMALS
Now it’s time to cut the bottom portion of the long rectangle stencil that includes the growth measurements and the base of the woodland animals.
Each Woodland animal will be painted in layers, and this first stencil will only include the very bottom layer of each animal.
Once the stencil is prepped, cut and weeded, I use the hinge method to apply this to the pine board.
APPLYING THE WOODLAND STENCIL
Next I grab my transfer tape, which is about 12″ x 18″ and apply it to the very bottom part of the stencil,
I lay the stencil on top of the board where I want the stencil to be placed, grab two small strips of painters tape and tack the stencil to the board just above the transfer tape.
Then I removed the backing, only where the transfer tape is applied, cut the backing off and then apply it to the board.
I removed the transfer tape carefully and then worked my way up the stencil in the same manner until the stencil is all applied to the woodland growth chart.
Once the stencil is applied, I burnished with Mod Podge to help prevent any paint bleeds.
PAINTING THE WOODLAND ANIMALS
The raccoon base cutout, I painted in Dixie Belle’s Driftwood.
Next I painted the other four animal base cutouts in Dixie Belle’s Putty.
Then I painted the measurements and numbers in Putty also.
I decided before I removed the stencil to add some highlights and lowlights to the measurements with Dixie Belles Fluff and Caviar.
Once the paint was all dry, I lightly sanded the stencil with my 220 grit sand block before removing the stencil carefully to avoid pulling any paint.
LETTERING THE WOODLAND TREE SIGN USING PVPP METHOD
This method is very simple.
As you can see below in the pic how I weeded my stencil for this part of the Woodland tree sign.
Once I applied this with transfer tape, I grabbed my Dixie Belle Putty and painted in vertical strokes.
Before this layer was dry, I added some watered down Fluff to give it a streaky or aged wood look.
When this area was dry, I lightly sanded with a 220 grit sand block before slowly removing the stencils.
Click here and here for more examples of how I use the PVPP method.
ADDING LEAVES TO THE WOODLAND GROWTH CHART
These are so easy, especially with my large round watercoloring brush.
For the leaves I used Palmetto, Monets Garden and Fancy Farmgirl
I started with the dark greens first and then the light ones.
My leaves are basically oval shapes and I use the end of my brush to start the end of each leaf.
My daughter came over to help finish this growth chart and took over the task of painting the remaining leaves.
I had her practice on a plain sheet of paper first, the trick it to make sure your brush is loaded with enough paint.
After about four tries, she was good to go! And she did a GREAT job!
PAINTING THE WOODLAND ANIMALS
I like using contact paper for my stencil material with my Silhouette.
Before we get started, I have a quick video showing you how I set up my SVG designs in Silhouette to cut my stencils on 12″ x 18″.
To keep my stencils straight, or to help me from getting confused, I worked with two animals at a time, and I made sure to label each stencil with a pen, the animal names.
I have another blog post on how I layered the stencils to paint certain cartoon characters, click here to get a better idea of how it’s done.
Now you don’t have to use the color of paints I used, or even mix paint like I did.
PAINTING THE FOX
The fox’s head and body were approximately two parts Terracotta to one part Coffee Bean.
And the fox’s nose and feet were Coffee bean and the eyes were Caviar then Fluff.
PAINTING THE DEER
While baby deer’s body was Putty and the antlers were Coffee Bean, along with the eyes being the same as the fox, Caviar and Fluff.
PAINTING THE OWL
The Owl was two parts Coffee Bean and one part Terracotta. This leftover mixture was also used to paint the squirrel’s nut.
Back to the owl, the wings were equal parts Coffee bean and Caviar and the feet were Rebel Yellow.
PAINTING THE SQUIRREL
The squirrel was equal parts Terracotta and Coffee Bean, but the squirrels hands and feet were equal parts Rustic Red and Coffee bean.
For the nut, I used some of the leftover paint mixture from the Owl for the bottom portion and Coffee Bean for the top portion.
PAINTING THE RACCOON
Finally, the raccoon’s base was Driftwood, so I mixed equal parts Driftwood with Caviar to paint the body.
Then I added a little more Caviar to this same mixture to paint the raccoons mask, for his feet, stripes and nose I used straight Caviar.
The key to painting or stenciling in layers, is to make sure the previous layer is good and dry before adding the next stencil on top of it.
FINISHING OUR WOODLAND GROWTH CHART
When everything was all painted and dry I lightly sanded the woodland growth chart and added three coats of Dixie Belle’s Flat sealer.
314
views
Part 1: How I Painted this Woodland Tree Growth Chart
I had a blast painting this Woodland Tree Growth Chart! Part stenciling, part free-hand, oh my! Let me show you how I, with the help of my daughter, put this all together!
Supplies I Used for the Woodland Growth Chart
1″ x 10″ x 72″ Pine Board, sanded and clean
Dixie Belle Paints: Haint Blue, Coffee Bean, Caviar, Putty, Fluff, Driftwood, Palmetto, Rebel Yellow, Terracotta, Rustic Red.
DIY Paints: Monets Garden, Fancy Farmgirl
Mod Podge
Sandpaper or sand block.
Paint brushes: I used regular artist brushes and my favorite large round watercolor brush.
acrylic ruler, pencil
Contact paper to make my stencils in my Silhouette Cameo 3
Growth Chart cut file (minus woodland animal): click here to join MPD tribe for access to this design on others in my free library.
Woodland Animals: set of four, owl.
PREPPING THE GROWTH CHART
My daughter and I came up with a vision of a woodland growth chart and she wanted a sky blue background.
For the sky like color, we went with Haint blue by Dixie Belle.
One of my idiosyncrasies, is to paint, seal and apply the hanger to the backside of my personalized signs, first.
I applied two coats and sealed the backside with Dixie Belle’s Flat sealer.
Before I was finished I added a special touch to the back, Psalm 91:11.
A few days later, I flipped her over and painted two coats of Haint blue to the front side.
DRAWING AND PLACEMENT OF THE WOODLAND TREE
Our woodland tree has a faux sign hanging on it, so I set up my design to cut the top of the overall design to help with the placement of this on the board.
My board is approximately 9″ x 72″ long, so in my Silhouette design program, I made a rectangle using one of the shape tools and with these same measurements.
After I had added the growth chart measurements to the design, I figured the placements of the tree sign, plus the five woodland animals.
I then figured out how to divide this into two separate stencils.
The first stencil is where the top of the tree is that includes the sign, the bottom stencil includes the growth measurements and woodland animal.
I cut my first stencil, weeded the outline of the sign and placed this on the top of my pine board, then I grabbed my pencil and traced around the inside of the tree sign.
Next I removed the stencil.
Now I’m ready to work on a rough draft of my tree.
I grabbed my acrylic ruler and measured 2″ in at the bottom but then moved my ruler in 1/8″ and used my pencil to draw and line along the ruler.
Repeat this process on the other side of the board and this will be the base or bottom or the tree.
Next, I grabbed my ruler and lined it up with the pencil marking, then brought the top of the ruler 1/8″ in and again marked it with the pencil I kept repeating this process until I reached my tree sign outline and also above the tree sign.
Finally, I marked where I wanted the woodland branches to be and penciled then in.
PAINTING MY WOODLAND TREE
I started painting the tree in Dixie Belle’s Coffee Bean.
When this was dry, I grabbed my round watercolor brush and some water and Dixie Belles Caviar.
In a disposable bowl, I watered the paint down a little and outlined the woodland tree, I also added some vertical lines, inside the tree.
Next i grabbed Dixie Belle’s Putty with a little water to use as highlights on the tree.
All these highlights and lowlights were random going vertically along the woodland tree to represent bark.
When this step was completed, I added two coats of sealer and let my project set until the next day.
STENCILING THE WOODLAND TREE MEASUREMENTS & ANIMALS
Now it’s time to cut the bottom portion of the long rectangle stencil that includes the growth measurements and the base of the woodland animals.
Each Woodland animal will be painted in layers, and this first stencil will only include the very bottom layer of each animal.
Once the stencil is prepped, cut and weeded, I use the hinge method to apply this to the pine board.
APPLYING THE WOODLAND STENCIL
Next I grab my transfer tape, which is about 12″ x 18″ and apply it to the very bottom part of the stencil,
I lay the stencil on top of the board where I want the stencil to be placed, grab two small strips of painters tape and tack the stencil to the board just above the transfer tape.
Then I removed the backing, only where the transfer tape is applied, cut the backing off and then apply it to the board.
I removed the transfer tape carefully and then worked my way up the stencil in the same manner until the stencil is all applied to the woodland growth chart.
Once the stencil is applied, I burnished with Mod Podge to help prevent any paint bleeds.
PAINTING THE WOODLAND ANIMALS
The raccoon base cutout, I painted in Dixie Belle’s Driftwood.
Next I painted the other four animal base cutouts in Dixie Belle’s Putty.
Then I painted the measurements and numbers in Putty also.
I decided before I removed the stencil to add some highlights and lowlights to the measurements with Dixie Belles Fluff and Caviar.
Once the paint was all dry, I lightly sanded the stencil with my 220 grit sand block before removing the stencil carefully to avoid pulling any paint.
LETTERING THE WOODLAND TREE SIGN USING PVPP METHOD
This method is very simple.
As you can see below in the pic how I weeded my stencil for this part of the Woodland tree sign.
Once I applied this with transfer tape, I grabbed my Dixie Belle Putty and painted in vertical strokes.
Before this layer was dry, I added some watered down Fluff to give it a streaky or aged wood look.
When this area was dry, I lightly sanded with a 220 grit sand block before slowly removing the stencils.
Click here and here for more examples of how I use the PVPP method.
ADDING LEAVES TO THE WOODLAND GROWTH CHART
These are so easy, especially with my large round watercoloring brush.
For the leaves I used Palmetto, Monets Garden and Fancy Farmgirl
I started with the dark greens first and then the light ones.
My leaves are basically oval shapes and I use the end of my brush to start the end of each leaf.
My daughter came over to help finish this growth chart and took over the task of painting the remaining leaves.
I had her practice on a plain sheet of paper first, the trick it to make sure your brush is loaded with enough paint.
After about four tries, she was good to go! And she did a GREAT job!
PAINTING THE WOODLAND ANIMALS
I like using contact paper for my stencil material with my Silhouette.
Before we get started, I have a quick video showing you how I set up my SVG designs in Silhouette to cut my stencils on 12″ x 18″.
To keep my stencils straight, or to help me from getting confused, I worked with two animals at a time, and I made sure to label each stencil with a pen, the animal names.
I have another blog post on how I layered the stencils to paint certain cartoon characters, click here to get a better idea of how it’s done.
Now you don’t have to use the color of paints I used, or even mix paint like I did.
PAINTING THE FOX
The fox’s head and body were approximately two parts Terracotta to one part Coffee Bean.
And the fox’s nose and feet were Coffee bean and the eyes were Caviar then Fluff.
PAINTING THE DEER
While baby deer’s body was Putty and the antlers were Coffee Bean, along with the eyes being the same as the fox, Caviar and Fluff.
PAINTING THE OWL
The Owl was two parts Coffee Bean and one part Terracotta. This leftover mixture was also used to paint the squirrel’s nut.
Back to the owl, the wings were equal parts Coffee bean and Caviar and the feet were Rebel Yellow.
PAINTING THE SQUIRREL
The squirrel was equal parts Terracotta and Coffee Bean, but the squirrels hands and feet were equal parts Rustic Red and Coffee bean.
For the nut, I used some of the leftover paint mixture from the Owl for the bottom portion and Coffee Bean for the top portion.
PAINTING THE RACCOON
Finally, the raccoon’s base was Driftwood, so I mixed equal parts Driftwood with Caviar to paint the body.
Then I added a little more Caviar to this same mixture to paint the raccoons mask, for his feet, stripes and nose I used straight Caviar.
The key to painting or stenciling in layers, is to make sure the previous layer is good and dry before adding the next stencil on top of it.
FINISHING OUR WOODLAND GROWTH CHART
When everything was all painted and dry I lightly sanded the woodland growth chart and added three coats of Dixie Belle’s Flat sealer.
308
views
How to Make my Spring Door Hanger
Check out my cute Spring door hanger! I completed this craft last year and I was so happy to pull her out of my storage box to decorate for Easter this year!
Join MPD Tribe: https://melissapetersondesigns.com/mpd-tribe/
MeWe: https://mewe.com/i/melissapeterson1
Rumble: https://rumble.com/c/c-309345
Pinterest: https://pin.it/3Ka1fOI
Facebook: https://www.facebook.com/melissapetersondesigns/
Facebook: https://www.facebook.com/boutiquebymelissamarie
Instagram: https://www.instagram.com/melissapetersondesigns/
Instagram: https://www.instagram.com/boutique_by_melissa_marie/
Making the world a little more beautiful with a paintbrush, a laptop, and a creative spirit..
30
views
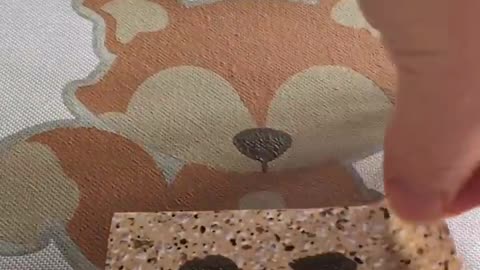
A little Instagram Stories Fun!
A little Instagram stories fun!
Join MPD Tribe: https://melissapetersondesigns.com/mpd-tribe/
MeWe: https://mewe.com/i/melissapeterson1
Parler: https://bit.ly/3ftTluu
Rumble: https://rumble.com/c/c-309345
Pinterest: https://pin.it/3Ka1fOI
Facebook: https://www.facebook.com/melissapetersondesigns/
Facebook: https://www.facebook.com/boutiquebymelissamarie
Instagram: https://www.instagram.com/melissapetersondesigns/
Instagram: https://www.instagram.com/boutique_by_melissa_marie/
Making the world a little more beautiful with a paintbrush, a laptop, and a creative spirit..
74
views
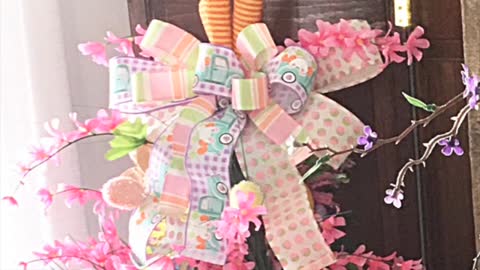
My Spring Tree Reveal
My Spring Tree reveal! I think this may be my cutest Easter tree yet! And I have the cutest surprise towards the bottom of the tree poking out! Check it out!
Bunny Butt and ribbons for my Spring Tree
The adorable ribbons, bunny butt and ears came from Decoexchange!
I’m afraid the last I looked, the bunny butt is no longer in stock but I’m wondering how hard (or easy) it would be to de-construct a bunny rabbit to use the butt and ears?
Hmmm…..
The bunny butt was the first thing I placed in my Spring Tree before adding other decorations.
My bow for my Spring tree was a simple combination of three different ribbons that I plan to use for my next project, my spring wreath.
Coming soon!
I had enough room at top of my tree and bow, where I added three carrot picks to top it off.
My bow topper, was the very last touch to my Spring tree.
FLOWERS AND PICKS FOR MY SPRING TREE
At Hobby Lobby, I found my tinsel garland in the Spring section and grabbed two of them and saved some money since they are 40% off.
The garland was the second decor I aded to my Spring tree.
I think Dollar Tree is becoming my new favorite craft and decoration store!
For my Spring Tree, I found a dozen pink Hyacinth florals bundles at Dollar Tree, grass picks with Easter eggs and berries bundles.
In all, I probably spent $20 in florals.
I love using bundle flowers, before I add them to my tree, I spread the flowers out to add dimension.
Each flower bundle was fluffed out and then placed randomly in my Spring Tree.
Next, I added my Easter egg and berries picks throughout the tree.
For my Spring Tree skirt, I am using my same skirt box from Christmas project.
I have two bricks in the bottom of the box to secure the tree and then I filled the Tree skirt with faux grass and faux Easter Eggs
I can tell you right now, I am so thankful I have those two bricks securing my tree! My cat Reeses almost pulled the tree down trying to play with the bunny butt!
Plus I added a ‘Bunny Crossing’ sign from my Easter stash and called it good!
If you decorate for Easter, I’d love to see it! You can follow me here and feel free to share your projects and crafts!
41
views

How I Made My St Patricks Gnome
I love Gnomes, but I do not have one for my St Patricks Day decor! So I gathered some of my supplies and in about 15 minutes I have this cute little shelf sitter!
Supplies I Used for my St Patricks Gnomes
Paper Mache Cone: I used a 12″ tall cone
White Faux Fur
Adult sized socks: I had unused St Patricks socks I purchased from Dollar Tree last year
Wood Beads
Optional: St Patrick picks and ribbon or fabric. I found my Shamrock picks at Dollar Tree and used ribbon and fabric I had on hand.
Hot glue and glue gun
Scissors
ASSEMBLING MY ST PATRICK GNOMES
Now to be honest, I wasn’t sure how I was going to craft my Gnomes.
Once I had my supplies gathered, I realized the fur fabric I had picked out was not going to wrap all the way around the bottom third of my paper mache cone.
I cut my sock so I had the long part, the part that goes over the calf in once piece, for my Gnomes hat.
Then I cut and disassembled the foot part of the sock for the backside of my Gnome.
I cut the toes section off, and then I cut the other side so this part of the sock was a rectangle shape.
It might be easier for you to check my video below to see how I did this!
Then I grabbed my favorite glue gun and glued the rectangle piece to the bottom third part of the cone.
This will be the backside.
Next I roughly measured my faux fur and started cutting the fur from the backside.
Cutting the faux fur from the back is a little less messy and you’re not cutting most of the fur that we are wanting for our gnome.
Then I hot glued the fur onto my Gnome, over lapping the sock fabric.
Next I placed the long part of the sock on my Gnomes “head”.
But before I did, I cut off the black end of the sock, since I didn’t really want that showing.
I kind of wish I left that alone, so I added some fabric ribbon over this area so the rough edges of the sock were hidden.
And it actually looks cute!
NOW I ADDED MY NOSE!
I parted the fur in the middle, the best I could, added some hot glue and placed my wood nose in the middle of the parted area.
I cute three small rectangle faux fur for eyebrows and mustache.
This step isn’t really necessary but I wanted to add a little more hair in these areas.
Next I added some fabric strips, leftover from my Messy Bows supplies and tied the top of my Gnomes hat.
For the final embellishment, I grabbed a Shamrock pick from a package I bought from Dollar Tree.
I broke off part of the pick, found a spot where I wanted to hot glue the pick, and also added a little more where I wanted the Shamrock to stay, up by the hat and that was it!
139
views
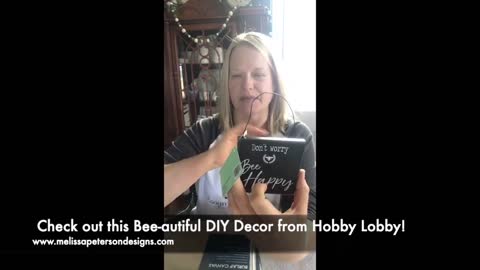
Check out this Bee-autiful DIY Decor from Hobby Lobby!
My hubby is digging this Bee-autiful Decor! Check out how easy this craft is and how you can add some umph to any small signs or plaques you may have!
Supplies I Used
3 –8″ x 8″ Burlap canvas
1 each – 4″ x 4″ Bee series signs from Hobby Lobby’s Spring section: Thank you for bee-ing you, You’re the Bee’s Knees, Don’t Worry Bee Happy.
Glue gun and glue stick
let’s get started
This project is way to easy!
I found these three cute small plaques in the Spring section at Hobby Lobby.
By themselves they are adorable and would look great in any display along side any Spring-y items but I wanted to figure out how I could make them stand out more and hang on the wall by my coffee bar!
It just so happened that the burlap canvases were on sale at the same time!
Instantly I thought of how I could make my own Bee-autiful wall decor!
Prepping
Heat up your glue gun and remove the wrapping from the burlap canvases.
Save those wood strips that come with the canvases for possible future crafting ideas!
I’ll think of something for them.
Next, you can use a screwdriver or pliers to remove the staples holding the wire hanger on each of the plaques.
I just folded mine over the backside since I was in a hurry.
PUTTING TOGETHER YOUR BEE-AUTIFUL DECOR
Once everything was prepped, I applied a generous amount of hot glue to the backside of the wood plaques.
The only area I didn’t apply the hot glue was about a 1″ border around the edges.
I didn’t want any hot glue seeping out along the side of the wood plaques.
Next I lined up the plaque over the burlap canvas and did my best to get it in the centered and held it in place until the glue cooled or cured.
Then I moved on and repeated this same process until I had all three Bee-autiful decor pics completed!
HANGING OPTIONS
The hangers that are in the canvas section I usually avoid.
I’ve had a few canvases fall off the walls using them, so I like to use the canvas frame and nail, or a sawtooth hanger and nail.
And, if the canvas is light enough, 3M strips are wonderful too!
GET CREATIVE!
This style of decorating has many options.
Instead of using burlap canvases for your Bee-autiful Decor, you could always use your choice of frames to apply the wood plaques too.
21
views