
Featured
Featured
The Ultimate Retro Gaming Upgrade | RetroTink 4K Review
In this episode, we test out and review the RetroTINK 4Kvideo upscaler, designed to improve the look of component, composite, s-video, VGA, RGB SCART, and HDMI inputs to see if it is the ultimate retro gaming upgrade.
Order a RetroTINK 4k At https://www.retrotink.com/product-page/retrotink-4k
To say I have been a huge fan of the RetroTINK line of products since I first tried the RetroTINK 2x would be an understatement. It took what I loved about my original retro systems, things like the Super Nintendo, Famicom Disk System, and N64, and line multiplied them to 480p and gave me an HDMI output. I loved the results and didn't think that they could get any better. And then they did with the RetroTINK 2X Pro, Multi-Format, and eventually the RetroTINK 5X. Never one to rest on his laurels, Mike Chi from RetroTINK has been hard at work to improve upon even the excellent 5X. The results? The RetroTINK 4K. Let's take a closer look at this magical machine.
Out of the box, you get the RetroTINK 4K, a standard-size SD card, a USB SD card adapter, and a remote control. The remote is a nice improvement over the original RetroTINK 5X remote, and my understanding is this is the remote that the 5X will be coming with moving forward as well. It features input, output, profile, and resolution buttons on the face just to name a few. It needs two AAA batteries, not included, but overall this is a very nice addition to the platform.
Slightly larger than the RetroTINK 5X by about 20% I would say, one of the things that I did was 3D print out a vertical stand from Todd at RetroFrog. He actually had me help him with some of the early prototyping and I provided him feedback on tweaks before he actually got a RetroTINK 4K of his own. This is a very well-designed base and will definitely help keep your setup cleaner and neater.
I went back and forth and how I wanted to connect my systems to the 4K. I could disconnect my RetroTINK 5X and put the inputs into the 4K and call it a day. If I did that I would have to go through my HDMI switcher, and at that point I wouldn't have 4K, 60Hz output. The more I thought about it, I decided to connect the RetroTINK 4K to the output of my HDMI switcher and leave my RetroTINK 5X in place. This way I didn't have to redo a bunch of profiles from the 5X on the 4K, and also ended up gaining extra inputs if I ever needed them on the 4K.
When it came time to test, I threw just about every system I own at this thing. From component, composite, and HDMI. The only thing I didn't test was S-Video and that's because I don't have any S-Video connections currently for anything. I did however even test RGB SCART coming out of the Sega Master System, JVC X'EYE, Super Famicom Jr, and the Dreamcast thanks to the Bahar Bros Mamba RGB SCART cable. It handled each and every one of these connections beautifully.
When I got into more recent systems, systems that natively output HDMI, I really noticed a huge difference. For me, the RetroTINK 5X does such an amazing job that for day-to-day gameplay that's still probably going to be my device of choice. But playing games through the PlayStation 3, PlayStation 4, and the Nintendo Switch upscaled to 4K made these systems absolutely come to life for me. I loved how bright and vibrant all the colors were, the depth of field in the images, and the overall quality of the results that I got. I think that's where this makes the biggest difference for me, the old systems definitely look great, but the newer ones get that extra punch of quality that really sets them apart.
Why it RoX:
- Beautiful video quality
- So many inputs!
- Wonderful upgrade for the remote control
- Firmware upgradable, and for free
- On-board profiles for different systems
- Can be used in conjunction with other scalers
What could be improved:
- Preloaded profiles not compatible with HDMI input
- Expensive
- My RetroTINK 4K door is very loose
Should you buy one?
I don't say this lightly, the RetroTINK 4K is a definite investment. If your goal is to get the best image quality possible on a modern, flat-panel display, this is the way to go. It allows you to utilize original hardware and generate visuals that were previously unthinkable. There's only so much you can do with certain signal types, I'm looking at you composite video, but it has an impact and improves every signal that goes through it. The fact that you now have an HDMI input expands the reach even further to even newer systems. It's an expensive investment, sure, but if it's in your budget you won't find a better performer on the market.
#RetroTink #VideoGames #4K #Nintendo #Sega #Xbox #HDMI #RetroTInk4k
Check out all of our 3D Printed items by visiting https://roxolid-productions.weeblysite.com/
234
views
2
comments

Let's Unbox & Play the Valis Collection On Genesis From Retro-bit!
Check this out, Retro-Bit has just sent us another amazing box and what was inside? Well the Valis Collection from Retro-bit and Renovation Products has arrived! And now that it's here, it is time for us to unbox the Valis Collection and get some gameplay in. Let's go!
In October 2022, Retro-bit Publishing announced they were once again teaming up with Renovation Games, much like they had for Gaires, to bring one of the most popular series for the Sega Genesis and Sega Mega Drive back in a limited release. That game? Valis. The first three games are being re-released in a limited fashion in both individual titles and as a box set collection.
Valis Collection
The epic story of Yuko Ahso from ordinary schoolgirl to the Warrior of Valis saving Earth and the Dreamland from the invading hordes from the Dark World graced the SEGA Genesis®/Mega Drive over 30 years ago. Those looking to own all three titles, they can look forward to receiving an additional master slipcase to store all three titles as well as a special acrylic stand displaying Cham, Valna, and Yuko.
MSRP: $144.99 / €169.99
● Sleek new master slipcase for those that purchase all three games
● Includes an additional acrylic stand featuring the three heroines
● Featuring artwork from all three titles
● Includes each game and its contents
● Makes for a great addition to any retro game collection
Valis: The Fantasm Soldier - Collector’s Edition
Yuko Asou had just finished a long day at school when a freak storm began pouring rain - just like in her dream the night before. She then encounters her classmate Reiko who leaves behind more questions than answers. Suddenly set upon by a monster, Yuko manifests a sword in her hand (much to her surprise) and is able to defeat her foe. She tries to go home but finds the entire city beset by demons.
Armed with the Sword of Valis, Yuko must fight off the dark forces of King Rogles across 7 action-packed stages and protect the Fantasm Jewel of Queen Valia. She will need to master the mystic blade as well as magic spells to defeat each one of Rogles’ Dark Lords. Does she have it in her to save both worlds from the encroaching darkness?
MSRP: $49.99 / €64.99
● Valna Sapphire Cartridge for SEGA Genesis®/Mega Drive
● Full-colored instruction manual redone for this release
● Reversible cartridge inlay sleeve featuring JP and NA artwork
● Exclusive art card featuring Yuko, Reiko, and more
● Individually numbered certificate of authenticity
Syd of Valis - Collector’s Edition
Yuko was out getting ice cream after a school day when she runs into an enemy she suspects is Rogles, but it turns out to be Emperor Megas looking to take over the dreamworld of Vecanti! She must embark once more to prevent the destruction of Queen Valia’s homeworld as the true Valis Warrior.
Emperor Megas looks to stop Yuko by taking the mystic sword away from her and rendering her powerless to stop him. New items and abilities are given to her in this "chibi" adventure as well as 6 different armors to defeat the dark forces across 5 perilous stages.
MSRP: $49.99 / €64.99
● Cham Rose Cartridge for SEGA Genesis®/Mega Drive
● Full-colored instruction manual redone for this release
● Fully translated to English
● Reversible cartridge inlay sleeve featuring JP and NA artwork
● Exclusive art card featuring some of the Chibi characters
● Individually numbered certificate of authenticity
Valis III - Collector’s Edition
Much time has passed since Yuko saved the dreamworld of Vecanti. Her own twin sister now sits on the throne as Queen of Valia and the Dark World falls into civil war. Now, one of the most powerful lords of the Dark World has proclaimed himself as King Glames and seeks to conquer worlds to prevent the destruction of his own. Still, there are those among the Dark World who fight against him such as Cham.
Yuko will need Cham to rescue Valna and then team up to defeat King Glames and his Sword of Leethus, which is powerful enough to take on the Sword of Valis. Use each character’s abilities and magic to their fullest through 9 treacherous stages to strike at the heart of the Dark World once again!
MSRP: $49.99 / €64.99
● Yuko Amber Cartridge for SEGA Genesis®/Mega Drive
● Full-colored instruction manual redone for this release
● Restored the Music Test Mode previously only in the JP version
● Reversible cartridge inlay sleeve featuring JP and NA artwork
● Exclusive art card featuring some of the cast
● Individually numbered certificate of authenticity
#ValisCollection #RenovationGames #RetroBit #Sega #MegaDrive #SegaGenesis
20.9K
views
8
comments

Is This Worth $50?!? Hyperkin Xenon Xbox Controller Review
In this video, we are going to unbox and test out the Xenon controller from Hyperkin, designed to replicate the look and feel of the original Xbox 360 controller.
Over the years, I have been pretty outspoken on my dislike of previous-generation Microsoft controllers. The Duke and S Controller are two of my least favorite of all time. The Xbox 360 controller is also one that I am not the biggest fan of. In early 2023, Hyperkin announced their Xenon series of controllers. Patterned after the Xbox 360 controllers, but designed for the Xbox Series S, Series X, One X, and One S. Would they be any better for what I prefer in a controller than the originals from Microsoft?
One of the major differences between the original Xbox 360 controller and the Xenon controller is how it connects to your system. The original controller utilized a huge battery pack on the back of the controller that housed rechargeable or alkaline AA batteries. The Xenon controller is a wired controller that utilizes a USB-C type cable to connect to your system. While not as convenient as wireless, at least in my opinion it drastically improves the ergonomics of the controller.
The overall layout and design of the Xenon pretty perfectly mimics that of the original controller. The button placements are identical, the triggers feel the same, the bumpers are the same, it's almost an exact one-for-one replica. The major difference is going to be the lack of that hump on the back from the battery pack.
When we first covered the Xenon controller announcement, there were four total colors. Now there are six as they have added two more additional colors from the original announcement. One of the really cool things is the fact that Hyperkin also includes a matching 10 ft long USB-C cable. This really helps complete the overall look and feel of the package.
Upon holding the controller in my hands I was astounded at how comfortable I thought it was. I literally hate the 360 controllers, and I think the omission of the battery pack hump on the back is a huge difference-maker. My hands just fall into place, I now understand a little bit more why so many people may have loved this controller. Perhaps if Microsoft would have gone with internal rechargeable batteries I would have been a bigger fan of the original 360 controller. But in my opinion, the Xenon controller is vastly superior to the original Xbox 360 Controller from Microsoft themselves.
Playing a wide variety of games, the Xenon controller just worked. Even the d-pad, something that the original 360 controller was heavily criticized for is very good on this controller. I pulled off all of my moves in Street Fighter, platformers felt great, and the D-pad is actually very good. The analog sticks also worked very well, and although they are not Hall effect sensors they are very smooth.
Why it RoX:
- Six different color options
- USB-C for connection
- Matching USB-C cable color
- Improved ergonomics without the battery pack
- It just works
What could be improved
- $50 for a wired controller is a bit expensive in my opinion
- Wireless would be phenomenal
- Concave and convex buttons for the face buttons would be huge
Should you buy one?
I'd love to see the Xenon released for the Xbox 360 with an internal rechargeable battery, I think that would be absolutely a game changer. As it is, as a wired controller for the Xbox One and Series S and X line of systems, this is darn good. It is probably, no it is my favorite incarnation of the Xbox 360 controller. I can see using and enjoying this in the future, and if it's something that I like, as someone who hated the 360 controller, I can only imagine those who love the 360 controller and what they might think of it. At $50 it's a bit pricey compared to wireless units, but the performance matches the price fairly well. Job well done Hyperkin!
#Hyperkin #XenonController #Xbox360 #XboxSeriesX #XboxSeriesS #FYP #fypシ
11.4K
views
4
comments

#Review RetroTink 5x - The Ultimate Way To Play Retro Games on Modern TVs?
In this episode, we test out the RetroTink 5X upscaler on a variety of different retro cartridge & disk-based systems.
While the more conventional way to play retro video games is on a CRT television, my goal since getting back into retro games has been to hook everything up to my modern flat panel television. I know that may not be the most authentic or popular approach, but it's the way I enjoy playing. As such, over the years I have added a number of different devices to my arsenal to try to achieve this. The first product I tried was the OSSC, or the open source scan line converter. While it worked terrifically with my Sega systems, I ran into many issues owing to the timing and other programming of the OSSC when it came to using my Super Nintendo, Super Famicom, or N64. As such, for the last 2 years I have used RetroTink products for my Nintendo systems. While these provided two times line multiplication, it left me wanting a little bit more. That's where the latest from RetroTink comes in, the RetroTink 5X, design to go head to head with devices such as the OSSC and the FrameMeister
Chapters:
0:00 - Introduction
3:46 - Doki Doki Panic (Famicom Disk System)
6:39 - Popeye (Famicom)
8:26 - Double Dragon (Master System)
8:40 - Altered Beast w/Scanline Test (Master System)
9:07 - Sonic 2 (Genesis/JVC X'EYE)
9:31 - Super Metroid Composite/Component/SCART Comparison (Super Famicom)
10:10 - F-Zero X Composite/Component/S-Video/SCART (Nintendo 64)
10:42 - Rogue Leader Rogue Squadron 2 Composite/S-Video/Component/HDMI (GameCube)
11:32 - Earthworm Jim (Genesis/JVC X'EYE)
13:11 - Bonk's Adventure (TurboGrafx 16)
15:36 - Halo (Original XBox)
17:29 - Ratchet & Clank (PlayStation 2)
19:27 - Mario Galaxy (Wii)
24:03 - Initial Impressions
26:50 - Final Thoughts
One of the biggest weaknesses on the OSSC is that it does not accept composite video inputs at all. For this reason I started up my tests with composite video inputs from my Sharp Famicom Turbo Twin, one of my favorite systems in my collection. It plays both Famicom cartridges and Famicom Disc System Games. One weird issue that I ran into was the fact that there was overscan on the left hand side of the screen that I could never get rid of, regardless of the settings on the RetroTink 5x. It wasn't game breaking, but it was annoying. On the OSSC I could apply a vertical mask to cover that, but the RetroTink 5x does not have that feature.
Next I moved over to Sega systems, a weakness of the original RetroTink 2x. From the Master System to the Sega Genesis/JVC X'EYE, the RetroTink 5x worked nearly flawlessly. I say nearly because much like on the Famicom, The Genesis games had overscan at the bottom of the screen. Again, the OSSC offers a horizontal mask that I could hide this from being displayed. The RetroTink 5x does not have this feature.
From here I moved on to other systems, comparing component, composite, RGB SCART, and S video signals. They all looked wonderful, and as one would expect the better quality input signal you had the better quality the output was. Comparing the component video cables for the GameCube to a retro-bit prism HDMI adapter, the prism definitely looks better, at least to me, but the component video cables do look darn good.
Why it RoX:
- Does everything the prior RetroTink lineup did and more
- Works with all systems that I've tested
- Plug and play operation
- Inputs for component, composite, s-video, and RGB SCART
- Adjustable scan lines
- Pre-programmed profiles for specific systems
- Firmware updatable
- Compatible with common capture cards
What could be improved:
- Expensive!
- No onboard display
- Visible overscan with some inputs
- S-Video does not work on SCART to composite video adapter
- Micro USB and not USB-C for power
Should you buy one?
This is the $300 question, isn't it? I will be blunt about this, the RetroTink 5X provides the best picture quality and best compatibility out of any product in the RetroTink line. It combines everything those other units do and takes it to the next level. However, I don't know that I would classify it as a $300 improvement to the video quality of my RetroTink Pro. Is it better looking? Yes. But the RetroTink Pro also looks darn good. I would say if you have any of the prior RetroTink products, except for the mini, I would not be in a rush to buy this. You already have an excellent solution. But if you are looking for the ultimate ease of use upscaler, the RetroTink 5x is about the most user friendly unit you will find.
#RetroTink #RetroGames #Review
The footage used in this review are used under the Fair Use laws:
https://www.law.cornell.edu/uscode/text/17/107
Notwithstanding the provisions of sections 106 and 106A, the fair use of a copyrighted work is not an infringement of copyright.
(Pub. L. 94–553, title I, § 101, Oct. 19, 1976, 90 Stat. 2546; Pub. L. 101–650, title VI, § 607, Dec. 1, 1990, 104 Stat. 5132; Pub. L. 102–492, Oct. 24, 1992, 106 Stat. 3145.)
2.04K
views

Get the best images from Super Nintendo with Voultar's RGB Mod Kit
In this video, we walk you through how to restore RGB-output of the Super Nintendo Entertainment System Jr.
The Super NES is my favorite system of all time, it just had so many great titles and really moved gaming forward in a monumental way. Nintendo released an updated version of the SNES and Super Famicom that simplified the system overall, and for those in the US, eliminated the blocky looks of the original. It’s a sharp looking system, and in recent years it has been discovered it also provides a sharper image than the original systems. One downside of these designs is that the RGB video output was removed from them, leaving you with either RF (puke) or composite (gag). Thankfully, there is a way to restore RGB output to the system thanks to Voultar, the same designer of the N64 RGB mod kit, and one of the finest specimens of male models you'll ever find.
Tools Needed:
4.5mm Game Bit
#1 Phillips Screw Driver
Soldering Iron
Solder
No-Clean Solder Flux
Flux Paste
Wire Strippers
Side/Flush Cutters
Pliers/Tweezers
The setup of the RGB board is really simple. The board lays over a set of pins that attach directly to the Video Output port on the back of the system. There are four connections you’ll need to make if you want to use a SCART Cable, one each for the R, G and B video feeds and another connection for C-Sync. If you are just using HD Retrovision Composite video cables, however, you can just get by with using the RGB connections and forego the C-Sync. Voultar’s board also supports S-Video out, however I do not connect this as I prefer to use RGB instead.
It took me about 20-minutes to disassemble, install, and reassemble everything inside my system. What I love about Voultar's mod chip is the fact that it is easy to install and the results are instantly noticeable. He has made several revisions to the Super NES mod chips since I first installed one, making it more compact, more user-friendly, and honestly, I think the results look better now too. See, the original Super NES and Super Famicom both were capable of outputting RGB right from the box, however, Nintendo removed the RGB output from the systems to reduce cost. Thankfully, Voultar's RGB Board makes restoring RGB output for either RGB SCART or HD Retrovision Component Video Cables a snap.
In addition to adding the RGB Mod kit to the system, I also installed Voultar's 1CHIP Ghosting Fix Capacitor Fix. This simply addresses the video issue some systems that experience a ghosting with some video output. This is an easy and inexpensive upgrade that, if you're under the hood to mod your system anyways, you should really do this at the same time.
The video quality is amazing output from this mod is nothing short of amazing. I didn’t believe that the quality would be much different between the original SNES/SFC and the Jr but man, I have to say, you can see the difference! It is super sharp and noticeable with the naked eye. If you are looking for the best possible video quality from a Super Nintendo, definitely pick up the Jr. version and get this mod installed. Voultar has produced an amazing kit, and should be praised, not just for being a beautiful specimen, but for producing beautiful mod kits such as this.
1.91K
views
23
comments
An unnecessary update? Hyperkin Retron 1 AV Clone NES review
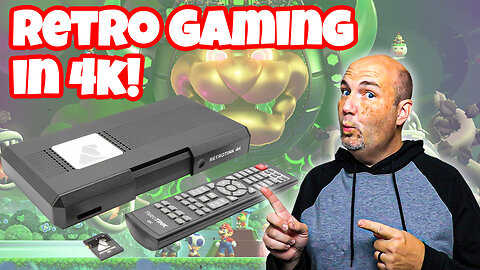
The Nintendo Entertainment System is an extraordinary little machine. One of the things that made it so remarkable was it's amazing library of games. People are still making games for it today, 35 years after it's initial release. The folks over at Hyperkin have been creating systems that can play NES cartridges for 10+ years, and their latest is a bit of an eyebrow raiser. Here, in early 2021, Hyperkin has released the Retron 1 AV, a composite-only clone NES system.
This new version of the Retron 1 AV is available in two different colors. Gray, which is inspired by the original system's color scheme, and the Hyper Beach Edition which you see here. Either color scheme includes one wired Cadet controller, RCA cables, and a micro USB cable for power. No power supply is included, and with any cartridge based system you must supply your own games. I was left scratching my head as to why there was no power supply included, is that shouldn't increase the cost of goods sold tremendously. Also, there's a typo on the back of the box which indicates you need a 5 amp, 1 volt power supply when in reality it is a 5 volt, 1 amp that you will need.
The overall look and feel of the system is, well, budget feeling. On the back of the unit, you have a set of mono RCA jacks for audio and video, and your micro USB port for power. There is no PAL switch, and no aspect ratio switch. The power and reset buttons, while functional, don't have the cool aesthetic that the Retron HD's power and reset buttons do, which are directly inspired from the original NES.
Since there is no terrific way to capture composite video at 240P, I had to run the system through my RetroTink2x with line doubling turned on. So if anything, my results here will look better than yours running straight into a television.
Performance is about as expected for a unit such as this. Prior to many of the HDMI equipped systems, there are a lot of games that simply would not work on clone systems. Castlevania 3 is a perfect example, and it did not work on this system either. Battletoads locks up on level two like it has with every other clone system I've ever tested. If you're looking for something extraordinary, remember the saying that you get what you pay for.
For the most authentic testing possible, I actually borrowed a CRT from Adrian at Live Action Games. I split the signal coming out of the system so that I could both capture footage and play on the CRT. I have to admit, the colors looked better on the CRT then going to my flat panel television. They were much more vibrant and robust. Plus, and this is exciting, light gun games will work on a CRT! Both Duck Hunts and Hogan's Alley both worked flawlessly, not something possible with an HDMI system.
I did run into a very major issue when it came to the controller one port. First and foremost, the port is extremely tight on the included Cadet controller. It really shouldn't be that much of a fight to plug a controller into a system. In addition to this, no other controller worked plugged into the player one port. My NES Advantage would work but only when I plugged in both player one and player two ports. This is a major concern, and something Hyperkin needs to address.
Why it RoX
- Inexpensive
- Cadet controller is very good
- 2 color scheme options
- Compatible with light gun games
- Cartridge pins did not have a death grip
What could be improved:
- I could not get other controllers to work
- No performance difference over previous models
- Only a 5 ft long controller wire
- No power supply included
- Tight controller port
- For less than $10 more you can get the Retron HD
Should you buy one?
I am typically of the belief that there is a customer for just about every product, however this system has me stumped. The cost savings over the Retron HD is not that significant, less than $10, and that system includes a controller with a longer cable, an HDMI output, and I think overall a more robust design. The Retron HD does not have the games compatibility issues that the Retron 1 AV has. Plus, the Retro HD still includes composite video output. If you are considering the Retron AV, I would either buy a standard NES front loader, or I would go for Hyperkin's Retron HD. This is a product that I look at and I don't understand why it exists.
854
views
2
comments

Upgrade Your Game Boy Advance SP Battery With the Megabat 800mAh
In this episode, we walk you through the steps to Upgrade Your Game Boy Advance SP Battery with the Megabat 800mAh Battery, available from Stone Aged Gamer.
Chapters:
00:00 - Introduction
1:01 - Unboxing
2:02 - Disassembly
2:42 - Comparisons with OEM
2:51 - Optional Battery Spacer
3:24 - Installation with Battery Spacer
4:00 - Optional USB Charging Adapter
4:41 - Initial Impressions
It is hard to believe that the Game Boy Advance is nearly 20 years old, but that just means that the Game Boy Advance SP turned 18 in February of 2021! One of the major improvements on the GBA SP over the original was the inclusion of a rechargeable battery instead of relying on expensive alkaline batteries. While a lot less expensive over its life, even these batteries wear out. That means there are a ton of handhelds out there with aging batteries that may be approaching the end of their useful life, and it's a matter of when not if you will need to replace your GBA SP battery. While not something widely advertised, the battery from the Game Boy Advance SP can actually be replaced, and all you need is a jewelers screwdriver.
The folks from Stone Age Gamer actually gave us the hook-up with the MegaBatt 800, a replacement for the original battery with a few twists. Where the original had a 600mAh LiIon, or Lithium Ion battery pack the MegaBatt800 uses an 800mAh LiPO, or Lithium Polymer battery. Now, having spent as much time in the RC world and with different batteries as I have there's some good and concern here. First, 200mAh of extra capacity means more playtime per charge. That's very good. The concern I have is that LiIon and LiPO batteries don't charge quite the same way, at least in the RC World. There are different charger settings and configurations for each, and I honestly don't believe the charger integrated into the GBA SP properly determines cell-type. You should be ok, but if you ever notice the battery starting to puff or swell, completely discharge it and dispose of it IMMEADIATELY! I really would have preferred seeing LiIon for the cell type here, just for safety sake.
To swap out the battery packs, all you need is a jewelers screwdriver. Unlike other Nintendo products they didn't rely on Tri-Wing or Security Bits, which is greatly appreciated. Once inside the GBA SP, simply pop the old battery out and safely dispose of it. The MegaBatt800 is slightly shorter than the OEM battery, so to accommodate for this they include a small 3D printed shim to take up any excess space. While I felt my contact was fine I used the spacer, just in-case. I charged the MegaBatt 800 up using my USB pigtail shown in the video and played for a few hours while watching a NASCAR race. Overall battery life was significantly improved over the original battery in my GBA SP, and there weren't any issues that I ran into.
Why It RoX:
- Only $11.99
- Roughly 35% more capacity than the original
- Included spacer to ensure proper fitment
- Super easy to install
What Could Be Improved:
- Changing chemical types without changing the charger makes me nervous
- LiPo batteries NEED to have a Low Voltage Cutoff to prevent possible damage to the battery, there's no indication that this does.
Should You Buy One?
On the surface level this is an incredible upgrade for those with aging Game Boy Advance SP batteries. As I mentioned it is not a matter of if but when you'll need to replace your battery. I am glad to see that the MegaBatt800 sticks with a Lithium-based battery type instead of opting for NiMH (Nickel Metal Hydride) as that would have definitely been a no-go for me. That being said, I will be paying attention for signs of battery swelling or puffing, a common occurrence with LiPo batteries that are not charged or discharged properly. I also wish there was some kind, any kind, of documentation to go with the battery. LiPo batteries need to be kept above 3.0 volts per cell. Below 3.0 volts and you can risk damaging the battery. Does the MegaBatt800 have some sort of integrated circuitry, as some batteries can indeed have, to prevent over charging or over discharging? These are important questions that simply lead to more questions. I will be sharing these concerns with Stone Age Gamer and asking that they look into them and address them on the product page.
#GameBoyAdvanceSP #GBASPBattery #StoneAgeGamer
The footage used in this review are used under the Fair Use laws, referenced below:
https://www.law.cornell.edu/uscode/text/17/107
(Pub. L. 94–553, title I, § 101, Oct. 19, 1976, 90 Stat. 2546; Pub. L. 101–650, title VI, § 607, Dec. 1, 1990, 104 Stat. 5132; Pub. L. 102–492, Oct. 24, 1992, 106 Stat. 3145.)
775
views
3
comments

RetroTink 5x Gameplay Spotlight - TurboGrafx 16 & PC Engine
In this episode, we expand on our review of the #RetroTink 5x and focus on gameplay footage for specific systems, in this instance the #TurboGrafx16 & #PCEngine.
Chapters:
0:00 - Introduction
1:18 - Pac Land
3:10 - Keith Courage
5:28 - Fantasy Zone
7:32 - Bonk's Adventure
In our review of the RetroTink 5x, we went through and played a lot of different games from a lot of different systems. That being said, due to the overall length of the review we were not able to go into as much depth into each system as we would like. As such, we have created videos specifically focusing on one console. Make sure you bookmark our playlist, link below, to be kept up to date when we do release new episodes.
While not as popular as the Nintendo Entertainment System, Super NES, or Sega Genesis here in the states, the TurboGrafx 16 is an amazing piece of hardware with a wonderful library. As such, fans are looking for ways to get the best video quality possible out of their systems. The RetroTink 5X works tremendously well with this system, making it look better than it possibly ever has. To connect our TurboGrafx 16 to the RetroTink 5x, we are using Insurrection Industries SCART cables, along with one of their Spark Plug RGB adapters.
One of the first things that makes this such a powerful combination is the fact that there is, in fact, a dedicated TurboGrafx 16 profile. This is something I misspoke about in my review, and honestly one of the inspirations for the series. Having the system already set up for the end user makes it all that much more convenient. The profile is actually compatible with both the PC Engine and the TurboGrafx 16, so it will work with both of these systems.
Up first in this example is Pac Land, one of my PC Engine games, and one of my favorite games for the system. Through the RetroTink 5X, I was extremely impressed with how vibrant the colors looked, how authentic the sound was, and how responsive the controls were. And cheaper adapters, like those crappy composite video to HDMI adapters, you get quite a bit of interference, latency, and other issues. None of that occurred here with the RetroTink 5x. The images were sharp, pixels were clear, and it was a wonderful overall experience.
Up next was Keith Courage, and this was one of the games that I decided to play around with scanlines. I am not a fan of the scan line look myself, but I know people are and are curious to see how they look. The 50% scanline option wasn't as terrible as I've seen used on other devices. I won't say that I'm a fan of scanlines, even after this, but this is possibly one of the best scanline examples I've seen to date.
Fantasy Zone is one of the most colorful games available for the system, and it is simply a wonderful shooter. The controls are tight, it's challenging as can be, and it's just fun. This is one of those games that was optimized in my opinion for the TurboGrafx 16, owing to the fact that you could turn rapid or turbo fire on and off. With the scan lines once again turned off, my personal preference, I thought that the graphic fidelity was outstanding.
To finish things up, we once again threw in on my favorite game on the system, Bonk's Adventure. This is just such a great title and really one of the reasons why I wanted a TurboGrafx 16 in the first place. Much like my previous experiences, it looks simply beautiful through the RetroTink 5x. And it plays wonderfully as well. Truth be told, I played for about an hour and a half after I was done recording, I was having that much fun playing bonk through this setup.
The TurboGrafx 16 looks absolutely wonderful going through the RetroTink 5x. The colors are vibrant, the pixels are sharp, and the gameplay is super responsive. I had previously used a RetroTink 2x with this system, and thought it couldn't get any better. I was wrong, it's bigger brother does an amazing job with pumping out amazing results.
#RetroTink5x #TurboGrafx16 #LetsPlay
The footage used in this review are used under the Fair Use laws, referenced below:
https://www.law.cornell.edu/uscode/text/17/107
Notwithstanding the provisions of sections 106 and 106A, the fair use of a copyrighted work, including such use by reproduction in copies or phonorecords or by any other means specified by that section, for purposes such as criticism, comment, news reporting, teaching (including multiple copies for classroom use), scholarship, or research, is not an infringement of copyright.
The fact that a work is unpublished shall not itself bar a finding of fair use if such finding is made upon consideration of all the above factors.
(Pub. L. 94–553, title I, § 101, Oct. 19, 1976, 90 Stat. 2546; Pub. L. 101–650, title VI, § 607, Dec. 1, 1990, 104 Stat. 5132; Pub. L. 102–492, Oct. 24, 1992, 106 Stat. 3145.)
1.56K
views
9
comments

Retro-Bit Tribute64 2.4GHz Wireless Controller Release Dates & Limited Edition
In this episode, we have an update regarding the availability of the soon-to-be released Tribute64 2.4 GHz Platinum Series Wireless Edition from Retro-Bit.
When I last attended the Portland Retro Gaming Expo in 2019, I interviewed Richard from Retro-Bit who showed off their, at the time in development, 2.4 GHz Wireless version of their popular Tribute64 controller. While their initial plans were to have it released in 2020, the global pandemic caused significant delays. Thankfully, they never stopped working on the project and the results are what you see here, the Tribute64 2.4 GHz Wireless Edition.
There are several refinements and enhancements to this version of the Tribute64 versus the version that I last saw. The shoulder buttons are in a more traditional location compared to what I had originally seen, and the overall layout has been finalized. There will be three different colors of this controller, a traditional Gray, Atomic Purple, and a very special limited edition available only at select retailers. Below is more information directly from their press release:
Tribute64 2.4GHz Wireless Controller
The Tribute64 2.4GHz Wireless Controller is part of Retro-Bit®’s Platinum Series of controllers dedicated to classic retro gaming consoles. Designed for use on the N64®’ and USB®’ enabled devices, it features ultimate versatility for any gaming genre. Built with an analog stick utilizing the highest grade in quality, a wide and ergonomic design to boost your gaming experience, and an ample button layout with additional functions for USB devices, players will enjoy long hours of classic retro gameplay. Built-in rumble and a memory card port will make you experience immersive wireless gaming right at your fingertips!
Tribute64 2.4GHz Wireless Controller - Ultra Edition
This special limited edition Tribute64 2.4GHz Wireless Controller is part of Retro-Bit®’s Platinum Series of controllers dedicated to classic retro gaming consoles. Designed for use on the N64® and USB® enabled devices, it features ultimate versatility for any gaming genre. Built with an analog stick utilizing the highest grade in quality, a wide and ergonomic design to boost your gaming experience, and an ample button layout with additional functions for USB devices, players will enjoy long hours of classic retro gameplay. Built-in rumble and a memory card port will make you experience immersive wireless gaming right at your fingertips!
Feature Highlights:
- Compatible with Nintendo 64®, Switch, and USB-enabled devices
- Includes N64 and USB receivers
- Sensitive, accurate, and high-quality analog stick
- Ergonomic design for comfort and extended gameplay
- Ample button layout with additional functions for use with USB devices
- Dual Z shoulder pads for maximum grip
- Built-in rumble Pak and memory card port
The Ultra Edition of the Tribute64 will be available in late May, with the standard editions coming in June 2021. At $39.99, I think the pricing is set right about where it should be, especially with all these baked-in features. I am super excited to be able to get my hands on one of these to test. The incorporation of rumble is truly something that sets this apart from other controllers on the market. As long as it works well, I think that could make this the definitive Wireless Nintendo 64 Controller.
734
views
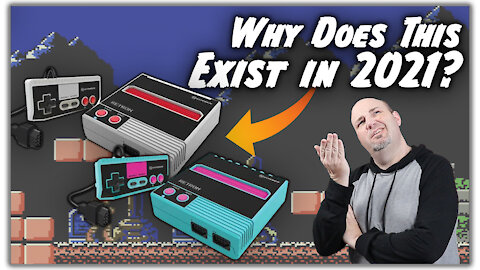
Is This The Ultimate Charging & Storage Stand for the PlayStation 5?
In this episode, we unbox and test out the Nexigo Multifunction Cooling Stand designed to store and charge your PlayStation 5 & it's accessories.
Chapters:
0:00 - Introduction
2:25 - Box Details
3:46 - Unboxing
6:59 - Installation
8:05 - Overview
10:16 - Final Thoughts
While the PlayStation 5 is still very difficult to get, that has not prevented accessory manufacturers from embracing the system. Nexigo, known for their webcam and other accessories, have produced a number of different charging bases, controller stands, and other accessories for the PlayStation 5. Their latest, an updated version of their Multifunction Cooling Stand, promises to provide you with an all-in-one storage and charging solution for your system.
I've tested out a similar charger from Nexigo in the past, and it has been my primary stand and charger for my PS5 since I reviewed it. It works well, it's compact, and I have confidence that when I set my controllers on it that they are actually being charged. That's one of my biggest criticisms of the Sony charging stand, I don't have a whole lot of confidence that it is actually charging when I place the controllers on it as there are no direct charging indicators on the base.
Their newest unit incorporates many of the things I liked about the original multifunction dock and added a few more as well. You can store 10 game cases along one side of the stand, charge two DualSense controllers at the same time, and these charging bays actually have very large, multi-color LEDs to indicate the charge status. Very nice! Another addition which I was not expecting was storage for the media remote. While it may seem like a simple thing but not leaving the media remote just laying around is definitely appreciated.
Set up and installation is quite easy, it shouldn't take you more than a few minutes and only requires either a large coin or a flat blade screwdriver. Simply remove the existing base from your PS5 if you are using the stock unit, place the Nexigo base on the bottom of your system, install and tighten the screw. That's it. The only other thing you'll need to do is connect the dual USB a to single USB cable to provide power. I would like to see the inclusion of a single USB-A to USB-C cable for charging. While this may lead to slightly longer charge times it would make it possible to charge while using a hard drive in one of the rear USB ports.
One thing I have not mentioned as of yet is the fact that this is actually a cooling stand and has incorporated fans into the base. This is not a feature I will use, I don't feel like there's any issue with heat in the PlayStation 5, and if the airflow goes in the wrong direction you can actually cause problems with your system.
One of the things I don't like about this charging stand is much as the earlier one is the fact that the DualSense controllers charge through the bottom port now versus having a USB-C dongle like the earlier model. I always struggled with the Sony charging dock, as I was never 100% sure that the controller was on and charging properly. Thankfully, the large LED displays makes it easy for me to tell at a glance whether or not my controllers are charged or not. However, I still prefer the USB-C dongle over this method of connecting to the base.
Why it RoX:
- Compatible with both the standard PlayStation 5 and the digital version
- Available in black and white
- Large led charge indicators
- Charges two dual sense controllers at once
- Storage for up to 10 PlayStation 4 or PlayStation 5 games
- Integrated storage for the media remote
What could be improved:
- Fans are really unnecessary
- Much larger than the unit I replaced
- Disc case slots are rather tight
- Try to incorporate a way to use a single USB port for power
- I prefer the USB-C dongle method of charging
Should you buy one?
If space is a consideration, I would probably recommend going with the earlier multifunction charging stand from Nexigo that I had reviewed. It is considerably smaller, & I prefer the charging method for the controllers better. If space is not a consideration, I definitely prefer the LED charge indicators that this model has, and I absolutely love the storage for the multimedia remote. I love that we have so many options for how to best store in charge our PlayStation 5 and the DualSense controllers. This definitely something I am thrilled to have been able to take a look at.
#PlayStation5 #PS5 #Nexigo
The footage used in this review are used under the Fair Use laws, referenced below:
https://www.law.cornell.edu/uscode/te...
Notwithstanding the provisions of sections 106 and 106A, the fair use of a copyrighted work, including such use by reproduction in copies or phonorecords or by any other means specified by that section, for purposes such as criticism, comment, news reporting, teaching (including multiple copies for classroom use), scholarship, or research, is not an infringement of copyright.
579
views
9
comments
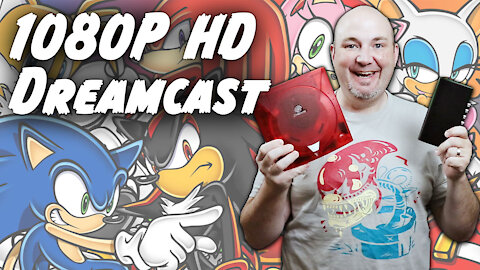
RetroTink 5x System Spotlight: Sega Dreamcast Composite Video Gameplay
In this episode, we test out the #RetroTink5x with the #Sega #Dreamcast using standard component video cables to see how well it works.
*Please note, at 0:41 seconds I state I am playing in 780P, clearly you can see in the upper left corner it is 1080P. Chalk this up to being tired while recording.*
Chapters
0:00 - Introduction
2:33 - Sonic Adventures
5:34 - Daytona USA
7:51 - Hydro Thunder
10:33 - Power Stone
11:58 - Jedi Power Battles
I've been wanting to up my game when it comes to my Dreamcast lately, and although I am planning to HDMI mod the system here, I did want to see what it would look like going through my RetroTink 5x. Up to this point, I had been using a VGA Cable with my OSSC, which admittedly looks wonderful. The downside of this setup is not all games work with this setup. Hydro Thunder, one of my favorites from Midway, is a perfect example. While HD Retrovision hasn't released their Dreamcast cables as of yet, I turned to standard component video cables as, well, it is what I had. Fearing a smudgy, ugly mess, I connected the system and powered it on.
First things first, this is NOT as sharp as VGA Cables, it just isn't. I'm not going to tell you it is. That being said, this is about the best I have ever seen any composite video video look before. Colors looked good, there weren't any weird artifacts, it just looks better than it deserves to. It is also nice that there is no noticeable lag or delay as I played. NICE!
One of the things I was a little disappointed in seeing, or really not seeing, was a profile for the Dreamcast. Now this may be because of the lack of VGA Input, or the lack of component or SCART Video cables, Mike Chi from RetroTink may have assumed fewer people would want to use the 5x with the Dreamcast. Retro-Bit and others do offer S-Video cables (which I unfortunately do not own) which would be great to use with the RetroTink 5x, we've seen how good S-Video looks on the SNES and N64, so having a dedicated Dreamcast profile would be greatly appreciated.
I started my testing with Sonic Adventures, a game I haven't spent a ton of time with because, frankly, I just don't like all the cut scenes. That being said, the Blue Blur looked better than I expected, even if he still has Tails following behind him and keeping him company.
Up next was Daytona, a game I honestly forgot I had for the system. I love Daytona USA, and while I don't think the gameplay of Daytona for the Dreamcast is as good as earlier entries, it is graphically more polished and sharper looking. Daytona looked quite wonderful, I dare say almost as good as VGA with just 2x line scaling through my OSSC.
While I will be HDMI modding my Dreamcast in the near future with the DCHDMI mod, that is a step many gamers aren't going to take. Component video cables are still a popular choice for the Dreamcast, and through the RetroTink 5x, it looks terrific. Now, the VGA cable through the OSSC most definitely looks better, and if the Dreamcast is your favorite system that is how I would connect it to your TV. The RetroTink 5x isn't the ultimate way to connect your Dreamcast to your modern TV, there are clearly better options out there. But still, for composite video the quality was decent, the controls were responsive, and the overall experience was wonderful.
The footage used in this review are used under the Fair Use laws, referenced below:
https://www.law.cornell.edu/uscode/text/17/107
Notwithstanding the provisions of sections 106 and 106A, the fair use of a copyrighted work, including such use by reproduction in copies or phonorecords or by any other means specified by that section, for purposes such as criticism, comment, news reporting, teaching (including multiple copies for classroom use), scholarship, or research, is not an infringement of copyright. In determining whether the use made of a work in any particular case is a fair use the factors to be considered shall include—
(1) the purpose and character of the use, including whether such use is of a commercial nature or is for nonprofit educational purposes;
(2) the nature of the copyrighted work;
(3) the amount and substantiality of the portion used in relation to the copyrighted work as a whole; and
(4) the effect of the use upon the potential market for or value of the copyrighted work.
The fact that a work is unpublished shall not itself bar a finding of fair use if such finding is made upon consideration of all the above factors.
(Pub. L. 94–553, title I, § 101, Oct. 19, 1976, 90 Stat. 2546; Pub. L. 101–650, title VI, § 607, Dec. 1, 1990, 104 Stat. 5132; Pub. L. 102–492, Oct. 24, 1992, 106 Stat. 3145.)
Follow Us on Social Media!
Instagram - @RoXolidProductionsGK
Twitter - @RoXolidStudios
Facebook - https://www.facebook.com/RoXolidProductions/
Get early access to our videos and support RoXolid Productions for as low as a dollar a month through our Patreon page, https://www.patreon.com/RoXolid
Looking for some RoXolid Merch? Check out our T-Spring store for shirts and swag at https://teespring.com/roxolid-productions-official-s
Would you like to have your products featured on RoXolid Productions? Do you have Questions? Comments? Email us at RoXolidMail@Gmail.com!!
544
views
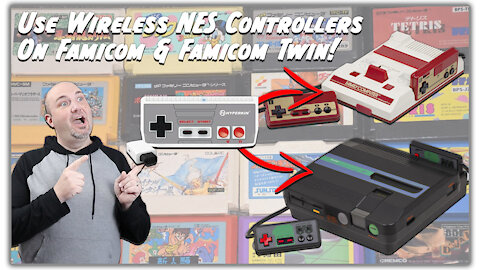
How to wire an adapter for the Nintendo Famicom to use NES Controllers
In this episode, I show you how to build an adapter so you can use NES Controllers on a Nintendo Famicom & Sharp Famicom Twin Turbo.
What we knew here in the USA as the Nintendo Entertainment System was a bit different in Japan. The Famicom, or Family Computer, was hugely successful in Japan at a time when the US was still reeling from the Video Game Crash of 1983. Nintendo made several add-on peripherals for the system, including a floppy drive system known as the Famicom Disc System. Both the Famicom and the Disc System would become so popular that they even collaborated with Sharp Electronics to make a 2-in-1 system called the Sharp Famicom Twin. These are all amazing systems and I now own several Famicoms and a Sharp Twin Turbo, thanks to the guys at @Famicom Dojo (Check them out at https://www.youtube.com/user/FamicomDojo)
I will tell you, I absolutely love my Famicom and of my Sharp Famicom Twin Turbo. They really do provide a different gaming experience than the NES, mostly due to the enhanced audio chips that the NES lacked. One of the downsides of both my Famicom and Sharp Famicom Twin, however, is the fact that the controller cables are extremely short. And on top of that, the fact that the Famicom itself only outputs via RF, but thankfully the Twin Turbo outputs Composite Video.
The Famicom, and the Sharp Twin Turbo, both have a 15 pin socket on them. This was designed to use with accessories such as the Light Zapper. Doing some research, I found an old controller adapter schematic that I could wire up to be able to potentially use NES controllers on my Famicom by tapping into this 15-pin port. I thought the schematic was a bit confusing myself, which took me longer to get the build complete. What threw me off was the fact the original diagram was created with the idea of 2 controllers connecting to this port. Frankly, I just needed one, and created my own schematic which helped me keep things straight.
With the adapter completed, I plugged it into my Sharp Twin Turbo Famicom, one of my favorite systems in my collection, and fired it up with my Hyperkin Wireless Cadet Controller. With Bio Miracle Bokutte Upa installed in the disk drive, I powered on my system. No sparks, that was a good sign! The LED on the dongle started to blink when the power was applied, another good sign! I powered up the Scout itself, and it connected to the dongle! Even more good signs! I started to mess with the D-Pad and buttons and everything worked as it should! I yelled a bit when this test was a success, alerting my dogs and my wife that I was up to something. It worked, it really did, and the lag and latency is virtually non-existent! With this setup, I do lose the turbo functionality, but Best of all, this also means that I can use things like the NES Max or NES Advantage as well.
With everything that I purchased for this Famicom Controller Adapter Mod, this adapter cost me about $15 to $20 in parts. I don't have any intention of mass producing these in the future, but I may do one-offs here and there to help people out. For those wondering, the name of the game being played is Bio Miracle Bokutte Upa, and it is designed by Konami for the Famicom Disc System. This is a platformer that I learned about from @JohnRiggs , and actually bought when I was at the Portland Retro Gaming Expo in 2018.
1.31K
views
8
comments

Livestream - Channel Update, Thank You for All the Support, and We Could Use Your Support
I wanted to thank everyone who has messaged and reached out to me and my family over the last few days since my Dad's passing. I will still be going through and responding to all the messages but I have to thank:
Aaron (Riff)
Gabbo
JLuv
Linda AKA the Gamer Girl
Castlemania Ryan
Michael J Crawford (The Anti-Trekker)
BirdOPrey5
BP Retro
SEGE and all the organizers
Russ Lymann
The Nostalgic Nuts
TBelly
NES Addict
Megadan29
Krillen64
Edgar Riveria
DHGamerBros
Solid Nate
Adam Koralik
Stephen Sayles
Joshua Mossman
Chiefvasqueeze
Jorge Osorio
Rafi Constantine Antar
VideogameLover58
Capt. Cisco
DimeDamage
Regan Dow
John Phillips
8BitGlitch79
Eugene Myers (ECMyersVids)
Aenashi
Jorge Lyon
Ranson Cubersmith
Auto Fusion
David Nesvacil
YourFunkLord
Shawn Parker
Erik Javier
Owaz Gaming
Justin Harris
Derek Buckler
Gulius
SNESTalgia
Rikarudo
Octovaio Tovar
Not so friendly gaming
Adam Yeager
Jeff Pom
Thomas Potts
Theraygun4
Gingerbeard the gaming dad Hartley
John Musahi
Jozeph Petrik
Nayyab Mughal
Kermit the Gaming Hermit
Tarks Gauntlet
Chris Amadeus
Gr8fulDead69
Dan Brozman
Kirk D
Harrison Hacks
Vader Gamer
Smash JT
Generational Gamer
Rewind By Design
Andrew Fielding
Tim Davis
Fading Shadow
benton r.p.
majorgify
Nathan Davis
Jay Johnson
Rafael Mendoza
Dereck Taitt
Bearcade
ArcadeMAD
Monterance Sharp
Alley Day
1Up Adam
https://www.youtube.com/channel/UCJakZE9mfOsZzmiO2Ewa7eQ
Our family could use a little help. We are having a celebration of life soon for my father and we're trying to fly my brother out to the service. The problem is that he's currently undergoing Cancer Treatment and, being so close to when he'd need to travel, airfare is stupid expensive. We have most of the ticket prices, between my oldest brother and I, but we could use a little help with this unexpected expense. Head over to our StreamLabs page at https://streamlabs.com/roxolidproductions if you can help out in any way. Streamlabs is the better way to help as the funds go through PayPal and are easier to access sooner, vs Google/YouTube payments which would be accessible until mid-September, after the service.
The footage used in this review are used under the Fair Use laws, referenced below:
https://www.law.cornell.edu/uscode/text/17/107
Notwithstanding the provisions of sections 106 and 106A, the fair use of a copyrighted work, including such use by reproduction in copies or phonorecords or by any other means specified by that section, for purposes such as criticism, comment, news reporting, teaching (including multiple copies for classroom use), scholarship, or research, is not an infringement of copyright. In determining whether the use made of a work in any particular case is a fair use the factors to be considered shall include—
(1) the purpose and character of the use, including whether such use is of a commercial nature or is for nonprofit educational purposes;
(2) the nature of the copyrighted work;
(3) the amount and substantiality of the portion used in relation to the copyrighted work as a whole; and
(4) the effect of the use upon the potential market for or value of the copyrighted work.
The fact that a work is unpublished shall not itself bar a finding of fair use if such finding is made upon consideration of all the above factors.
(Pub. L. 94–553, title I, § 101, Oct. 19, 1976, 90 Stat. 2546; Pub. L. 101–650, title VI, § 607, Dec. 1, 1990, 104 Stat. 5132; Pub. L. 102–492, Oct. 24, 1992, 106 Stat. 3145.)
650
views

Genki Shadowcast HDMI Capture Card Review - It is Just Not Ready
In this episode, we unbox and test out the Genik ShadowCast, designed to let you play and capture gameplay on your computer without needing a separate television.
0:00 - Introduction
2:17 - Unboxing
6:51 - Testing the Genki Arcade App
7:27 - Genki Arcade Chrome App
8:28 - Super Genjin 2/Super Bonk 2
9:07 - Recording Format Issues
9:32 - Recording on Android
10:05 - Capturing in Streamlabs OBS
10:06 - Super Mario Collection
11:43 - Earthworm Jim 2
13:38 - Street Fighter 30th Anniversary Collection
15:45 - PS4 Testing
17:27 - Final Thoughts
I am always looking for new ways to capture my gameplay footage. Over the past 4 years, I've gone from shooting my TV with a Phone, then I upgraded to an EZ Cap 284 to capture footage, followed up by an Elgato HD, and most recently I've moved to a Hauppauge PVR 60 Pro. The different capture cards all offer different benefits, from price to convenience to simply ease of use. When I got an email from Genki about their latest Kickstarter, the ShadowCast, and when I saw the $40 price tag I knew I needed to try it out.
The overall design is pretty simple. A device roughly the size of a thumb drive features an HDMI connector on one side and a USB-C Connection on the other. Plug the HDMI end into your game system and the USB-C into your PC or Mac, and you're ready to record and capture. Genki has their own Genki Arcade App for Windows and Macs, plus there is a Chrome app for capture as well. It also states it is compatible with OBS, Streamlabs OBS, X-Split, Zoom, and other popular applications.
For testing, I started by connecting the ShadowCast to the output of my HDMI Switcher, this way I wouldn't need to plug and unplug as I changed from system to system. Up first was my newly RGB-Modded Super Famicom Jr which I run through my RetroTink 2X Pro. I downloaded and installed the Genki Arcade app for Windows and, well... There's no record button! Seriously, you cannot record on a PC in their native app! That is terrible! I then went to the Chrome App and there were the recording controls I was looking for. Before recording in the Chrome App I decided to try recording in Streamlabs OBS.
From the word go, the game felt extremely laggy and had a lot of latency in it. Even with something simple like the Super Mario All-Stars version of Super Mario 1, the delay was extremely noticable! I was extremely disappointed in this performance, and things didn't get better as I went along. Regardless of what I did the game play experience was not good as Genki presented it for use in their Kickstarter. Looking into the comments on the Kickstarter page, it appears that Genki removed the recording functionality from the Windows version of the Genki Arcade, as many others seem to have reported latency and lag issues. This is disappointing as the app was clearly not ready for release when the hardware was.
The easiest way to get around this lag and latency issue was to use an HDMI Splitter, outputting one side to my television and the other to the ShadowCast. This now fixed any gameplay issues as, well, I was bypassing the problem and displaying on my television. This is counterproductive as the whole idea behind the ShadowCast is to ELIMINATE the need for a TV to play on, when in actuality at this time you need a Television to make it playable.
Why it RoX:
- Only $40
- Supports 1080P/60FPS & 4K/30FPS
- USB-C output instead of Micro USB
What Could Be Improved
- High lag and latency
- Other capture cards work identically for less than 1/2 the price
- Genki Arcade App is not ready and will not record
- The one benefit of not needing a TV is actually needed to make work properly
- No Android support
Should You Buy One?
At this time, I have a hard time recommending the Genki ShadowCast to anyone. The main benefit promoted, being able to play and capture on your computer without a Television is simply not ready at this time. The Windows app doesn't record, and the output files for the Chrome App is a WEBM file, something my video players and editors doesn't recognize. In the end there's a lot of promise here but not a lot of execution. For the money, there are other options out there which work similarly or better that you might want to consider before this.
#Genki #ShadowCast #CaptureCard #Kickstarter
The footage used in this review are used under the Fair Use laws, referenced below:
https://www.law.cornell.edu/uscode/text/17/107
Notwithstanding the provisions of sections 106 and 106A, the fair use of a copyrighted work, including such use by reproduction in copies or phonorecords or by any other means specified by that section, for purposes such as criticism, comment, news reporting, teaching (including multiple copies for classroom use), scholarship, or research, is not an infringement of copyright.
The fact that a work is unpublished shall not itself bar a finding of fair use if such finding is made upon consideration of all the above factors.
390
views
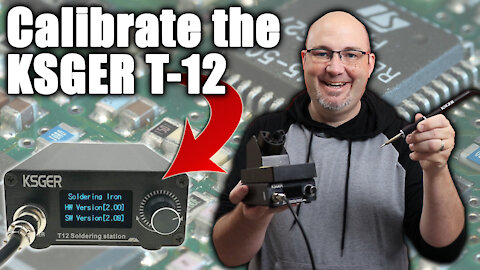
Improve Your Soldering: How to Calibrate The KSGER T-12 Soldering Iron
In this episode, we show you how to calibrate the temperature settings on the KSGER T12 soldering station.
Soldering is a skill that I have been utilizing since I was in high school. Being an avid RC enthusiast, there is so much soldering that used to have to be done in that hobby. From soldering motors in and out of a car, changing battery connectors to ones that are more efficient, replacing brushes on motors before brushless took over, even building six cell battery packs. While I have used a variety of RC and hobby grade soldering iron over the decades, they weren't always the best for fine PCB work such as console mods can sometimes require.
In 2020, I picked up a KSGER T12 soldering iron, based on the recommendations of the amazing Voultar. While it worked ok overall, I was not seeing the results out of my unit that he was out of his. In doing some research, I discovered you could calibrate the temperature settings to ensure that your tip was not too hot or too cold. There is a tool called the FG-100 that is essentially a thermometer to measure the heat directly from the soldering iron tip. At under $20, it is a simple tool to pick up and use, and once you're done it's somewhat set and forget.
In the KSGER station menu, if you push in the knob and rotate to the right, you can select what tip you currently have installed in your soldering iron. You will want to select the tip that you have installed in your handle and calibrate each one individually. I have a JL-O2 and a K tip for my station, so those are the two that I went through to calibrate.
To get to the calibration menu itself, you push the knob in and actually turn to the left. This will give you three different options where you can initiate calibration, you can reset calibration, or you can exit. Upon selecting initiating calibration, the unit will increase its temperature for your first measurement. I cleaned & tinned my tip and placed it upon the pad on the FX-100 and got my first reading. I figured it would be off, but I was floored at exactly how far off it was. My soldering iron tip read considerably colder than what the KSGER thought it was. Once I had my temperature set, I pushed in the knob and it gave me a second temperature to calibrate. Once I had this one done, also considerably off, I pushed in the knob for the 3rd and final temperature reading. Once this third reading was done, I pushed in the knob and was taken back to the main menu. From here, you will notice that There is now an asterix next to the indicator for what tip you have installed in your unit. This indicates that the tip has been calibrated.
In addition to picking up the FX-100, I also opted to pick up the aluminum handle for the T-12 as well. Compared to the included plastic one, it's easier to change tips, it feels better in the hands, and is overall a better put together design. That being said, even after calibration with that handle, I ran into multiple issues where I would get an error reading flashed on screen on my display. I've tried to find several fixes for this, but have not found anything that works. I bought this through Banggood.com, and I've reached out to them seeking a replacement.
Soldering is a skill that is worthwhile to pick up, and is fairly easy to get comfortable with. Having a soldering iron that does not heat up to the proper temperatures can make your job frustrating and difficult. Since calibrating my tips, I have found that my iron does heat up more consistently, I am getting better flow with my solder, and overall my results have improved. This is something that, for under $20, it's something you should definitely consider picking up if you're soldering iron allows you to calibrate the temperatures.
Purchase the FG-100 by visiting https://amzn.to/3kOMlx0
Purchase the Aluminum Handle by visiting https://usa.banggood.com/KSGER-T12-Aluminum-Alloy-FX9501-Soldering-Handle-STM32-OLED-Soldering-Iron-Station-Welding-Tips-p-1362088.html?cur_warehouse=USA
Join this channel to get access to perks:
https://www.youtube.com/channel/UCznAOWQLsiCAMNRq9fzQJpw/join
Follow Us on Social Media!
Instagram - @RoXolidProductionsGK
Twitter - @RoXolidStudios
Facebook - https://www.facebook.com/RoXolidProductions/
Get early access to our videos and support RoXolid Productions for as low as a dollar a month through our Patreon page, https://www.patreon.com/RoXolid
Looking for some RoXolid Merch? Check out our T-Spring store for shirts and swag at https://teespring.com/roxolid-productions-official-s
Would you like to have your products featured on RoXolid Productions? Do you have Questions? Comments? Email us at RoXolidMail@Gmail.com!!
418
views
Ranking My 3 Favorite Star Trek Shows For Star Trek Day
Happy Star Trek Day! September the 8th marks the anniversary when Star Trek the original series debuted. In recent years there have been celebrations to mark the occasion. I recently talked about my favorite and least favorite Starfleet ships so I figured in this episode we would discuss what my three favorite Star Trek shows are.
Number three:
Star Trek Enterprise
Man, this show seemed to be cursed from the start but I had such an amazing cast. Scott Bakula is the first ever captain of the Enterprise was absolutely amazing. I got the sense watching him that he truly was an explorer, but he was also a badass too. The rest of the cast all were terrific as well, Trip Tucker is one of the best engineers in all of Star Trek history. The Xindi arc definitely raises Enterprise in my rankings and I truly wish we could have gotten a full seven seasons out of it.
Number two:
Star Trek: The Next generation
I have never been a fan of Star Trek The originals series television shows, however I have always enjoyed the movies. That being said, when Star Trek The Next Generation premiered that truly became my Star Trek. I loved the fact that the ship could separate, it seemed to be better written and acted than the original series, and we got so many amazing characters introduced here. From Q, the Borg, the Marquis, The Cardasians, these all started on the Next Generation.
Number one:
Deep Space Nine
I have been extremely vocal with my love of Deep Space Nine, and I truly believe it is some of the best sci-fi, not just Star Trek, ever written. There was something about this show from the very beginning that, even though my initial reaction was that I didn't like it, I could not not watch. The older I've got the more I appreciate the nuance that has gone into DS9, from the father-son relationship between Ben and Jake, the pain of losing a spouse, and much more, Deep Space Nine is simply phenomenal.
What is your favorite Star Trek series? Let me know in the comment section, I would love to hear your opinions.
#StarTrekDay #NextGeneration #DS9
610
views
5
comments

Health Update - I have Bells Palsy - What It Is & My Recovery Plans
In this episode, we share some recent health concerns with you, my diagnosis, and what the recovery path looks like after discovering I have Bells Palsy - What It Is & My Recovery Plans.
Towards the end of July 2021, I was working in my office when I noticed some odd things happening to my face. To be honest, me and weird face things go hand in hand, but this was weird even for me. I noticed my left eye drying out terribly, and when I went to crinkle my face it wasn't responding on the left side. When I got home I asked my wife to check if something was in my eye, and there was. She then asked me to smile. And I couldn't. Houston, we have a problem.
It was early enough in the evening where I was able to go to the Convenient Care right up the road from me. When I checked in at the desk, they put me at the highest level of triage, as there were concerns of a possible stroke. I went into the office, and performed all the stroke tests. Push, pull for arms and legs, finger squeeze, hop on one leg, it was like a field sobriety test! I was shocked they didn't ask me to do the curly shuffle!
The staff at urgent care wanted me to go to the Emergency Room, but eventually we agreed that making an appointment to see my regular physician in the morning would be sufficient. When I went to check in, the next morning, they had inadvertently double booked the Doctor, so I needed to come back later in the afternoon. I left and went to my office for a bit, and brought my co-workers up to speed.
Later in the day, when I finally got into the doctor, he confirmed that it was not a stroke, nor a seizure, but definitely Bell's Palsy.
What is Bell's Palsy?
Bell's Palsy is a facial paralysis or facial palsy of the nerves on one side of the face. Bells Palsy Symptoms can include the loss of facial control, the inability so fully smile or frown, blinking is affected, and in some instances, facial drooping can occur.
Is it Life Threatening?
It is not. It's annoying as hell, but not life threatening
Can You Recover?
There are 3 recovery potentials. The first is a full recovery within 2-6 weeks. The second is full recovery within 9-12 months. Beyond 12-months, recovery is unlikely. My Bell's Palsy Recovery Journey looks to be split between medication and potentially physical therapy.
What Causes It?
Per the Mayo Clinic:
The exact cause is unknown. It's believed to be the result of swelling and inflammation of the nerve that controls the muscles on one side of your face. Or it might be a reaction that occurs after a viral infection.
Side note, a certain recent vaccination has also been linked to triggering Bell's Palsy
Current Status and Recovery
Currently I am on a couple medications to try to address the situation, and I have follow up tests and appointment to rate my condition. I'm not going away, I'm not shutting the channel down. I may have an eyepatch on in some episodes if my left eye is really bugging me. I haven't lost motor control or my faculties, and beyond being irritated at the situation, I'm doing ok.
THANK YOU
Since I posted about this on Twitter, the outpouring of support has been tremendous. Thank you all for your messages, kindness, and support.
#BellsPalsy #FacialParalysis #FacialNerves #BellsPalsyRecovery #BellsPalsyTreatment
The footage used in this review are used under the Fair Use laws, referenced below:
https://www.law.cornell.edu/uscode/text/17/107
Notwithstanding the provisions of sections 106 and 106A, the fair use of a copyrighted work, including such use by reproduction in copies or phonorecords or by any other means specified by that section, for purposes such as criticism, comment, news reporting, teaching (including multiple copies for classroom use), scholarship, or research, is not an infringement of copyright. In determining whether the use made of a work in any particular case is a fair use the factors to be considered shall include—
(1) the purpose and character of the use, including whether such use is of a commercial nature or is for nonprofit educational purposes;
(2) the nature of the copyrighted work;
(3) the amount and substantiality of the portion used in relation to the copyrighted work as a whole; and
(4) the effect of the use upon the potential market for or value of the copyrighted work.
The fact that a work is unpublished shall not itself bar a finding of fair use if such finding is made upon consideration of all the above factors.
(Pub. L. 94–553, title I, § 101, Oct. 19, 1976, 90 Stat. 2546; Pub. L. 101–650, title VI, § 607, Dec. 1, 1990, 104 Stat. 5132; Pub. L. 102–492, Oct. 24, 1992, 106 Stat. 3145.)
354
views
7
comments

Should You Buy the RetroTINK 5X Vertical Stand from RetroFrog.net
In this episode, we unbox and test out the vertical stand designed for the RetroTink 5x from Todd Gill at RetroFrog.net.
Chapters:
0:00 - Introduction
1:30 - Unboxing
2:36 - Test Fitting
3:34 - SCART Cable Management
5:30 - Installing the Feet
6:29 - Final Thoughts
Ok, I know we have posted a lot of content around the RetroTink 5x, and for many reasons. We've focused on the hardware, and we've focused on how games look through it. One of the things I haven't talked about much is how I have the RetroTink 5x hooked up or stored in my setup. See, I basically placed my RetroTink 5x in my cabinet where I had my RetroTink 2x, which was ok, but not idea. When I saw the tweet go out from Todd Gill of RetroFrog that he was designing a vertical stand for the RetroTink 5x, I knew I needed one. As soon as it was available I placed an order.
Todd has created many products for the gaming community for some time. Focusing on 3D printed designs, he's created 3D printed items for the Gamecube, MiSTer, OSSC, and other retro items. As such, the Vertical Stand for the RetroTink 5x has a very finished feel to it. The Vertical Stand itself has a channel for the RetroTink to sit in, along with a storage area for the remote control as well. On the side of the stand, there is a molded spot for a hook and loop strap to hold the SCART cable securely. The underside of the stand is completely smooth, although Todd does provide 4 adheasive feet to help prevents sliding around.
The RetroTink 5x just sits into the base itself rather nicely. The base is broad enough that tipping over isn't an issue. When mounted into the base, it provides a much more compact and condensed footprint compared to when it is laying on a shelf vertically. I also prefer this orientation with the SCART connector and cable as it addresses my major complaint about the RetroTink 5x, in that the SCART cable exits towards the front and not towards the rear of the device. While it still exits in this direction, the integrated hold-down is much more elegant in its design than just letting the cable flop around where-ever.
Why it RoX:
- Only $12
- SCART Cable Management
- Integrated remote stand
- Incredibly stable
- Reduces overall footprint
What could be improved?
- More color options
- Shorter hook and loop strap
- Have the RetroTink 5x snap into place for a secure connection
Should You Buy One?
This is a super-easy recommendation to make. For the money, this is possibly the best investment you could make regarding your RetroTink 5X. Sure, I admit that right now it is still hard to get your hands on a RetroTink 5x, but more are on the way and production won't be limited. That being said, this is an amazingly simple yet functional design, and I am glad to see Todd step up to the plate with a great solution to an issue I didn't even realize I wanted fixed until I saw his design! For as inexpensive as it is, the RetroFrog vertical stand for the RetroTink 5x is the closest to a must-have accessory I've come across in some time.
Join this channel to get access to perks:
https://www.youtube.com/channel/UCznAOWQLsiCAMNRq9fzQJpw/join
Order the Vertical Stand for the RetroTink 5x from RetroFrog.net by visiting https://retrofrog.net/products/retrotink-5x-pro-vertical-stand?variant=39827407175863
Follow Us on Social Media!
Instagram - @RoXolidProductionsGK
Twitter - @RoXolidStudios
Facebook - https://www.facebook.com/RoXolidProductions/
Get early access to our videos and support RoXolid Productions for as low as a dollar a month through our Patreon page, https://www.patreon.com/RoXolid
Looking for some RoXolid Merch? Check out our T-Spring store for shirts and swag at https://teespring.com/roxolid-productions-official-s
Would you like to have your products featured on RoXolid Productions? Do you have Questions? Comments? Email us at RoXolidMail@Gmail.com!!
The footage used in this review are used under the Fair Use laws, referenced below:
https://www.law.cornell.edu/uscode/text/17/107
Notwithstanding the provisions of sections 106 and 106A, the fair use of a copyrighted work, including such use by reproduction in copies or phonorecords or by any other means specified by that section, for purposes such as criticism, comment, news reporting, teaching (including multiple copies for classroom use), scholarship, or research, is not an infringement of copyright. In determining whether the use made of a work in any particular case is a fair use the factors to be considered shall include—
(1) the purpose and character of the use, including whether such use is of a commercial nature or is for nonprofit educational purposes;
(2) the nature of the copyrighted work;
(3) the amount and substantiality of the portion used in relation to the copyrighted work as a whole; and
(4) the effect of the use upon the potential market for or value of the copyrighted work.
The fact that a work is unpublished shall not itself bar a finding of fair use if such finding is made upon consideration of all the above factors.
(Pub. L. 94–553, title I, § 101, Oct. 19, 1976, 90 Stat. 2546; Pub. L. 101–650, title VI, § 607, Dec. 1, 1990, 104 Stat. 5132; Pub. L. 102–492, Oct. 24, 1992, 106 Stat. 3145.)
307
views
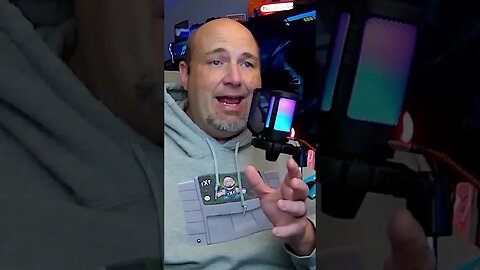
Eon Gaming XBHD Plug-N-Play HDMI & LAN Solution for Original XBOX
What do you do if you want to connect your original Xbox to your TV via HDMI? And what if you wanted to have a LAN party with original Xbox hardware? Well, towards the end of May 2023, the team over at Eon Gaming announced a new addition to their product lineup. They are calling it the XBHD, and it has a number of interesting features, but it raises a lot of questions too. Let's take a closer look.
One of the challenges with the original Xbox is the fact that you can't tap right into it and get an HDMI output. You have your multi connector which can output composite, component, and S video. Well, it appears that Eon Gaming is tapping into this port and providing you with an HDMI output. According to their own specs, it will output anywhere from 480i, 480p, 720p, and 1080i resolutions. This tells me that there is no line multiplication going on here. Unlike something like a RetroTink 2x or RetroTink5x, what you see is kind of what you get.
It seems like, connecting to your television, The XBHD is more an adapter of convenience than any actual video improvement. Now, this does feature twin HDMI outputs, so you can connect one Xbox to two different TVs to be able to have multiplayer fighting games for example, and each player gets their own television. I don't see the appeal to that, but at the same time, I'm not the biggest Xbox fan either.
Another interesting feature of the XBHD is the integrated LAN adapter and ethernet ports. It appears to feature three different LAN connection ports so you can go ahead and get your LAN party started. Interesting in theory, but in 2023 are LAN parties with original Xbox hardware that common? I don't know the answer to that question. I would think that if you would want to have the equivalent of an Xbox LAN party you would use either an Xbox 360, Xbox One or Xbox Series S or X and connect over the internet. A LAN party requires you to be in the same room, and is anyone really lugging around an original Xbox anymore? I don't know.
One interesting addition is an integrated 3.5mm MiniTOSLINK connector for audio. This is a very generational appropriate connector, but audio and video are both handled by HDMI so I don't know that there's a specific need for this.
In the end, for $190 I am not sure what market needs this is serving. I applaud Eon Gaming for doing something different, and I'm glad to see more love going to more retro hardware. I just don't know where this fits into the landscape of things. When you have the Xbox2HDMI adapter from Shepherd Electronics and things like these Xedusa from the Behar Bros that will get you to an HDMI connector for a fraction of the cost, it prices itself out of the market. I don't think going to HDMI is going to be the big winning feature here, I honestly think this is something that people who are going to set up and host land parties will get the most benefit from.
Let me know what you think of this in the comments, we are working on acquiring a sample for review. They are open for pre-order right now through the Castlemania Games website.
#Xbox #EonGaming #XBHD #HDMIXbox #GCHD #HDMIXBox #Xedusa #Xbox2HDMI #FYP #fypシ
370
views
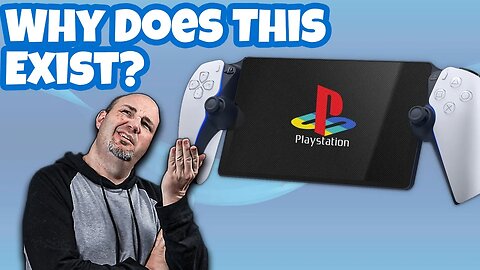
We Need To Discuss Who The PlayStation Portal is For!
In the first half of 2023, Sony announced Project Q. Designed to be a handheld tablet to play PlayStation 5 games on, we were definitely left with more questions than answers. Towards the end of August 2023, we got several answers including the official name and pricing information. Let's take a closer look at whether the PlayStation Portal is a Killer Accessory for the PS5 or whether it'll be dead on arrival. We Need To Discuss Who The PlayStation Portal is For because I honestly do not understand this thing.
Name:
The official name of the device is the PlayStation Portal, and I have to admit when I saw this trending I thought there was a remake of the Portal games coming to the PlayStation. I think it's very strange that yet again Sony will have something that can be called the PSP, PlayStation Portable versus PlayStation Portal. I don't love the name but I don't entirely hate it either.
Display:
This was information already provided but the PlayStation portal uses an 8-in LCD display with a 1080p 60 Hz refresh rate. Quite honestly, the display is slightly better than what Nintendo used for the Switch OLED as that was only 720P, but at this size the resolution difference is minimal.
Usage:
The PlayStation portal is designed to be used while connected to your PlayStation 5 via Wi-Fi remote play. It can play any disc game remotely along with any digital games that you have purchased. What it cannot do is play cloud-based games through PlayStation Plus, which is a definite minus. I'm sure it has to do with the throughput of the connection, streaming games down on top of streaming them to a handheld device. We do know you can be tethered to a cell phone or other Wi-Fi hotspot to be able to play remotely.
Bluetooth audio:
Sony continues its infuriating trend of equipping their devices with Bluetooth yet not making them Bluetooth compatible. You cannot use just any old set of Bluetooth headphones with the PlayStation portal, you have to use their PlayStation headphones. This is infuriating and when people talk about anti-consumer moves this is one of the most egregious offenses. Even Nintendo allows you to use any Bluetooth earphone with the switch.
Pricing:
There are a lot of people speculating about what the price could be, some are thinking it could be north of $300, something it would be around $150. Much like the name, the pricing is okay but not great at $199 USD.
What we don't know:
There are still a lot of questions that we have about the PlayStation Portal. Are the analog sticks Hall effect sensors or are they standard potentiometers? Are they user-replaceable? What's the battery size and what is its expected play time? And finally, what's the exact release date? We still don't know when it is coming out.
At $200 I'm somewhat intrigued by the PlayStation portal, but I'm not motivated to buy one. It's an interesting idea but has far too many limitations for me to really have much interest in it. Let me know what your thoughts are in the comments.
#Playstation5 #playstationportal #PS5 #PSP #PlaystationHandheld #Backbone #NintendoSwitch
496
views
2
comments

A New Wavebird for '22! Retro Fighters Announces BladeGC for Gamecube
In this episode, we share the news from Retro Fighters as they are launching an all-new wireless controller for the Nintendo Gamecube in the BladeGC!
The Nintendo Gamecube controller is still one of the most popular controllers of all time, even now some 20-years later. The Wavebird took the Gamecube controller to the next level by cutting the cord, and it is still sought after, however they can be crazy expensive. The Wavevbird also sacrifices rumble for wireless compatibility. The folks at Retro Fighters have a history of bringing great, updated controllers to retro systems, and the latest system they're focusing on is the Nintendo Gamecube with the new BladeGC wireless controller.
While the focus is on the Gamecube, Retro Fighters has built in PC and Switch compatibility into the the BladeGC. Additionally, Retro Fighters have gone to town building in a ton of awesome features, and improvements over the Wavebird, into the Blade GC. First of all, the BladeGC's ergonomics are completely updated over the original Wavebird, giving it a comfortable and updated look and feel. The triggers and shoulder buttons are pressure sensitive, giving you enhanced control in games that need it. The position of the left analog stick and D-Pad have been swapped, and the D-Pad has been optimized to be accurate and responsive. The analog sticks look to be placed similarly to a Sony controller's analog sticks.
To communicate with the system, the BladeGC utilizes 2.4GHz wireless technology. It appears that 2 separate dongles will be included, one for the Gamecube port, and one to plug into a USB port. Each BladeGC features a 4-LED player indicator on them, making it easy to identify player and controller at just a glance. Other features include a Turbo Button, Home Button for use with the Switch or Emulators, 10-hour battery and a 30-foot range.
When playing on the Gamecube itself, the BladeGC will be compatible with all the games that the system can play. In addition to the Gamecube's awesome library, that also means you can play the full library of Game Boy, Game Boy Color, and Game Boy Advance games via the Game Boy Player attachment. I see this as a big advantage of the BladeGC, as the D-Pad's position promises to make wireless Game Boy Game playing even more comfortable.
When playing with an OEM Wavebird, one of the features I miss most is the rumble function. Retro Fighters is addressing this with the BladeGC, as we have confirmed with them that this new controller does indeed feature rumble. That means you'll have full immersion in your games, full support for all the controller features, while enjoying a completely wireless experience.
The BladeGC is a limited edition controller, with pre-orders only open for 20-days starting on September 14th, 2021. The release date is scheduled for April 25th, 2022, but things could shift depending on world-wide shipping issues. I, for one, and very excited about this and cannot wait to try these out. I'd love to see a more, non-limited release follow these up with even more color options, but we'll have to see how well these are received by the community before getting our hopes up. I am super excited to see this announcement and cannot wait to get my hands on them.
Is it April yet?
#RetroFighters #BladeGC #WaveBird #GameCube #Nintendo #Switch
The footage used in this review are used under the Fair Use laws, referenced below:
https://www.law.cornell.edu/uscode/text/17/107
Notwithstanding the provisions of sections 106 and 106A, the fair use of a copyrighted work, including such use by reproduction in copies or phonorecords or by any other means specified by that section, for purposes such as criticism, comment, news reporting, teaching (including multiple copies for classroom use), scholarship, or research, is not an infringement of copyright. In determining whether the use made of a work in any particular case is a fair use the factors to be considered shall include—
(1) the purpose and character of the use, including whether such use is of a commercial nature or is for nonprofit educational purposes;
(2) the nature of the copyrighted work;
(3) the amount and substantiality of the portion used in relation to the copyrighted work as a whole; and
(4) the effect of the use upon the potential market for or value of the copyrighted work.
The fact that a work is unpublished shall not itself bar a finding of fair use if such finding is made upon consideration of all the above factors.
(Pub. L. 94–553, title I, § 101, Oct. 19, 1976, 90 Stat. 2546; Pub. L. 101–650, title VI, § 607, Dec. 1, 1990, 104 Stat. 5132; Pub. L. 102–492, Oct. 24, 1992, 106 Stat. 3145.)
278
views
1
comment

Atari 2600 For the 21st Century? Hyperkin Retron 77 Review
In this video, we test out the Hyperkin RetroN 77 Atari 2600 HDMI-equipped clone system.
During a livestream in the summer of 2020, one of our supporters, John Early, asked if we could test out the Hyperkin RetroN 77, a clone system designed to play the Atari 2600 catalog of games in 720P HD. I finally pulled the trigger and bought a unit.
While I did have a 2600 in the 80's, I've never had the passion or love for it as I have had for Nintendo or Sega system. As such, I've not delved into collecting for the system. The 2600's blocky graphics, poor sound, and generally crappy games are some of the reasons why I have never collected for the system. As such, I consider myself part of the audience Hyperkin is targeting with a system such as this; familiar with the console and library but not a purist for it.
After I finished filming my unboxing video, a weird thing happened. I couldn't get any games to read in the system. Like none. When you don't have a cartridge installed, the system should boot to the system menu, and it wasn't even doing that. Perplexed I tried updating the firmware, flashing custom firmware, nothing I tried worked. I exchanged the unit where I bought it at Live Action Games, and the replacement unit failed out of the box. This time I contacted Hyperkin directly for a replacement. I gave them all the info with what was going on, a copy of my receipt, and they sent me an RMA form to send the unit back. I was very disappointed that I had to pay nearly $15 on return shipping. As someone involved in customer service, this is something I have pushed against in my own fields. The customer has already been let down with the product failure, don't make them pay more for a device that failed, especially an out of the box failure like I encountered.
Nearly 6-weeks later I finally received my replacement unit. And, well, this also failed right out of the box. For those keeping score, this is 3 failures, 2 of which were right from the box. I tried 3 different TVs, 4 power supplies, going through and bypassing my capture card, everything I could think of and I don't get any display or audio. Finally, I downloaded the stock firmware to a different SD card, and amazingly, the system now worked. Firmware updates should provide new features or stability, they shouldn't be there for out-of-the-box core functionality.
With these issues finally out of the way, I got to try some gameplay. And, well, Atari 2600 games are just not great. I bought 10-games for the system for this review, 3 of which I could never get working, but the other 7 worked after cleaning. With the stock Trooper controller, I did feel that gameplay was ok, but in games like Pac Man, quick inputs were often not read or registered. I never had these issues with the Ranger controller, which worked much better across all games.
Speaking of the Ranger controller, this is a decent add-on for the system. The integrated paddle is an interesting option. I dig the 10-foot long controller cable, and for joystick games, it felt much more precise than the Trooper controller. The paddle option was decent, but I felt like I had to rotate it excessively to get the full range of motion. Less rotation for full travel would be nice, as would be a center or neutral position click or notch, similar to what RC transmitters have.
Why It RoX:
- Allows Atari 2600 Games to play in 720P
- 4:3/16:9 button
- Trooper Controller has a good feel
- Large community for custom firmware
- Can run ROMs from SD Card
What could be improved:
- 3 Out of the Box failures, QC is definitely lacking
- Aspect ratio must be set each time the system is power cycled
- Doesn't play cartridge, instead ROM is dumped to local memory
- Trooper controller didn't always feel precise
- Firmware update required to get 3rd unit to play
Should you buy one?
If the first Retron 77 I bought worked like the 3rd one after the firmware update from the box, it would have been easy to recommend. I cannot ignore the 3 system failures from the box, even if the 3rd unit only needed a firmware update. If these systems are QC'ed before being boxed or shipped, these should have been caught. I also have an issue with a manufacturer charging return shipping on a from-the-box failure. You've already disappointed a customer with the failure, don't make them have to pay more to get what they should have gotten from the box with what they've already paid. The Homebrew community has really embraced the Retron 77, and that's a good thing. Perhaps the reason for the popularity is the lack of competition as Hyperkin has this space pretty much to themselves. There's definitely room for competitors to enter the market, and push everyone to get better.
#Atari2600 #Hyperkin #Retron77 #AtariHDMI #AtariBox #AtariVCS
The footage used in this review are used under the Fair Use laws, referenced below:
https://www.law.cornell.edu/uscode/text/17/107
282
views
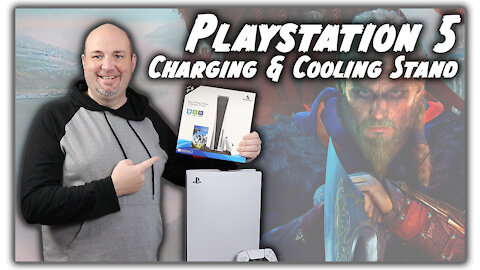
NexiGo Upgraded Vertical Stand with Cooling Fan & Game Storage For PlayStation 5 & PS5 Digital
In this episode, we unbox and test out the Nexigo Upgraded Vertical Stand with Cooling Fan & Game Storage For PlayStation 5 & PS5 Digital
While the Sony PlayStation 5 is still incredibly hard to get a hold of, I was actually able to get my hands on one on launch day. In addition to the system, I also purchased one of Sony's charging stations, as I don't like to charge my controllers just via USB cable. While functional, I did not like the way that the controller charger worked, I didn't like how the controller sat on it and I could never always tell whether or not my controllers are being charged. Thankfully, the folks from Nexigo have a promising solution that not only looks to make it easier for me to charge my controllers, but store my games and better support my PlayStation 5 vertically.
The stand itself is actually compatible with both the PlayStation 5 and PlayStation 5 Digital Edition. It also has integrated fans that work with the fans in the system, pushing air through in the proper direction. It also has storage locations for 11 game cases, and those slots also fit PlayStation 4 games.
To power the charging dock itself, Nexigo includes two Y-Cables to connect from your system to the vertical stand. The reason for a Y-Cable? This provides more current to each controller to charge faster, at least in theory. If you are using accessories such as USB wireless headphones, there is a USB 2.0 Port integrated into the stand itself. However, if you are like me and you have a USB 3.0 hard drive connected, there is no way to pass that signal through the stand and into the system what I found was that I could use a single USB a to USB cable to provide Power for one controller, the fans, and use the open port on the back of my system then for my hard drive. If I were charging two controllers at the same time, I would have to use the Y-Cable and then connect my hard drive to the front of the system.
I really like how they designed the dongles to plug into the controller and then interface with the base to charge. It's a simple design, they won't fall out, and it ensures that you have a good connection each and every time you place your controller on the charging stand. that's one of my biggest complaints about the Sony one, I never know that my controller is actually charging. this does not have any lights or anything like that to indicate when a controller is charging, however I can see the LEDs around the touchpad well enough to know.
One of the coolest things, pun very much intended, are the two fans that help keep your PlayStation 5 running cool. The nice thing about their design is the fact that you can adjust the fan speed in three different steps, and regardless of whether you have them at their lowest setting or their highest setting they are extremely quiet. The air flow system is also designed to work in conjunction with the onboard Cooling of the system. The downward exhaust cooling system is the same as the cooling system built into the PlayStation 5, compared to other options which force air up into the system against what the system is naturally doing.
You can store 11 different game cases in the side of the stand. The curious thing about this is, at least for those who own the All Digital edition, this is completely worthless. I would like to see the disc organizer as a separate attachment, that would help those who have the All Digital version save even more space.
Why it RoX:
- Under $30
- Works with standard PlayStation 5 and digital PlayStation 5
- Integrated storage for 11 games
- Integrated charging for two controllers
- Correct airflow direction to work with the onboard fans in your PS5
- 3 fan speeds
- Quiet fans even at full RPM
- Stable
What could be improved?
- Unclear as to why they included two white cables and two screws that are identical for either system
- Requiring the use of both USB ports on the rear makes it challenging to connect an external hard drive
- Integrated game storage is worthless for digital only PS5 owners
- Not many people know about the brand
Should You Buy One?
Let's get the running joke out of the way, I know it's hard to get your hands on a PlayStation 5 right now. That will change in the near future I believe. That being said, if you have a PlayStation 5 and you want to keep everything more organized, this is actually a really nice way to do it. I like the onboard charger for the controllers, better than their own standalone charger to be honest. The integrated disc storage is nice, although it doesn't quite work for me in my situation, but that's nothing major. I've never had a major issue with cooling on my PlayStation 5, but it's good to know that if I ever do decide to utilize the onboard fans they are quiet and they work with the integrated cooling of the system instead of against it. For 30 bucks, this is actually really a nice stand and something I would consider if you are an owner of a PlayStation 5.
#PlayStation5 #CoolingStand #DualShock
340
views
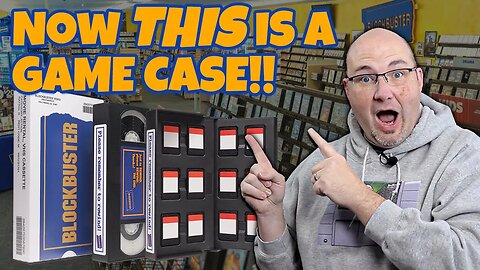
You Can Store Your Switch Games in a BlockBuster VHS Tape Case?!?
If you are of an older generation such as myself, the words "Make it a Blockbuster Night" have a special meaning. It meant you were going to get a movie or game to spend time with friends or family and have a great time. I know I spent many a Friday or Saturday in our local Blockbuster checking out the latest NES, SNES, Genesis, or other video games.
Retro Fighters is tapping into that nostalgia and introducing their Retro Limited Series of products. Their first definitely is something very cool, very retro, and speaks to my generation. It is the Retro Limited Series of Blockbuster VHS Cassette Tapes, but they're scaled down and designed to store and transport your Nintendo Switch cartridges. Let's take a look:
From Retro Fighters:
The Retro Limited Series offers nostalgia-based retro products from decades past that have a very LIMITED production. This new line of Retro Fighters accessories and collectibles is specifically designed for the retro enthusiast. Once these are sold out, they will be gone FOREVER!
Retro Limited Series 1:
Blockbuster VHS Mini Switch Game Case
Transport yourself back to the 80s & 90s with the Blockbuster VHS Switch game case! This unique and nostalgic accessory offers a stylish and practical way to store your Switch games and memory cards. Embrace the nostalgia and make every day a Blockbuster Night!
Key Features:
- Officially licensed Blockbuster® product
- Hold up to 12 Switch games with additional room for 4 memory cards
- Miniaturized Blockbuster rental case and cassette
- Feels and looks like the real thing
- Magnetic safe closure to keep games from falling out
- Easily pop games in and out
- Compact and convenient design
- Soft silicone slots
- Perfect for display or travel
Initial Thoughts:
When Retro Fighters first sent me the images and video for this, I was blown away. I already have and love their Retro 85 case, designed to look like an NES Cartridge which stored smaller NES Cartridges and then in turn held Nintendo Switch Game Cartridges. This has that same sort of appeal but turns it on its ear slightly by replicating the look and feel of a VHS tape, but slightly smaller. I love the fact that they got all the scale details right, from the tape, the spindles the drive motors key into, the spine with "Movie Rental, VHS Cassette", the labels on the tape itself, it all is just, man, chef's kiss awesome.
At only $19.99, the Blockbuster Mini VHS Cassette Switch Game Case looks to be a must-have for anyone old enough to remember going to Blockbuster. The limited-release nature of this makes this something truly special because once they're gone, they're gone. As I stated, I was probably going to pre-order a couple of these, and I just completed the order, putting my money where my mouth is. I think this is super cool and cannot wait to get my hands on them.
What do you think of the Blockbuster® Mini VHS Cassette Switch Game Case from Retro Fighters? What are some of your most fond memories of going to Blockbuster over the years? Share your stories in the comments!
#BlockbusterVideo #NintendoSwitch #RetroFighters #FYP #fypシ
333
views
2
comments

Video Games! Toys! Transformers! Star Wars! 2023 Utah Retro Game Swap
In this episode, we share our experiences from attending the 2023 Utah Retro Gaming Expo where we We Re-Bought Part Of Our Childhood collection, and something we haven't owned in over 30 years.
While I have attended a number of video game conventions in the Midwest, along with the Southeast Game Exchange, that's pretty much been the extent of my travel for the YouTube channel. That is until September 2023 when I was invited to set up a table and host a panel at the Utah Retro Gaming Expo. Hosted by Minus World Games based in Layton Utah, about 30 miles north of Salt Lake City, this is my first time to a game convention this far west.
Friday was my travel day, and it was interesting because it was also my last day at my old job. I packed up my office, headed home to grab the rest of my stuff, and drove two and a half hours north to Chicago to fly out. This meant that I wouldn't get into Salt Lake City until almost midnight local time, and by the time I got there and got my rental car picked up everybody had either hit the bars or hit the sack for the night.
I brought a number of items with me for my 3D printer store to sell, including my latest prints featuring the Game Boy, Famicom Disk System, GameCube, and Legend of Zelda LED lights. I also brought some of my staples including my Nintendo, Super Nintendo, Sega, Xbox, and Dreamcast lights.
This was the first year they had invited guests to be a part of the show, and in addition to me, my good friend John Riggs was to my right most of the weekend, and Ryan from Archades games was to my left. John had his homebrew games and other items for sale, well Ryan was showing people how to dump the ROMs from their existing cartridges and use emulators to play them through a soft modded Xbox Series S.
I tend to plan out my panels pretty specifically before I go to a convention. I know what I'm going to say. This convention was all a bit different because Ryan and I really didn't have a chance to touch base ahead of time so we just riffed for about an hour. We talked about everything from different controllers, YouTube issues, and just the general gaming community. We both had fun and it was good to spend time with him and kind of get to know each other a little bit better in front of everybody else.
Once the panel was over, I decided to take a little bit of time and walk the floor. My youngest daughter had wanted me to see if I could find her a Princess Daisy or Princess Peach stuffy, and I thought I saw one when I got in first thing in the morning, but when I went back it was gone. I was extremely shocked to see the amount of toys at this show. And classic toys too from Transformers, Star Wars, and Star Trek. We're talking about the original 1980s-era TIE fighter and Millennium Falcon were here. Optimus Prime, Megatron, the Protectobots, Technobots, there was a lot of stuff here. I actually saw two that I had to pick up, the first being a Mail-In exclusive named Power Dasher. I had this as a kid, I remember my excitement getting it, and I love the fact that it's back in my collection. I also picked up a Metroplex that was nowhere near complete, but I plan on 3D printing replacement parts and pieces.
There are a lot of import games at this convention, something I love to see. One vendor actually had quite a few boxed import N64 games and they looked terrific. One in particular caught my eye, however. Mischief Makers is a pretty expensive US game, but he had $40 on it, marked down from $50. I offered him $30, he fired back with $35 and I accepted.
My final pick up of the weekend is completely due to Jay over at @YTSquarePegs. He had recently featured Motocross Madness for the original Game Boy and it reminded me of how much I loved that game as a kid. That was actually the one game I was on the lookout for at the show. I couldn't find a US version, but one table did have a Japanese version, and the only wanted six bucks for it. I offered him five and we sealed the deal.
Once we packed up the show for the night, I headed out to dinner with Daniel Pesina, his brother Carlos, Tim Kitzrow, Paul Niemeyer, John, and a friend of Daniel. We had an amazing server who rolled with the punches all night long, and was just generally fun. I can truly say that while I was friendly with the Mortal Kombat guys, Tim, and Paul in the past after the conversations we had that night I truly consider them friends.
This was a terrific convention and I truly believe it has nowhere to go but up. It has lots of floor space, terrific vendors, and really did offer something for everybody. I am very thankful to Tracy and the crew for having me out, and I would love to attend again next year.
#GameHunting #UtahRetroGameSwap #Transformers #StarWars #Toys #Collectables
423
views
1
comment
1 Of The Best Blind Box Draws We've Ever Gotten | Video Games Monthly
In this episode, we unbox, evaluate, clean, and rate games that we purchased from Video Games Monthly for September of 2023.
What do you do if you don't have video game conventions, swap meets, flea markets, or retro video game stores in your area and you want to collect retro video games? Well, Video Games Monthly is here to deliver a solution right to your doorstep. With Video Games Monthly you can select games from a number of different systems, all the way back to the Intellivision and Atari 2600 forward to the PlayStation 4 and Xbox One. The best thing about it, this is not a rental service, you get to keep the games.
There are four different tiers of service you can sign up for, three games for $34.99 a month, four games for $44.99 a month, five games for $54.99 a month, and 10 games for $74.99 a month. We subscribe to the $ 34.99-a-month plan, and with tax and shipping, it costs us about $45. My goal with each box is to at least break even, so if I'm spending $45 I want to get $45 worth of games. Some months they hit that mark, some months they just miss it, and other months they exceed it.
What we got:
Super Famicom:
Super Donkey Kong (Loose)
Value: $9
Nintendo Entertainment System
Airwolf (Loose)
Value: $8
Wii U
Gianna Sisters: Twisted Dreams Director's Cut (SEALED)
Value: $14
Nintendo Wii
Lego Star Wars III: The Clone Wars (CIB)
Value:$8
Nintendo GameCube
Crash Nitro Kart (Game & Case)
Value: $12
Value for all games:
$51
What do we think:
In terms of the quality of games, this is probably one of the best boxes I've ever gotten from Video Games Monthly. There's something here that I would play from every game. While the dollar value isn't high on the individual games, these are not terrible games. Probably the only thing I would call a stinker would be Airwolf, and even that is a halfway decent game.
One of the issues I have had with Video Games Monthly over the years is the cleanliness of the games, whether that be the pins on cartridges or discs. The Airwolf game looked beautiful, and I was extremely happy with the condition of that. Super Donkey Kong definitely needed some extra TLC with all the gunk and junk that was on the pins. I know they indicate that they do a cursory cleaning of all their games before they ship them out, and quite honestly standard cleaning would not have gotten these pins cleaner than what they were out of the box. Thankfully I was able to use Bright Boy to get off the extra carbon buildup and dirt to prevent that from getting into my system.
The disc-based games were a mixed bag. Obviously, Gianna Sisters is sealed so that disc should not have any issues whatsoever. Both LEGO Star Wars and the Crash Nitro Kart game had signs of disk polishing fluid buildup around the center hole. I really wish they would do a better job of wiping that off the discs. Crash Nitro Kart also had a few leftover smudges and scratches on the face of the disc, which left me concerned about whether or not the game would actually play. Thankfully it did, but that initial concern was still real.
From a value standpoint, I'd rate this month's box a solid B, cleanliness I would put a C, and value I would put at a B-. In recent months they have increased their shipping charges, meaning they need to improve the quality of games included to make sure that people get value for what they're paying for.
What do you think of our Video Games Monthly box this month? Are there any of these games that you've played or that you like or dislike? Let me know in the comment section.
#Nintendo #PlayStation #VideoGamesMonthly #BlindBox #fypシ
376
views
1
comment