

Watch Before You Use Fix-A-Flat
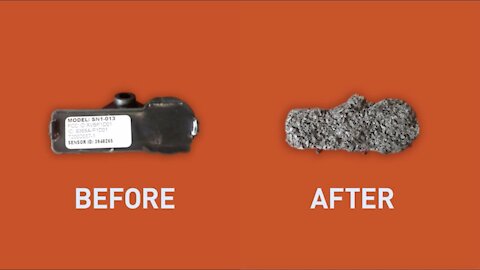
Watch Before You Use Fix-A-Flat. Did you know fixing a flat tire with Fix-A-Flat, Slime or any other tire sealant can cause irreparable damage to your car's tire pressure sensor? Check out the before and after pictures in this video to see what these products can do to your expensive sensor. We're not saying these products don't do the job, they do and can get you out of a jam. But, if you have other options like AAA or another towing club, you may want to save your can of flat tire juice for a real emergency situation.
Now, if you do find yourself in a situation where you have to use a can of flat tire juice, make sure you get to your mechanic and have him rinse that stuff off the wheel and tire pressure sensor as soon as possible!
#MechanicSecrets #Automotive #Auto #Car #Garage #Fix-A-Flat #Slime #Fixaflat #Tire #Tires #FlatTire
87
views
2
comments

Pro Tip: Moving Cars and Trucks and Hockey Pucks
Pro Tip on how to move a car around in the shop without pushing and what do hockey pucks have to do with car repair? Today, it's all about hockey pucks and cars and trucks.
#MechanicSecrets #Automotive #Auto #Car #Garage #CarRepair #AutoShop #AutoRepair #AutomotiveRepair
47
views

Zero Turn Tire Change By Hand
In this week's exciting episode, we're going old school and changing a zero turn mower tire with hand tools. Sure these cute little bite-sized tires look innocent enough, but they can really put up a fight, especially if they sit for a while before being used and take on a weird shape. but fear not, our friendly neighborhood mechanic was not going to let this tiny little tire win this battle. Sit back and enjoy the struggle of man vs. machine on this "simple" tire change on a zero turn mower wheel.
Tools used in this repair:
-2 large flat screwdrivers (not to be used as pry bars ahhaha). I prefer to use the ones with out the warning label on the handle as I don't want to misuse anything.
-10 inch vice grips with a slight modification to the jaws as seen in pic.
-A securely mounted bench vice. (You could also use a steel dowel rod driven into the dirt and another pair of vice grips holding the little rim down through the spindle hole.
-Spray bottle of soapy water. (Ascot tire leak detector is my soapy water solution and can be found here https://rubber-inc.com/ascot-concentrate-air-leak-detector-1-qt-/p4145/).
-Tire valve core remover tool
-Valve stem installer tool.
-Lock on tire valve inflator.
This video was recorded with:
-GoPro Hero 6
-GoPro Hero 8
-Sandisk Extreme Pro SD Cards.
#MechanicSecrets #Automotive #Auto #Car #Garage #CarRepair #AutoShop #AutoRepair #AutomotiveRepair
25
views

The Stihl 090: The World's Most Powerful Chainsaw
Just firing up the old Stihl 090 for a quick cut. Why would I use the 090 for one single cut? Why not? It's a fun and very powerful saw to run. Sometimes after a tough day at the shop, the sound and feel of the lower rpm and high torque is just the ticket. And let's face it, a 30 lb saw in your hands makes you feel like a real man.
The Stihl 090 is a legendary chainsaw heralded as “the world’s most powerful chainsaw.” Mine was made in Germany around 1976. It’s a Stihl 090av (anti vib) 137cc and is running on 100LL (aviation 100 octane low lead fuel) with Stihl ultra oil at a 40 to 1 mix. It has 404 chain .063 full chisel round file. (Stihl 46RS) on a 36 inch Duromatic bar (large mount.)
Note: The use of this type of saw should be used with great caution due to the lack of safety features and the fact that it produces extreme quantities of testosterone and endorphins. You should always wear proper safety gear whenever using your saw.
Although demonstrated on a Stihl brand saw fans of Echo, Husqvarna, Craftsman, Worx, Rigid, Black & Decker, Poulan, Remington, Ryobi, Makita, Oregon and Homelite chainsaws can also appreciate the sweet, sweet sound of the world’s most powerful chainsaw.
#Stihl #StihlChainsaw #Chainsaw
28
views

Fast Wheel Lock Removal Without Keys
Lost wheel lock key? Not a good situation, right? Well, if you have no hope of finding the key to your wheel locks, don't panic. You, or your mechanic, can still get your wheels off. And, it can be done easily and quickly with the right amount of tools, force, knowledge and practice.
For this particular wheel lock removal we used the Blue Point LSR 2500 Plus Lug and Lock Socket Set with the following sockets:
-Blue Point LSR 2502 7/8"
-Blue Point TSR-600
-Blue Point LSR 2501 19mm/3/4"
-Blue Point LSR 2503 17mm
We set the Blue Point twist sockets with a Snap On hammer-operated impact driver and a Craftsman 32 oz. ball-peen hammer. Then we drive it on further with 10 pound short-handle sledge hammer. Warning: Remove the impact driver before hitting with a sledge. And don't use a sledge at all when using the Matco kit. The only thing used from the Matco kit in this video is the punch from the Matco WCK402 Wheel Lock Removal Kit, to knock the lugs out of the sockets once they were removed. Please be aware that the Blue Point sockets will dig into, and damage, the wheel locks. As you'll see at the end of the video, the Blue Point sockets, with their left hand twist, really dig into the metal of the lock and pretty much ruin it. If we don't want to damage to the lugs/locks, we use the Matco sockets only.
Note: Eye protection and ear protection is a MUST for this project. Sockets and hammers can shatter! And never strike two hardened surfaces together. And if you must, please exercise extreme caution.
We really hope this Mechanic Secret gives you an idea of the process of wheel lock removal without key. This is obviously not the only method to remove a lock with no key, this is just our method. There are plenty of other very effective techniques to get wheel locks off. And, of course, there's a million other tools designed for this job by Snap, Blue Point, Matco, Lisle tools, Turbo Sockets and others.
***Please DO NOT use this information for illegal purposes. This is purely intended to HELP you if you happen to loose your wheel lock key.***
#MechanicSecrets #Automotive #Auto #Car #Garage #CarRepair #AutoShop #AutoRepair #AutomotiveRepair
50
views

Building Our Synology NAS - Synology DS918+ RAM, SSD and HD Install
Building Our Synology NAS - Synology DS918+ RAM, SSD and HD Install
36
views
Quick Fix: 2008 Lexus RX400H Oil Life Reset
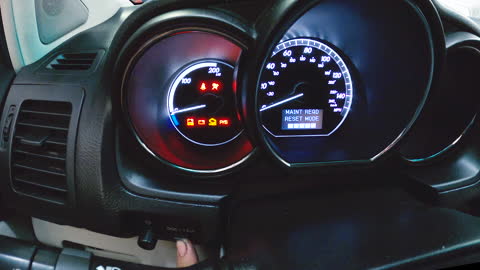
Welcome to another installment of the "Quick Fix" series. This is a super-fast, how to demonstration of the procedure to reset the oil life setting on a 2008 Lexus RX400h. Yes, you too can reset the oil light in your RX400h in under 1 minute. Just watch! Thanks for watching and please consider subscribing for more Mechanic Secrets in the future.
8
views

Quick Fix: 2017 Ford Explorer Oil Reset In Under A Minute
Part of our ongoing "Quick Fix" series, this simple how to demonstration is designed to quickly show you the procedure to reset the oil life setting on a 2017 Ford Explorer. Yes, you too can reset the oil light in your Ford Explorer in under 1 minute. Just watch! Please subscribe for more Mechanics Secrets.
14
views
Quick Fix: 2012 Acura MDX Rear Wiper Blade Replacement
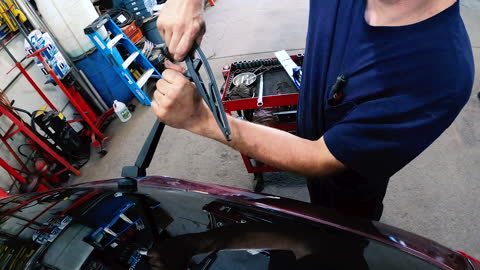
Welcome to another Mechanic Secrets "Quick Fix." This rear wiper replacement was done on an Acura MDX 3.7 and should be very similar on most MDX models. We hope you find this helpful in assisting you to replace your Acura MDX rear wiper blade.
13
views
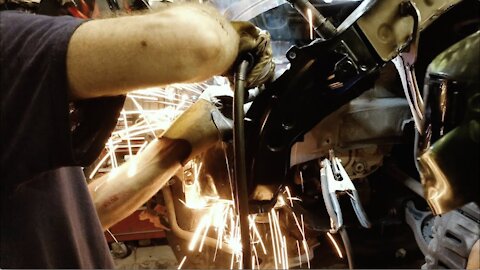
Welding Porn Episode 3 - Santa's Workshop
Here we are building a go kart for Santa’s workshop because they were a little bogged down this year up at the North Pole. Well, not really, but let’s not spoil the festive mood with details. Back by popular demand(?), it’s the 3rd installment of our Welding Porn series. Sparks fly in this sexy, slow motion homage to welding.
Shot with a Blackmagic Pocket 4K camera and Zeiss ZF2 18mm, 28mm, 50mm and 85mm lenses and possibly a Nikon 135mm F2.0, not sure if any of those shots made it into this cut. We also used a manually operated Kessler Pocket Dolly for the camera moves.
Welding Porn Episode 3 - Santa's Workshop
#MechanicSecrets
#MechanicSecrets #Automotive #Auto #Car #Garage #CarRepair #AutoShop #AutoRepair #AutomotiveRepair
10
views
2000 Ford Mustang 4.6L Tune Up and Tips
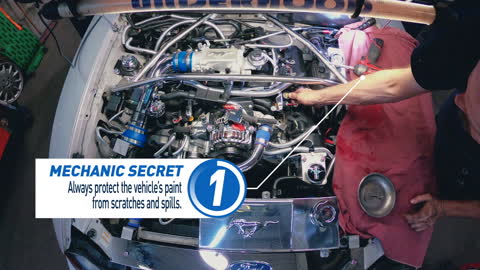
Grab your popcorn and sit back and watch a man tune up a car, including spark plug and coil boot replacements on a 2000 Ford Mustang with a 4.6L engine. On screen tips can also be found below. If you've ever wondered how to change your Mustang spark plugs, or other tune up essentials, we hope this Mustang tune up is helpful. More projects on this car will be coming soon!
Mechanic Secrets Covered in this Episode:
-Always protect the vehicle's paint from scratches and spills
-Blow compressed air into the spark plug holes before removing the spark plugs.
-Put a small amount of anti-seize on spark plug threads. (Threads ONLY)
-Apply silicone dielectric grease to spark plug boots. (Spark plug connection end ONLY)
-Link to Permatex Anti_Seize Lubricant: https://amzn.to/2GeI6Z8
-Link to Permatex Dielectric Grease: https://amzn.to/3kQTMjR
Thanks for watching and please subscribe to see more Mechanic Secrets.
104
views

The Best Way to Light Your Charcoal BBQ Grill : The All-Natural Brazilian Fire Starting Method
The Best Way to Start Your Charcoal BBQ Grill : The All-Natural Brazilian Fire Starting Method uses NO LIGHTER FLUID.. If you've been searching for a healthy way to start your charcoal fires without lighter fluid, gasoline or poison-soaked charcoal, this is the method for you. This completely natural and organic fire-starting method works every time, with zero chemicals and yields the best tasting BBQ food you could ever hope for.
Ingredients: one paper towel, olive oil and a pile of Braseiro (or your preferred brand) Brazilian Hard Wood Charcoal big enough to cook your food. The charcoal we use is sourced locally, but here is a similar healthy option available on Amazon: https://amzn.to/3iNDA1f
Special thanks to our friend Dan for teaching us the method that Brazilians have used for decades to produce the best tasting wood charcoal cooked meals you've ever had. Also worth noting, is the homemade stainless steel grill used in this video. We'll be sharing the complete construction of this grill in a future video.
This charcoal starting technique is reliable, healthy and environmentally friendly. It's a win, win, win!!! We hope this video helps you change the way you light your charcoal grill for good, and for the better. Thanks for watching and happy cooking!
116
views
1
comment

Quick Fix: 2006 Toyota Avalon In-Cabin Air Filter Replacement
Please enjoy this no-nonsense demonstration of how to replace the in-cabin air filter on a 2006 Toyota Avalon. Hope it helps! And if you like our automotive repair content and want to help us keep making it, please like, share and subscribe to keep the Mechanic Secrets coming. Thanks!!!
Oh, and Pro Tip: Always be careful with your snow man!
41
views
1
comment
Jeep Wrangler Lift Kit Install
Featured here is a 3.5 inch lift kit install, on a 2017 Jeep Wrangler 4X4. The Rough Country JEEP JK 3.5" Suspension Lift Kit will lift your Jeep 3 and 1/2 inches to accommodate a 35x12.50x17 tire (1" wheel spacer may be required). Be sure to stick around till the end for a behind the scenes glimpse into our patent-pending creative process. The highly detailed, full-length video of the complete install will be posted this Christmas.
This video was shot with a Blackmagic Pocket 4K camera and Zeiss ZF2 18mm, 28mm, 50mm and 85mm lenses.
45
views
Welding Porn Episode 2: The Odyssey
In the second installment of the Welding Porn series, we do a quick welding job for our body shop neighbors. Here we are welding the left front radiator and apron support brackets that hold the headlight housing and the inner fender well. The vehicle is a 2012 Honda Odyssey 3.5. It's hot work, on an already hot day, but somebody's gotta do it! Please consider subscribing to help us grow this channel. We've got lot's of big plans!!!
51
views

GoPro Hero 6 240fps vs 120fps Split Screen Comparison
As we shoot more GoPro footage, we find ourselves overwhelmed by the wide array of frame rate choices. But, after some simple visual/technical analysis, we can immediately eliminate once choice, for our purposes. This video is a GoPro Hero 6 Black split screen comparison of 240fps vs 120 fps shot at 1920x1080. For us, the decision was easy, go with the 120fps. If you look at the top of the table saw, you can see that there is just too much grain and compression noise on the 240fps and, for us, not worth the compromise of image quality for the slower movement. Perhaps for sports, outdoors or some other activity or application, the results and decision would be different. But for our indoor work light illuminated environment, 120fps is as fast as we're going to go on the Hero6.
If you like our content, please like, share and subscribe to keep more Mechanic Secrets coming.
Thank you!!!
50
views

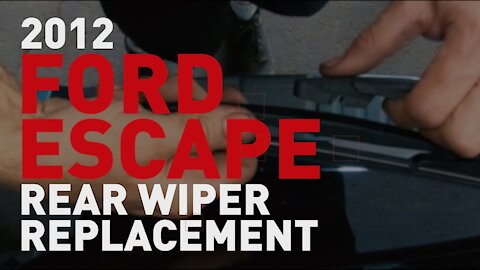
Quick Fix: 2012 Ford Escape Rear Wiper Blade Replacement
Welcome to our first Mechanic Secrets "Quick Fix." They say a picture is worth a thousand words and with certain simple repairs, that couldn't be more true. We could write a several paragraph instruction sheet for replacing the rear wiper blade on this 2012 Ford Escape, but in this case, nothing works better than showing you how it's done. We hope you find this helpful in assisting you to replace your Ford Escape rear wiper.
30
views
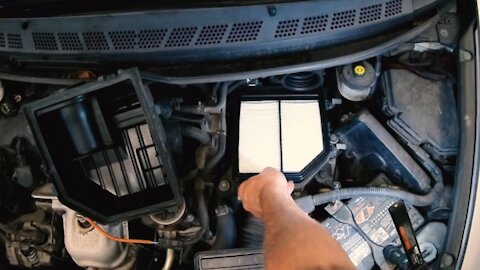
Quick Fix: 2010 Honda Civic Air Filter Replacement
If you're looking to learn how to replace the engine air filter on a 2010 Honda Civic, we have good news for you, it's a snap. Literally. You just snap open the 4 latches on the the air filter cover, pull the the cover off, swap out the filter, put the cover back on and snap the 4 latches closed. It couldn't be easier. If you like our automotive repair content, please like, share and subscribe to keep more Mechanic Secrets coming. Thank you!!!
17
views
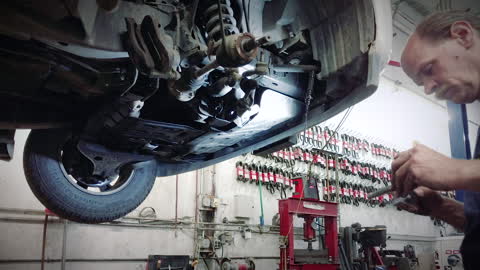
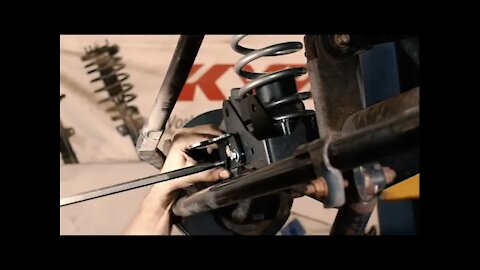
Infiniti QX56 Upper and Lower Control Arm Replacement in 3 Minutes
2006 infiniti QX56 5.6L 4x4 right upper and lower control arm replacement in 3 minutes. To ensure a smooth installation of your Infiniti Control arms, make sure to stay tuned after the timelapse for very important installation secrets.
Secret #1: The bolts going through the control arm to the frame bushings tend to freeze, seize and/or rust weld into the steel collars of the bushings, preventing the bolts from sliding out. Coat all bolts, threads and shafts with anti-seize compound.
Secret #2: DO NOT get and lube or anti-seize on tapered part of ball joint studs or tie rod studs.
Secret #3: Don't allow CV axle shaft to hang free when lower control arm is removed. Use a rope, wire or bungee to support its weight to prevent damage to the inner CV.
Secret #4: When tightening control arm to frame bolts, the arms should be roughly in the their normal ride height position. This prevents the bushings from being under stress or way out of position because the bushings do not rotate. Only the flex in the rubber allows the arms movement.
You can buy Permatex Aluminum Anti-seize Lubricant here:
https://amzn.to/2yxESfW
If you like our automotive repair content, please share and subscribe to keep more Mechanic Secrets coming. Thank you!!!
77
views

How to Make, Break and Repair Chainsaw Chains
You're likely here because you bought yourself a box of bulk chain, or you're about to, and you want to make yourself a bunch of extra chains, maybe even in a couple different bar sizes, but you have no idea what to do next. Well, wonder no more. In this Mechanic Secrets video, we bring you step by step instructions for making and breaking chainsaw chains. From a bulk spool of chain, counting links, punching rivets out to separate chain and spinning new rivets to complete a replacement chain for a Stihl MS290. Although demonstrated on Stihl brand chain and chainsaw, the knowledge transfers to any brand, including Echo, Husqvarna, Craftsman, Worx, Rigid, Black & Decker, Poulan, Remington, Ryobi, Makita, Oregon and Homelite chainsaws. We're happy to answer questions below and good luck making a new chain for your chainsaw!
Please share and subscribe to keep more Mechanic Secrets coming. Thank you!!!
335
views
1
comment
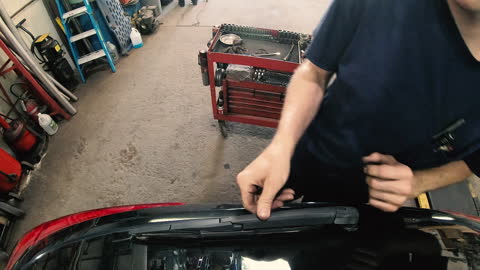
Quick Fix: 2016 Hyundai Tucson Rear Wiper Blade Replacement
Welcome to another Mechanic Secrets "Quick Fix." They say a picture is worth a thousand words and with certain simple repairs, that couldn't be more true. We could write a several paragraph instruction sheet for replacing the rear wiper blade on this 2016 Hyundai Tucson, but in this case, nothing works better than showing you how it's done. We hope you find this helpful in assisting you to replace your Hyundai Tucson rear wiper blade. And please subscribe to help us keep making more.
37
views

2012 Kia Soul 1.6L Engine Replacement In 4 Minutes
Being a good mechanic isn’t really about speed. But, it’s no secret that if you do something long enough, you’re bound to get faster at it. And here’s a pretty darn quick, mostly one-man, engine swap, to prove the point. Don’t let the 4 hour and 41 minute completion time fool you. No shortcuts were taken and no details missed. This fun one-shot timelapse of this Kia Soul engine replacement covers the entire job, from start to finish, in only 3 minutes. The timelapse is made of 4249 individual hi-res photographs shot on a Motorola Droid Turbo 2 XT1585 and manipulated in Adobe After Effects to explore all the important details. The car is a 2012 Kia Soul 1.6L Automatic with air conditioning. Questions and comments are always welcome. Liking and subscribing is heartily encouraged. And be sure to watch the end of this one, where we reveal important secrets to help you save time and avoid mistakes on your next Kia Soul engine replacement.
OK, since you’re still reading, and we're not good at keeping secrets, here are some of the key secrets to this repair:
1. Engine can be easily removed from the top. There is no need to remove engine and transmission from bottom.
2. Radiator can stay in car.
3. A/C system doesn't need to be discharged of refrigerant prior to engine removal. Just remove A/C compressor (4 bolts to block) and position it aside.
4. Alternator can be left attached to engine when engine is removed, just disconnect its wiring.
5. Disconnect the exhaust manifold from cylinder head while engine is still in car. Then disconnect the first 3 rubber hangers from the exhaust and you can slide the complete exhaust system back far enough to remove engine without disconnecting any other parts of the exhaust. Exhaust will stay complete, resulting in less chance for leaks and broken bolts.
6. Engine to trans bolts are several different lengths with all the same thread pitch, so note their locations (mark with nail polish) to prevent damage.
And general rules for getting a job done correctly and quickly are as follows: Limit distractions. Always try to work in a clean, organized well-lit work space. Maintain clean and well kept tools. Only pull out what you need and put away what you don't. Take pictures along the way. And use lots of magnetic trays for bolts. If you like our automotive repair content, please share and subscribe to keep more Mechanic Secrets coming. Thank you!!!
102
views