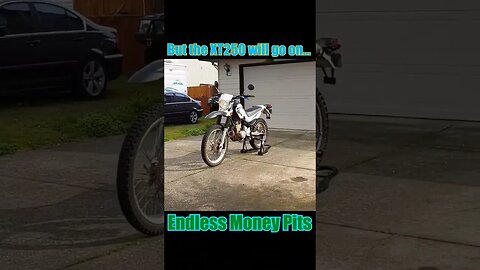
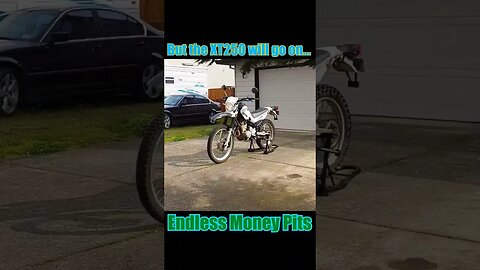
Flatland Racing Skid Plate Installation – Honda CRF 300L / Rally
Install a Flatland Racing skid plate on your Honda CRF 300L yourself and save some money!
LINKS:
Buy a shirt!: https://endless-money-pits.myspreadshop.com/
Flatland Racing skid plate: https://www.crfsonly.com/catalog/product_info.php/products_id/7555
Impact driver: https://amzn.to/3tC97vN
Socket wrench set: https://amzn.to/3EP9kBW
Hex wrench set: https://amzn.to/32U647P
Thread locker: https://amzn.to/3AZh9RK
Magnetic bowl: https://amzn.to/3HsWtnA
Want to support my channel?
Become a patron! https://www.patreon.com/EndlessMoneyPits
Or make a one-time donation via PayPal: https://paypal.me/EndlessMoneyPits?locale.x=en_US
TOOLS AND SUPPLIES USED:
• Impact driver with an extension
• 10mm socket
• 5mm hex bit
• Medium strength thread locker
• Magnetic bowl
A huge thanks goes to my sole Patreon supporter, Elizabeth Y.!
Music not provided by YouTube:
“Song E01” by Seth Schneider
sethds93@gmail.com
**This video description contains affiliate links, which means that if you click on one of the product links and make a purchase, I'll receive a small commission at no additional cost to you. This helps support the channel and allows me to continue making videos like this.
**Disclaimer**
Due to the litigious world we live in, I have to include this statement:
I cannot guarantee against improper use or unauthorized modifications of this information. The creator of this content assumes no liability for property damage or injury incurred as a result of any of the information contained in this video. Use this information at your own risk. I recommend safe practices when working on vehicles and or with tools seen or implied in this video. No information contained in this video shall create any expressed or implied warranty or guarantee of any particular result. Any injury, damage, or loss that may result from improper use of these tools, equipment, or from the information contained in this video is the sole responsibility of the user and not the creator of this content.
18
views
Foot Peg Replacement – Yamaha XT250
Replace the foot pegs on your Yamaha XT250 yourself and save some money!
LINKS:
Plastic mallet: https://amzn.to/3HBYRYU
Needle nose pliers: https://amzn.to/3L7jvCv
Standard pliers: https://amzn.to/3gkXUIB
Rags: https://amzn.to/3J6prtT
Waterproof grease: https://amzn.to/3xwXkQ9
Coarse steel wool: https://amzn.to/3saRmSA
Spray lubricant: https://amzn.to/3L6WejZ
A couple cotter pins: https://amzn.to/3FKpZ8v
Left foot peg (xt250): https://www.partzilla.com/product/yamaha/3LD-27411-10-00?ref=b6cf3af3503a56dbaa899eaa0a300d276f8cbde4
Right foot peg (xt250): https://www.partzilla.com/product/yamaha/3LD-27421-10-00?ref=b6cf3af3503a56dbaa899eaa0a300d276f8cbde4
Want to support the channel?
Buy a shirt!: https://endless-money-pits.myspreadshop.com/
Become a patron! https://www.patreon.com/EndlessMoneyPits
Or make a one-time donation via PayPal: https://paypal.me/EndlessMoneyPits?locale.x=en_US
TOOLS AND SUPPLIES USED:
• Plastic mallet
• Needle nose pliers
• Standard pliers
• A rag
• Waterproof grease
• Coarse steel wool
• Spray lubricant
• A couple cotter pins (3/32 x 1/2 would have been ideal)
A huge thanks goes to my sole Patreon supporter, Elizabeth Y.!
**This video description contains affiliate links, which means that if you click on one of the product links and make a purchase, I'll receive a small commission at no additional cost to you. This helps support the channel and allows me to continue making videos like this.
**Disclaimer**
Due to the litigious world we live in, I have to include this statement:
I cannot guarantee against improper use or unauthorized modifications of this information. The creator of this content assumes no liability for property damage or injury incurred as a result of any of the information contained in this video. Use this information at your own risk. I recommend safe practices when working on vehicles and or with tools seen or implied in this video. No information contained in this video shall create any expressed or implied warranty or guarantee of any particular result. Any injury, damage, or loss that may result from improper use of these tools, equipment, or from the information contained in this video is the sole responsibility of the user and not the creator of this content.
32
views
Giant Loop Hot Springs Heat Shield Installation
Install a Giant Loop Heat Shield on your motorcycle yourself and safe a little bit of money probably!
LINKS:
Buy a shirt!: https://endless-money-pits.myspreadshop.com/
Giant Loop heat shield: https://amzn.to/3j4iku2
Impact driver: https://amzn.to/3tC97vN
Socket wrench set: https://amzn.to/3EP9kBW
Tin snips: https://amzn.to/3t2P7l2
Want to support my channel?
Become a patron! https://www.patreon.com/EndlessMoneyPits
Or make a one-time donation via PayPal: https://paypal.me/EndlessMoneyPits?locale.x=en_US
TOOLS AND SUPPLIES USED:
• Impact driver
• 8mm socket
• Metal snips
A huge thanks goes to my sole Patreon supporter, Elizabeth Y.!
**This video description contains affiliate links, which means that if you click on one of the product links and make a purchase, I'll receive a small commission at no additional cost to you. This helps support the channel and allows me to continue making videos like this.
**Disclaimer**
Due to the litigious world we live in, I have to include this statement:
I cannot guarantee against improper use or unauthorized modifications of this information. The creator of this content assumes no liability for property damage or injury incurred as a result of any of the information contained in this video. Use this information at your own risk. I recommend safe practices when working on vehicles and or with tools seen or implied in this video. No information contained in this video shall create any expressed or implied warranty or guarantee of any particular result. Any injury, damage, or loss that may result from improper use of these tools, equipment, or from the information contained in this video is the sole responsibility of the user and not the creator of this content.
3
views
Zeta Revolver Shift Lever – Honda CRF 300L / Rally
Replace the shift lever on your Honda CRF 300L yourself and save some money!
LINKS:
Buy a shirt!: https://endless-money-pits.myspreadshop.com/
Shift lever: https://amzn.to/3Vy4VbJ
Socket wrench set: https://amzn.to/3EP9kBW
Wrench set: https://amzn.to/32T9pE2
Hex wrench set: https://amzn.to/32U647P
Magnetic bowl: https://amzn.to/3HsWtnA
Thread locker: https://amzn.to/3AZh9RK
Rags: https://amzn.to/3J6prtT
Motorcycle stands: https://amzn.to/3rv1gyA
Want to support my channel?
Become a patron! https://www.patreon.com/EndlessMoneyPits
Or make a one-time donation via PayPal: https://paypal.me/EndlessMoneyPits?locale.x=en_US
TOOLS AND SUPPLIES USED:
• Socket wrench
• Socket extension
• 8mm socket
• 10mm wrench
• 8mm wrench
• 5mm hex wrench
• Magnetic bowl
• Medium strength thread locker
• And a rag
• A rear stand
A huge thanks goes to my sole Patreon supporter, Elizabeth Y.!
**This video description contains affiliate links, which means that if you click on one of the product links and make a purchase, I'll receive a small commission at no additional cost to you. This helps support the channel and allows me to continue making videos like this.
**Disclaimer**
Due to the litigious world we live in, I have to include this statement:
I cannot guarantee against improper use or unauthorized modifications of this information. The creator of this content assumes no liability for property damage or injury incurred as a result of any of the information contained in this video. Use this information at your own risk. I recommend safe practices when working on vehicles and or with tools seen or implied in this video. No information contained in this video shall create any expressed or implied warranty or guarantee of any particular result. Any injury, damage, or loss that may result from improper use of these tools, equipment, or from the information contained in this video is the sole responsibility of the user and not the creator of this content.
12
views
FOXWELL NT710 BMW Scan Tool Review
Get a Foxwell NT710 dealer level scan tool for your BMW and save a ton of money!
NOTE:
I am a complete novice with this tool. This video is not an instruction manual for safe use of the Foxwell NT710 scan tool.
LINKS:
FOXWELL NT710 BMW Scanner: https://amzn.to/3Uf2QBe
For a limited time, get 5% off with this code: 48JAMOU9
Adapter for 20-pin port: https://amzn.to/3onByum
Battery charger: https://amzn.to/3Yd05mu
Want to support my channel?
Buy a shirt!: https://endless-money-pits.myspreadshop.com/
Become a patron! https://www.patreon.com/EndlessMoneyPits
Or make a one-time donation via PayPal: https://paypal.me/EndlessMoneyPits?locale.x=en_US
A huge thanks goes to my sole Patreon supporter, Elizabeth Y.!
Music not provided by YouTube:
“Song E01” by Seth Schneider
sethds93@gmail.com
**This video description contains affiliate links, which means that if you click on one of the product links and make a purchase, I'll receive a small commission at no additional cost to you. This helps support the channel and allows me to continue making videos like this.
**Disclaimer**
Due to the litigious world we live in, I have to include this statement:
I cannot guarantee against improper use or unauthorized modifications of this information. The creator of this content assumes no liability for property damage or injury incurred as a result of any of the information contained in this video. Use this information at your own risk. I recommend safe practices when working on vehicles and or with tools seen or implied in this video. No information contained in this video shall create any expressed or implied warranty or guarantee of any particular result. Any injury, damage, or loss that may result from improper use of these tools, equipment, or from the information contained in this video is the sole responsibility of the user and not the creator of this content.
8
views
Zeta Hand Lever Installation – Honda CRF 300L / Rally
Replace the clutch and front brake levers on your Honda CRF 300L yourself and save some money!
NOTE:
It wouldn’t be a bad idea to apply thread locker to the lever pivot nuts too.
LINKS:
Buy a shirt!: https://endless-money-pits.myspreadshop.com/
Zeta hand levers: https://www.crfsonly.com/catalog/product_info.php/cPath/355_358_436_454/products_id/7495
Socket wrench set: https://amzn.to/3EP9kBW
Thread locker: https://amzn.to/3AZh9RK
Waterproof grease: https://amzn.to/3xwXkQ9
Rags: https://amzn.to/3J6prtT
Want to support the channel?
Become a patron! https://www.patreon.com/EndlessMoneyPits
Or make a one-time donation via PayPal: https://paypal.me/EndlessMoneyPits?locale.x=en_US
TOOLS AND SUPPLIES USED:
• Socket wrench
• 10mm socket
• 8mm socket
• Medium strength thread locker
• Waterproof grease
• A rag
A huge thanks goes to my sole Patreon supporter, Elizabeth Y.!
Music not provided by YouTube:
“Song E01” by Seth Schneider
sethds93@gmail.com
**This video description contains affiliate links, which means that if you click on one of the product links and make a purchase, I'll receive a small commission at no additional cost to you. This helps support the channel and allows me to continue making videos like this.
**Disclaimer**
Due to the litigious world we live in, I have to include this statement:
I cannot guarantee against improper use or unauthorized modifications of this information. The creator of this content assumes no liability for property damage or injury incurred as a result of any of the information contained in this video. Use this information at your own risk. I recommend safe practices when working on vehicles and or with tools seen or implied in this video. No information contained in this video shall create any expressed or implied warranty or guarantee of any particular result. Any injury, damage, or loss that may result from improper use of these tools, equipment, or from the information contained in this video is the sole responsibility of the user and not the creator of this content.
29
views
Clutch Cable Adjustment Shortcut – Suzuki V-Strom 650xt 2017-2022
Adjust the clutch lever on your Suzuki V-Strom the forbidden way and save yourself a lot of money!
NOTE:
Hey, I warned you, this isn’t the proper way. I don’t see any problems with it, but don’t get mad at me if something goes wrong. Always understand what you are doing before you do it.
LINKS:
Socket wrench set: https://amzn.to/3EP9kBW
Wrench set: https://amzn.to/32T9pE2
Flathead screwdriver: https://amzn.to/3J3azft
Bits and driver: https://amzn.to/34v0Dg7
Tape measure (SAE): https://amzn.to/36Fd3TX
Tape measure (metric): https://amzn.to/3Lnw8bO
Want to support my channel?
Buy a shirt!: https://endless-money-pits.myspreadshop.com/
Become a patron! https://www.patreon.com/EndlessMoneyPits
Or make a one-time donation via PayPal: https://paypal.me/EndlessMoneyPits?locale.x=en_US
TOOLS AND SUPPLIES USED:
• Socket wrench
• Socket extension
• ¼” socket
• 4mm hex bit
• Two 10mm wrenches
• Flathead screwdriver
• Tape measure
A huge thanks goes to my sole Patreon supporter, Elizabeth Y.!
Music not provided by YouTube:
“Song E01” by Seth Schneider
sethds93@gmail.com
**This video description contains affiliate links, which means that if you click on one of the product links and make a purchase, I'll receive a small commission at no additional cost to you. This helps support the channel and allows me to continue making videos like this.
**Disclaimer**
Due to the litigious world we live in, I have to include this statement:
I cannot guarantee against improper use or unauthorized modifications of this information. The creator of this content assumes no liability for property damage or injury incurred as a result of any of the information contained in this video. Use this information at your own risk. I recommend safe practices when working on vehicles and or with tools seen or implied in this video. No information contained in this video shall create any expressed or implied warranty or guarantee of any particular result. Any injury, damage, or loss that may result from improper use of these tools, equipment, or from the information contained in this video is the sole responsibility of the user and not the creator of this content.
10
views
Hand Grip Replacement – Honda CRF300L / Rally
Replace the hand grips on your Honda CRF 300L Rally yourself and save some money!
NOTE:
Sorry I didn’t go out and buy hairspray. I’m a guy with no hair so that would have felt weird.
LINKS:
Buy a shirt!: https://endless-money-pits.myspreadshop.com/
Pro Taper Grips: https://amzn.to/3UI2ovF
Tongue and groove pliers: https://amzn.to/3L4yNYO
Phillips #3 screwdriver: https://amzn.to/3EFZH7W
Flathead screwdriver: https://amzn.to/3J3azft
Tiny flathead screwdriver: https://amzn.to/3sbUm0L
Utility knife: https://amzn.to/3ujmAJP
Air compressor: https://amzn.to/38XZXSA
Gloves: https://amzn.to/36WLk1b
Hairspray: https://amzn.to/3ObMfvY
Rags: https://amzn.to/3J6prtT
Want to support my channel?
Become a patron! https://www.patreon.com/EndlessMoneyPits
Or make a one-time donation via PayPal: https://paypal.me/EndlessMoneyPits?locale.x=en_US
TOOLS AND SUPPLIES USED:
• Tongue and groove pliers
• Phillips #3 screwdriver
• Flathead screwdriver
• Tiny flathead screwdriver
• And a utility knife
• An air compressor
• Gloves
• Really strong hair gel (I wanted to use hair spray but this worked)
• A rag
A huge thanks goes to my sole Patreon supporter, Elizabeth Y.!
Music not provided by YouTube:
“Song E01” by Seth Schneider
sethds93@gmail.com
**This video description contains affiliate links, which means that if you click on one of the product links and make a purchase, I'll receive a small commission at no additional cost to you. This helps support the channel and allows me to continue making videos like this.
**Disclaimer**
Due to the litigious world we live in, I have to include this statement:
I cannot guarantee against improper use or unauthorized modifications of this information. The creator of this content assumes no liability for property damage or injury incurred as a result of any of the information contained in this video. Use this information at your own risk. I recommend safe practices when working on vehicles and or with tools seen or implied in this video. No information contained in this video shall create any expressed or implied warranty or guarantee of any particular result. Any injury, damage, or loss that may result from improper use of these tools, equipment, or from the information contained in this video is the sole responsibility of the user and not the creator of this content.
43
views
DoubleTake Adventure Mirrors Installation – Honda CRF 300L / Rally
Install Double Take mirrors on your motorcycle yourself and save some money!
LINKS:
Buy a shirt!: https://endless-money-pits.myspreadshop.com/
Double Take mirrors: https://amzn.to/3tFfCNv
Wrench set: https://amzn.to/32T9pE2
Thread locker: https://amzn.to/3AZh9RK
Want to support my channel?
Become a patron! https://www.patreon.com/EndlessMoneyPits
Or make a one-time donation via PayPal: https://paypal.me/EndlessMoneyPits?locale.x=en_US
TOOLS AND SUPPLIES USED:
• A 14mm wrench
• Medium strength thread locker
A huge thanks goes to my sole Patreon supporter, Elizabeth Y.!
**This video description contains affiliate links, which means that if you click on one of the product links and make a purchase, I'll receive a small commission at no additional cost to you. This helps support the channel and allows me to continue making videos like this.
**Disclaimer**
Due to the litigious world we live in, I have to include this statement:
I cannot guarantee against improper use or unauthorized modifications of this information. The creator of this content assumes no liability for property damage or injury incurred as a result of any of the information contained in this video. Use this information at your own risk. I recommend safe practices when working on vehicles and or with tools seen or implied in this video. No information contained in this video shall create any expressed or implied warranty or guarantee of any particular result. Any injury, damage, or loss that may result from improper use of these tools, equipment, or from the information contained in this video is the sole responsibility of the user and not the creator of this content.
14
views
Spark Plug Replacement & Inspection - 2019 KX450 - Kawasaki
Replace the spark plug in your Kawasaki KX450 yourself and save some money!
LINKS:
Spark plug (normal): https://amzn.to/3tt2xa9
Spark plug (colder): https://amzn.to/3Eskmwn
Spark plug gap tool: https://amzn.to/3hqgFhK
Torque wrench (for lbs/foot): https://amzn.to/3ooqxJl
Torque wrench (for lbs/inch): https://amzn.to/3UHYtis
Socket wrench set: https://amzn.to/3EP9kBW
Socket extensions: https://amzn.to/3TkyTPS
Hex wrench set: https://amzn.to/32U647P
Spark plug socket: https://amzn.to/3IUWVek
Drop light: https://amzn.to/3uoiwIo
Wire brush: https://amzn.to/3UkKfDI
Want to support my channel?
Buy a shirt!: https://endless-money-pits.myspreadshop.com/
Become a patron! https://www.patreon.com/EndlessMoneyPits
Or make a one-time donation via PayPal: https://paypal.me/EndlessMoneyPits?locale.x=en_US
TOOLS AND SUPPLIES USED:
• Torque wrench
• Socket wrench
• Two socket extensions
• 8mm socket
• 10mm socket
• 5/8” spark plug socket OR 16mm
• 5mm hex wrench
• A light
A huge thanks goes to my sole Patreon supporter, Elizabeth Y.!
Music not provided by YouTube:
“Song E01” by Seth Schneider
sethds93@gmail.com
**This video description contains affiliate links, which means that if you click on one of the product links and make a purchase, I'll receive a small commission at no additional cost to you. This helps support the channel and allows me to continue making videos like this.
**Disclaimer**
Due to the litigious world we live in, I have to include this statement:
I cannot guarantee against improper use or unauthorized modifications of this information. The creator of this content assumes no liability for property damage or injury incurred as a result of any of the information contained in this video. Use this information at your own risk. I recommend safe practices when working on vehicles and or with tools seen or implied in this video. No information contained in this video shall create any expressed or implied warranty or guarantee of any particular result. Any injury, damage, or loss that may result from improper use of these tools, equipment, or from the information contained in this video is the sole responsibility of the user and not the creator of this content.
9
views
Oil and Filter Change – Kawasaki KX450 - 2019-2022
Change the oil and filter on your Kawasaki KX 450 yourself and save some money!
NOTE:
Please recycle your used automotive fluids!
LINKS:
Oil change kit: https://amzn.to/3hiixsL
Large flat head screwdriver: https://amzn.to/3unqAsT
Torque wrench: https://amzn.to/3UdcAf8
Socket wrench set: https://amzn.to/3EP9kBW
Socket extensions: https://amzn.to/3NJadyf
Pick set: https://amzn.to/3giPlxR
Funnel: https://amzn.to/3LhpQeS
Fluid drain pan: https://amzn.to/3uo6Xks
Rolling stool: https://amzn.to/36KSJQZ
Nitrile gloves: https://amzn.to/3IUg00c
Want to support my channel?
Buy a shirt!: https://endless-money-pits.myspreadshop.com/
Become a patron! https://www.patreon.com/EndlessMoneyPits
Or make a one-time donation via PayPal: https://paypal.me/EndlessMoneyPits?locale.x=en_US
TOOLS AND SUPPLIES USED:
• Large flat head screwdriver
• Torque wrench
• Socket wrench
• A couple socket extensions
• 8mm socket
• 12mm socket
• And an angled pick
• A funnel
• Fluid drain pan
• A stool
• Gloves
A huge thanks goes to my sole Patreon supporter, Elizabeth Y.!
Music not provided by YouTube:
“Song E01” by Seth Schneider
sethds93@gmail.com
**This video description contains affiliate links, which means that if you click on one of the product links and make a purchase, I'll receive a small commission at no additional cost to you. This helps support the channel and allows me to continue making videos like this.
**Disclaimer**
Due to the litigious world we live in, I have to include this statement:
I cannot guarantee against improper use or unauthorized modifications of this information. The creator of this content assumes no liability for property damage or injury incurred as a result of any of the information contained in this video. Use this information at your own risk. I recommend safe practices when working on vehicles and or with tools seen or implied in this video. No information contained in this video shall create any expressed or implied warranty or guarantee of any particular result. Any injury, damage, or loss that may result from improper use of these tools, equipment, or from the information contained in this video is the sole responsibility of the user and not the creator of this content.
14
views
Fender Duct Installation – C5 Corvette 1997-2004
Install fender duct air vents on your C5 Corvette yourself and save some money!
NOTE:
The wood blocks I used are a joke. Get some good pieces of 2x6 lumber from your local hardware store. I used rubber mats under the front blocks because they always slide, but you could use floor mats or something similar.
LINKS:
Fender ducts: https://www.electronsportusa.com/corvette-c5-products/nwznc8hvna0t6mwimj5d2q8fnq16j7
Metal mesh: https://amzn.to/3NAjlFB
Metal clips: https://amzn.to/3he1wA3
Torque wrench: https://amzn.to/3HqCZjq
Socket wrench set: https://amzn.to/3EP9kBW
Electric screwdriver: https://amzn.to/3Hoafrt
Tin snips: https://amzn.to/3t2P7l2
Needle nose pliers: https://amzn.to/3L7jvCv
Tiny flat head screwdriver: https://amzn.to/3sbUm0L
Pick set: https://amzn.to/3giPlxR
Drill bit set: https://amzn.to/3grtyUJ
Magnetic bowl: https://amzn.to/3HsWtnA
Impact driver: https://amzn.to/3tC97vN
Impact wrench: https://amzn.to/3L8Wora
Floor jack: https://amzn.to/37D10qc
Jack stands: https://amzn.to/3sgH6be
Drop light: https://amzn.to/3uoiwIo
Rolling stool: https://amzn.to/36KSJQZ
Creeper: https://amzn.to/3sgEE4q
Rags: https://amzn.to/3J6prtT
Gloves: https://amzn.to/36WLk1b
Marker: https://amzn.to/32Vys9v
Degreaser: https://amzn.to/3E3GTPL
Want to support my channel?
Buy a shirt!: https://endless-money-pits.myspreadshop.com/
Become a patron! https://www.patreon.com/EndlessMoneyPits
Or make a one-time donation via PayPal: https://paypal.me/EndlessMoneyPits?locale.x=en_US
TOOLS AND SUPPLIES USED:
• Torque wrench
• 19mm socket
• 7mm socket
• Electric screwdriver
• Tin snips
• Needle nose pliers
• Tiny flat head screwdriver
• A pick
• 3/16” drill bit
• Magnetic bowl
• Impact driver
• Impact wrench
• Jack
• Jack stands
• A light
• A stool
• Creeper
• Wood blocks
• Rubber mats
• A rag
• Gloves (padded)
• A marker
• Degreaser
A huge thanks goes to my sole Patreon supporter, Elizabeth Y.!
Music not provided by YouTube:
“Song E01” by Seth Schneider
sethds93@gmail.com
**This video description contains affiliate links, which means that if you click on one of the product links and make a purchase, I'll receive a small commission at no additional cost to you. This helps support the channel and allows me to continue making videos like this.
**Disclaimer**
Due to the litigious world we live in, I have to include this statement:
I cannot guarantee against improper use or unauthorized modifications of this information. The creator of this content assumes no liability for property damage or injury incurred as a result of any of the information contained in this video. Use this information at your own risk. I recommend safe practices when working on vehicles and or with tools seen or implied in this video. No information contained in this video shall create any expressed or implied warranty or guarantee of any particular result. Any injury, damage, or loss that may result from improper use of these tools, equipment, or from the information contained in this video is the sole responsibility of the user and not the creator of this content.
20
views
Chain and Sprocket Replacement – Honda CBR 500R / 500F / 500X
Replace the chain and sprockets on your motorcycle yourself and save some money!
NOTE:
Always learn about the dangers of the tools you use and wear the appropriate personal protective equipment.
LINKS:
Impact driver: https://amzn.to/3tC97vN
Angle Grinder: https://amzn.to/3DoTbAI
Chain tool: https://amzn.to/3HI5CbJ
Breaker bar: https://amzn.to/348rIWD
Torque wrench (3/8” drive): https://amzn.to/3ooqxJl
Torque wrench (1/2” drive): https://amzn.to/3HqCZjq
Socket wrench set: https://amzn.to/3EP9kBW
Socket extensions: https://amzn.to/3TkyTPS
24mm socket: https://amzn.to/3Ci5YWf
Impact socket set: https://amzn.to/3ux1WEm
Wrench set: https://amzn.to/32T9pE2
Ratcheting wrench set: https://amzn.to/32SN2hY
Hex wrench set: https://amzn.to/32U647P
Bits and driver: https://amzn.to/34v0Dg7
Needle nose pliers: https://amzn.to/3L7jvCv
Bent nose pliers: https://amzn.to/3J0YffT
Flat head screwdriver: https://amzn.to/3J3azft
Plastic mallet: https://amzn.to/3HBYRYU
Tape measure (SAE): https://amzn.to/36Fd3TX
Tape measure (metric): https://amzn.to/3Lnw8bO
Motorcycle stands: https://amzn.to/3rv1gyA
Rolling stool: https://amzn.to/36KSJQZ
Drop light: https://amzn.to/3uoiwIo
Nitrile gloves: https://amzn.to/3IUg00c
Padded gloves: https://amzn.to/36WLk1b
Face shield: https://amzn.to/3zvmLmW
Ear plugs: https://amzn.to/3SKyDIx
Safety glasses: https://amzn.to/35AO9ns
Kerosene: https://amzn.to/3GmUqQr
Spray bottle: https://amzn.to/3L7eWby
Chain brush: https://amzn.to/3HoVtRa
Chain lube: https://amzn.to/3L6WejZ
Waterproof grease: https://amzn.to/3xwXkQ9
Painter’s tape: https://amzn.to/3gr2k0t
Rags: https://amzn.to/3J6prtT
Chain (custom colors): https://sprocketcenter.com/i-30499462-ek-chain-520-zvx3-heavy-duty-xring-chain-8-colors-choose-length.html
Chain (basic): https://amzn.to/3SP9Tiu
Front sprocket (15T): https://amzn.to/3LlW8p0
Rear sprocket (41T): https://amzn.to/3rCoMtZ
Rear sprocket (43T): https://amzn.to/3Biix1N
Want to support my channel?
Buy a shirt!: https://endless-money-pits.myspreadshop.com/
Become a patron! https://www.patreon.com/EndlessMoneyPits
Or make a one-time donation via PayPal: https://paypal.me/EndlessMoneyPits?locale.x=en_US
TOOLS AND SUPPLIES USED:
• Breaker bar
• A couple torque wrenches
• Socket wrench
• Short socket extension
• 24mm socket
• 19mm socket
• 17mm socket (impact)
• 14mm socket (impact)
• 19mm wrench
• 14mm wrench
• 12mm wrench
• 10mm ratcheting wrench
• 5mm hex bit
• Needle nose pliers
• Bent nose pliers
• Flat head screwdriver
• Plastic mallet
• Measuring tape
• Impact driver
• Chain tool
• And an angle grinder
• A motorcycle stand
• A stool
• A light
• Rubber gloves
• Padded gloves
• A face shield
• Ear plugs
• Safety glasses
• Kerosene
• Spray bottle
• Chain brush
• Chain lube
• Waterproof grease
• Tape
• Rags
• Some cardboard to work on
• And a new chain and sprocket set (Front 15T, Rear 43T)
A huge thanks goes to my sole Patreon supporter, Elizabeth Y.!
Music not provided by YouTube:
“Song E01” by Seth Schneider
sethds93@gmail.com
**This video description contains affiliate links, which means that if you click on one of the product links and make a purchase, I'll receive a small commission at no additional cost to you. This helps support the channel and allows me to continue making videos like this.
**Disclaimer**
Due to the litigious world we live in, I have to include this statement:
I cannot guarantee against improper use or unauthorized modifications of this information. The creator of this content assumes no liability for property damage or injury incurred as a result of any of the information contained in this video. Use this information at your own risk. I recommend safe practices when working on vehicles and or with tools seen or implied in this video. No information contained in this video shall create any expressed or implied warranty or guarantee of any particular result. Any injury, damage, or loss that may result from improper use of these tools, equipment, or from the information contained in this video is the sole responsibility of the user and not the creator of this content.
71
views
VIAIR Portable Air Pump 3 Year Review
The best 12 volt portable air compressor you can buy! (I think?)
NOTE:
Seriously, don’t burn your hands on this thing.
LINKS:
VIAIR Portable Air Pump: https://amzn.to/3rXMErA
Tire pressure gauge: https://amzn.to/3F0vEIU
Buy a shirt!: https://endless-money-pits.myspreadshop.com/
Want to support my channel?
Become a patron! https://www.patreon.com/EndlessMoneyPits
Or make a one-time donation via PayPal: https://paypal.me/EndlessMoneyPits?locale.x=en_US
A huge thanks goes to my sole Patreon supporter, Elizabeth Y.!
**This video description contains affiliate links, which means that if you click on one of the product links and make a purchase, I'll receive a small commission at no additional cost to you. This helps support the channel and allows me to continue making videos like this.
**Disclaimer**
Due to the litigious world we live in, I have to include this statement:
I cannot guarantee against improper use or unauthorized modifications of this information. The creator of this content assumes no liability for property damage or injury incurred as a result of any of the information contained in this video. Use this information at your own risk. I recommend safe practices when working on vehicles and or with tools seen or implied in this video. No information contained in this video shall create any expressed or implied warranty or guarantee of any particular result. Any injury, damage, or loss that may result from improper use of these tools, equipment, or from the information contained in this video is the sole responsibility of the user and not the creator of this content.
1
view
How to Winterize Any Motorcycle - The Important Stuff
Winterize your motorcycle before putting it in storage and save a lot of money in the long run!
NOTE:
This is the most comprehensive list I could come up with that applies to all motorcycles. Please leave a comment if you have more to add.
LINKS:
Buy a shirt!: https://endless-money-pits.myspreadshop.com/
Motorcycle stands: https://amzn.to/3rv1gyA
Fluid catch pan: https://amzn.to/3uo6Xks
Flexible funnel: https://amzn.to/3ulP5qc
Chain lube: https://amzn.to/3L6WejZ
Cable luber: https://amzn.to/3sAzDoy
Chain brush: https://amzn.to/3HoVtRa
Kerosene: https://amzn.to/3GmUqQr
Spray bottle: https://amzn.to/3L7eWby
Car soap: https://amzn.to/3T58a9w
Dish soap: https://amzn.to/3E4S4Za
Wash bucket: https://amzn.to/3Vwk5ik
Wash mitt: https://amzn.to/3VrbNIC
Garden hose: https://amzn.to/3VGXrnN
Hose nozzle: https://amzn.to/3RXGNx3
Rolling stool: https://amzn.to/36KSJQZ
Rags: https://amzn.to/3J6prtT
Microfiber cloths: https://amzn.to/3T5HcyO
Hydroflask: https://amzn.to/3eB111R
Gas can: https://amzn.to/3CYzaC4
Fuel stabilizer: https://amzn.to/3S1Rui8
Clay bar kit: https://amzn.to/3D04ErF
Ceramic paint sealer: https://amzn.to/3eED3CN
Vinyl protectant: https://amzn.to/3rV0P0s
Armorall: https://amzn.to/3VuVESr
WD-40: https://amzn.to/3oo5Opb
Air compressor: https://amzn.to/38XZXSA
Tire inflator attachment: https://amzn.to/3CpUTT2
Tire pressure gauge: https://amzn.to/3MayU65
Trickle charger: https://amzn.to/3s2tgJK
Steel wool: https://amzn.to/3saRmSA
Motorcycle cover: https://amzn.to/3uOowK3
Shoei RF-1400: https://amzn.to/3Ur8xMT
Want to support my channel?
Become a patron! https://www.patreon.com/EndlessMoneyPits
Or make a one-time donation via PayPal: https://paypal.me/EndlessMoneyPits?locale.x=en_US
A huge thanks goes to Carlos D. for his recent donation and my sole Patreon supporter, Elizabeth Y.!
Music not provided by YouTube:
“Song E01” by Seth Schneider
sethds93@gmail.com
**This video description contains affiliate links, which means that if you click on one of the product links and make a purchase, I'll receive a small commission at no additional cost to you. This helps support the channel and allows me to continue making videos like this.
**Disclaimer**
Due to the litigious world we live in, I have to include this statement:
I cannot guarantee against improper use or unauthorized modifications of this information. The creator of this content assumes no liability for property damage or injury incurred as a result of any of the information contained in this video. Use this information at your own risk. I recommend safe practices when working on vehicles and or with tools seen or implied in this video. No information contained in this video shall create any expressed or implied warranty or guarantee of any particular result. Any injury, damage, or loss that may result from improper use of these tools, equipment, or from the information contained in this video is the sole responsibility of the user and not the creator of this content.
14
views
Honda CBR 500R / CB 500X / CB 500F 8,000 Mile / 12,000 km Service 2013-2018
Perform an 8,000 mile inspection on your 2013-2019 Honda cbr500r, cb500f, or cb500x yourself and save some money!
NOTE:
This is my interpretation of what the Honda service manual says to do. I have done my best to explain it through this video but I am not a professional mechanic and am just trying to help people maintain their motorcycles at home. Always verify information you find online with other sources, and always do repairs promptly and correctly.
LINKS:
Buy a Shirt!: https://partner.spreadshirt.com/shop-area/101546687/shop
Fairing removal video: https://www.youtube.com/watch?v=fBHAmn-71iQ
Tire replacement video: https://www.youtube.com/watch?v=JndfelYve6w
Brake fluid video: https://www.youtube.com/watch?v=OlIXkz2yvB4
Coolant flush video: https://www.youtube.com/watch?v=UKOTrHoDtHo
Fuel feed hose: https://amzn.to/3rznpM2
OBDII for scanner for motorcycles: https://amzn.to/3EabVWN
Electric screwdriver: https://amzn.to/3Hoafrt
Bits and driver: https://amzn.to/34v0Dg7
Ratcheting wrench set: https://amzn.to/32SN2hY
Socket wrench set: https://amzn.to/3IZm73p
Socket extensions: https://amzn.to/34hFxBT
Hex wrench set: https://amzn.to/32U647P
Needle nose pliers: https://amzn.to/3L7jvCv
Bent nose pliers: https://amzn.to/3J0YffT
Phillips screwdriver: https://amzn.to/34wLzhH
Stubby Phillips screwdriver: https://amzn.to/3GpnVkP
Tiny flathead screwdriver: https://amzn.to/3sbUm0L
Cable luber: https://amzn.to/3sAzDoy
Tape measure (metric): https://amzn.to/3Lnw8bO
Tape measure (SAE): https://amzn.to/36Fd3TX
Tire inflator: https://amzn.to/3CpUTT2
Air compressor: https://amzn.to/38XZXSA
Motorcycle stands: https://amzn.to/3rv1gyA
Drop light: https://amzn.to/3uoiwIo
Rolling stool: https://amzn.to/36KSJQZ
Cotton swabs: https://amzn.to/3wfzpFu
Chain lube: https://amzn.to/3L6WejZ
Rags: https://amzn.to/3J6prtT
Tire air pressure gauge: https://amzn.to/3MayU65
Want to support my channel?
Become a patron! https://www.patreon.com/EndlessMoneyPits
Or make a one-time donation via PayPal: https://paypal.me/EndlessMoneyPits?locale.x=en_US
TOOLS AND SUPPLIES USED:
• Electric screwdriver
• Phillips bit
• 10mm ratcheting wrench
• 8mm ratcheting wrench
• Socket wrench
• Socket extension
• 12mm socket
• 10mm socket
• 8mm socket
• 8mm hex
• 5mm hex
• Needle nose pliers
• Bent nose pliers
• Phillips screwdriver
• Stubby Phillips screwdriver
• Tiny flathead screwdriver
• Cable luber
• Tape measure
• Tire inflator
• And an air compressor
• A set of stands
• A light
• A stool
• A cotton swab
• Chain lube
• A rag
• Tire air pressure gauge
• And some running water
A huge thanks goes to my sole Patreon supporter, Elizabeth Y.!
Music not provided by YouTube:
“Song E01” by Seth Schneider
sethds93@gmail.com
**This video description contains affiliate links, which means that if you click on one of the product links and make a purchase, I'll receive a small commission at no additional cost to you. This helps support the channel and allows me to continue making videos like this.
**Disclaimer**
Due to the litigious world we live in, I have to include this statement:
I cannot guarantee against improper use or unauthorized modifications of this information. The creator of this content assumes no liability for property damage or injury incurred as a result of any of the information contained in this video. Use this information at your own risk. I recommend safe practices when working on vehicles and or with tools seen or implied in this video. No information contained in this video shall create any expressed or implied warranty or guarantee of any particular result. Any injury, damage, or loss that may result from improper use of these tools, equipment, or from the information contained in this video is the sole responsibility of the user and not the creator of this content.
87
views
Motorcycle Tire Change the Wrong Way and What They Didn’t Tell You
Replace the tires on your motorcycle yourself and save some money (but don’t do it like I did)!
NOTE:
• Use brake cleaner on your rotors if they get contaminated beyond what you can wipe off.
• Please recycle your old tires at your local motorcycle or automotive store.
LINKS:
Front Tire: https://amzn.to/3SqoAIY
Rear Tire: https://amzn.to/3C7kf84
Wheel balancing beads: https://amzn.to/3Rm8WNO
Motion Pro tire levers: https://amzn.to/3fxpLs8
Motion Pro rim protectors: https://amzn.to/3CsyLb3
Motorcycle stands: https://amzn.to/3rv1gyA
Air compressor: https://amzn.to/38XZXSA
Bench vise: https://amzn.to/3y0wSiO
Breaker bar: https://amzn.to/3Hqibsl
Torque wrench (3/8” drive): https://amzn.to/3ooqxJl
Torque wrench (1/2” drive): https://amzn.to/3HqCZjq
Socket set (3/8” drive): https://amzn.to/3IZm73p
Socket set (1/2” drive): https://amzn.to/3uDDza3
Socket extensions (3/8” drive): https://amzn.to/34hFxBT
Socket extensions (1/2” drive): https://amzn.to/3J1SHle
24mm socket: https://amzn.to/3Ci5YWf
12mm socket: https://amzn.to/3dPQG1A
17mm hex bit socket: https://amzn.to/3y5dqSb
19mm wrench: https://amzn.to/3UO3kPl
Flat head screwdriver: https://amzn.to/3unqAsT
Valve core remover: https://amzn.to/3Cjqmqf
Plastic mallet: https://amzn.to/3HBYRYU
Gloves: https://amzn.to/3IUg00c
Dish soap: https://amzn.to/3E4S4Za
A spray bottle: https://amzn.to/3L7eWby
Shop towels: https://amzn.to/3ftBozY
Waterproof grease: https://amzn.to/3xwXkQ9
Brake cleaner: https://amzn.to/3utiC1r
Broom and dustpan: https://amzn.to/3SsCuL5
Rags: https://amzn.to/3J6prtT
Tape: https://amzn.to/3dSfZA4
Plastic container: https://amzn.to/3R7hAQQ
Stool: https://amzn.to/36KSJQZ
Light: https://amzn.to/3uoiwIo
Laser thermometer: https://amzn.to/34wOaIt
Want to support my channel?
Become a patron! https://www.patreon.com/EndlessMoneyPits
Or make a one-time donation via PayPal: https://paypal.me/EndlessMoneyPits?locale.x=en_US
TOOLS AND SUPPLIES USED:
• Breaker bar
• A couple torque wrenches
• A couple socket wrenches
• A couple socket extensions
• 24mm socket
• 12mm socket
• 17mm hex bit socket
• 19mm wrench
• A set of tire levers
• Flat head screwdriver
• Valve core remover
• Plastic mallet
• Air compressor
• Bench vise
• Gloves
• Dish soap
• A spray bottle
• Shop towels
• Waterproof grease
• Rim protectors
• Broom and dustpan
• A couple rags
• Some tape
• Plastic bowl
• Stool
• A light
• Motorcycle stands
• And some cardboard to work on
A huge thanks goes to my sole Patreon supporter, Elizabeth Y.!
Music not provided by YouTube:
“Song E01” by Seth Schneider
sethds93@gmail.com
**This video description contains affiliate links, which means that if you click on one of the product links and make a purchase, I'll receive a small commission at no additional cost to you. This helps support the channel and allows me to continue making videos like this.
**Disclaimer**
Due to the litigious world we live in, I have to include this statement:
I cannot guarantee against improper use or unauthorized modifications of this information. The creator of this content assumes no liability for property damage or injury incurred as a result of any of the information contained in this video. Use this information at your own risk. I recommend safe practices when working on vehicles and or with tools seen or implied in this video. No information contained in this video shall create any expressed or implied warranty or guarantee of any particular result. Any injury, damage, or loss that may result from improper use of these tools, equipment, or from the information contained in this video is the sole responsibility of the user and not the creator of this content.
10
views
Shoei RF-1400 3 Month Review and First Impressions
Shoei RF-1400 motorcycle helmet review.
NOTE:
It’s just, like, my opinion, man.
LINKS:
Shoei RF-1400 Helmets: https://amzn.to/3Ur8xMT
Sena Intercom for RF-1400: https://amzn.to/3qSxa7J
Transitions Photochromic Visor for RF-1400: https://www.revzilla.com/motorcycle/shoei-cwr-f2-photochromatic-face-shield?sku_id=10058443
GoPro Hero 10: https://amzn.to/3qREqAK
Want to support my channel?
Buy my sweet merch! https://partner.spreadshirt.com/shop-area/101546687/shop
Become a patron! https://www.patreon.com/EndlessMoneyPits
Or make a one-time donation via PayPal: https://paypal.me/EndlessMoneyPits?locale.x=en_US
A huge thanks goes to my sole Patreon supporter, Elizabeth Y.!
Music not provided by YouTube:
“Song E01” by Seth Schneider
sethds93@gmail.com
**This video description contains affiliate links, which means that if you click on one of the product links and make a purchase, I'll receive a small commission at no additional cost to you. This helps support the channel and allows me to continue making videos like this.
**Disclaimer**
Due to the litigious world we live in, I have to include this statement:
I cannot guarantee against improper use or unauthorized modifications of this information. The creator of this content assumes no liability for property damage or injury incurred as a result of any of the information contained in this video. Use this information at your own risk. I recommend safe practices when working on vehicles and or with tools seen or implied in this video. No information contained in this video shall create any expressed or implied warranty or guarantee of any particular result. Any injury, damage, or loss that may result from improper use of these tools, equipment, or from the information contained in this video is the sole responsibility of the user and not the creator of this content.
16
views
Chevrolet Key Fob Battery Replacement 1997-2004
Replace the battery in your Corvette’s key fob yourself and save some money! (You could probably get someone to do it for free if you ask nice, to be honest)
NOTE:
I spent an hour looking for my soldering iron. Actually, I think I have two of them and couldn’t find either one. I’m not buying a third one. Keep track of your tools!
LINKS:
Battery (CR2032): https://amzn.to/3TT65hQ
Flat head screwdriver: https://amzn.to/3J3azft
Tiny flat head screwdriver: https://amzn.to/3sbUm0L
Replacement key fob (C5 Corvette): https://amzn.to/3RyvV9u
Want to support my channel?
Become a patron! https://www.patreon.com/EndlessMoneyPits
Or make a one-time donation via PayPal: https://paypal.me/EndlessMoneyPits?locale.x=en_US
TOOLS AND SUPPLIES USED:
• Battery (CR2032)
• Flat head screwdriver
• Tiny flat head screwdriver
A huge thanks goes to my sole Patreon supporter, Elizabeth Y.!
Music not provided by YouTube:
“Song E01” by Seth Schneider
sethds93@gmail.com
**This video description contains affiliate links, which means that if you click on one of the product links and make a purchase, I'll receive a small commission at no additional cost to you. This helps support the channel and allows me to continue making videos like this.
**Disclaimer**
Due to the litigious world we live in, I have to include this statement:
I cannot guarantee against improper use or unauthorized modifications of this information. The creator of this content assumes no liability for property damage or injury incurred as a result of any of the information contained in this video. Use this information at your own risk. I recommend safe practices when working on vehicles and or with tools seen or implied in this video. No information contained in this video shall create any expressed or implied warranty or guarantee of any particular result. Any injury, damage, or loss that may result from improper use of these tools, equipment, or from the information contained in this video is the sole responsibility of the user and not the creator of this content.
19
views
Front Sway Bar End Link Replacement – C5 Corvette 1997-2004
Replace the sway bar end links on your C5 Corvette yourself and save some money!
NOTE:
Always use quality jack stands! Never get under a car that is only supported by a jack.
LINKS:
Sway bar end links: https://amzn.to/3DgewOA
Torque wrench: https://amzn.to/3HqCZjq
Socket set: https://amzn.to/3uDDza3
Socket extensions: https://amzn.to/3J1SHle
19mm socket: https://amzn.to/3d6vxA4
Wrench set: https://amzn.to/32T9pE2
Ratcheting wrench set: https://amzn.to/32SN2hY
Impact wrench: https://amzn.to/3L8Wora
T40 torx bit socket: https://amzn.to/3QybBn2
Floor jack: https://amzn.to/37D10qc
Jack stands: https://amzn.to/3sgH6be
Wheel blocks/ramps: https://amzn.to/3xbYVeX
Gloves: https://amzn.to/36WLk1b
Creeper: https://amzn.to/3sgEE4q
Stool: https://amzn.to/36KSJQZ
Light: https://amzn.to/3uoiwIo
Want to support my channel?
Become a patron! https://www.patreon.com/EndlessMoneyPits
Or make a one-time donation via PayPal: https://paypal.me/EndlessMoneyPits?locale.x=en_US
TOOLS AND SUPPLIES USED:
• Torque wrench
• Socket wrench
• Two socket extensions
• 19mm socket
• 18mm socket
• 18mm ratcheting wrench
• 8mm wrench
• Impact wrench
• T40 torx bit socket
• A floor jack
• Two jack stands
• Two blocks of wood
• Gloves
• Creeper
• Stool
• Light
• And a set of sway bar end links
A huge thanks goes to my sole Patreon supporter, Elizabeth Y.!
Music not provided by YouTube:
“Song E01” by Seth Schneider
sethds93@gmail.com
**This video description contains affiliate links, which means that if you click on one of the product links and make a purchase, I'll receive a small commission at no additional cost to you. This helps support the channel and allows me to continue making videos like this.
**Disclaimer**
Due to the litigious world we live in, I have to include this statement:
I cannot guarantee against improper use or unauthorized modifications of this information. The creator of this content assumes no liability for property damage or injury incurred as a result of any of the information contained in this video. Use this information at your own risk. I recommend safe practices when working on vehicles and or with tools seen or implied in this video. No information contained in this video shall create any expressed or implied warranty or guarantee of any particular result. Any injury, damage, or loss that may result from improper use of these tools, equipment, or from the information contained in this video is the sole responsibility of the user and not the creator of this content.
12
views
Toyota Sun Visor Replacement – Camry Corolla Tacoma 4Runner Rav4 Sienna etc. 2007-2011 ish
Replace the broken sun visor in your Toyota Camry yourself and save some money!
LINKS:
Pry bar kit: https://amzn.to/3MAwYCl
Toyota Sun Visor Replacement: https://amzn.to/3KDzOY5
Aftermarket Sun Visor Replacement: https://amzn.to/3q5f5CX
Why You Can’t Replace a Toyota Sun Visor: https://www.youtube.com/watch?v=BAXd2Yh1dq0
Want to support my channel?
Become a patron! https://www.patreon.com/EndlessMoneyPits
Or make a one-time donation via PayPal: https://paypal.me/EndlessMoneyPits?locale.x=en_US
TOOLS AND SUPPLIES USED:
• Pry bar
• New sun visor
A huge thanks goes to my sole Patreon supporter, Elizabeth Y.!
Music not provided by YouTube:
“Song E01” by Seth Schneider
sethds93@gmail.com
**This video description contains affiliate links, which means that if you click on one of the product links and make a purchase, I'll receive a small commission at no additional cost to you. This helps support the channel and allows me to continue making videos like this.
**Disclaimer**
Due to the litigious world we live in, I have to include this statement:
I cannot guarantee against improper use or unauthorized modifications of this information. The creator of this content assumes no liability for property damage or injury incurred as a result of any of the information contained in this video. Use this information at your own risk. I recommend safe practices when working on vehicles and or with tools seen or implied in this video. No information contained in this video shall create any expressed or implied warranty or guarantee of any particular result. Any injury, damage, or loss that may result from improper use of these tools, equipment, or from the information contained in this video is the sole responsibility of the user and not the creator of this content.
30
views