

Crafty Man Shows How To Make A Handy Mini Bar
In this video viewers will learn how to make a mini bar from Jerry can. The same concept could be used to make storage for anything. All you need is to work on different shelving design!
The narrator in this video teaches how to make this project very well, and it seems like an easy task that anyone can do who may be wanting a contraption such as this. It does take some basic tool working skills, but none of it seems so complicated that it would be impossible for the novice to learn how to make.
This would certainly be a great project for those who like creating things and working with their hands. The end result could also be something that is considered sellable in the right marketplace. For the handyman husband who has a little extra time on a Sunday afternoon, this could be the perfect project. The process of creating the product would be enjoyable, but the final result is also exciting if the contraption is something that can be then sold in the right areas.
The instructor starts the project with a newly purchased red 20 liter Jerry can.
He includes in the materials needed hedge trim, clasps, and hinges. It is advised that you should get all materials together before beginning the project. You are more likely to finish the project faster and more efficiently if you are not having to stop between steps to go gather materials. The speaker also suggests making sure that there is no leftover gasoline inside the can whatsoever if you are going to use a can that has been previously utilized for another purpose.
The last thing you need is to create a disastrous fire hazard because the can still contained traces of gasoline that could pose a very serious threat for flare ups. This is especially true when there will be power tools involved that create heat, extreme friction, and sparks.
The first step is to use the tape to mark where the <a href="https://rumble.com/v32vmj-bar-tricks-balancing-two-forks.html" target="_blank">mini bar</a> will be. He uses a black sharpie to do this marking. One quick tip that the speaker uses to mark off rounded edges is the top of a container.
This could make the rounded edges much easier to spot and helps with making all of your corners symmetrical. He then uses an angle grinder to cut the straight lines. Watch the speaker’s dexterity with power tools. He is definitely not a novice; he seems to be a very experiences tool worker and is not new to <a href="https://rumble.com/v6g01x-how-to-make-a-bank-rod-holder.html" target="_blank">projects</a> such as these. He also utilizes a rotary tool. Again, be sure that you have all of the necessary products with you before you begin doing anything.
Another thing to remember is to use all safety precautions necessary. The speaker recommends gloves to protect the hands, and he advises viewers to use some kind of hearing and sight protection also. All of these are imperative to stay safe while working with power tools.
Watch the video to see the rest of this very impressive project.
251
views
3
comments
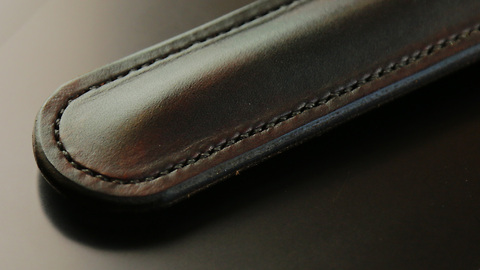
Easy leather craft project: DIY Apple pencil case
I love my iPad Pro. It helps me organize and sketch my ideas with the apps such as Procreate and Good Notes. The functionality of drawing with the Apple Pencil is awesome! But the pencil itself is pretty fragile. That is why I made this Apple Pencil Sleeve out of beautiful full grain veg tan leather. The top half of the sleeve is openable, this allows the Pencil to be pulled out of the sleeve without having to grab on the easy to pull off magnetic cap.
183
views

Making Of Modern Steel Metal Vase
This video is sure to motivate amateur metal fabricators. It's a long way between the planning and the finished product, but in the end, all that hard work was worth it. The maker should rightly be proud.
The faceted metal vase was inspired by modern art. It's quite marvelous how all those irregular angles nicely fit together. The video starts out showing a paper plan with many two dimensional shapes. We see the project name is Polygon Vase Set. Next, we see the craftsman sorting the pieces, now cut into their metal forms, into a coherent pattern on his work table.
The video is in slow motion, set to a synth rhythm. Putting a large metal <a href="https://rumble.com/v5k74h-give-a-boy-a-vase-and-you-will-see-what-happens.html" target="_blank">vase</a> together isn't a one-man job since we see multiple hands involved. Maybe the different roles, like designer and fabricator require unique skill sets? The video moves quickly through construction phases, so this isn't meant to be a tutorial as much as it is documentary.
Struts and braces are measured, cut, and welded together using precision techniques. The plan is referred to again to make sure we're doing it right! As the piece takes shape on the table, we can get a sense of scale against the two men bringing it to completion.
With every piece welded into place, it's time to grind out the rough corners and edges. Now we have to pause to <a href="https://rumble.com/v32qxc-little-puppy-meets-big-dog.html" target="_blank">admire</a> the spirit of the vase. We have a sense of pride and relief seeing the imagination manifest itself into the real world. Only a day before this was just an idea in someone's mind.
There's one more stage after grinding, and that's polishing. The craftsman uses a buffing wheel to smooth down the surface, and finally polishes the metal structure to a silky finish. It's ready for painting!
The final part of the video shows the painting process, which is a kind of dance between the painter and his airbrush. This is a very sensitive stage, where the piece cannot be touch or contaminated by air born particles. It is hung on a rack like a side of beef, then rolled into the kiln. There's a lot more to ceramic coating than just spray painting. The kiln sets the ceramic coating by bringing it to high temperatures and then letting it gradually cool. This makes the coating hard as a rock. The kiln is quite a large space that can accommodate several other works, as well. May as well take advantage of all that extra space that would otherwise be unavailable for the day.
The time has come to take the vase out of the kiln. Our videographer shows it off, with close-ups. It's a work of art unto itself. At this point the craftsman's part in its construction is over, so we don't need any people in the final shots. We want to marvel at the elegant design, space and color it takes against the studio brick walls and wood floor.
Where will this vase spend the next years of its life, in a New York studio, or a museum? Maybe it will get the attention due in the foyer of a luxury hotel, or, just maybe, the private residence of its creator.
161
views
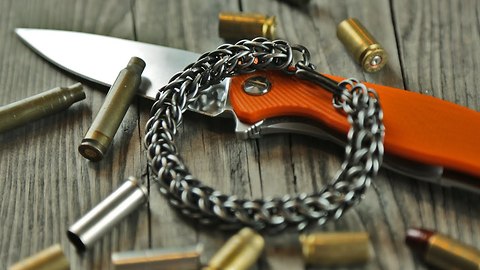
DIY chain bracelet with Persian chainmail weave
Learn how to make this awesome chain bracelet with a Persian chainmail weave pattern. The final result will blow your mind!
107
views

Creative DIY Trick To Make A Whiskey Glass
In this video, learn how to cut a glass bottle by using regular glass cutter and thermal stress, repetitive use of hot and cold water. Enjoy!
DIY projects, or Do It Yourself projects, are always fun to watch. It is amazing how people use their creativity to improve their lives and have fun in the process. DIY projects can inspire the viewers to take on their own <a href="https://rumble.com/v4xm9n-diy-project-gift-box-with-no-glue-just-from-1-single-paper-bee-diy.html" target="_blank">DIY projects</a> and tasks.
In this video, the man will make his own whiskey glass out of a glass wine bottle. Usually glasses are purchased and used, but this man wants to create his own personal glass! Handling glass is always risky so make sure to remain careful and be safe with the tools you are using!
The man in the video goes by the name of Igor and he is on YouTube channel called Inspire to Make. This channel is all about inspiring others to make their own cool items, such as their own whiskey glass. Igor finds the perfect bottle as it resembles the bottom of a typical whiskey glass. This will be his first time trying something like this and he is really excited about the possibility of a new glass!
The tools needed for this project will include a tub of water, some fuel, cotton string, spears or scissors, some different types of sandpaper, a lighter, and of course goggles for safety. Dealing with glass can be dangerous and you definitely don’t want to have your eyes exposed if something goes wrong! Now that you got all your materials ready, it is time to start!
The first step is to tie your string around the bottle at the height you want to cut it at. This will be the height of your glass so choose wisely! Next, Igor dabs some fuel along the string all the way around as you will be setting it on fire to make your glass. Igor struggles with this step and has to resort to a plan B. Igor crafts a simple glass cutter that makes a nice cut in the wine bottle that will be the top of his new glass.
Next, he gets boiling water and cold water to create temperature differences that will eventually split the bottle. As he pours both waters on the bottle and alternates between the two, it pops off and he left with his glass! Now the top of his glass is still sharp and not suitable for use, this is where the sandpaper comes in. Igor gets out his sandpaper and goes to work on the glass. You can obviously sand to your own liking but you have to make sure it isn’t sharp anymore, because that can be very dangerous.
Igor sands in circular motions and uses the different grades of sandpaper to get different types of smoothness on his glass. Finally, he gets it just how he likes it and pours himself up a nice drink. This video is sure to inspire people to make their own glass. If you are a <a href="https://rumble.com/v6em31-the-slave-who-helped-create-jack-daniels-whiskey.html" target="_blank">whiskey</a> drinker this a great watch for you! Always remember to be careful with the glass, fire, and different water temperatures!
2.16K
views
1
comment
![How to make POTATO CANNON - [ Gone Wrong ]](https://1a-1791.com/s/s8/1/h/V/g/O/hVgOa.oq1b.1-small-How-to-make-POTATO-CANNON-G.jpg)
How to make POTATO CANNON - [ Gone Wrong ]
How to Make a Potato Launcher from PVC pipe.
You will need:
4" pvc pipe for the body
2" pvc pipe for the barrel
4" to 2" neckdown
4" end cap
BBQ igniter
91
views

DIY headphones made with real bullets
Learn how to make these awesome bullet headphones in this phenomenal DIY tutorial video. Enjoy!
110
views
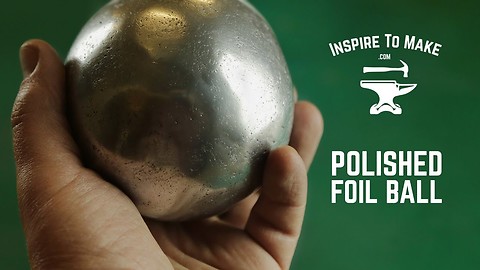
DIY challenge: Polished aluminium foil ball
The latest crazy online trend is polishing aluminum foil balls until they shine. We didn't even know you could do that to aluminum foil, so challenge accepted! Who knew you could polish tinfoil? The end result is an utter masterpiece!
485
views

DIY Hand Lettering Wooden Sign - Home Decor and perfect gift Idea. Oddly Satisfying.
This wooden sign was a good starting point for me learning hand lettering on the scroll-saw. It's not perfect, but made for a nice gift for my friends. Cutting those letters on a scroll saw was oddly satisfying, and I'll definitely make more in the future.
Next Video: https://www.youtube.com/watch?v=QE7HTgKqfCg
PLEASE CONSIDER SUBSCRIBING: https://goo.gl/KhTMU2
****************************************
MUSIC: HAYDEN JAMES - NUMB feat. GRAACE
****************************************
CHECK OUT MY CHANNEL: https://goo.gl/KhTMU2
☞ FACEBOOK: http://facebook.com/inspiretomake
☞ TWITTER: http://twitter.com/inspire_to_make
☞ INSTAGRAM: http://instagram.com/inspire_to_make
****************************************
▼▼▼My Equipment:▼▼▼
Camera - http://amzn.to/2kub4Uj
Lenses:
http://amzn.to/2ldU8Wu
http://amzn.to/2lHuXMW
http://amzn.to/2lgGgdG
http://amzn.to/2knnZvY
Tripod - http://amzn.to/2lhii2b
12
views

Awesome DIY electric skateboard tutorial
This clip will teach you how to create a DIY electric skateboard/longboard. Enjoy!
75
views

Here's How To Make A Stylish Bluetooth Speaker
Music gives a certain flavor to our lives. It has been part of our everyday lives since the beginning of time. As technology advanced, so did the means to reproduce music and before we could wrap our minds around it, we now have speakers that play our music without having to attach them to anything!
So if you want to create a <a href="https://rumble.com/v49mgz-wraps-has-a-stylish-solution-for-tangled-earbuds.html" target="_blank">stylish</a> double speaker that connects to your devices via Bluetooth, then this is the tutorial for you!
Concrete might not be everyone’s go-to material when it comes to interior decorating, but its roughness and simplicity of color make it the perfect way to exude your impeccable taste. To turn a simple cinder block into a double Bluetooth speaker, you will need two full range speakers that will fit the holes in the block, a couple of pine boards for the face and back and a Bluetooth amp to connect it all together.
The rest is just knowhow, but there are a lot a schematics that you can find online that will make your life much easier. The power router does give the board a nice touch, rounding the edges and making everything look smooth and professional, but you can skip that and work in some elbow grease with a few grits of sanding paper.
True, this project might not look as awesome if you don’t have the power tools, but can you imagine the pride you will feel when you display the work that you have done with your bare hands?
DIY Bluetooth Speaker made out of a single cinder block and pine board.
Parts I've used:
Full range speakers - http://amzn.to/2sOjVrT
Bluetooth amp - http://amzn.to/2sRd1mg
Music: https://goo.gl/AVYbJd
▼▼▼Find me here:▼▼▼
☞ Facebook: http://facebook.com/inspiretomake
☞ Instagram: http://instagram.com/inspire_to_make
☞ Twitter: http://twitter.com/inspire_to_make
▼▼▼My Equipment:▼▼▼
Camera - http://amzn.to/2kub4Uj
Lenses:
http://amzn.to/2ldU8Wu
http://amzn.to/2lHuXMW
http://amzn.to/2lgGgdG
http://amzn.to/2knnZvY
Tripod - http://amzn.to/2lhii2b
110
views
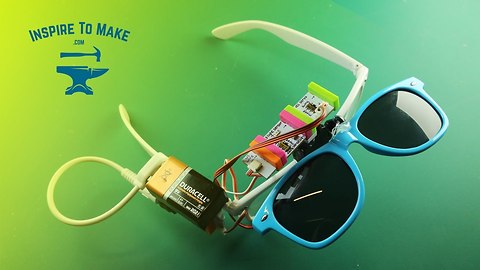
3 awesome 'LittleBits' Gizmos & Gadgets Kit projects
Here are 3 'LittleBits' projects to solve everyday challenges. Which one is your favorite?
46
views

DIY electric skateboard tutorial
Can't afford an electric skateboard? Make your own with this cheap and easy DIY solution. So cool!
233
views
1
comment

These Amazing Simple Life Hacks Using WD-40 Will Save You Tons Of Time
Check out these ten useful and cool life hacks using WD-40 that will blow your mind! A can of WD-40 does more than just free rusted metal parts or stop things from making irritating squeaky noises. Here are some clever uses for the fluid that you should keep in mind and put in practice.
This video shows us that WD-40 fluid can be used to do helpful things like remove wax crayons from screens, clean off chewing gum from carpets and shoes, act as a carpet and kitchen cleaner to fight tough stains, add a short-term shine to leather shoes, and so much more. It is amazing how WD-40 can lubricate the stuck and tight zipper, and help it move in smooth motion.
Did you know you can light a fire in the rain or in any wet conditions, because WD-40 is very flammable and can be used as a fire starter. You can also use it to remove grease or wax from any surface. <a href="https://rumble.com/v3083p-video-apparently-if-you-douse-a-floor-in-wd-40-it-can-do-something-i-never-.html" target="_blank">WD-40 works like magic</a> for removing your kids’ crayon drawings from any surface, and it is very easy too.
If you have difficulty removing a piece of gum off the carpet, all you need is WD-40. The same method works if the gum stuck in your hair. Amazing! However, this is also the case if you need to remove some stains. If you spill some ketchup on your carpet you should soak the stain for 5 minutes with WD-40 and the stain will be easily removed.
When you need to cut something, you should lubricate your scissors with WD-40 so that they manage to easily cut through tough stuff. This amazing liquid also works for cleaning and making your leather shoes waterproof, or for <a href="https://rumble.com/v3lw3r-supervising-parrot-oversees-cleaning-chore.html" target="_blank">cleaning</a> stainless steel appliances.
Next time you need to remove dirt, rust or glue that is stuck and stained, remember to use WD-40 to clean up your stove from those dry and hard to remove spills or stickers.
10K
views
3
comments

7 Simple Useful Tricks With Plastic Cards
Who knew plastic cards could have so many uses? Here are the absolute 7 best ones! Get ready, because this video is going to shock you!
Who had a clue that plastic cards had this many uses? We know that we had absolutely no clue! Videos like this make us see everyday things in completely new ways.
The first use of the plastic cards is one that is somewhat fairly known. Most people have heard that you can unlock a <a href="https://rumble.com/v4idvz-clever-life-hack-to-fix-a-loose-door-latch.html" target="_blank">door</a> with a plastic credit card, but we don’t think most have seen this specific way of cutting the card. It seems that cutting it in the way shown in the video makes it a little easier to unlock a door.
The second use is the one that really blows the mind. The video maker shows how to make an actual working, battery-powered fan! Oh yes, it really does work! Now, of course, it is a little bit more complicated than the other uses, but if you are the kind of person who tends to do well-manipulating technology and such, this is probably for you. Personally, we think it might be a bit easier just to purchase a 99 cent fan, but we have to admit that creating one in this way is pretty impressive! In the end, young people especially really enjoy making a project like this in one of their science or physics classes. To all the <a href="https://rumble.com/v5al6v-unpaid-teacher-in-tears-after-students-give-him-cash.html" target="_blank">teacher</a>s out there, teaching these subjects, maybe this can inspire a new project idea for you!
Use number three shows how to make a stand for a phone or other small device. Now, this is really something that everyone can use, and it is simple enough for anyone to create!
This video also shows how to create a guitar pick from a plastic card. Not everyone is a guitar player, but we can imagine that this little trick might come in handy. If you need a replacement pick in a hurry in the middle of the night, but no store is open for you to have the ability to just go and purchase one, this could be really helpful.
We don’t want to spoil the rest of the plastic card use ideas for you, so you’ll have to watch the rest of the video to see them all!
Do you have any ideas for even more creative uses for plastic cards? If so, do place your comments below! Share your ideas with us!
Did you like this video? Do you want to see more like it? Then you are in the right place! Rumble gives small creators opportunities that other sites do not. No longer do you have to wait until you have a specific number of subscribers or views or watch hours in order to make money! Create a Rumble account, and join the movement! It is the easiest platform to share high-quality video content. Simply upload your video in the same way that you would on any other site, choose your management package, and let us do the hard work for you!
45.7K
views
1
comment

Six Simple Drilling Tricks Necessary In Everyday Living
Life hacks allow people to get task from their everyday life done faster than it meant to be done. It doesn’t require much work to implement those easy life hacks to your everyday life. Now we would like to talk about the video, because it is specific to the drilling life hacks. So now what does this means? It means that for the life <a href="https://rumble.com/v31ggt-6-fruit-cutting-hacks-to-make-your-life-easier.html" target="_blank">hacks</a> shown in this video you need a drill. A little bit more material is required as well as a drill, for exemple, screws and a marker, but we think it is common in every household.
The first life hack that is explained in the video is to shred cheese. We all have this machine to allow us to shred cheese right above our warm dish but it doesn’t always work, the cheese gets stuck on the side of the machine and you need a little bit of force to be able to shred the cheese in little pieces. That’s when the life hack comes in, the video shows how to attach the drill to the back of the machine, with a few screws, and you can now shred your cheese by with your drill. Just press the button and it will make the machine speed as fast as the drill is, which guarantee nice shredded pieces of cheese.
The second life hack featured in the video has the same function as the previous one, just that this time it is faster to just attach a whip to the end of the drill to be able to whip any cream without much arm effort.
During this video, the life hacks are well explained and shown to you, from how to prepare the drill and the other tools, until the person shows as well the final result. For example, the one with the bottle of <a href="https://rumble.com/v44dqw-holiday-food-and-wine-pairing-101.html" target="_blank">wine</a> is well explained because the type of screw required is clearly visible and identifiable and how to get the cork out of the bottle as well.
The other hacks shown in the video are really practical and allow to save a lot of time but I would like to go over simple security measures while using such hacks and a drill.
First of all, make sure to be close to an outlet to be able to connect the drill. Another thing that I believe is really important is that the drill used for those kitchen hacks should be new and not have been used previously to work around the house, just to limit the spread of microbes and viruses. This came to our mind as we were watching the different life hacks of the video and especially when the one about the apple came. It might be really easy, fast and practical but the drill is in the middle of the apple during the life hack, hence why it needs to be cleaned properly or brand new. Any children watching this video and thinking about using those life hacks should be supervised by an adult at all times.
596
views
2
comments

This DIY Rocket Powered Fidget Spinner Will Get You Dizzy
Just when we were starting to get fatigued by fidget spinner news, somebody put three rockets on a huge metal one. Has the fame surrounding fidget spinners finally begun to die down? Probably not, but either way, in this video you will see a dude who has taken the ever-popular toy to the next level.
Check out this epic rocket powered fidget spinner experiment. This is probably the world's fastest and <a href="https://rumble.com/v3amrc-rocket-powered-fidget-spinner.html" target="_blank">most dangerous fidget spinner</a> that goes about 1,000mph. Enjoy!
We are amazed as we observed how to make a rocket-powered fidget spinner out of metal parts as the entire procedure is explained step by step and we finally got to see a huge aluminum fidget spinner get the <a href="https://rumble.com/v3jlad-rs-25-rocket-engine-test.html" target="_blank">rocket engine</a> treatment.
Fidget spinners are everywhere. Thousands upon thousands of plastic discs in every shape, size and color have been press-fit with skate bearings and piled high on every store shelf. Just like all fads, they’ll surely fade from the mainstream before too long, but in the meantime this dude has something to say about the ubiquitous, gyroscopic toy. We have seen bladed fidget spinners, giant fidget spinners, and now even rocket-powered fidget spinners. Never one to let something this popular go by without investigating, so people come up with different ways to freshen up this worldwide trend!
190
views

How to make a leather wallet
Making a cool leather wallet is easier than you think. Just get yourself some scrap strips of leather and you are good to go. No special tools required!
263
views