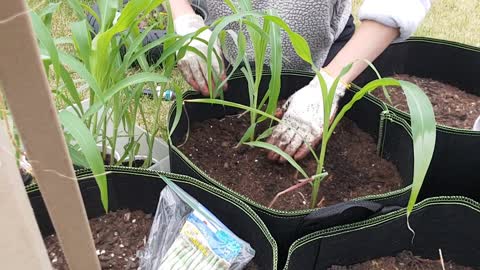
Raised Garden Bed
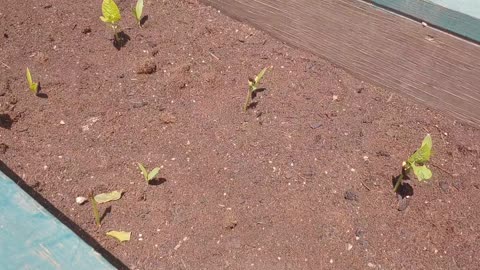
I was super fortunate to have some friends give us these 2 raised garden beds that they were not using! With it being mid June when I received them I wanted to get seeds in IMMEDIATELY in hopes of getting good immediate use out of the extra gardening space!
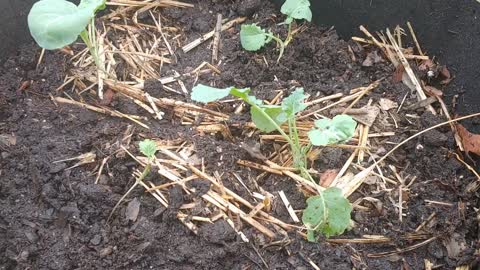
In the first garden box I took a bit of a risk in sowing some cooler weather crops, broccoli and carrots! This box is slightly shaded and I intend on doing what I can to keep the soil cooler. You will see I did mulch lightly with some glass clippings in this box in hopes it will help retain moisture and block the sun from hitting the soil as heavily. As my seedling emerge more I may add a little more grass clippings as well. I will say, these seedlings emerged quite quickly, especially my carrots in comparison to the first sow I did this season, so I was happy about that! I
Box two contains warmer weather crops, corn and beans. As I have now learned a little bit about growing corn, I decided I would give it a go and try growing some more!! Because who doesn't love FRESH CORN! These seedlings are looking amazing as well! I will in time mulch the bed with grass clippings as well BUT the urgency isn't as high since I do not have to shade this soil as much! It will however help with retaining moisture, so next mow I do, they will get some clippings!
Also keep in mind that each bed had two different veggies BUT they ARE compatible! Always something to keep in mind when gardening 😁
Happy Gardening!
99
views

Trying our first backyard grown CORN 🌽
I am not so sure that we are going to get many full ears of corn this first time growing it. I learned a little more about how corn is pollinated along the way and perhaps just a little too late to ensure well pollinated corn.
Corn does NOT rely on insects for pollination. It only relies on the wind. This I knew. What I hadn't realized, was that each little strain of silk that comes out of the corn cob when it develops, represents a kernel of corn! Each piece of silk must have pollen from the corn stalk tassel land on it in order for it to fully pollinate! I suspect that the number of green bean plants, planted with my corn, may have blocked some pollen from getting to the silks!
This one piece of corn on the cob was mostly pollinated and good and sweet. It had a milky substance release when I did a small prick test before harvesting. This is an indication it is ready to harvest.
I am a bit bummed as I suspect I will not end up with much corn BUT I am excited BECAUSE I recently planted some more and will try again 😁
87
views
NJ Garden May 2022 Update
This is just a video to show a bit of my garden as of May 24th 2022 located in NJ
35
views
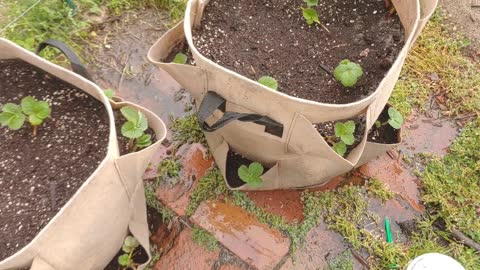
Strawberry Root Transplant
In this video I first show a quick demo of transplanting my strawberry roots upon initial arrival. I go on to show how I transplanted them into my strawberry planter outside once they had a few leaves. I kept them in cups for 6 days before moving to my planter.
Some key pointers:
1.Soak you strawberry roots for about 20 minutes
2. Have a soil mixture of about 2/3 soil to 1/3 sand
3. Have Fun!
56
views
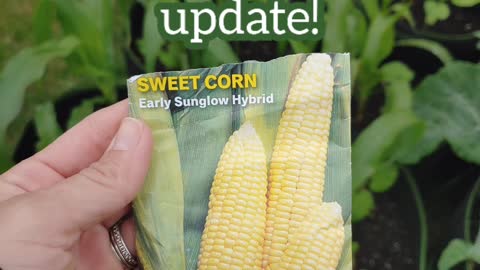
Early Sunglow Hybrid Corn 9 week update
In this video I am simply showing some of the stages of my container grown corn 9 weeks since sowing the seeds.
This is my first time ever growing corn and I am still learning a lot, however based on research I have done my corn seem to vary between growing stage v5 and v10. I am expected that as some tassels have formed as well as far shoots, these should soon experience a growth spurt as well.
I will be sure to follow up again in a few weeks!
42
views
Asparagus Roots
After sampling just a few spears from last years asparagus roots, I knew I needed to get some more asparagus growing ASAP! I do have some asparagus ferns here that I planted from seed this year, but I wont get to enjoy those for quite some time. In hopes of getting to enjoy some more asparagus in the next year or 2, I decided to plant a few more asparagus roots in my raised bed and will be transplanting my asparagus seed ferns into a pot for the next year instead. I will make sure to save space in the garden bed for them next year!
Happy Gardening!
57
views

PVC Hoop Gardenhouse
This here is a last minute, "oh no we have some unexpectedly low May temps" project. I was unable to record the actual process here, but it really was quite simple.
Using my 1/2 " thick 10ft long PVC pipes, I wedged one end into one side of the raised bed, bent it over and wedged the other into the opposite side of the bed. I followed the same step with my fabric pots, which stability wise wouldn't be great long term, but will get us through some unexpected cold temps. After putting a few hoops I cut a pvc pipe to length ( few inches over in length on each side) and attached the center beam using twine. I again did the same for my fabric pot hoop house, but instead of PVC I used a wood dowel we had laying around that fit perfectly.
When I covered them with plastic I used cheap plastic spring clips from walmart, along with craft foam sheets that I cut to put against the plastic before attaching the clip. I did this to protect the plastic from any tears the clips may cause. When I covered the hoop frame over the pots I tucked the plastic under some of the pots to keep it a little more snug.
While not perfect, I am pretty confident this will do the job its intended to do.
You will also notice the two mine greenhouses I had purchased and did a video on recently from Groundwork.
Thanks for watching
36
views
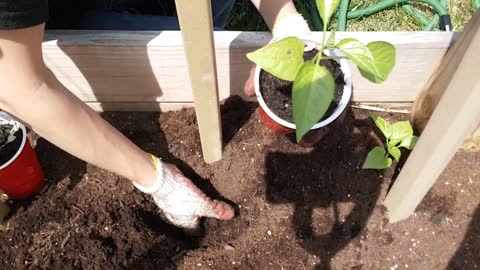
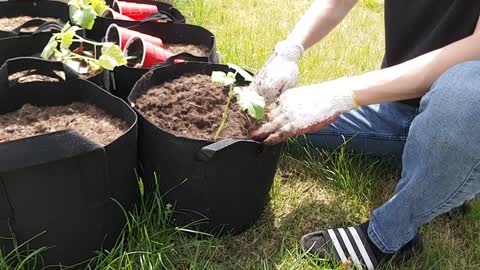
Transplanting pepper plants fabric pot/ garden bed
In this video I transplant my pepper plants. I start by transplanting two entwined pepper plants into a 10gallon fabric pot. I have read that you can plant 1 pepper plant per 5 gallons, so I feel comfortable planting these together.
The majority of my pepper plants are planted in my raised garden bed. I am trying this year to mix and match between garden bed, pots and even in the ground for some of my plants, to see what methods yield the most success.
I take a very laid back approach to how I plant. I did do a little to mend my soil. You can view previous videos to see how I prepared my pots and other garden areas for this seasons crops as well. I do try not to over think what I am doing, unless my method fails.
Hope this helps! Happy GARDENING
45
views
Transplanting Corn with Garden Bean Seeds
In this video I am transplanting my corn into 10 gallon fabric pots. Beside each corn stalk I planted 2 green bean seeds as well. Ultimately, I will likely thin out the green beans to have just 2 green bean plants and 2 corn stalks per pot.
Three things I would like to point out. 1. Green beans and corn grow well together 2. Green beans will use the corn as a natural trellis 3. I read that corn will grow well in pots, but did not see much about how many to plant per pot. I am going to see how this goes and will be sure to share results in a later video!
Happy Gardening!
93
views
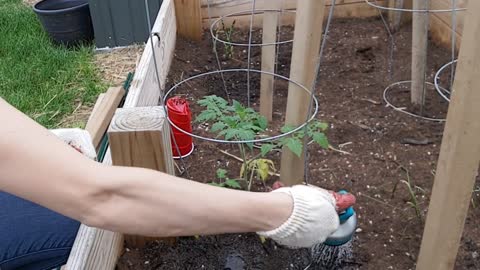
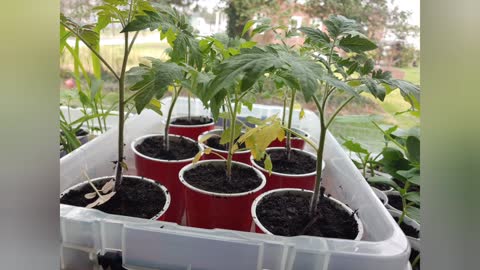
Transplanting Tomato Plants into the Garden Bed
In this video I show you how I transplanted my tomato plants directly into a staked in tomato cage. I want to mention that the stakes I used here are larger (wider) than an average stake BUT were free and I wanted to put them to good use. They are also shorter than what my tomato plants will be, so I do suspect I may have to add a taller stake if my plants need to be stabilized higher up.
All in all, these plants are craving some more nutrients, which I think they will find here in the garden bed! The temps however are still dropping into the 30s some nights, which tomato plants can handle some 30 degree temps, but to air on the side of caution I am covering them with these cute little greenhouse toppers I found at tractor supply.
I have two locations in my garden for tomatoes, I only show 4 of my 8 here. I planted the others in the ground and am actually excited to see which of my plants do best between these two locations.
I hope you found this video helpful! Happy Gardening!
45
views
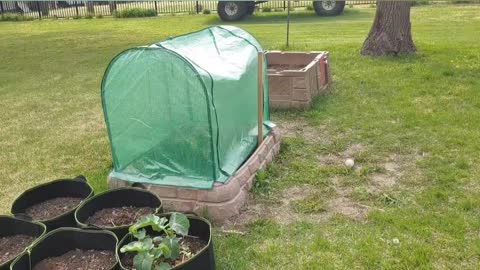
Groundwork Greenhouse Topper
This NJ weather has been sketchy and my tomato plants were outgrowing everything inside so I figured this would be a quick easy way to cover them and protect them from out cold night time temps. I will eventually use these more for my potted plants and will do a PVC pipe greenhouse on the raised garden bed :)
41
views
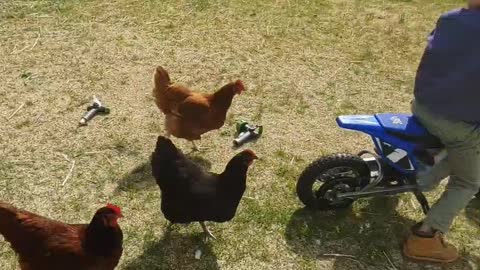
Chicken Fun
We live right in town so our chickens don't get to free range, but we do get them out to run and range the yard when we can.
My son used his electric dirt bike and a bag of mealworms to give them a little exercise. Don't worry, they got some mealworms when they were done.
41
views
Transplanting Tomato into Larger Cups
I noticed my tomato plants getting a little yellow in the leaves and had read this is commonly a nutrient issue.
I decided to transplant into larger cups to give the roots more soil to dig into.
These tomato plants are 6 weeks old and could go outside BUT our weather has been a little too chilly, so the goal is to keep them inside another 2 to 3 weeks.
24
views
Frozen broccoli Seedling
Well, as we know I enjoy a good experiment. As a new gardener I like to document everything! A week ago here in NJ our temps dropped so much that my fabric pots all froze! Thankfully, I had only planted in one of my pots so far. Broccoli being a cooler weather crop I felt comfortable planting these outside. However, what I wish I had done, was bring in my broccoli pot in when I realized the temps were dropping to the level of FREEZING! However, I didn't and every ounce of the soil surrounding my sweet little broccoli seedlings was hard as a rock!
The video here does not show in the best detail just how desperate parts of my broccoli seedlings appeared. Some of the leaf stems were "pinched" and looked like slimy old spinach you might find in your fridge. I honestly was really undecided on leaving the leaves OR removing them. I opted to remove the ones that appeared in really bad condition. My thinking was that the plant may waste too much energy on the unhealthy parts of the plant. Logical? I have no clue. However, I went with my theory and removed the bad leaves. One of my broccoli plants was nothing but a stem by time I was done.
This experiment is something I will continue to update on. I am uncertain on if these seedlings will eventually produce some good broccoli OR if they will just take up space in a pot until they whither away. None the less, bring those pots in if freezing temps are expected.
Best of luck!!
19
views

A cat found the Cat nip plant
The other day I posted a video about my daughter starting an herb garden. Well, looks like we will need an enclosure for that CAT NIP🤣
131
views
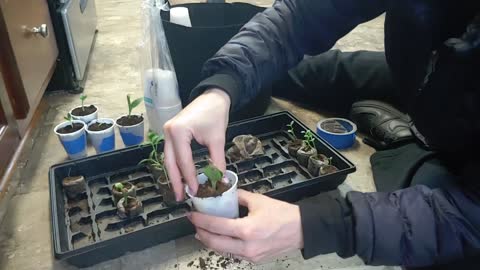
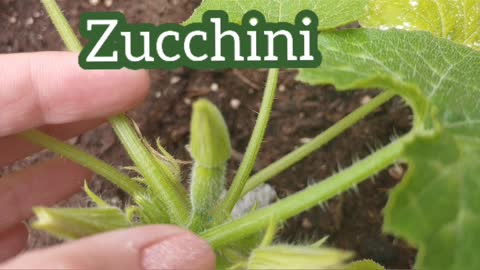
Thinning and Transplanting Peat Pellet Seedlings
In this video I first move watermelon and Zucchini seedlings into cups so their roots can continue to expand before placing them in the garden.
I also thin my cucumber seedlings in this video. This is my first year growing from seed, as opposed to buying seedlings. The first seedlings I thinned were my broccoli ones and I pinched off the extra seedlings and tossed them. However, it bothered me tremendously to toss those healthy seedlings. So, I did some research and saw that others were separating them and planting in separate pots. I decided to try this method with my peppers but did not take a video unfortunately. I did however have success as all of my pepper seedlings are thriving. This time around I did get it on video with my cucumbers. You can see this around the 1 minute mark!
Thanks for watching!
44
views
Starting a Herbal Tea Garden
While I spend most of my time working to grow veggies and berries, my 15 year old has been studying the benefits of a variety of herbs. She is very interested in making her own herbal teas. Last fall she did plant some catnip, rosemary and peppermint. Her peppermint and rosemary never fully established. She also decided on a whim when finding a dandelion that had went to seed, that she wanted to use it to plant her own dandelion for dandelion root tea.
In this video we transplant her dandelion as well as her catnip. We also tried to start some new rosemary and peppermint plants. Those peppermint seeds are about the size of the tip of a pin! Hopefully some will take!
All in all, I am excited to watch her herbal garden take off and see her complete the process of making teas from her herbs.
85
views
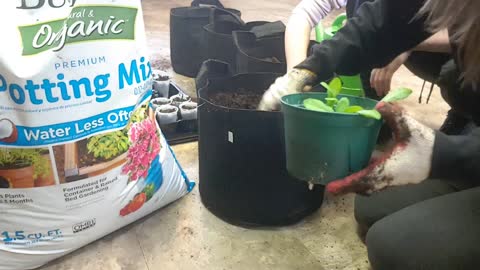
Transplanting Broccoli seedlings into a Fabric Pot
When I initially decided to use grow bags in my garden this year, I had planned to only plant one seedling per pot. I had read that broccoli does well in a 5 gallon pot. However, just prior to transplanting these seedlings, I decided to research just a bit more, because I have been really wanting to utilize my garden in a way that allows me the most possible growth!
In doing my research I came across this article:
https://gardenerspath.com/plants/vegetables/grow-broccoli-containers/
It mentioned that you can grow multiple broccoli plants in one pot, though it may lead to smaller broccoli heads, it will also likely produce side shoot heads later on. I personally tested my boundaries just a bit with the suggestions from the article. While it suggested planting 3 plants in an 18inch wide pot, a minimum of 12 inches deep, I opted to plant 4 plants in a 15 inch wide, 12 inch deep pot. Honestly, I only did this because A. I love to experiment and see how I can get the MOST out of my space, B. I had just 4 seedlings and was being stingy with my space, C. I can always try again in the fall so it was worth the risk to see how it goes or GROWS!
I'll be sure to touch back on their growth as time goes on. I suspect I will need to water this pot pretty regularly given broccoli likes cooler temps and the 4 broccoli plants may absorb the water more quickly. Not to mention it is a black pot, which works against the temp and moisture elements of this pot.
All in all, in the fall when I have less need for gardening space, I will more than likely plant just two plants in a 10 gallon pot. But will use multiple pots to plant many broccoli seedlings. We eat a lot of broccoli, so I would be willing to utilize much more of my gardening space to grow broccoli in the fall!
Wish me luck!
84
views
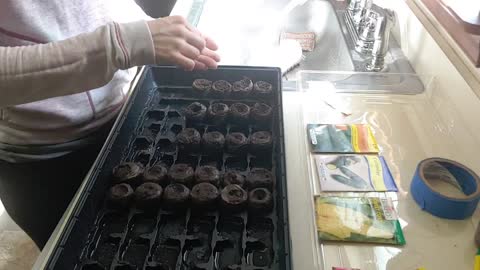
Jiffy Seed Starting Greenhouse tutorial
I have previously shared about the Jiffy Seed Starting Greenhouse, but here is an actual look at the process of setting it up and starting your seeds the EASY WAY!
40
views
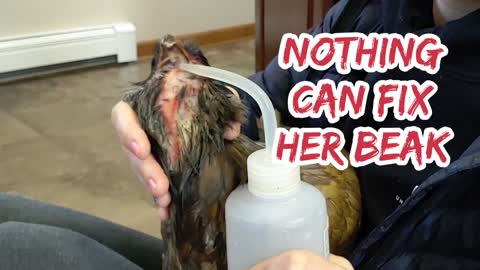
Special Needs Chicken Cross Beak, Scissor Beak
Meet Chirp.
She is our special needs chicken. She has a deformity known as Cross Beak or scissor beak. Because of her deformity she can not eat independently. She can drink some water on her own but she has to work a little harder for it.
We make her food mixture by blending:
2.5 cups of chicken crumble (egg layer meal)
1/2 cup avian health shake
(https://www.springwateravian.farm/product/avian-health-shake/ )
5 eggs
(This will cover a few days of feedings)
We let it chill in the fridge for about a half hour and mold it into small pellets about 1 inch in length and 1/4" wide.
It takes some practice when you first start, but if you give it time you will both become comfortable with the process.
25
views
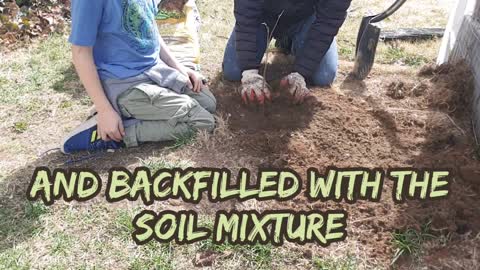
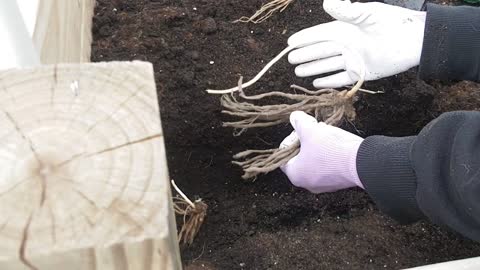
Planting Raspberry Heritage Bareroot
This is my very first attempt at planting raspberries. I didn't overly research it but did read that they are pretty easy to grow and not overly picky. They do like slightly acidic soil and mostly sunny areas but will tolerate some shade as well.
In my research the basic things I saw were to use some peat moss and compost. I wanted to work with what I had on hand, so used peat moss and some hummus and manure.
I dug a hole about a foot deep and a foot wide (excuse my typo in the video). I added a solid handful of peat moss to the empty hole and blended it with some soil I loosened along the sides of the hole.
After that I added a handful or so of peat moss to the soil pile I removed from the hole along with some hummus and manure ( about 1 handful)
We held the raspberry roots in place with the roots low enough to be completely in the soil once we filled the hole and covered about an inch of the base of the plant as well as we backfilled with our soil mixture.
I gave the plant enough water that it was not absorbing immediately and also spread the packaging material from the plant along the base of the plant as well.
This may not be the perfect scientific method of planting a raspberry bush, BUT my hope is that it truly is a simple plant to please and by following some of the basic tips I read about, we will eventually have a thriving raspberry bush!
47
views
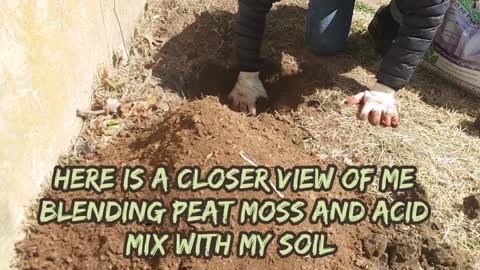
Planting Blueberry Bluecrop-Bareroot
This here is our families second attempt at growing blueberries. We did attempt to grow them last year, which was our first year of gardening but we failed. Honestly, we did very little to try and have a successful plant last year. This year we did our homework and are hoping for greater results.
This time around we planted in the ground, while last year we tried in a pot. The biggest difference this year is that we used peat moss and acid mix to help make our soil more acidic! Here is to hoping for success!
Excuse my typo in the video- food= foot
What we added:
1 part peat moss to 1 part ground soil and 1 cup of acid mix per plant.
25
views
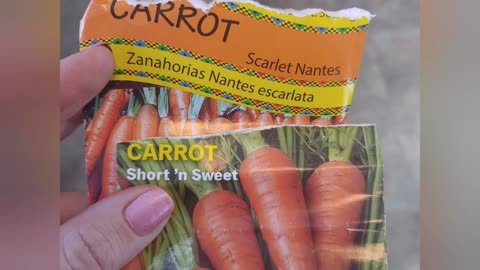
Sowing Carrots in a Container
Today the kids and I sowed our carrot seeds in our garden container. We did not follow recommendations precisely, as we spaced our rows only 8" apart rather than 12". However, we did choose not to oversow too much, placing seeds approximately 1" apart and will be sure to thin out carrots once we can see them emerging if necessary. They do say carrots is one of those things you should oversow, but seeing as my rows are a bit closer I didn't want to overdo it on all aspects. We always have fall to try again as well.
With that said, we started by spraying our soil with water until it was good and moist. I had actually moistened this soil a few days prior as well, plus we recently had a decently rainy day.
After that I loosened the soil with a gentle raking so that I could later gently toss loose soil over the seeds.
We used a ruler to make our rows by simply using the edge of the ruler to mark each row and measured 8" over for the next row.
Finally we sowed our seeds using just eyeball judgement and spaced them anywhere from 1/2" to 1.5" apart. We did not dig a trench or poke any holes, just dropped them on the slim line marked by the ruler.
After all seeds were sowed, we gently combed over some of the loose soil onto the seeds.
Lastly, I had read that a great way to help carrot seeds germinate is to cover them with some cardboard (you can also use other materials such as wood to cover your seeds). When you cover your seeds you are ensuring that the seeds stay in place, keeping them from full sun exposure, which also helps to keep soil moist and preventing them from being eaten by outdoor critters.
Carrot seeds can take 14 to 21 days to germinate, so I will begin checking on the seeds around day 10 or so. Once I see some growth emerging, I will remove the cardboard, allow the plants to perk up and thin what needs thinned. I will be sure to update along the way!
Happy Gardening
88
views
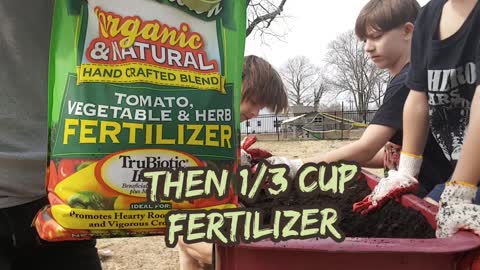
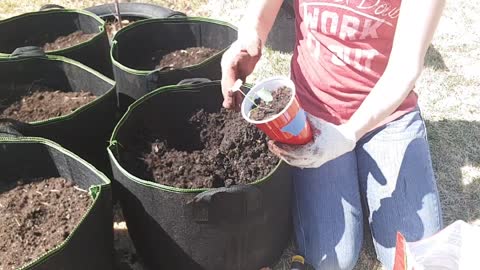
Revitalizing garden soil
I am am inexperienced gardener, learning through Trial and Error and sharing my journey with you.
In this video my kids and I are working to revitalize our soil from last year. Here is a bit of info about the items we added:
Humus and Manure-
This is said to help provide structure to your soil. It conditions and aerates the soil while also holding nutrients and moisture. I was hesitant to add this to my pots as it is said to be for in ground use, but I read a review where someone stated it helped their container plants tremendously. I opted to not use a ton and blended it in to our old soil. This could be something I later kick myself in the butt for, but sometimes we have to learn the hard way and it could be a blessing!
Dr. Earth Slow Release Fertilizer-
This product is said to promote plant growth as well as helping your plants to establish a strong root system, which in turn helps the plant with absorption. We mixed this directly into our soil but will also sprinkle some in when we transplant out vegetables.
Blood Meal-
I was intrigued by this item because its specifically said to be good for soil you reuse, because the soil can become depleted if nutrients. It is said to be especially good for vegetable plants that require a lot of nitrogen. Broccoli is definitely one of those vegetable and the pots we prepared today will be used to grow broccoli.
55
views