
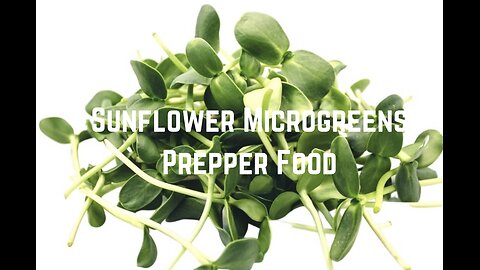
Grow Sunflower Microgreens: Prepper Food
Microgreens Tray Kit
https://onthegrow.net/products/otg-microgreen-tray-set
Eat Microgreens in Salad, Stir Fry, Garnish, Veggie Burger, Sandwich, Soup, Stew, Burrito, Wrap, Avocado Toast, Smoothie, etc.
Sunflower Microgreens
USDA Nutrition Data
2.25 Ounces (64 Grams)
Calories 25
Protein 2 g
Carbohydrate 4 g
Fiber 2 g
Calcium 80 mg
Iron 14.4 mg
Magnesium 60 mg
Phosphorus 80 mg
Potassium 270 mg
Sodium 10 mg
Zinc 0.6 mg
Vitamin C 9 mg
Vitamin K 40 mcg
Folate 60 mcg
Vitamin A 500 IU
The greens also contain selenium, manganese, and a range of B vitamins.
167
views
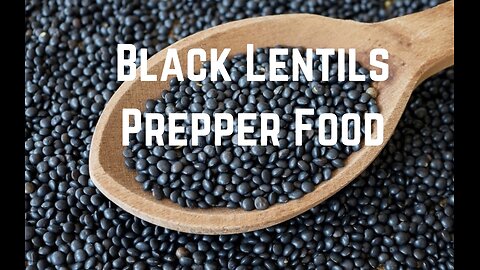
Black Lentils Prepper Food
Black Lentils can be considered one of the ultimate prepper staple foods. They are also known as Beluga Lentils for their resemblance to caviar. Similar to black beans, yet round, smaller, with a mild nutty flavor.
Unlike other types of lentils like brown or red, black lentils hold their shape when cooked making them a favorite in salads. Also they are perfect for soup or stews.
They are the most nutrient dense of all lentils, and easy to cook with no presoaking. High in protein, calcium, potassium, iron, folate, and fiber. Combined with any grain, they make a complete protein.
Easy to grow by planting in a 5 gallon bucket with drain holes, raised bed, or in ground. You can find the organic seeds in the bulk section of the health food store. Seeds are planted directly in soil at 1 depth. Space 1 inch apart. Thin successful plants 4-5 inches apart. Rows 18-24 inches apart.
Requires full sun and moderate water. Grows into a bush about 12 to 30 inches high. USDA grow zones 4 through 11 in the Spring. Grows best in deep, sandy loam soils, however they will grow in all soil types with good drainage. Lentils are ready to harvest after 100 days, and pods are brown/dry. You will be able to hear lentil rattle inside dry pod.
As with other legumes, planting lentils near alliums such as onions, garlic, and chives should be avoided because they tend to build up sulfur in the soil, which in large enough concentrations can inhibit the growth of lentils. Unlike the popular Red Lentil, Black Lentils do not require processing with a millstone to remove the outer husk and to be split in half.
For the 3 step harvest process, first cut the pods from the tops of each tendril and separate the bulk of the plant. For threshing, put the dry plant on a sturdy flat plastic tray or tarp, stand on one end of the plant and shuffle over the rest of it with one foot. The pods crack open and separate from the stem.
Some place plant in a bag and step on bag. Alternately, some fill a 5 gallon bucket 3/4 full with the plant, and lightly push down on the plant with a baseball bat to thresh. Some additionally filter using a kitchen colander on top of container with holes of colander large enough for beans to pass through while rubbing with hand.
Beans, chaff, and stems will remain for the winnowing. Place in bucket or tray, pour into second bucket or tray with natural wind or a house fan blowing away chaff. The dry lentils are now ready for storage.
The average lentil yield is 1,098 pounds per acre, or 2.5 pounds per 100 square feet aka 10 feet by 10 feet. Using that figure, you would need about 6,000 square feet to produce 150 pounds of lentils, enough for one person for one year.
Black Lentils Recipe (Dhal Makhani)
https://www.harighotra.co.uk/dhal-makhani-recipe
167
views
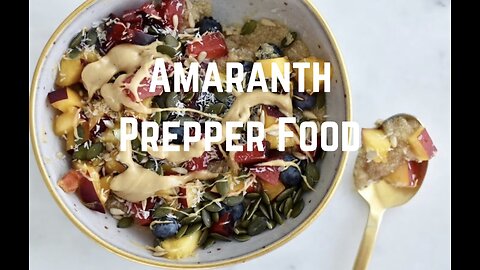
Amaranth Prepper Food
Amaranth Porridge Recipe
https://mariamarlowe.com/recipe/my-breakfast-obsession-amaranth-porridge
134
views


America To Be Exterminated By Zionism: Christopher Jon Bjerknes
Christopher Jon Bjerknes Website
https://cjbbooks.com
229
views
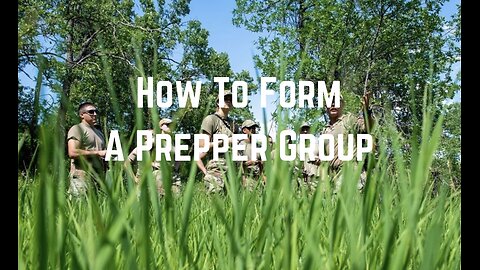
How To Form A Prepper Group
Prepper Information Guide PDF
https://acrobat.adobe.com/id/urn:aaid:sc:US:b46cb4da-4978-414f-ad65-fdf4dab21c24
112
views
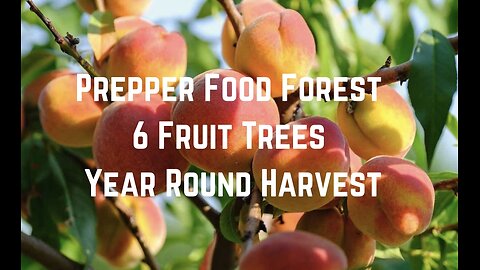
Prepper Food Forest: 6 Fruit Trees Year Round Harvest
Prepper Food Forest & Perennials
A Food Forest or forest gardening is a low-maintenance, sustainable, plant-based food production system based on woodland ecosystems, incorporating perennial vegetables, fruits, nuts, and herbs.
For a prepper, a food forest can augment ones primary stored food supply located at ones bug out location or residence. It is advantageous to have planted a food forest before a collapse of society. If the plants are spaced out far enough, they can blend in with natural environment for camouflage factor.
A perennial is a plant that comes back year after year. This differentiates it from annuals, which must be planted each year, and biennials, which only live for two years. Just plant your garden or orchard once, and your plantings should last for several years, maybe even several decades.
While all plants listed below are perennials, they may not grow perennially in all locations. In your local climate, plants that come back year after year may not be able to survive over a more extreme winter or summer. Research and check for compatibility with your region before you buy anything by referring to the USDA hardiness zones listed on the seed or plant's label.
Perennial Vegetables
Artichoke (Try Jerusalem, also known as Sunchokes.) Arugula (Type Specific), Asparagus (Keep the bed weed-free, and they'll produce for 20 years or more. You can take your first harvest in the third growing season.) Broccoli (Not all varieties are perennial. Try varieties Nine Star or Purple Cape.) Collard (Type Specific), Dandelion, Kale (Type Specific), Lovage, Onion (Try potato onions, shallots, Egyptian onions, Japanese bunching onions, Welsh onions, and Chinese leeks.), Radicchio, Rhubarb, Sorrel, Spinach (Not all varieties are perennial. Try varieties Ceylon, Sissoo, or New Zealand.) Sweet Potato, Tree cabbages/tree collards, Watercress, Wasabi, Yacon, Yam.
Perennial Fruits
Apple, Asian Pear, Apricot, Avocado, Blackberry, Blueberry, Cherry, Currant, Date, Fig, Goji Berry, Gooseberry, Grape, Honeyberry, Huckleberry, Kiwi, Lemon (Must be brought indoors in the winter in colder climates.) Lime, Mulberry, Nectarine, Olive, Orange (Must be brought indoors in the winter in colder climates.), Paw Paw, Peach, Pear, Persimmon, Plum, Pomegranate, Raspberry, Strawberry (Replant every three years to maintain vigor and cut down on disease.)
Perennial Nuts
Almond, Chestnut, Hazelnut, Macadamia, Pecan, Pistachio, Walnut.
Perennial Herbs
Basil (Not all basil is perennial. Try African Blue or East Indian for a perennial variety.), Chamomile, Chia (Seeds Food Source), Chives, Echinacea, Fennel, Garlic, Ginger, Green Tea, Horseradish, Lavender (It often takes several seasons to establish.) Lemon Balm, Mint, Oregano, Parsley, Rosemary (It can be difficult to grow in some zones.) Sage, Thyme, Turmeric.
Prepper Information Guide PDF
https://acrobat.adobe.com/id/urn:aaid:sc:US:b46cb4da-4978-414f-ad65-fdf4dab21c24
186
views
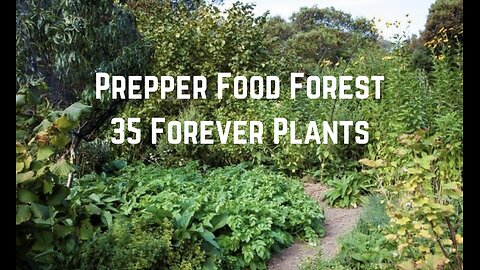
Prepper Food Forest: 35 Forever Plants
Prepper Food Forest & Perennials
A Food Forest or forest gardening is a low-maintenance, sustainable, plant-based food production system based on woodland ecosystems, incorporating perennial vegetables, fruits, nuts, and herbs.
For a prepper, a food forest can augment ones primary stored food supply located at ones bug out location or residence. It is advantageous to have planted a food forest before a collapse of society. If the plants are spaced out far enough, they can blend in with natural environment for camouflage factor.
A perennial is a plant that comes back year after year. This differentiates it from annuals, which must be planted each year, and biennials, which only live for two years. Just plant your garden or orchard once, and your plantings should last for several years, maybe even several decades.
While all plants listed below are perennials, they may not grow perennially in all locations. In your local climate, plants that come back year after year may not be able to survive over a more extreme winter or summer. Research and check for compatibility with your region before you buy anything by referring to the USDA hardiness zones listed on the seed or plant's label.
Perennial Vegetables
Artichoke (Try Jerusalem, also known as Sunchokes.) Arugula (Type Specific), Asparagus (Keep the bed weed-free, and they'll produce for 20 years or more. You can take your first harvest in the third growing season.) Broccoli (Not all varieties are perennial. Try varieties Nine Star or Purple Cape.) Collard (Type Specific), Dandelion, Kale (Type Specific), Lovage, Onion (Try potato onions, shallots, Egyptian onions, Japanese bunching onions, Welsh onions, and Chinese leeks.), Radicchio, Rhubarb, Sorrel, Spinach (Not all varieties are perennial. Try varieties Ceylon, Sissoo, or New Zealand.) Sweet Potato, Tree cabbages/tree collards, Watercress, Wasabi, Yacon, Yam.
Perennial Fruits
Apple, Asian Pear, Apricot, Avocado, Blackberry, Blueberry, Cherry, Currant, Date, Fig, Goji Berry, Gooseberry, Grape, Honeyberry, Huckleberry, Kiwi, Lemon (Must be brought indoors in the winter in colder climates.) Lime, Mulberry, Nectarine, Olive, Orange (Must be brought indoors in the winter in colder climates.), Paw Paw, Peach, Pear, Persimmon, Plum, Pomegranate, Raspberry, Strawberry (Replant every three years to maintain vigor and cut down on disease.)
Perennial Nuts
Almond, Chestnut, Hazelnut, Macadamia, Pecan, Pistachio, Walnut.
Perennial Herbs
Basil (Not all basil is perennial. Try African Blue or East Indian for a perennial variety.), Chamomile, Chia (Seeds Food Source), Chives, Echinacea, Fennel, Garlic, Ginger, Green Tea, Horseradish, Lavender (It often takes several seasons to establish.) Lemon Balm, Mint, Oregano, Parsley, Rosemary (It can be difficult to grow in some zones.) Sage, Thyme, Turmeric.
Prepper Information Guide PDF
https://acrobat.adobe.com/id/urn:aaid:sc:US:b46cb4da-4978-414f-ad65-fdf4dab21c24
186
views

Prepper Firearms: Shotgun Rifle
Prepper Information Guide PDF
https://acrobat.adobe.com/id/urn:aaid:sc:US:b46cb4da-4978-414f-ad65-fdf4dab21c24
220
views

Prepper Firearms: AR-15 Rifle
Prepper Information Guide PDF
https://acrobat.adobe.com/id/urn:aaid:sc:US:b46cb4da-4978-414f-ad65-fdf4dab21c24
198
views

Prepper Firearms: Glock 19 Handgun
Prepper Information Guide PDF
https://acrobat.adobe.com/id/urn:aaid:sc:US:b46cb4da-4978-414f-ad65-fdf4dab21c24
180
views

Plano Sportsman Storage Trunk
Prepper Information Guide PDF
https://acrobat.adobe.com/id/urn:aaid:sc:US:b46cb4da-4978-414f-ad65-fdf4dab21c24
97
views

Mission Mountain Camp Cot
Prepper Information Guide PDF
https://acrobat.adobe.com/id/urn:aaid:sc:US:b46cb4da-4978-414f-ad65-fdf4dab21c24
97
views
1
comment

Gorilla Utility Cart
Prepper Information Guide PDF
https://acrobat.adobe.com/id/urn:aaid:sc:US:b46cb4da-4978-414f-ad65-fdf4dab21c24
92
views
1
comment


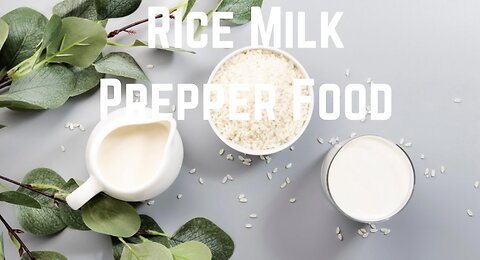
Rice Milk Prepper Food
Ingredients and equipment:
1. 1 cup (340 g) of brown rice of your choice. It can be short grain or long grain (I use long grain jasmine brown rice)
2. A glass jar (I use a quart size or bigger mason jar)
3. A sprouting screen and a band (or a piece of cheesecloth with a rubber band)
4. A container to catch the excess water
5. 4 cups (940 ml) of filtered water.
Note: In the video, I sprouted 2 cups (680 g) of rice and only used half for making the milk. I kept the other half to cook with later.
Instructions:
1. Day 1: In a jar, add the amount of the rice you want to make and cover the jar with the screen. Rinse the rice thoroughly a few times, add filtered water and soak it overnight.
2. Day 2: Dump the water and rinse well. Tilt the jar in a container, and cover it with kitchen towels to keep it dark.
Let it sprout for 2 more days., and repeat the rinsing each day
3. Day 3-4: Repeat the rinsing process.
4. Day 5: You can see tiny sprouts on all of the rice--even the broken parts. Rinse well and let the excess water drain.
5. In a blender, add the sprouted rice with 4 cups (940 ml) of filtered water and blend on high speed until smooth.
Strain it through a cheesecloth and squeeze as much milk as you can. You can add your sweetener while blending or right before drinking it, or drink it plain. I like to use a small amount of Maple Syrup to sweeten mine. If you make more than you can finish at a time, store it in a glass container and keep it refrigerated. It stays fresh up to 3 days.
91
views
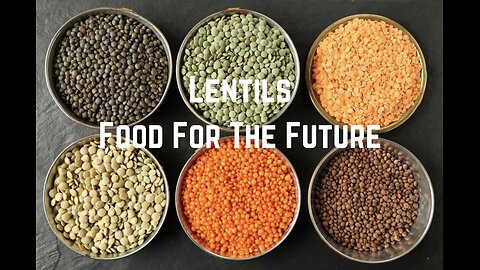
Lentils: Food For The Future Documentary
Lentils are referred to as “A Gift From God” and “The Humble Pearls Of The Earth”. Lentils and grains have sustained most of humanity for millennia. Together they make a complete protein. Lentils are known for being delicious, a powerhouse of protein, and a miracle of nutrition.
This documentary investigates the lentil's past and future applications in order to solve the growing threat of world famine. The word lentil derives from Latin meaning lens. Eye glass lenses are related to the biconvex shape of lentils.
Although part of this documentary speaks of genetically modified lentils, many are calling for support of local organic farmers, and making your voting dollars count against corporate GMO food.
The self-sufficiency prepping movement is growing because of the concern regarding societal collapse, rising food prices, and people wanting to unplug from dependency on corporate GMO food.
The lentil is now being rediscovered and taking center stage. Lentils are beginning to trend in America due to the advantages of a plant based diet, health concerns, and for having a low carbon footprint compared to animal production.
Although there are numerous types of lentils, red lentils are the most popular variety in India and Britain. In India, red lentils are known as Masoor Dal.
Red lentils begin as brown lentils until the outer husk is removed revealing their red color, plus they are split in half. The reason for this process is that it makes the lentil faster to cook and requires no soaking.
Also without the hull, they are easier to digest than other legumes, plus they cook into a creamy texture. They are known for having a subtle sweet and nut like flavor.
Prior to modern machinery, people in India removed the hull and split the lentil using a hand crank mortar machine with two round stones called a Millstone.
As the multi-billion dollar organic and plant based diet industry continues to surge, and the rise of self-sufficiency, off-grid, prepping trend grows, the humble lentil is sure to be a shining star.
172
views

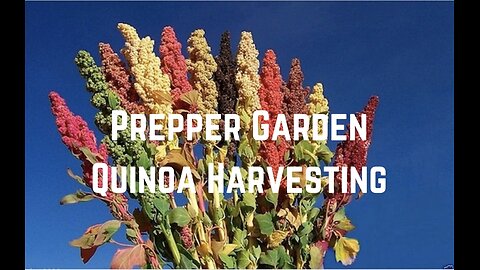
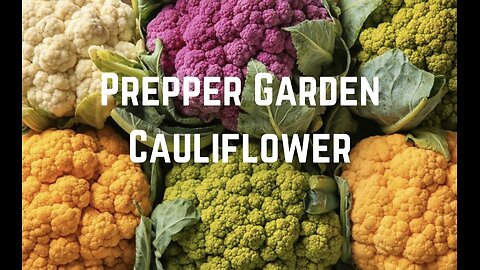
Prepper Garden: Quinoa Harvesting
Quinoa can be considered one of the ultimate prepper staple foods. It is much less labor intensive to grow and process compared to other grains like rice. It is high in protein and easy to cook.
Quinoa is a grain. A grain combined with a legume makes a complete protein which feeds most of the planet. Also the young leaves are edible and taste similar to spinach. They can be used in salad or cooked as a vegetable.
Quinoa can be grown in a 5 gallon bucket with drain holes, raised bed, or in ground. You can find the organic seeds in the bulk section of the health food store. The stalk grows 4 to 6 feet high. USDA grow zone 4-10. Requires full sun.
Plant seed 1/4 inch deep and 2-3 inches apart after no frost in Spring. Keep soil moist until germination in 4-7 days. Thin when seedlings are a few inches tall and space 12-28 inches apart. Water moderately and stop watering at end of Summer.
In windy areas, secure stalk with twine and stake when a few feet tall to keep plant from blowing over, or run cord the length of row on both sides of plant and secure to stakes at both ends of row.
Harvest when mature and dry after 100 to 120 days. Cut seedhead from stalk. If not fully dry, you can hang dry. Seed has no hull to remove. Thresh seeds by hand over a container by rubbing seedhead between both bare hands or wearing gloves letting seeds fall into container. Some additionally use a wire coarse mesh colander and lastly place in water letting chaff float and remove.
Winnow chaff by slowly pouring from one bucket or tray into second bucket or tray with natural wind or a house fan blowing away chaff and stems. Continue process until seeds are clean. The seeds are now ready for storage.
The quinoa plant typically produces 1 to 2 ounces of seeds, but can produce up to 6 ounces if grown in fertile soil. Quinoa plants can produce 6 to 26 pounds of grain per 100 square feet which is 10 feet by 10 feet. Using this figure averaged to 20 pounds, you would need about 750 square feet to produce 150 pounds of quinoa, enough for one person for one year.
Related Videos
Prepper Garden: Grow Quinoa Part One
https://rumble.com/v4we2iq-prepper-garden-grow-quinoa-part-one.html
Prepper Garden: Grow Quinoa Part Two
https://rumble.com/v4we4ph-prepper-garden-grow-quinoa-part-two.html
138
views
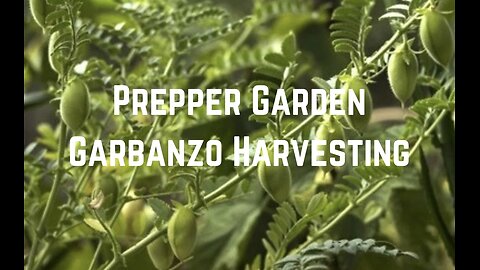
Prepper Garden: Garbanzo Harvesting
Garbanzo beans aka chickpeas can be considered one of the ultimate prepper staple foods. They are packed with protein, caloric horsepower, and can be used in numerous recipes.
They are used to make soups, stews, sandwich spread, etc. Some famous dishes are Indian Chana Masala and Greek Hummus. Also the young leaves are edible. Washing the leaves can remove any sour taste. Garbanzo beans are a legume. A legume combined with a grain makes a complete protein which feeds most of the planet.
Easy to grow by planting in a 5 gallon bucket with drain holes, raised bed, or in ground. You can find the organic seeds in the bulk section of the health food store. Seeds are planted directly in soil at 1 to 2 inch depth. Container 4 inches apart. Ground 3-6 inches apart. Rows 18-24 inches apart. No stake or trellis required.
Requires full sun and moderate water. Grows into a bush about 30-36 inches high. USDA grow zones 2 through 10b in the Spring. Zones 10b through 11 can plant in the Fall. Garbanzos can be picked green and eaten raw in salad or cooked. At maturity about 100 days, the plant will dry brown.
For the 3 step harvest process, first cut the pods from the tops of each tendril and separate the bulk of the plant. For threshing, put the dry plant on a sturdy flat plastic tray or tarp, stand on one end of the plant and shuffle over the rest of it with one foot. The pods crack open and separate from the stem.
Some place in a bag and step on bag, plus use metal screen on top of container with holes of screen large enough for beans to pass through while rubbing with hand.
Beans, chaff, and stems will remain for the winnowing. Place in bucket or tray, pour into second bucket or tray with natural wind or a house fan blowing away chaff and stems. The dry beans are now ready for storage.
One hundred square feet or 10 feet by 10 feet of garbanzo plants will produce about 5.5 pounds of beans. Using this figure you would need about 2,700 square feet to produce 150 pounds of beans, enough for one person for one year.
Related Videos
Prepper Garden: Grow Garbanzos Part One
https://rumble.com/v4wf9nl-prepper-garden-grow-garbanzos-part-one.html
Prepper Garden: Grow Garbanzos Part Two
https://rumble.com/v4wfb2h-prepper-garden-grow-garbanzos-part-two.html
88
views

The Jesus Controversy by Adam Green
Broadcast May 16, 2024. Hosted by Karlyn Borysenko.
167
views
1
comment