
New Sound Rat and Cokroach Trap
In this video, we'll show you how to make an effective rat and cockroach trap using this sound. Keep your home clean and free of pests with this easy and affordable DIY solution. Don't let pesky rodents and insects ruin your peace. Watch now and learn how to protect your space!
7
views
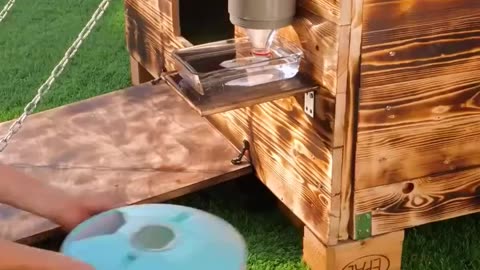
Dog House From Used Wood | DIY
Creating a dog house from used wood can be a fun and sustainable project. Here's a basic guide to get you started:
Materials Needed:
Used wood (pallets, old furniture, etc.)
Saw
Hammer and nails or screws
Measuring tape
Sandpaper
Paint or wood stain (optional)
Roofing material (e.g., shingles, corrugated metal, or waterproof tarp)
Hinges and latch for the door (optional)
Insulation (optional, for colder climates)
Steps:
Plan Your Design: Decide on the size and shape of the dog house based on the size of your dog and the available materials. Sketch out a simple design to guide you through the building process.
Prepare the Wood: If the used wood is in rough condition, use sandpaper to smooth out any rough edges and surfaces. Cut the wood to the appropriate sizes based on your design using a saw.
Assemble the Frame: Start by building the frame of the dog house using the larger pieces of wood. Use nails or screws to attach the pieces together securely. Make sure the frame is sturdy and stable.
Build the Walls: Attach the walls to the frame using nails or screws. Leave an opening for the entrance, making sure it's large enough for your dog to comfortably enter and exit.
Add the Roof: Attach the roofing material to the top of the dog house. You can use shingles, corrugated metal, or a waterproof tarp, depending on what you have available. Make sure the roof overhangs the walls slightly to provide protection from rain.
Finish the Interior: If desired, add insulation to the interior of the dog house to provide warmth during colder months. You can use foam board insulation or recycled materials like old blankets or pillows.
Paint or Stain (Optional): If you want to give the dog house a finished look and added weather protection, you can paint or stain the exterior. Make sure to use pet-safe paint or stain.
Add Finishing Touches: Install hinges and a latch for the door to allow for easy access and security. You can also add a nameplate or decorations to personalize the dog house.
Place the Dog House: Find a suitable location in your yard for the dog house, preferably in a shaded area with good drainage. Make sure it's elevated slightly off the ground to prevent moisture buildup.
Introduce Your Dog: Once the dog house is complete, introduce your dog to their new shelter. Encourage them to explore it and make it their own cozy space.
Remember to prioritize safety and comfort when building a dog house, and consider your dog's size and needs throughout the process. Enjoy your DIY project and the satisfaction of providing your furry friend with a custom-built shelter!
19
views

Tips & Trick Builder 1
"Tips & Trick Builder 1" is a comprehensive guide designed to equip builders, contractors, and DIY enthusiasts with valuable insights and strategies for optimizing their construction projects. Whether you're a seasoned professional or a novice in the field, this resource offers a wealth of practical tips and clever tricks to enhance your efficiency, productivity, and overall success on the job site.
Inside "Tips & Trick Builder 1," you'll discover:
Expert Advice: Benefit from the expertise of seasoned builders who share their insider tips and tricks accumulated through years of hands-on experience in the industry.
Time-Saving Techniques: Learn innovative techniques and shortcuts to streamline your workflow, allowing you to complete projects more quickly without sacrificing quality.
Cost-Effective Solutions: Explore cost-effective strategies for sourcing materials, managing budgets, and maximizing resources to ensure optimal project outcomes while staying within budget constraints.
Safety Protocols: Prioritize safety with essential guidelines and best practices for creating a secure work environment, minimizing risks, and preventing accidents on the job site.
Problem-Solving Strategies: Develop your problem-solving skills with practical approaches to troubleshooting common construction challenges and overcoming unexpected obstacles with confidence.
Tool Mastery: Master the use of essential tools and equipment with expert tips on maintenance, operation, and selection to maximize their lifespan and performance.
Project Planning: Enhance your project planning skills with valuable insights into project management, scheduling, and organization, ensuring smooth execution from start to finish.
Quality Assurance: Maintain the highest standards of quality craftsmanship with techniques for ensuring precision, accuracy, and attention to detail in every aspect of your work.
Innovative Ideas: Stay ahead of the curve with innovative ideas and creative solutions for incorporating modern design trends, eco-friendly practices, and cutting-edge technologies into your projects.
Continuous Improvement: Cultivate a mindset of continuous improvement by embracing lifelong learning opportunities and staying updated on the latest industry trends, techniques, and technologies.
17
views
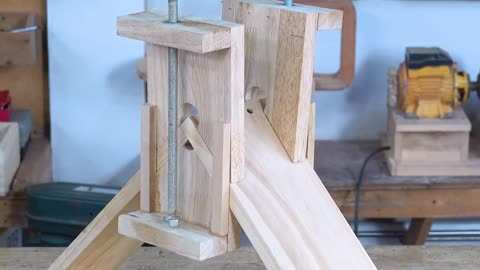
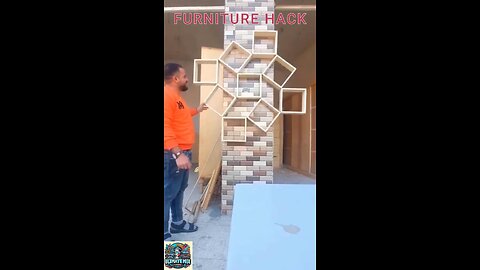
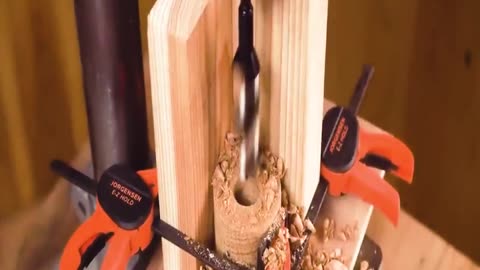
Simetrical Trick Wood working
"Symmetrical Trick Woodworking" is a technique employed by woodworkers to incorporate symmetrical elements into their projects, resulting in visually appealing and balanced designs. This approach emphasizes precision, attention to detail, and creativity to achieve symmetrical patterns or features in woodworking pieces.
Key aspects of "Symmetrical Trick Woodworking" include:
Design Planning: Before beginning a project, woodworkers carefully plan and visualize symmetrical patterns or motifs they intend to incorporate. This may involve sketching designs, creating templates, or using design software to ensure accuracy and balance.
Measurement and Marking: Accurate measurement and marking are crucial for achieving symmetrical results. Woodworkers use tools such as rulers, squares, and marking gauges to ensure precise alignment and symmetry.
Symmetrical Layout: Symmetrical layouts involve dividing the woodworking piece into equal sections or mirroring elements on both sides to create balance. Woodworkers may use techniques such as halving, quartering, or dividing circles to achieve symmetrical designs.
Cutting and Shaping: Woodworkers use various cutting and shaping techniques, such as sawing, routing, or carving, to create symmetrical patterns or features in the wood. Precision tools and techniques are employed to ensure uniformity and consistency.
Joinery and Assembly: Symmetrical woodworking often requires precise joinery and assembly techniques to maintain alignment and symmetry. Woodworkers may use methods such as doweling, mortise and tenoning, or biscuit joining to join symmetrical components securely.
Finishing and Detailing: The finishing touches are essential to enhancing the beauty of symmetrical woodworking projects. Woodworkers carefully sand, stain, and finish the wood to highlight the symmetrical patterns and features, bringing out their full aesthetic appeal.
"Symmetrical Trick Woodworking" allows woodworkers to create visually stunning and harmonious designs that showcase their craftsmanship and attention to detail. Whether used in furniture, cabinetry, or decorative pieces, symmetrical elements add a sense of balance and elegance to woodworking projects.
7
views
Mini Saw Electric from PVC (DIY)
Creating a mini electric saw from PVC pipes is a fun and potentially useful DIY project. Below is a description of how you can construct one:
**Materials Needed:**
1. PVC pipe (1-inch diameter or larger)
2. electric motor (such as a small DC motor)
3. Switch
4. Battery pack or power adapter
5. Saw blade
6. Drill
7. Screws or adhesive
8. Wire
9. Safety goggles
10. Gloves (optional but recommended)
**Instructions:**
1. Prepare the PVC housing:
Cut a section of PVC pipe to your desired length, depending on how long you want your mini saw to be. This will serve as the main housing for your electric saw.
Use a drill to create holes in the PVC pipe where you'll attach the motor, switch, and blade.
2. Mount the Electric motor:
Attach the electric motor to one end of the PVC pipe using screws or adhesive. Make sure the motor is securely in place.
Position the motor so that the drive shaft is sticking out from the PVC pipe.
3. Attach the Saw blade.
Securely attach the saw blade to the drive shaft of the electric motor. You may need to use a nut or other fastening mechanism to ensure the blade is firmly in place.
Make sure the blade is aligned properly and doesn't wobble when the motor is running.
4. Install the Switch and wiring.
Mount the switch on the PVC pipe near the handle area for easy access.
Connect the electric motor to the switch using wire. You may need to solder the connections for better conductivity.
Connect the switch to the power source (battery pack or power adapter) using a wire. Make sure all connections are secure and insulated properly.
5. Test the Mini Saw:
Before fully assembling the mini saw, test it to make sure everything is working properly.
Turn on the switch and check if the motor runs smoothly and the saw blade rotates without any issues.
Ensure that the blade is securely attached and doesn't come loose during operation.
6. Final Assembly:
Once you've confirmed that the mini saw is working correctly, finalize the assembly by securing any loose wires and components inside the PVC pipe.
Optionally, you can add a handle or grip to the PVC pipe for better control and comfort during use.
Double-check all connections and make any necessary adjustments before using the mini saw.
7. Safety Precautions:
Always wear safety goggles and gloves when operating the mini saw to protect your eyes and hands from debris and sharp edges.
Use caution and common sense when using power tools, even small ones like this DIY mini saw.
Keep fingers and loose clothing away from the saw blade while it's in operation.
Once you've completed these steps, you'll have your very own DIY mini-electric saw made from PVC pipes. Use it for small cutting tasks and DIY projects around the house, but always prioritize safety when operating power tools.
9
views

Speed Technique Working
Speed Technique Working" encompasses a range of methods and approaches aimed at maximizing efficiency and minimizing time spent on various tasks. It involves the implementation of strategies, tools, and practices that streamline workflows, optimize processes, and enhance productivity.
This approach emphasizes the importance of prioritization, organization, and time management to achieve desired outcomes within shorter time frames. It encourages individuals to identify and eliminate inefficiencies, automate repetitive tasks, and focus on high-impact activities.
Key components of "Speed Technique Working" may include:
Prioritization: identifying and focusing on tasks that contribute most to overall goals and objectives.
Time blocking: allocating specific time periods for dedicated focus on particular tasks or projects.
Batching: grouping similar tasks together to minimize context switching and increase efficiency.
Automation: Leveraging technology and tools to automate routine or repetitive tasks reduces manual effort and saves time.
Streamlining Processes: Identifying and removing unnecessary steps or bottlenecks in workflows to optimize efficiency.
Continuous Improvement: Regularly evaluating and refining work processes to enhance productivity and effectiveness.
Mindfulness: cultivating awareness and focus to maintain productivity and avoid distractions.
By adopting a "Speed Technique Working" approach, individuals and teams can achieve greater productivity, meet deadlines more effectively, and ultimately accomplish more in less time.
#short
3
views
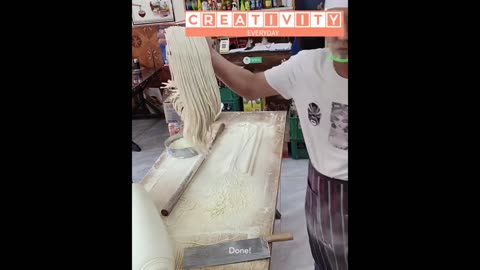
Traditional noodles with hand
Making manual noodles by hand can be a delightful culinary experience. Here's a basic recipe and instructions for making homemade noodles without a pasta machine:
**Ingredients:**
2 cups all-purpose flour
2 large eggs
1/2 teaspoon salt
Water, as needed
**Instructions:**
1. Prepare the dough.
On a clean surface or in a large mixing bowl, mound the flour and make a well in the center.
Crack the eggs into the well and add salt.
Using a fork or your fingers, gradually incorporate the flour into the eggs until a dough forms.
If the dough seems too dry, add water, a tablespoon at a time, until it comes together. If it's too sticky, add a little more flour.
Knead the dough for about 5–10 minutes until it becomes smooth and elastic. You can sprinkle a little flour on the surface to prevent sticking if needed.
2. **Rest the Dough:**
Once the dough is kneaded, wrap it in plastic wrap or cover it with a clean towel and let it rest at room temperature for about 30 minutes. This allows the gluten to relax, making the dough easier to work with.
3. Rolling and cutting:
After resting, divide the dough into smaller portions for easier handling.
Take one portion at a time and flatten it into a rectangular shape with a rolling pin or by hand until it's about 1/8 inch thick. Keep the remaining dough covered to prevent it from drying out.
Once rolled out, sprinkle a little flour on top of the dough to prevent it from sticking.
To cut the noodles, you can use a sharp knife or a pizza cutter. You can make them as thin or as wide as you like. For traditional noodles, aim for around 1/4 inch in width.
As you cut the noodles, lightly dust them with flour and gently toss them to separate.
4. Cooking the noodles:
Bring a large pot of salted water to a boil.
Once boiling, add the noodles and cook for about 2–4 minutes, or until they float to the surface and are tender but still slightly chewy (al dente).
Drain the noodles and rinse them briefly under cold water to stop the cooking process. Serve immediately with your favorite sauce or broth.
Making homemade noodles by hand requires a bit of time and effort, but the result is well worth it! Experiment with different flour types, flavorings, or shapes to create your own unique noodle creations. Enjoy your handmade noodles.
#short
18
views

Creativity eye glass and helmet from car logo
Creativity: eye glass and helmet from car logo
7
views
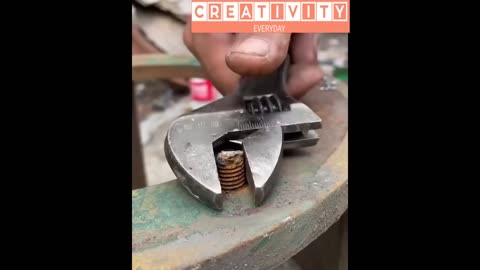
Nut and bolt Trick
The "nut & bolt trick" typically refers to a simple yet effective method used to solve a common problem encountered when dealing with nuts and bolts that are difficult to separate due to rust, corrosion, or overtightening. Here's how it works:
Apply Lubricant: Start by spraying or applying a lubricant, such as penetrating oil or WD-40, generously around the stuck nut and bolt. Allow the lubricant to penetrate the threads and loosen any rust or corrosion that may be causing the issue.
Tap Gently: Once the lubricant has had time to work its way into the threads, gently tap the head of the bolt with a hammer. The vibrations from tapping can help to further loosen the bond between the nut and bolt.
Use Heat: If the nut and bolt remain stuck after applying lubricant and tapping, you can try applying heat to the area. Use a heat gun or propane torch to heat the nut directly for a few minutes. The expansion caused by the heat can help to break the bond between the nut and bolt.
Use Vice Grips: If the above methods fail, you can try using a pair of vice grips or locking pliers to grip onto the head of the bolt firmly while using a wrench to turn the nut counterclockwise. The additional grip provided by the vice grips can sometimes provide the extra leverage needed to break the nut free.
Cutting: As a last resort, if all else fails, you may need to cut through the bolt with a hacksaw or angle grinder. Be sure to wear appropriate safety gear, such as gloves and eye protection, when cutting through metal.
By following these steps, you can often successfully separate a stuck nut and bolt using the "nut & bolt trick" without damaging the surrounding materials.
19
views


3D Electrical Tips Trick
3D Electrical Tips and Tricks refer to methods and techniques used in AutoCAD Electrical to streamline the design process and improve efficiency. These tips and tricks can include adjusting settings for specific widths, using shortcuts to avoid guesswork, and leveraging resources such as IMAGINiT's expert advice on enhancing workflows in AutoCAD Electrical. Additionally, there are clever electrical tips that can be helpful for everyone, such as the importance of understanding electrical codes and the benefits of using the right tools for the jobs.
7
views
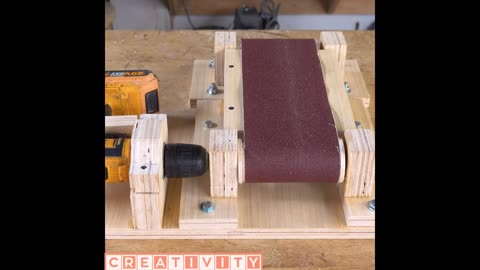
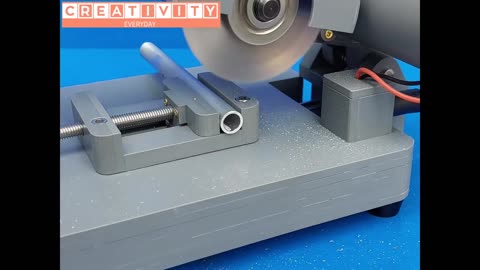
A drill sander machine is a tool unlike anything you have ever seen.
A drill sander machine revolutionizes the way you approach sanding tasks. Combining the versatility of a drill with the precision of a sander, it effortlessly smooths surfaces and contours with unprecedented ease. Say goodbye to manual sanding struggles; this innovative tool redefines efficiency and quality in woodworking and DIY projects.
5
views

Creating a Trendy Sling Bag Out of a Construction Brick
Transform a mundane construction brick into a chic sling bag with this innovative DIY project. By carefully hollowing out the brick and adding a sturdy strap, you'll fashion a one-of-a-kind accessory that merges industrial flair with urban fashion. Embrace sustainability and style with this trendy upcycling endeavor.
94
views

Fantastic Handmade Hammock
Indulge in relaxation with a fantastic handmade hammock crafted with care and creativity. Using durable fabric and sturdy ropes, this DIY project offers comfort and style for outdoor lounging. Embrace the satisfaction of handcrafting as you swing peacefully under the stars in your personalized oasis of tranquility.
9
views

From broom to practical gardening implement!
Repurpose an old broom into a versatile gardening tool with this simple DIY project. Trim the bristles to a suitable length, attach a sturdy wooden handle, and voila! You've crafted a practical implement for raking leaves, tilling soil, or sweeping pathways. Give new life to old tools in your garden today!
2
views

Unique Ice Cream
Unik ice cream is a creative treat that combines fun twists with unique tastes. With flavors ranging from silky matcha to tart dragon fruit, each scoop is a creative explosion. Every bite of this sensory adventure is unique due to the vibrant colors and surprising additions like edible flowers.
2
views

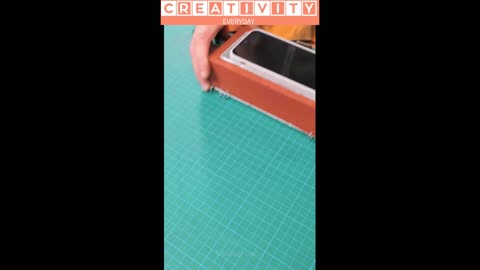
DIY_ Master Your iPhone in 10 Minutes
Learn how to master your iPhone in just 10 minutes with these simple tips and tricks. Improve your experience and get the most out of your device.
45
views

Experts craft fashionable metal and leather phone cases!
the professional fabrication of stylish phone cases from metal and leather. These cases are made to be both fashionable and practical, and the film displays the skill and attention to detail that goes into their creation.
44
views

Speakers constructed by hand can endure for generations.
Handcrafted speakers can last for generations, as demonstrated by the Bible character Joseph. 400 years later, during the Exodus, Joseph, who lived to reach 110 years old, asked that his bones be returned to Canaan.
#short
47
views
Hack Life (9 best Angle hack Grinder)
Hacks that make life way easier
"Life hacking" is all about finding clever, efficient ways to navigate daily tasks and challenges.
164
views
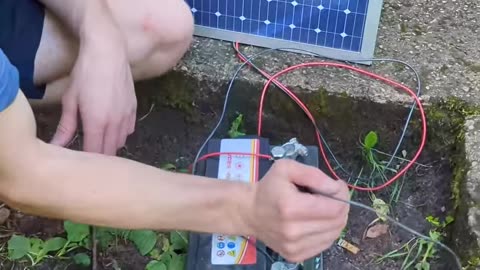
DIY water pump
Craft a DIY water pump from simple materials: a plastic bottle, a rubber tube, and a wooden stick. Drill a hole in the bottle cap, insert the tube, and seal it. Submerge the bottle in water, then rotate the stick to create suction, drawing water up through the tube—a homemade marvel of ingenuity.
3
views

Wall Creative
Adorned with a tapestry of dreams, our wall whispers tales of imagination. Each brushstroke a story, every hue a mood. It's a canvas of possibilities, where art dances with purpose and color speaks volumes. Our wall isn't just a barrier; it's a gateway to boundless creativity.
6
views