
Enjoyed this channel? Join my Locals community for exclusive content at
straightarrowrepair.locals.com!
Building Motorized Bicycle #2
Second part of building a motorized bike. Using a Schwinn Stingray.
🙏 Subscribe, 👍, it helps a lot!!
➤❓/ 💬: ask@straightarrowrepair.com
➤ Follow https://straightarrowrepair.com/pipf
➤➤I get a little for the channel-no charge for you if you use the links:
➤➤Shop Amazon https://amzn.to/3CxD1T4
➤➤Tool lists & recommended products🧰 https://straightarrowrepair.com/0lvf
➤➤Services We use
➤➤MORNINGFA·ME https://morningfa.me/invite/StraightArrowRepair
➤➤A2 Hosting http://www.a2hosting.com/refer/140244
➤➤Tubebuddy https://www.tubebuddy.com/StraightArrowRepair
➤➤Apsumo http://fbuy.me/v/philbridges
➤➤VidIQ: https://vidiq.com/straightarrowrepair
#motorizedbike #motorizedbicycle #diymotorizedbike
43
views
Installing A Mini Split - Complete Cassette Head
Phil's installing a 3 headed mini split air conditioner for a customer. Here they are completely installing one of the cassette heads.
Pioneer Inverter Ultra High Efficiency Heat Pump 3 head mini split.
⏱️⏱️Chapters⏱️⏱️
00:00 Intro
00:12 Installing a 3 headed mini-split
00:25 One of the heads will be going through a double ceiling
00:45 Took a drill and bit and drilled out the corners where we need to cut
01:05 Went upstairs to mark the plywood
01:45 Made the cut marks
02:15 Going to cut the drywall
02:40 Back after pulling the drywall out
02:50 Scored the drywall with razor knife and cut with an oscillating saw
03:08 Put a paddle bit wider that the saw blade and drill the corners
04:00 Something you may run into when measuring
04:15 The jog in the hole is for the freon lines
04:35 Before cutting, make sure there's no electrical above you
04:45 They ran into that with one of the heads
04:55 The instructions are for offices, not good for putting in a house
05:13 This job has several complications. They have to adjust to.
03:20 Cutting the plywood
06:10 Be careful of falling debris
06:25 Need to move insulation back... The heat is flooding into the room
06:50 Put boards to support the area
07:20 The area for your freon lines you'll have to support too
08:00 Pattern for the shape of the head
08:25 The pattern shows a gap, you're not going to have it when it comes to rafters
08:45 They are doing the second head
08:55 Where the control wires go
09:50 Installation manual, pretty specific for acoustical ceiling
10:05 He's showing you how to put it into a home
10:20 The supports are in the blue package
10:50 The drain and freon lines for the head
11:05 Where the lines will be pointing
11:30 Electrical will come in there. You're using a 5/8 wrench
12:00 Installing the support bars
14:25 You have to keep an eye on the support to make sure it's facing where you need it to
15:00 2 supports are done
15:45 Want to be careful when rolling the head over
16:10 Leave enough room on the bottom to adjust it if you have to
16:50 The kit has anchors for concrete
17:30 You could use the anchors if it was inside a wall, but probably won't need them
18:00 Cut a piece of wood to keep the head 7/8 above the ceiling
18:20 Using 1/4" roofing screws
18:52 Not really a one person job trying to get the head up there
19:10 Woops, cut the area wrong
19:20 Need to cut the other corner out
19:45 Had to move the freon lines and cut another hole
20:00 You can't have the freon lines going out, may have to adjust
21:00 Using roofing screws to fasten it
21:45 The fun of working with someone you can't see
23:00 Only thing stays same is everything changes
23:10 Heavy or awkward?
24:50 The small piece of board is a measuring device
26:10 The box for the cassette head cover
26:50 Little tiny package of screws in the box
27:10 The cover doesn't go on just any old way
27:35 The wires have to go to a specific space
27:45 Where the wires have to go
28:25 To put the screws in you have to take one of the covers off
29:55 Tight fit
🙏 Subscribe, 👍, it helps a lot!!
➤❓/ 💬: ask@straightarrowrepair.com
➤ Follow https://straightarrowrepair.com/pipf
➤➤I get a little for the channel-no charge for you if you use the links:
➤➤Shop Amazon https://amzn.to/3CxD1T4
➤➤Tool lists & recommended products🧰 https://straightarrowrepair.com/0lvf
➤➤Services We use
➤➤MORNINGFA·ME https://morningfa.me/invite/StraightArrowRepair
➤➤A2 Hosting http://www.a2hosting.com/refer/140244
➤➤Tubebuddy https://www.tubebuddy.com/StraightArrowRepair
➤➤Apsumo http://fbuy.me/v/philbridges
➤➤VidIQ: https://vidiq.com/straightarrowrepair
#minisplit #ACInstall #cuttingceiling
66
views

Build A Motorized Bike at Home #1
First part of building a motorized bike. Using a Schwinn Stingray.
🙏 Subscribe, 👍, it helps a lot!!
➤❓/ 💬: ask@straightarrowrepair.com
➤ Follow https://straightarrowrepair.com/pipf
➤➤I get a little for the channel-no charge for you if you use the links:
➤➤Shop Amazon https://amzn.to/3CxD1T4
➤➤Tool lists & recommended products🧰 https://straightarrowrepair.com/0lvf
➤➤Services We use
➤➤MORNINGFA·ME https://morningfa.me/invite/StraightArrowRepair
➤➤A2 Hosting http://www.a2hosting.com/refer/140244
➤➤Tubebuddy https://www.tubebuddy.com/StraightArrowRepair
➤➤Apsumo http://fbuy.me/v/philbridges
➤➤VidIQ: https://vidiq.com/straightarrowrepair
#motorizedbike #motorizedbicycle #diymotorizedbike
99
views

Floor Damage from AC Unit Halted: Here's How!
Phil is repairing the subfloor, water damaged from a leaking AC unit. In this video he shows you several little tips to make your work look professional.
⏱️⏱️Chapters⏱️⏱️
00:00 Your floor joists in a mobile home
00:50 Cable wire we need to watch for
01:10 Interesting situation by the wall
01:38 To help support the weight
01:52 In mobile home there's usually a frame 3' from the outside wall
02:21 Cut materials, when doing several, write the measurements on your board
02:45 Better to use screws if you can
03:00 Why he doesn't build directly under the walls
03:37 Mobile home walls are never straight after moving and sitting for so long
03:38 You don't have to use 2x6s
04:55 It can be frustrating
05:05 Living right
05:35 Boring description and hard to live that way
07:07 Had to use big bars, long 2x4s just to pry up wood
07:22 Lot of ways to do it by yourself
07:52 You can put a scrap under the support, against the floor joist if you're worried about it
08:28 A 2x6 would set on the frame
08:45 You can do a 2x4 and then 2 by anything on the side and get 2x6
09:20 Can span the area and have a lot more weight support
09:30 Notched a board to add strength and join with the spacers
10:30 Thing about screws you can adjust
10:42 Making that area stronger because she had bookshelves right there
11:15 Went ahead and adjusted support board
11:40 If high traffic area you want to support
11:55 Plywood and 2x4s are exactly the size, they say
12:14 Lowe's tongue-and-groove plywood
12:30 If you don't use tongue-and-groove
12:55 Recommend you put two bys
13:15 They made the tongue and groove for flooring
13:30 Whenever you need to hammer a board in
13:41 Video to put floors in https://youtu.be/tXolAnaGu3E
14:05 Use 1 1/2 screws outside edges every 6"
14:20 Easy way to measure 6" other quick field measurements
16:45 His 265# jumping on the floor
17:00 We'll try showing you different floors and situations
17:40 He had to learn the hard way, trying to help you through that
17:52 Try to cut corners and you will pay a price
18:15 Don't overlay the wood
18:44 When you put in or patch a floor
19:05 Mix a floor leveler
19:20 Bigger the package the better the price
19:37 How to mix the floor leveler the easy way
20:44 Do the same thing with drywall mud
21:30 How can you tell when the leveler is mixed right
21:50 Like a really thick soup
22:40 Want to fill the cracks
23:53 How he was originally taught by a flooring guy
24:30 Mix the floor leveler on the floor
🙏 Subscribe, 👍, it helps a lot!!
➤❓/ 💬: ask@straightarrowrepair.com
➤ Follow https://straightarrowrepair.com/pipf
➤➤I get a little for the channel-no charge for you if you use the links:
➤➤Shop Amazon https://amzn.to/3CxD1T4
➤➤Tool lists & recommended products🧰 https://straightarrowrepair.com/0lvf
➤➤Services We use
➤➤MORNINGFA·ME https://morningfa.me/invite/StraightArrowRepair
➤➤A2 Hosting http://www.a2hosting.com/refer/140244
➤➤Tubebuddy https://www.tubebuddy.com/StraightArrowRepair
➤➤Apsumo http://fbuy.me/v/philbridges
➤➤VidIQ: https://vidiq.com/straightarrowrepair
#MobileHomeRepair, #acunitdamage, #waterdamagerepair
63
views
4
comments
Kitchen Makeover & Floor Support
Kitchen Revamp & Supporting Floor 2020
⏱️⏱️Chapters⏱️⏱️
00:00 Problem with the floor breaking
00:20 We're going to put wood across the ends
00:30 Asked if we could raise the ductwork up a little, change part of the kitchen
01:10 Dealing with water puddles under the house
01:25 Letting the young bucks handle the tools to increase their skill level
01:50 Boys are moving the water line
04:45 The fun of finding supplies under a house
05:10 Explaining to Phil why a 90
05:30 Bright light
07:00 Getting the water line where they need it
08:00 Deciding exactly where the hole needs to be, and talking to the customer
09:25 Phil giving directions to keep the boys on track
09:40 The guys kidding around while Tim gets the hole cut in the wall
11:15 What we used to get rid of cockroaches
13:40 Still working on the hole
15:00 How to do the hole, knock out the grout
15:30 Cut away and back, need to move a cabinet
15:55 Measuring everything
16:25 The cabinets were pretty far out of level
16:45 Pulling the cover off
17:45 Moving the cabinet
20:30 The frame has 2-foot centers
20:55 Measuring the hood vent to the center
22:00 Marking for installation
22:15 Each job has to be adjusted for, things are never exact
22:30 Cutting a hole so can adjust the install
23:15 Cut away to get the hole drilled
24:05 Next job, moving a cabinet
24:30 Cover the vent and build a box to vent outside the cabinet
25:00 Measured from the stove
25:30 Have to build a frame in the cabinet
26:20 He marked out where the vent goes, and they are drilling it out
26:45 You could use a Sawzall, but shakes the cabinet pretty bad
26:55 If you drill the corners you can go any way
27:05 Doesn't have to look pretty just be there
28:03 Moving the cabinet over to where it goes
29:20 Putting the top back on
29:35 Set the little vent
30:30 Putting the drawers back
🙏 Subscribe, 👍, it helps a lot!!
➤❓/ 💬: ask@straightarrowrepair.com
➤ Follow https://straightarrowrepair.com/pipf
➤➤I get a little for the channel-no charge for you if you use the links:
➤➤Shop Amazon https://amzn.to/3CxD1T4
➤➤Tool lists & recommended products🧰 https://straightarrowrepair.com/0lvf
➤➤Services We use
➤➤MORNINGFA·ME https://morningfa.me/invite/StraightArrowRepair
➤➤A2 Hosting http://www.a2hosting.com/refer/140244
➤➤Tubebuddy https://www.tubebuddy.com/StraightArrowRepair
➤➤Apsumo http://fbuy.me/v/philbridges
➤➤VidIQ: https://vidiq.com/straightarrowrepair
#KitchenMakeover, #BudgetKitchenRemodel #DIYHomeRepair
55
views
Bathroom Remodel DIY 2
Second part of a complete bathroom remodel. We pull out the toilet, tear out the tile and get ready to tile the floor.
⏱️⏱️Chapters⏱️⏱️
00:00 Mixing thin set
00:30 Instructions on how to mix the thin set
00:55 Put water in first, outside to control the mess
01:15 Putting water first will help with your clean up
01:30 Goal is a consistency between peanut butter and soup
02:10 If it's a little heavy you can do cups instead of picking the bag up
02:30 Use an electric drill to mix it
03:00 Get all the lumps out of there
03:30 The drill is getting a work out
03:45 You might want to use a heavier electric drill
04:30 Random marriage advice lol
04:55 When you mix a lot you kind of know
05:25 He'll use a 6" finishing knife to pull that out
05:55 Chalk line that he popped
06:10 Size of trowel they are using
06:40 You need more there if you can see the dots
07:15 He provides the knowledge of how it's supposed to be done
07:30 Decided to lay tile in thirds
08:00 Cut at 6 and half inches for the stagger
08:23 Cutting the tile
08:45 This particular saw how it works
09:40 The speed of the motor
09:50 Want to watch the speed near edges, it will break the tile
10:00 You don't have to have this fancy of a saw
10:45 Already lined the tiles up
11:00 You don't want to be too far away or you'll end up squeezing the grout up
11:20 They make a little rubber hammer
11:55 The other third of tile
12:55 Don't have to be that close because going to put trim on it
13:05 Complex cut
13:30 How to measure for the tile
13:50 Measuring like drywall, just faster
14:40 Tough cut, have to help Clay with that
15:15 You can use a speed square to mark it
15:50 The way he cut the tile
16:05 Will use nibblers to complete the cut
16:30 Now can set the tile
16:40 Need to cut depth from the tile
17:33 Back after all the tile has been set
17:45 Made sure the customer was happy with the color
17:55 He's used to using drywall tools
18:15 Forcing the grout in the cracks
18:25 He suggested the kids get to pull the spacers out
18:45 How we mix our grout
18:55 Don't want to mix a lot because got to get it down it 45 mins
19:15 Wiping down the tile with a sponge
19:40 Using thrift store towels to clean
20:00 After the towel leaves a fine dust
20:30 Come back in an hour and knock the dust off all of this
20:40 Cover the tile paint the walls and ceiling
21:00 Using 5 min mud to fill in holes in the walls
21:50 If you're not a good finisher you don't have to use 5 min mud
🙏 Subscribe, 👍, it helps a lot!!
➤❓/ 💬: ask@straightarrowrepair.com
➤ Follow https://straightarrowrepair.com/pipf
➤➤I get a little for the channel-no charge for you if you use the links:
➤➤Shop Amazon https://amzn.to/3CxD1T4
➤➤Tool lists & recommended products🧰 https://straightarrowrepair.com/0lvf
➤➤Services We use
➤➤MORNINGFA·ME https://morningfa.me/invite/StraightArrowRepair
➤➤A2 Hosting http://www.a2hosting.com/refer/140244
➤➤Tubebuddy https://www.tubebuddy.com/StraightArrowRepair
➤➤Apsumo http://fbuy.me/v/philbridges
➤➤VidIQ: https://vidiq.com/straightarrowrepair
#bathroomremodeling #bathroom #bathroomrenovation
79
views
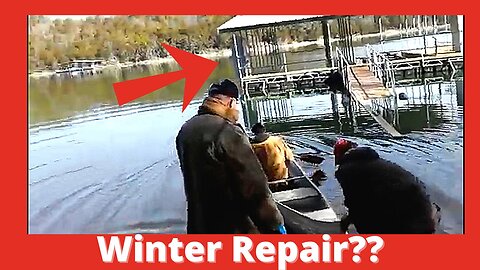
Dock Repair In Winter
The guys have to try to repair a boat dock during winter... The major thing is to NOT fall in!!
⏱️⏱️Chapters⏱️⏱️
00:00 Day started at 17F degrees
00:57 Checking out the wheels, after they get it over to the bank
01:30 Boundry to the Army core of engineers, can't build near it
01:50 Dock might be deeper than they thought
02:00 What we need to do to get the dock in
02:30 Using a canoe to get to the deck
03:20 They're in the boat
03:39 Woops, they have a leak
04:40 Will they make it to the dock?
05:08 They didn't attach a rope to the boat
06:00 Getting the dock back in
06:15 Jumping on the dock at 150# isn't going to help
07:00 Reeling the dock in or trying to
08:15 Got the dock in
09:00 Coming back to the dock
10:00 Super steep road
11:45 Crazy places we work off the beaten path
12:45 Fixing the first wheel
15:35 Moving the jack
15:50 Learning to operate the jack
17:40 Moving the jack to the other side
18:15 And we're lifting
18:45 Trying to line up the bolts
19:50 Making the best of the parts they have
21:45 Loosen the dock so can go up and down with the rain
22:30 Now to get the canoe back
23:20 Decided to ride it back around
24:15 Carrying the canoe back up
25:15 Everyone needed to catch their breath
25:40 Trying to figure out what they can patch the canoe with
27:12 Coming back out of the job site.
🙏 Subscribe, 👍, it helps a lot!!
➤❓/ 💬: ask@straightarrowrepair.com
➤ Follow https://straightarrowrepair.com/pipf
➤➤I get a little for the channel-no charge for you if you use the links:
➤➤Shop Amazon https://amzn.to/3CxD1T4
➤➤Tool lists & recommended products🧰 https://straightarrowrepair.com/0lvf
➤➤Services We use
➤➤MORNINGFA·ME https://morningfa.me/invite/StraightArrowRepair
➤➤A2 Hosting http://www.a2hosting.com/refer/140244
➤➤Tubebuddy https://www.tubebuddy.com/StraightArrowRepair
➤➤Apsumo http://fbuy.me/v/philbridges
➤➤VidIQ: https://vidiq.com/straightarrowrepair
#boatdock #boatdockrepair #winterjobs
20
views

Underfloor Insulation Installation & House Wrap on Mobile Home
Installing Insulation and house wrap under a mobile home floor.
⏱️⏱️Chapters⏱️⏱️
00:00 Cold day, adding insulation to floor
00:32 First thing is to measure the overall area
01:20 Cutting the house wrap
01:45 Discourages animals
02:10 Helping discourage animals
02:20 Opening the insulation
02:45 Too much insulation is OK
03:00 Putting the insulation under the trailer
04:30 Hard trying to get it in place
05:15 A lot of times there's plumbing you have to work around, not this time
05:40 You want the insulation next to the house wrap
06:00 That prevents freezing pipes
07:00 Shoving as much insulation in as they can
08:00 Random conversation about Amish people moving barns
08:30 House wrap and the screw guns
09:35 Should have been cut out
10:10 Wrap is going to go against the frame
11:30 Getting the house wrap in place
12:10 Tight under there with 3 people
12:35 Shoving the house wrap under the board
13:05 Watch for your electrical lines
14:15 Locating the floor joists
14:40 Screwing through the one by
16:00 Continuing to secure the house wrap
16:25 The cold weather just takes out the batteries
17:30 Moving to the other side
18:00 You can roll the house wrap up under the one by and get the slack out
18:30 Fun times when you work with your children
19:45 More battery troubles
20:50 Next area
22:00 Boys are having technical difficulties
22:46 Have to go get more screws
23:40 Trying to decide where to secure the 1 by
24:50 Patching another area
25:33 What you do to patch it
26:00 Black Gorilla tape
26:40 Not sure I ever expected this conversation from Phil
27:50 Moving to the next hole
29:20 Moving to the next hole needing patched
30:00 Patched the small one with just tape
32:00 Next hole
34:00 Putting the house wrap in so he can tape
🙏 Subscribe, 👍, it helps a lot!!
➤❓/ 💬: ask@straightarrowrepair.com
➤ Follow https://straightarrowrepair.com/pipf
➤➤I get a little for the channel-no charge for you if you use the links:
➤➤Shop Amazon https://amzn.to/3CxD1T4
➤➤Tool lists & recommended products🧰 https://straightarrowrepair.com/0lvf
➤➤Services We use
➤➤MORNINGFA·ME https://morningfa.me/invite/StraightArrowRepair
➤➤A2 Hosting http://www.a2hosting.com/refer/140244
➤➤Tubebuddy https://www.tubebuddy.com/StraightArrowRepair
➤➤Apsumo http://fbuy.me/v/philbridges
➤➤VidIQ: https://vidiq.com/straightarrowrepair
#MobileHomeRepair, #MobileHomeImprovement, #FloorInsulation
17
views
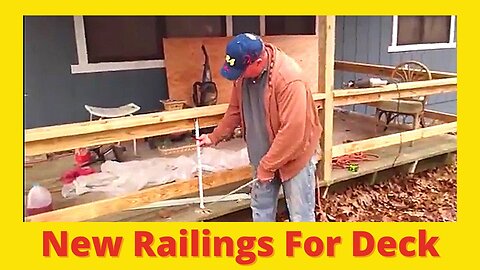
Repairing a Mobile Home Deck
Phil is working to repair and improve a deck. They walk you through the job step-by-step.
⏱️⏱️Chapters⏱️⏱️
00:00 You missed us moving the rafters they had up for support
00:30 Doing straight rails today
00:54 Measured between the 2 4x4's
01:50 He set the pole off to the side so he could set the support
02:55 Phil's been married long enough to know it's always his fault
03:42 You can set it caveman style with a piece of wood
04:40 Fastening the 4x4 support
06:30 Getting the support level.
07:15 He likes the handrails at 30" where you can sit down and see over
08:15 We're going to assume people are smarter than falling over your handrail
08:25 Cut a 28 1/2 inch 4x4--video done to here
09:10 First support for the handrail
11:32 Thing about screws.
12:10 How he will cut the rail out for step area
13:40 Cutting the posts
14:00 Had to change the cut because of floor joists
19:00 Cutting the support for the railing
20:30 Changing the depth of the saw
21:30 Notching out the 4x4
23:30 Fun of cutting in a notch
26:20 How to protect wood when you need to beat it into place
27:55 Marking the other side of the porch
28:25 How he marks things when he's working by himself
29:30 Cutting the rails
31:00 They cut the rail tight
33:20 Installing the top rail
36:10 Putting the rails up on the other side
38:15 Even pros mess up, they just fix it
39:00 Moved on to the next rail
41:54 Cut off or grabbed the wrong side of the board.
45:00 Next railing section
50:24 Installing the handrails
50:35 Porch is running downhill, but they are going to raise it up
50:46 May need to notch the handrails
54:15 How he notched in the railing
55.00 Lunch time for them
55:45 Fixing his mess up on the rail support
58:00 Old timers called the level a whiskey stick
59:45 Putting in the rails over there
1:00:00 Need to cut the rail shorter
1:03:50 Adjusting the rails
1:05:30 Putting the last 2x6 on top rail
1:07:00 Why he puts the rail height at 30"
1:07:18 Putting the slats into the rails
1:08:20 Measure each and mark your wood
1:10:25 Measuring the slats
1:11:18 Run screws at an angle
1:11:45 If it wants to split on you
1:13:25 Raising up the end of the porch
1:13:38 Using a lever
1:14:30 Putting blocks under the porch
1:15:16 Trying to decide if the moved it up enough
🙏 Subscribe, 👍, it helps a lot!!
➤❓/ 💬: ask@straightarrowrepair.com
➤ Follow https://straightarrowrepair.com/pipf
➤➤I get a little for the channel-no charge for you if you use the links:
➤➤Shop Amazon https://amzn.to/3CxD1T4
➤➤Tool lists & recommended products🧰 https://straightarrowrepair.com/0lvf
➤➤Services We use
➤➤MORNINGFA·ME https://morningfa.me/invite/StraightArrowRepair
➤➤A2 Hosting http://www.a2hosting.com/refer/140244
➤➤Tubebuddy https://www.tubebuddy.com/StraightArrowRepair
➤➤Apsumo http://fbuy.me/v/philbridges
➤➤VidIQ: https://vidiq.com/straightarrowrepair
#woodendeck #deckrepair #deckrailing
40
views
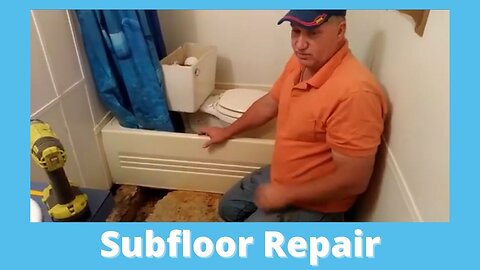
Mobile Home Subfloor Repair From AC Water Leak
When you're central heating and air leaks, make sure and check the floors. Phil shows you what to check on your a/c to prevent this problem. Then they take the toilet out and start repairing the subfloor.
⏱️⏱️Chapters⏱️⏱️
00:00 We're finishing up a job someone else started
00:10 They called to have him explain it and then wanted to just have us fix it
00:26 First thing he sees is the a/c has leaked more than once
01:00 There's a coil here that freezes up
01:22 Has a plastic overflow pan, but not very big
01:35 Need to clean the a-coil at least once a year
02:02 We recommend you keep the a/c clean for it to run good
03:07 First thing is to take off the door, so it's not in the way
03:56 Quick tip on how to fix doors not working, bent hinges
04:37 Easy way to make the place better
04:50 Next we're going to make a starting point to pull the bad floor out
05:10 They put the linoleum down before the walls at the factory
05:26 We're going to replace it with house type. You can put house type materials in the mobile home
05:51 There are always obstacles, want to watch for water and electric lines
06:12 Want to run a shallow, long cut with the sawzall
06:48 Have an oscillating saw, which is cheap and we keep finding more uses for
07:15 Pulling the toilet up
07:51 You can take a hacksaw to get the nuts off
08:06 Want to take the lid off, and then best place to put the toilet is in the tub
08:20 If you try putting in another room, the trap can spill water
08:43 Things you want to keep in mind when working. If you break the top, not likely to be able to replace it.
09:11 The rusty bolts aren't always because of a leak
10:29 Cut the bolts off and ready to move the toilet
10:52 When you get the toilet up you want to plug that hole with something while you're working
11:20 This floor vent is smaller than usual
11:34 A lot of times if you're losing a/c or heat it will be because this is loose. Easy fix
12:20 We use screws, never staple the vents back in like the factory does
13:04 We've taken a sawzall and cut under the wall at an angle to avoid lines
13:32 This wall is a little difficult because floor joist is just under the wall
14:00 With flooring, sometimes you can cut it in the middle and take it out in big chunks
14:20 Putting in the floor supports
14:57 How to pull up floor supports that are down
15:53: The ductwork is odd, not something we've seen before
16:25 So, we need to support the floor there to make sure the ductwork isn't smashed
17:09 That plastic barrier is why you don't have to have a vapor barrier on the ground under a mobile home
17:32 If you want to hold water under your house, put plastic on the ground
17:57 Mobile homes have the vapor barrier against the house, holding the insulation in
19:00 Where we're putting the support and why
19:30 Measured and cut the 2x6 for under the cabinet
21:00 Supporting the entire area where the ductwork is
21:42 Pre-drilling the area
22:43 Ready to lay the plywood
23:06 Want to run the plywood across the two bys, not with them
🙏 Subscribe, 👍, it helps a lot!!
➤❓/ 💬: ask@straightarrowrepair.com
➤ Follow https://straightarrowrepair.com/pipf
➤➤I get a little for the channel-no charge for you if you use the links:
➤➤Shop Amazon https://amzn.to/3CxD1T4
➤➤Tool lists & recommended products🧰 https://straightarrowrepair.com/0lvf
➤➤Services We use
➤➤MORNINGFA·ME https://morningfa.me/invite/StraightArrowRepair
➤➤A2 Hosting http://www.a2hosting.com/refer/140244
➤➤Tubebuddy https://www.tubebuddy.com/StraightArrowRepair
➤➤Apsumo http://fbuy.me/v/philbridges
➤➤VidIQ: https://vidiq.com/straightarrowrepair
#MobileHomeRepair, #waterdamagerepair #subfloorrepair
63
views

Mobile Home Flooring Replacement - Water Damage
We're replacing the floors in a mobile home. They were severly water damaged. We have videos where we tarred and elastomeric sealed the roof. The guys are getting the old damaged floors pulled out and replacing it.
This was a horrible water leak. We've already replaced the master bathroom's floor, resealed the roof, and are now moving out inte the other rooms. This is what can happen with rental properties.
⏱️⏱️Chapters⏱️⏱️
00:00 Follow along with a handyman
00:25 This is what can happen with a BAD water leak.
01:20 How we get the nasty floor out, a hammer is your friend
03:15 He's going to replace the floor in sections, that way you can move your tools around
03:30 He can usually pull the floor up in sections, which will help with the clean up
03:50 He's sawing in the middle of the floor to mark the sections, makes it easier to get the sections out.
04:40 If you cut between both floor joists you can just rock the piece back and forth to get it all out at once
06:05 The particle board is close to double the size it should be from the water
07:15 Putting 2bys along the sides to reinforce the floor
08:02 Putting the plywood into place
10:00 The owner wants to put carpet... It's her property, but NOT recommended for rentals
11:50 Adjusting with wood under to keep the plywood together, mobiles do get out of square
12:30 Generally, you want 6' between your screws
14:00 For stability of your floor you want to add a 2by everywhere 2 pieces of plywood will meet
16:35 Doing the center of the floor, you want to make sure and stagger your plywood joints
18:15 They aren't putting piece of wood yet because there's still more to take out
18:40 Laying the next sheet of plywood
20:30 You don't need to screw the middle joist under the plywood as much. You can, but you only need half as many.
21:40 You can stagger the screws where your 2 pieces of plywood meet.
22:00 Pulling out the other half of the floor
24:35 Be an American, not an American't
🙏 Subscribe, 👍, it helps a lot!!
➤❓/ 💬: ask@straightarrowrepair.com
➤ Follow https://straightarrowrepair.com/pipf
➤➤I get a little for the channel-no charge for you if you use the links:
➤➤Shop Amazon https://amzn.to/3CxD1T4
➤➤Tool lists & recommended products🧰 https://straightarrowrepair.com/0lvf
➤➤Services We use
➤➤MORNINGFA·ME https://morningfa.me/invite/StraightArrowRepair
➤➤A2 Hosting http://www.a2hosting.com/refer/140244
➤➤Tubebuddy https://www.tubebuddy.com/StraightArrowRepair
➤➤Apsumo http://fbuy.me/v/philbridges
➤➤VidIQ: https://vidiq.com/straightarrowrepair
#mobilehomefloorrepair #rottedmobilehomefloorsinglewiderepair #homerepairfloorssouthportnc #mobilehometrailerfloorrepair #mobilehomefloorproblems #mobilehomerepair #flooringproblemsrepiar
7
views
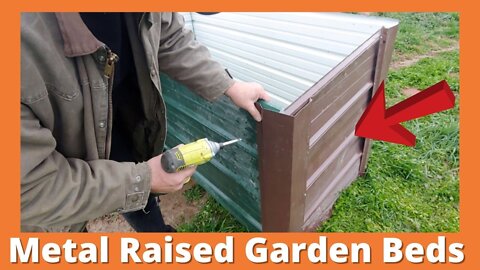
Recycled Raised Garden Beds
We are using metal left over from roofing and skirting jobs to build out raised garden beds. We kept them at 36", plan to fill about 3/4 with mulch we can get from recycled yard waste.
The guys are putting together as many beds as they have material for. They learned from the first one to put the first 3 pieces of metal together and then make the box with the fourth side.
This is Phil's wife. I have to say I LOVE how these have turned out. I don't have to bend over to weed or take care of the plants once we get them filled. We ended up with 4, and he plans on making me at least 2 more.
⏱️⏱️Chapters⏱️⏱️
00:00 Follow along with a handyman
00:25 Showing the first completed bed
00:45 They learned from the first one
01:45 You want to keep your corners lined up
02:30 Using the wood to hold the metal together until they can get the screws in.
03:10 Starting the next box
06:00 Almost assembly line at this point
06:38 Ready for the short end pieces
09:20 Covering the holes in that piece of metal
09:55 Putting the second side on
11:37 Securing the patch for the holes
12:10 They're using j-channel for the middle piece to split the garden bed in half
14:26 Attaching the center metal sheet
19:28 Be an American not an American't
🙏 Subscribe, 👍, it helps a lot!!
➤❓/ 💬: ask@straightarrowrepair.com
➤ Follow https://straightarrowrepair.com/pipf
➤➤I get a little for the channel-no charge for you if you use the links:
➤➤Shop Amazon https://amzn.to/3CxD1T4
➤➤Tool lists & recommended products🧰 https://straightarrowrepair.com/0lvf
➤➤Services We use
➤➤MORNINGFA·ME https://morningfa.me/invite/StraightArrowRepair
➤➤A2 Hosting http://www.a2hosting.com/refer/140244
➤➤Tubebuddy https://www.tubebuddy.com/StraightArrowRepair
➤➤Apsumo http://fbuy.me/v/philbridges
➤➤VidIQ: https://vidiq.com/straightarrowrepair
#RecycledGardenBed, #MetalRaisedBedGardens, #DIYRaisedGardenBeds
16
views
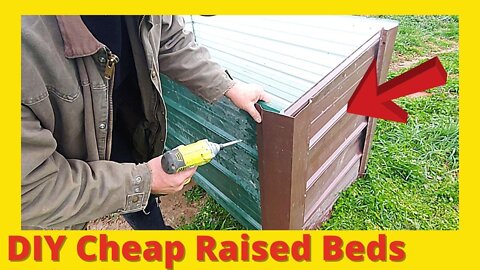
Diy Raised Garden Beds Cheap
This is the complete video of them putting together all the raisedbed gardening boxes. We quickly put together the boxes in one morning before they left on a job. I can't wait to get vegetables growing in them.
The guys are building several raised garden beds out of recycled metal. We left them at 36". The plan is to fill them about 3/4s of the way with local yard waste we can get free from the recycling center.
You might check with your area recycling center. If they don't have mulch you can pick up, you could try calling local tree service guys. Many times you can get mulch cheap from them. I'm also filling the bottom of the bins with trees and brush from cleaning up the park.
We wanted to do a video with all the garden beds being done, because with each one they learn new tips and tricks.
The material cost for each diy garden bed would be less than $100 if you had to buy all the material, but I bet if you looked around you'd be able to find someone with metal they want to get rid of.
⏱️⏱️Chapters⏱️⏱️
00:00 Follow along with a handyman
00:25 Using recycled metal to build corrugated metal raised garden beds
01:00 Plan to leave them 3 foot high, but you could cut the metal in half
02:05 Using rake and corner for the corner of each box
03:00 Material needed for each box
04:30 We are not using any wood it the boxes because the wood will rot
09:00 Phil is doing the putting together now.
14:54 First Garden box is complete
15:17 Talking about rabbit fertilizer
15:42 Putting together the second garden bed
16:00 They are using a 2by to hold the metal together while screwing
18:00 And the next one, this one they have to patch the holes
20:20 They are screwing each corner piece right into the ribs
21:20 Great way to use leftover material, or even for you to pick up cheap or free material and end up with damn near free garden beds.
22:45 Sheet is a perfect patch for the holes in the metal
24:00 Best way to put them together is put one long side and the two wide sides, then add the other long side.
25:00 You can use the 2by to apply pressure while putting the screws in, also keeps you from screwing your partner.
27:06 Use the J-channel to secure the middle panel so the box will be more stable. Also, gives you 2 growing boxes.
30:00 See even pro-builders have problems
34:24 Be an American not an American't
🙏 Subscribe, 👍, it helps a lot!!
➤❓/ 💬: ask@straightarrowrepair.com
➤ Follow https://straightarrowrepair.com/pipf
➤➤I get a little for the channel-no charge for you if you use the links:
➤➤Shop Amazon https://amzn.to/3CxD1T4
➤➤Tool lists & recommended products🧰 https://straightarrowrepair.com/0lvf
➤➤Services We use
➤➤MORNINGFA·ME https://morningfa.me/invite/StraightArrowRepair
➤➤A2 Hosting http://www.a2hosting.com/refer/140244
➤➤Tubebuddy https://www.tubebuddy.com/StraightArrowRepair
➤➤Apsumo http://fbuy.me/v/philbridges
➤➤VidIQ: https://vidiq.com/straightarrowrepair
#anyonecanmake #elevatedgarden #gardenbed #raisedbeds #gardenbeds #gardening
77
views
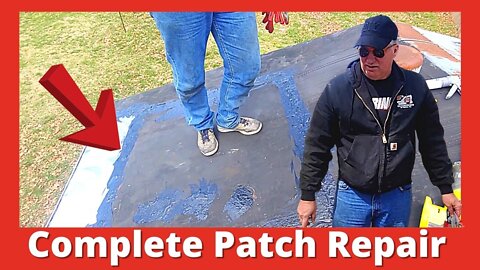
How To Repair A Patch On Metal Roof
Here we are, patching a patch that someone else messed up. The best fix for this roof would be a new metal roof. That is what we told the customer.
This is a rental property, so they chose to just have us re-patch it. This IS NOT what you should do at home or with your rentals. Again, we are trying to fix this the best way we can and stay with in the budget the customer gave us.
⏱️⏱️Chapters⏱️⏱️
00:00 Follow along with a handyman
00:25 What it looks like inside the trailer
01:16 John's story
02:00 Up digging up a patch, someone else screwed up
02:45 They just sealed it up with caulking
03:25 No screws holding the metal
04:30 We will recommend a metal roof, but the customer chooses not to
05:00 Phil is giving that they might not have known better
05:50 You don't need a massive glob of calking to cover a screw
06:40 This is where there was a skylight, or that's what we were told
08:00 Why we are doing the videos
10:55 Caulked at least 3 times
11:20 And the metal has rusted out
12:35 We have patched the whole with 20" flashing
13:45 Not our style, but what the customer wanted
16:30 This is way better than it was
17:30 We put screws about every six inches
18:10 Just cover the edges with metal roof tar
18:50 Smooth on the edges, but you want to pack it into the area
22:25 Patch will cause a roof rumble
23:00 We will not guarantee this patch of a patch
23:33 Be an American not American't
🙏 Subscribe, 👍, it helps a lot!!
➤❓/ 💬: ask@straightarrowrepair.com
➤ Follow https://straightarrowrepair.com/pipf
➤➤I get a little for the channel-no charge for you if you use the links:
➤➤Shop Amazon https://amzn.to/3CxD1T4
➤➤Tool lists & recommended products🧰 https://straightarrowrepair.com/0lvf
➤➤Services We use
➤➤MORNINGFA·ME https://morningfa.me/invite/StraightArrowRepair
➤➤A2 Hosting http://www.a2hosting.com/refer/140244
➤➤Tubebuddy https://www.tubebuddy.com/StraightArrowRepair
➤➤Apsumo http://fbuy.me/v/philbridges
➤➤VidIQ: https://vidiq.com/straightarrowrepair
#MobileHomeRoofRepair, #MobileHomeMetalRoofPatch, #MetalRoofPatch
9
views
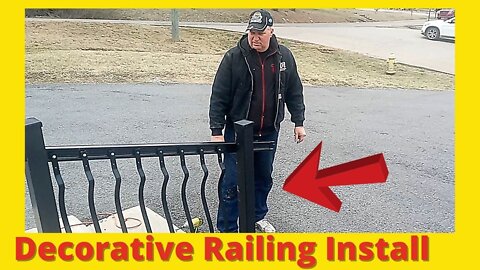
Railing Repair
Someone backed into a clinic wrought iron handrail. We are fixing that so they can have it back. The parts had to be special ordered, and this is an expensive repair.
Lots of traffic noises, not much we can do about that. Pretty much at the mercy of location.
⏱️⏱️Chapters⏱️⏱️
00:00 What it looks like after
00:10 Follow along with a handyman
00:35 Someone backed into the railing
01:05 Want to be careful not to scratch up the railing when taking it down
02:01 How they put together the top rail
02:14 We plan to build it heavier
02:37 Pulling off the top rail
03:56 And the bottom off
06:10 Pulling out the support
07:40 Setting the new supports
08:10 Packing the rocks in and then we'll pour concrete
09:00 Getting the metal level
09:25 Cutting off the excess metal
10:51 Capping the metal
11:30 Measuring and marking for the rails
12:55 Figuring out how and what to cover the raw metal with
13:40 Need to drill to attach it-guys deciding how
15:25 We going to drill a hole or two
18:54 Putting the decorative pieces back on the railing
19:55 Marking for each piece
20:15 And how many times do you need to count? As many as you have to.
25:30 Installing the last piece of trim
26:20 Wops Upside Down
27:10 Need to put the caps on the top rail
28:30 Making caps for the bottom rail
33:05 Installing the second cap for bottom rail
34:45 Be an American not an American't
🙏 Subscribe, 👍, it helps a lot!!
➤❓/ 💬: ask@straightarrowrepair.com
➤ Follow https://straightarrowrepair.com/pipf
➤➤I get a little for the channel-no charge for you if you use the links:
➤➤Shop Amazon https://amzn.to/3CxD1T4
➤➤Tool lists & recommended products🧰 https://straightarrowrepair.com/0lvf
➤➤Services We use
➤➤MORNINGFA·ME https://morningfa.me/invite/StraightArrowRepair
➤➤A2 Hosting http://www.a2hosting.com/refer/140244
➤➤Tubebuddy https://www.tubebuddy.com/StraightArrowRepair
➤➤Apsumo http://fbuy.me/v/philbridges
➤➤VidIQ: https://vidiq.com/straightarrowrepair
#RailingRepair, #WroughtIronRail, #DecorativeRailRepair
2
views
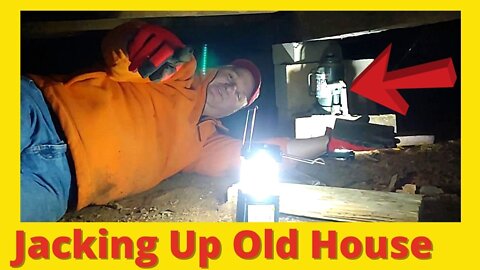
How to Level Old House Floor
Complete video showing how to level an old house, fix saggy floors and install house wrap for moisture barrier. Step by step, walkthrough of how to jack up your home, what you need to watch for. We give you all the tools we use, and explain exactly why.
First, we walk you through how to check the house, what signs you need to watch for to find saggy, uneven, and unlevel floors. It's not just the floors you need to look at, but also the walls.
Once you get into the crawl space, you can see what you need to get done, and never know what you could run across. All the beams are flimsy and lightweight. We end up reinforcing them with new wood. Usually, you would want to insulate the floors and house wrap the entire floor if you are going to relevel the floors.
🙏 Subscribe, 👍, it helps a lot!!
➤❓/ 💬: ask@straightarrowrepair.com
➤ Follow https://straightarrowrepair.com/pipf
➤➤I get a little for the channel-no charge for you if you use the links:
➤➤Shop Amazon https://amzn.to/3CxD1T4
➤➤Tool lists & recommended products🧰 https://straightarrowrepair.com/0lvf
➤➤Services We use
➤➤MORNINGFA·ME https://morningfa.me/invite/StraightArrowRepair
➤➤A2 Hosting http://www.a2hosting.com/refer/140244
➤➤Tubebuddy https://www.tubebuddy.com/StraightArrowRepair
➤➤Apsumo http://fbuy.me/v/philbridges
➤➤VidIQ: https://vidiq.com/straightarrowrepair
#LevelingHouseFloors #LevelOldHouseFloors, #JackingUpOldHouse
⏱️⏱️Chapters⏱️⏱️
00:00 Follow along with a handyman
00:25 Older house we will be leveling, and completely re-plumbing
00:45 Walk through house to see what needs to be jacked up
02:30 Huge hump in the floor, what shows you that the house is out of level
05:35 Will Phil fit through the access panel?
07:00 Under the house deciding what we need to do
10:45 Gathering the jacking material. What we need and why.
11:00 Trying to decide if the beam is usable or needs reinforced before we jack on the house
13:00 You never want to jump into the project, take your time deciding how to do it the safest way
14:20 We're set up to jack and lift the beams, but it's crushing them
18:30 Why they put plastic on the ground or in mobile home against the floor
19:55 Day two: jacking the house up and lifting the floors
23:00 Fixing the beams and joist that are breaking as we jack on the house
24:00 Getting to know Phil a bit more. What we did, but couldn't take you along.
28:30 Sliding boards through vent after John cuts them
29:30 How we reinforced the beams
37:45 Setting up for the next sagging beam
42:22 Clay showing the gaps we're trying to close
43:50 One way you can get an idea of how much you need to jack the house up
45:50 Back under the house, what we did yesterday
46:50 None of your piers should have less than 1 1/2" of wood
50:00 How you want to run your blocks
53:20 Everything is as level as we're going to get it
54:35 Tools needed and installing house wrap and insulation
58:15 Be an American not an American't
96
views
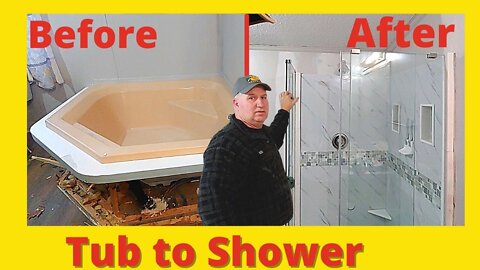
Tub To Shower Conversion Complete Install
Complete garden tub to Sistine Stone Alcove Shower kit conversion. We take a mobile home garden tub out and install a beautiful American Bath Factor Sistine Stone Alcove Stone Shower Kit, with glass doors.
Not something you expect to see in a mobile home bathroom remodel. While complex, it's a diy remodel anyone could do. Phil shows you how to adjust the kit for a mobile home bathroom remodel.
⏱️⏱️Chapters⏱️⏱️
00:00 Installing a Sistine Stone Corner Alcove Shower Kit
00:18 Follow along with a handyman
00:42 How to take out a garden tub
05:23 Why we use long flexible metal cutting blades instead of wood
06:20 Back to pulling the tub out
10:15 We're cutting the faucet out of the tub since we aren't trying to save it
15:45 And the tub's out
16:11 Opening the American Bath Factory shower kit
18:40 Measuring for where the kit will sit and where the plumbing needs to be moved to
26:40 Getting the walls ready
29:00 Plumbing moved, and we plugged holes
30:00 The shower uses 100% silicone for adhesive. We are putting the shower pan down.
34:25 Learn about pipe threads, getting the plumbing attached
37:55 How we needed to adjust the shower kit for a mobile home wall
40:45 Putting in the shower faucet
47:36 Installing the shower head
49:09 Dry fitting the shower panels
51:30 Installing the shower panels
54:48 How to install the shower pockets
55:55 Installing the stone shower trim and sealing it
1:03:25 Completing the Moen shower handle installation
1:07:28 Installing the shower glass and the problems we ran into
1:10:52 How to repair replace a broken shower tile
1:19:28 Installing Fluidmaster click-fit access panel through the siding
1:23:26 Best tape for mobile home underpinning
1:24:56 How to mix a small batch of grout the easy way
1:29:00 Stainless vs Non-stainless drywall knives
1:29:54 Grouting the stone tile shower pan and trim
1:34:23 How to clean up the tile with a sponge and water
1:36:46 Installing the footstool that came with the shower kit
1:39:23 Installing the soap dish
1:40:12 Be an American not an American't
🙏 Subscribe, 👍, it helps a lot!!
➤❓/ 💬: ask@straightarrowrepair.com
➤ Follow https://straightarrowrepair.com/pipf
➤➤I get a little for the channel-no charge for you if you use the links:
➤➤Shop Amazon https://amzn.to/3CxD1T4
➤➤Tool lists & recommended products🧰 https://straightarrowrepair.com/0lvf
➤➤Services We use
➤➤MORNINGFA·ME https://morningfa.me/invite/StraightArrowRepair
➤➤A2 Hosting http://www.a2hosting.com/refer/140244
➤➤Tubebuddy https://www.tubebuddy.com/StraightArrowRepair
➤➤Apsumo http://fbuy.me/v/philbridges
➤➤VidIQ: https://vidiq.com/straightarrowrepair
#MobileHomeRepair, #MobileHomeTubRemoval, #TubToShowerConversion
198
views

Tub To Shower Conversion - Glass Doors Installation
This is part four of five of the conversion. We sealed the decorative stone tile on the shower walls and sealed the corners.
The glass doors were more complex than expected, so we had to get additional instructions. While the first set of doors were drying, we held them in place. The hinges for the sliding doors were where the instructions were confusing.
Then we repair one of the glass/stone pieces that was broken when we opened the package. We get started on installing the access panel for the plumbing shut-offs.
Complete garden tub to Sistine Stone Alcove Shower kit conversion. We take a mobile home garden tub out and install a beautiful American Bath Factor Sistine Stone Alcove Stone Shower Kit.
Not something you expect to see in a mobile home bathroom remodel. While complex, it's a diy remodel anyone could do. Phil shows you how to adjust the kit for a mobile home bathroom remodel.
⏱️⏱️Chapters⏱️⏱️
00:00 Follow along with a handyman
00:25 Sealing the shower trim and the corners
02:18 Putting the faucet cover on
02:50 Want to make sure the shower faucet handle is correctly positioned
04:10 You want to make sure you line the notch up on all the various pieces
06:15 Positioning the glass shower doors, we had to call for additional instructions
06:45 You'll want to hold the glass until the silicone dries.
07:15 The brackets to keep sliding glass from falling out was confusing, but they got it
09:00 Handles are part of the door, and rollers were already on the glass when they came.
09:45 How to replace a broken piece of tile in the shower pan
15:50 The problem we ran into and why we didn't take you along with all the shower glass installation
17:20 You may need to shim the bumpers to make sure they are tight
18:05 Vacuuming the shower pan
18:18 Start of installing Fluidmaster 14 by 14 Click Fit access panel
19:50 Set the saw depth to the siding
20:17 Be an American not an American't
🙏 Subscribe, 👍, it helps a lot!!
➤❓/ 💬: ask@straightarrowrepair.com
➤ Follow https://straightarrowrepair.com/pipf
➤➤I get a little for the channel-no charge for you if you use the links:
➤➤Shop Amazon https://amzn.to/3CxD1T4
➤➤Tool lists & recommended products🧰 https://straightarrowrepair.com/0lvf
➤➤Services We use
➤➤MORNINGFA·ME https://morningfa.me/invite/StraightArrowRepair
➤➤A2 Hosting http://www.a2hosting.com/refer/140244
➤➤Tubebuddy https://www.tubebuddy.com/StraightArrowRepair
➤➤Apsumo http://fbuy.me/v/philbridges
➤➤VidIQ: https://vidiq.com/straightarrowrepair
#MobileHomeRepair, #MobileHomeBathroomRemodel, #ShowerKitInstallation
58
views
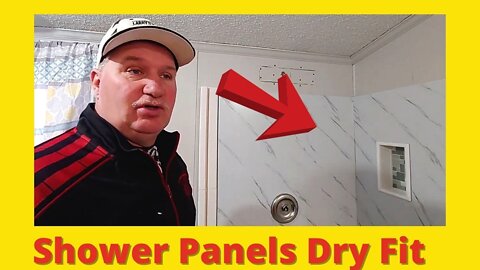
Tub To Shower Conversion - Shower Panels Installation
This is part three of five of the conversion. We are putting in the shower faucet and getting the shower panels started. We set the faucet where it would be at a comfortable height for the customer.
We're doing the finishing touches of the shower panels, shower head, and the stone trim.
Complete garden tub to Sistine Stone Alcove Shower kit conversion. We take a mobile home garden tub out and install a beautiful American Bath Factor Sistine Stone Alcove Stone Shower Kit.
Not something you expect to see in a mobile home bathroom remodel. While complex, it's a diy remodel anyone could do. Phil shows you how to adjust the kit for a mobile home bathroom remodel.
⏱️⏱️Chapters⏱️⏱️
00:00 Follow along with a handyman
00:25 We're measuring to put the shower faucet in
01:10 Wanted to make sure the Moen faucet would fit with the wood securing it flush with the drywall
02:42 What Pex and other plumbing fittings we will use on the faucet
03:43 Installing the 2 by 4 and securing the faucet
06:05 Want the shower fitting sitting pretty level
06:30 Hooking up all the plumbing
07:39 What we did to make sure the shower head would be sturdy
08:45 Why we usually don't use shark bite vs pex fittings
09:11 Dry fitting the shower panels
09:45 Measure a lot, make sure you have it right before you cut the panels
10:30 Cut the shower panels with skill saw, jigsaw and paddle bit
11:05 Take the panels down start over on the bottom using 100% Silicone to glue
11:55 Want to do the silicone outside of the shower to prevent getting silicone in the drain
14:50 How to put the soap holders
15:50 Setting up and installing the stone tile trim, Clay's putting the shower head on
20:00 How he cut the trim also needs to support the trim until it dries
21:04 Be an American not an American't
🙏 Subscribe, 👍, it helps a lot!!
➤❓/ 💬: ask@straightarrowrepair.com
➤ Follow https://straightarrowrepair.com/pipf
➤➤I get a little for the channel-no charge for you if you use the links:
➤➤Shop Amazon https://amzn.to/3CxD1T4
➤➤Tool lists & recommended products🧰 https://straightarrowrepair.com/0lvf
➤➤Services We use
➤➤MORNINGFA·ME https://morningfa.me/invite/StraightArrowRepair
➤➤A2 Hosting http://www.a2hosting.com/refer/140244
➤➤Tubebuddy https://www.tubebuddy.com/StraightArrowRepair
➤➤Apsumo http://fbuy.me/v/philbridges
➤➤VidIQ: https://vidiq.com/straightarrowrepair
#MobileHomeRepair, #MobileHomeTubRemoval, #TubToShowerConversion
47
views
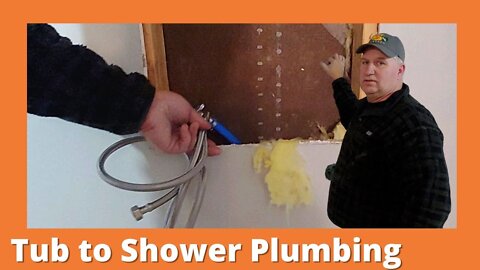
Tub To Shower Conversion - Plumbing
This is part two of the conversion. We are marking where we will put the new holes for the plumbing. When doing the silicone to secure the shower pan and panels, you don't have to do any particular order, just cover it the best you can.
Complete garden tub to Sistine Stone Alcove Shower kit conversion. We take a mobile home garden tub out and install a beautiful American Bath Factor Sistine Stone Alcove Stone Shower Kit.
Not something you expect to see in a mobile home bathroom remodel. While complex, it's a diy remodel anyone could do. Phil shows you how to adjust the kit for a mobile home bathroom remodel.
⏱️⏱️Chapters⏱️⏱️
00:00 Follow along with a handyman
00:25 Marking out for the shower head and plumbing
01:00 Cutting access in the drywall
03:00 The second wall had thin paneling underneath so a little tougher to cut
05:00 Cutting to make room for the mechanical vent
06:07 Marking where the new shower pan will go
06:20 Getting the blue and red pex to hook the water up
07:05 Drilling out the holes for the mechanical vent to wall
08:13 Cutting new drain hole
08:47 Plugged the holes and moved the lines
09:25 Next step, put 100% silicone on the shower pan area and place the pan
10:11 Yes, we are using 100% silicone to glue the floor
11:15 Talking about heated flooring
13:20 Fishing stories-these are to pass the time as they work
14:00 What you should know about pipe thread
15:20 Why you want to use galvanized pipe with plumbing
16:35 Putting the hardy board on
17:20 Marking the studs
18:05 Adjusting the shower kit and pockets for a mobile home
20:30 Be an American not an American't
🙏 Subscribe, 👍, it helps a lot!!
➤❓/ 💬: ask@straightarrowrepair.com
➤ Follow https://straightarrowrepair.com/pipf
➤➤I get a little for the channel-no charge for you if you use the links:
➤➤Shop Amazon https://amzn.to/3CxD1T4
➤➤Tool lists & recommended products🧰 https://straightarrowrepair.com/0lvf
➤➤Services We use
➤➤MORNINGFA·ME https://morningfa.me/invite/StraightArrowRepair
➤➤A2 Hosting http://www.a2hosting.com/refer/140244
➤➤Tubebuddy https://www.tubebuddy.com/StraightArrowRepair
➤➤Apsumo http://fbuy.me/v/philbridges
➤➤VidIQ: https://vidiq.com/straightarrowrepair
#MobileHomeRepair, #MobileHomeTubRemoval, #TubToShowerConversion
140
views
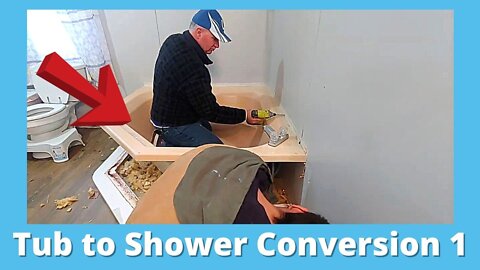
Tub To Shower Conversion - Removing Tub
This is part one of the conversion. We are removing the tub and working with the plumbing.
Complete garden tub to Sistine Stone Alcove Shower kit conversion. We take a mobile home garden tub out and install a beautiful American Bath Factor Sistine Stone Alcove Stone Shower Kit.
Not something you expect to see in a mobile home bathroom remodel. While complex, it's a diy remodel anyone could do. Phil shows you how to adjust the kit for a mobile home bathroom remodel.
⏱️⏱️Chapters⏱️⏱️
00:00 Installing Sistine Stone Corner Shower
00:12 Follow along with a handyman
00:37 Taking apart a garden tub to install a shower kit
00:54 Took off the trim and wallpaper loosely put on
01:40 Tearing the paneling and trim out from around the garden tub
04:40 Cutting the plumbing and mechanical vent
05:18 Why we use long metal cutting blades
06:45 Getting the caps for the water lines
07:20 Trim is down except one piece of wood
07:39 Telling customer about putting cut offs, disconnecting the drain. Our next steps
08:24 Should have the tub out in about 15 minutes
10:00 Makes it much easier if you aren't trying to salvage the tub, just cut around it
10:38 Listen to the camera man, lol
11:20 Cutting the faucet out of the tub
12:13 Make sure to check anything hanging on the wall when remodeling, lol
12:45 Trying to break out the tub faucet
13:46 Faucet's out
14:30 Breaking the drain out of the tub
15:40 And it's out.
16:05 Opening the shower kit: American Bath Factory
17:10 The kit is 600 lbs
19:15 Back inside, working on the plumbing
20:26 Be an American not an American't
🙏 Subscribe, 👍, it helps a lot!!
➤❓/ 💬: ask@straightarrowrepair.com
➤ Follow https://straightarrowrepair.com/pipf
➤➤I get a little for the channel-no charge for you if you use the links:
➤➤Shop Amazon https://amzn.to/3CxD1T4
➤➤Tool lists & recommended products🧰 https://straightarrowrepair.com/0lvf
➤➤Services We use
➤➤MORNINGFA·ME https://morningfa.me/invite/StraightArrowRepair
➤➤A2 Hosting http://www.a2hosting.com/refer/140244
➤➤Tubebuddy https://www.tubebuddy.com/StraightArrowRepair
➤➤Apsumo http://fbuy.me/v/philbridges
➤➤VidIQ: https://vidiq.com/straightarrowrepair
#MobileHomeRepair, #MobileHomeTubRemoval, #TubToShowerConversion
117
views
Jacking Up A House - Reinforcing House Beams
Phil and company are jacking up the floors in an old house. In this video, we are reinforcing house beams. We already jacked up some of these beams, but they started falling apart.
This job between jacking up the house and re-plumbing the complete house took about a week.
When reinforcing the beams, you want to screw into the beam. It won't take any of the weight, but will keep the boards attached to your beams.
One thing you can say about Phil, he has fun no matter what he's doing.
⏱️⏱️Chapters⏱️⏱️
00:00 Follow along with a handyman
00:25 Under the house getting set up
03:00 How we plan to reinforce the house beams
04:00 We will reinforce between the piers
04:40 Being self-conscious about saying "So"
05:15 Learn a little about Phil
06:40 Need to measure so John can cut the wood supports
07:15 We re-plumbed this house and had to fix a leak today but too tight to bring you along
08:50 Who would have thought of sliding wood through a vent?
09:20 Here's the wood
09:55 Setting the wood alongside of the beam to reinforce it
10:55 Fortunately, the beams aren't crushed where they sit on the piers
11:40 He doesn't like the way one of the 2 by is sitting
12:00 You'll want to put screws to it all, just to hold it to the beam
12:45 Who knew you could get paid to work out... of the house
15:50 Measuring for the next set of boards
16:30 The next beam will take some maneuvering because the beam is crushed
17:20 Securing the beam between the next 2 piers
18:15 They need to jack the beam up to even be able to secure it.
19:30 Getting the 20-ton jack set up, and the wood to jack the beam level and secure it
20:21 Stories about what people did to stop destruction of their yards
21:00 Back to jacking up the beam
22:10 We need to jack near the second pier to get enough height
22:55 There's the gap we need to get the beam up too
23:30 You can see the beam start to move (as the editor THAT'S COOL)
24:20 Be an American not an American't
🙏 Subscribe, 👍, it helps a lot!!
➤❓/ 💬: ask@straightarrowrepair.com
➤ Follow https://straightarrowrepair.com/pipf
➤➤I get a little for the channel-no charge for you if you use the links:
➤➤Shop Amazon https://amzn.to/3CxD1T4
➤➤Tool lists & recommended products🧰 https://straightarrowrepair.com/0lvf
➤➤Services We use
➤➤MORNINGFA·ME https://morningfa.me/invite/StraightArrowRepair
➤➤A2 Hosting http://www.a2hosting.com/refer/140244
➤➤Tubebuddy https://www.tubebuddy.com/StraightArrowRepair
➤➤Apsumo http://fbuy.me/v/philbridges
➤➤VidIQ: https://vidiq.com/straightarrowrepair
#HouseBeamRepair, #RelevelAHouse, #JackUpAHouse
81
views

People's Convoy Springfield MO
We're bring you something a little different. Phil and I (Chris-his wife) and Clay all went to watch and support the truckers and the People's Convoy.
I figured we would upload the convoy film. How often will you see over 7,000 trucks and vehicles all at the same time, fighting for the same thing?
There was talk that the convoy had grown to over 12,000 vehicles. We drove over an hour and a half to support the convoy. This is the footage from my camera. It's Chris.
There will be another video that I put up for the video Clay took.
🙏 Subscribe, 👍, it helps a lot!!
➤❓/ 💬: ask@straightarrowrepair.com
➤ Follow https://straightarrowrepair.com/pipf
➤➤I get a little for the channel-no charge for you if you use the links:
➤➤Shop Amazon https://amzn.to/3CxD1T4
➤➤Tool lists & recommended products🧰 https://straightarrowrepair.com/0lvf
➤➤Services We use
➤➤MORNINGFA·ME https://morningfa.me/invite/StraightArrowRepair
➤➤A2 Hosting http://www.a2hosting.com/refer/140244
➤➤Tubebuddy https://www.tubebuddy.com/StraightArrowRepair
➤➤Apsumo http://fbuy.me/v/philbridges
➤➤VidIQ: https://vidiq.com/straightarrowrepair
#peoplesconvoy, #truckersconvoy, #freedomconvoy
160
views

People's Convoy Springfield Mo - Clay
We're bring you something a little different. Phil and I (Chris-his wife) and Clay all went to watch and support the truckers and the People's Convoy.
I figured we would upload the convoy film. How often will you see over 7,000 trucks and vehicles all at the same time, fighting for the same thing?
There was talk that the convoy had grown to over 12,000 vehicles. We drove over an hour and a half to support the convoy. This is the footage from Clay's video.
There will be another video that I put up for the video Chris, I took.
🙏 Subscribe, 👍, it helps a lot!!
➤❓/ 💬: ask@straightarrowrepair.com
➤ Follow https://straightarrowrepair.com/pipf
➤➤I get a little for the channel-no charge for you if you use the links:
➤➤Shop Amazon https://amzn.to/3CxD1T4
➤➤Tool lists & recommended products🧰 https://straightarrowrepair.com/0lvf
➤➤Services We use
➤➤MORNINGFA·ME https://morningfa.me/invite/StraightArrowRepair
➤➤A2 Hosting http://www.a2hosting.com/refer/140244
➤➤Tubebuddy https://www.tubebuddy.com/StraightArrowRepair
➤➤Apsumo http://fbuy.me/v/philbridges
➤➤VidIQ: https://vidiq.com/straightarrowrepair
#peoplesconvoy, #truckersconvoy, #freedomconvoy
57
views

How to do Metal Skirting Trim - Both Top-front and J-channel Tips and Tricks
Phil teaching you how to install metal skirting and trim yourself, and maybe in your own business. You can install this on homes, trailers, mobile homes and even some commercial buildings. He covers J-channel, top-front, and how to do your corners.
The material lasts forever and stands up to the punishment. You can order the metal from a metal building supply store, maybe Lowe's. Lowe's will cost more. Wiss snipes are the ones I like.
The reason we are doing all these videos is to share Phil's experience, and teach you how to make your life better. No way Phil can do it all, we love teaching and helping others.
⏱️⏱️Chapters⏱️⏱️
00:00 Alot of questions-Where do I get the metal
01:07 J-channel-if you put it on wood, the wood WILL rot
01:55 How to order and install top front & bottom j-channel
02:55 Want to order hemmed on the top front
03:35 J-channel-why want that shape
04:05 Starting with Top-front
04:40 Steel skirting panels will not bow, usually will shove the j-channel in the dirt
05:00 How to do a Top-front outside corner
07:15 Wiss snipes are the ones he likes
08:00 How to do inside corner top-front
09:25 How to cut around phone and other lines-leave yourself room to lap over
10:50 Top-front doesn't have to be 2" but give yourself room
11:30 When ordering, make sure your color is on the outside
11:53 Moving to j-channel-supplies at metal building supply
12:10 Problems with j-channel, how to deal with dips
12:58 Don't like the gaps
13:14 How to go over blocks and boards
16:30 How to make it really fancy and line up
16:56 Outside corner on j-channel
18:50 Inside corner j-channel
19:25 Showing you how to do your own work, even if you want to start a business doing it
🙏 Subscribe, 👍, it helps a lot!!
➤❓/ 💬: ask@straightarrowrepair.com
➤ Follow https://straightarrowrepair.com/pipf
➤➤I get a little for the channel-no charge for you if you use the links:
➤➤Shop Amazon https://amzn.to/3CxD1T4
➤➤Tool lists & recommended products🧰 https://straightarrowrepair.com/0lvf
➤➤Services We use
➤➤MORNINGFA·ME https://morningfa.me/invite/StraightArrowRepair
➤➤A2 Hosting http://www.a2hosting.com/refer/140244
➤➤Tubebuddy https://www.tubebuddy.com/StraightArrowRepair
➤➤Apsumo http://fbuy.me/v/philbridges
➤➤VidIQ: https://vidiq.com/straightarrowrepair
#MobileHomeRepair, #MobileHomeSkirting, #MetalSkirtingTrim
180
views