

Loom Knit A House Sock - How To - Step-by-Step Tutorial - 'Wambui Made It' DIY Crafting Project
Loom Knit A House Sock - How To - Step-by-Step Tutorial - 'Wambui Made It' DIY Crafting Project - -
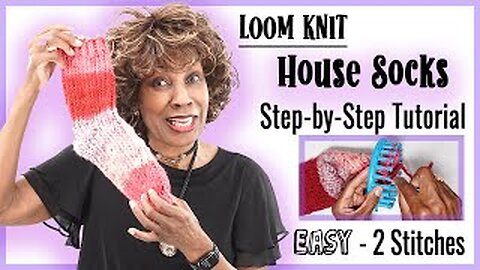
Welcome to Wambui Made It! Wambui Bahati's video will teach you how to loom knit house socks. House socks are great if you have a "no-shoe" or a house. These socks are also excellent gifts for someone recovering from an illness, either at home or in the hospital.
———————————————
How to Loom Knit House Socks Video Chapters
00:00 - Intro
02:54 - Supplies Needed
03:43 - Marking the Loom
06:08 - Making the Loop
07:17 - E-Wrap Cast On Row
09:44 - The Loom Knit Sock Cuff
14:23 - Loom Knitting the Sock Leg
18:13 - Loom Knitting the Sock Heel
20:24 - Section 1 of the Loom Knit Sock Heel - Four Rows
25:05 - Section 2 of the Loom Knit Sock Heel - The Decrease
33:43 - Section 3 of the Loom Knit Sock Heel - Closing the Gaps
38:55 - The Row After the Heel
41:00 - Loom Knitting the Sock Foot
43:15 - Loom Knitting the Sock Toe
45:05 - Section 1 of the Loom Knit Sock Heel - Four Rows
49:10 - Section 2 of the Loom Knit Sock Heel - The Decrease
56:47 - Section 3 of the Loom Knit Sock Heel - Closing the Gaps
39:37 - Closing the Toe and Removing the Sock From the Loom
01:00:04 - The Row After the Toe
01:01:27 - Closing the Toe and Taking the Loom Knitted Sock Off the Loom
01:08:35 - Outro
✦ ✦ ✦ ✦ ✦ ✦
🔸Wambui's Classes on Creative Fabrica:
https://www.creativefabrica.com/teacher/wambui-bahati/
———————————————
🎶 Music:
https://www.epidemicsound.com/referral/2v01qt
- - - - - - -
☕️ Buy me a coffee ☕️: https://www.buymeacoffee.com/wambuibahati
◇ ◇ ◇ ◇ ◇
🏠 Wambui’s Home site: http://www.wambui-bahati.com/
#wambuimadeit #wambuibahati #loomknitting #diy #socks
90
views
How to Loom Knit a Pot Holder - How to make a Pot Holder with Loom Knitting - Wambui Made It
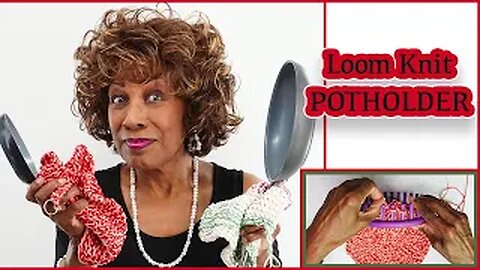
Greetings! Welcome to Wambui Made it! In this video tutorial, Wambui Bahati demonstrates how to LOOM KNIT, a potholder in this video tutorial.
✦ ✦ ✦ ✦ ✦ ✦
Video Chapters
00:00 - Intro
01:38 - Supplies Needed
04:34 - 'Bowls For Our Balls' (How to Keep the Yarn From Rolling Around)
05:02 - Working With Two Yarns As If They Are One
05:14 - Making An Extra Long Tail
05:56 - Making the Loop and Casting On With An E-wrap Stitch
09:19 - Our First Row of Purl Stitches
11:10- Loom Knitting the First Triangle
20:54 - Ending of the First Triangle
22:13 - Loom Knitting the Second Triangle
27:40 - Ending of the Second Triangle
28:45 - Preparing to Take the Potholder Off the Loom (A Really Loose Final Purl Row)
31:54 - Taking the Potholder Off the Loom with a Chain Stitch
34:33 - Removing the Final Loop
35:02 - Cutting the Source Yarn
35:45 - Using A Jump Ring As A Hanging Loop
37:22 - Measurements of Potholders: 1/2 inch Gauge Loom vs. 3/4 inch Gauge Loom
37:46 - Outro
37:57- Musical Outro
✦ ✦ ✦ ✦ ✦ ✦
For instructions on 'How to Block' a project: https://youtu.be/oLTuu3Ayzpw
Got to this mark 36:52 - Blocking the Placemat
✦ ✦ ✦ ✦ ✦ ✦
🔸Wambui's Classes on Creative Fabrica:
https://www.creativefabrica.com/teacher/wambui-bahati/
———————————————
🎶 Music:
https://www.epidemicsound.com/referral/2v01qt
- - - - - - -
🏠 Wambui’s Home site: http://www.wambui-bahati.com/
☕️ Buy me a coffee ☕️: https://www.buymeacoffee.com/wambuibahati
#wambuimadeit #wambuibahati
31
views
Easy-Peasy Potholder! Easiest Potholder For Me - Wambui Made It - How To Make A Potholder - Beginne
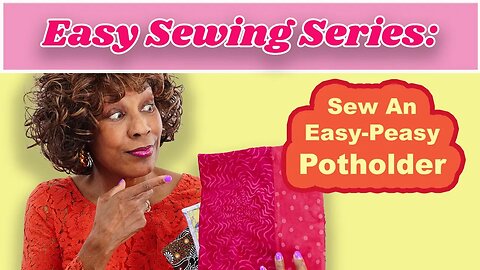
Welcome! Someone said to me, "I want to make an easy potholder. How do I do that?" I thought about what she said for a little while. There are hundreds of ways to make potholders. I thought of the easiest way for me and decided to share it with you. I'll go ahead and take you step by step through the process. Enjoy!
✔ How to Make An Easy Peasy Potholder
✔ A Potholder Made of Fabric
Video Chapters
00:00 - Intro
00:43 - Materials Needed to Make the Easy Peasy Potholder
06:14 - Preparing and Making the Loop
11:04 - Making the Potholder Sandwich
14:53 - Marking the Potholder Sandwich
18:25 - Sewing the Potholder
21:03 - Trimming the Potholder
22:14 - Cutting the Tips Off the Corners
22:53 - Turning the Potholder Inside Out
25:33 - Closing the Open End / Hand-stitching
31:48 - The Finished Potholder
32:00 - Musical Outro
✦ ✦ ✦ ✦ ✦ ✦
*. *. *. *. *. *. *. *.
🔸Wambui's Classes on Creative Fabrica:
https://www.creativefabrica.com/teacher/wambui-bahati/
- - - - - - -
🎶 Music:
https://www.epidemicsound.com/referral/2v01qt
- - - - - - -
☕️ Buy me a coffee ☕️: https://www.buymeacoffee.com/wambuibahati
◇ ◇ ◇ ◇ ◇
🏠 Wambui’s Home site: http://www.wambui-bahati.com/
#wambuimadeit #wambuibahati
25
views
How To Loom Knit A Wavy Infinity Scarf - Easy - Two Stitches - Wambui Made It Infinity Scarf
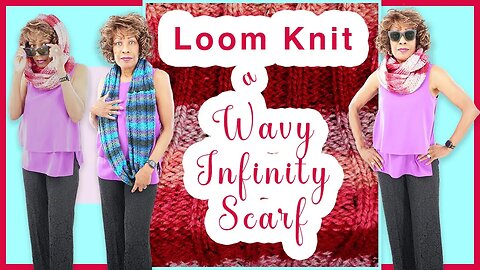
Welcome to Wambui Made It! In this tutorial, we will knit an infinity scarf on a round loom. Wambui Bahati walks you through how to loom knit an Infinity Scarf step by step. Because of this infinity scarf's natural waves and buoyancy, Wambui calls it the WAVY Infinity Scarf.
You only have to know two loom knit stitches to do this project. Those two stitches are the loom knit, e-wrap stitch, and the loom knit purl stitch.
If you need a refresher on these two stitches, the links to the videos below may be helpful for you.
• How to Loom Knit – the e-wrap stitch: https://youtu.be/1dc9dGiAtqc
• How to do the Loom Knit Purl stitch: https://youtu.be/zWMrpL04H_8
✦ ✦ ✦ ✦ ✦ ✦
Download the Wavy Infinity Scarf Marking Guide here for FREE:
https://www.buymeacoffee.com/wambuibahati/e/58152
✦ ✦ ✦ ✦ ✦ ✦
Video Chapters
00:00 - Intro
01:40 - Supplies Needed
06:49 - Preparing the Yarn
07:41 - Marking the Pegs
10:42 - E-wrap Cast On Row
15:03 - The First Row Using the Stitch Pattern
24:25 - A Look at the Wavy Infinity Scarf After the First Several Inches
25:30 - How to Add A New Ball of Yarn
27:33 - Loom Knit the last Row so that the Working Yarn is at the LAST peg
28:20 - Measuring Your Scarf Before Cast off
29:30 - Preparing to Close the Infinity Scarf
30:43 - Joining the two Ends of the scarf
38:10 - Cutting the Working Yarn and Threading the Darning Needle
39:37 - Securing the Closure
43:41 - Removing the Scarf from the Loom
44:25 - Finishing Up, Securing Ends, Hiding, and Cutting Yarn Ends
46:19 - Outro
✦ ✦ ✦ ✦ ✦ ✦
🧵✄ 🧵✄ 🧵✄ 🧵✄ 🧵✄
*. *. *. *. *. *. *. *.
🔸Wambui's Classes on Creative Fabrica:
https://www.creativefabrica.com/teacher/wambui-bahati/
———————————————
🎶 Music:
https://www.epidemicsound.com/referral/2v01qt
- - - - - - -
🏠 Wambui’s Home site: http://www.wambui-bahati.com/
☕️ Buy me a coffee ☕️: https://www.buymeacoffee.com/wambuibahati
#wambuimadeit #wambuibahati
64
views
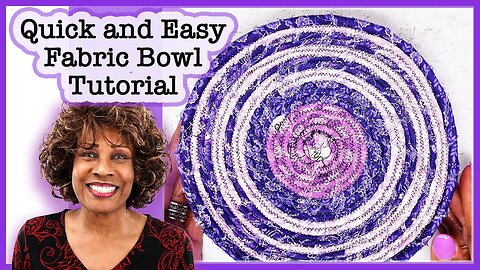
A Quick and Easy Fabric Bowl Tutorial - Wambui Made It - Fabric Bowls - DIY - Wambui Bahati
A Quick and Easy Fabric Bowl Tutorial - Wambui Made It - Fabric Bowls - DIY - Wambui Bahati
In this fabric bowls tutorial, Wambui Bahati demonstrates making a fabric bowl. Her bowl-making was inspired by the book called 'It's A Wrap' by Susan Breier.
Wambui walks you through the fabric bowl-making process step by step in this tutorial.
If you find this is a crafting technique you enjoy, she recommends the book 'It's a Wrap' for more ideas and further inspiration.
🧵✄ 🧵✄ 🧵✄ 🧵✄ 🧵✄
Video Chapters
00:00 - Intro
02:47 - Supplies Needed
07:42 - Cutting the Fabric
09:42 - The Cut Strips, The 22 Ft of Rope, The Glue
11:06 - Glueing Starter Tail to Rope
12:07 - Adding and Wrapping the First Strip
18:58 - How to Add and Wrap All Future Strips
22:17 - When You Get to the End of the Rope and the Last Strip
23:47 - Continuing to Add Strips and Wrapping Until the End
24:07 - Finishing Off the Rope with the Last Strip
25:06 - Starting to Build the Bowl Bottom
27:42 - The First Thing To Do At the Sewing Machine
28:59 - At Sewing Machine - Straight Seams Across Core of Center Bottom to Hold It Together
32:07 - Which Way to Set Up Your Project In the Sewing Machine
32:46 - Building the Bowl Bottom
37:28 - Building the Sides of the Bowl
40:18 - Finishing Off the Bowl
41:56 - A Look At Our Finished Project
42:21- Outro
🧵✄ 🧵✄ 🧵✄ 🧵✄ 🧵✄
Fabric Bowl Supplies --------
Some of the links below are affiliate links. This channel makes a small percentage from some of these items at no extra expense to the buyer.
Jelly Rolls and Precut Fabric: https://amzn.to/3AxaxJQ
Clothesline Rope: https://amzn.to/3g5JyvrFabric Glue
'It's A Wrap' Book: https://amzn.to/3o0doWT
Sewing Machine that does a ZigZag Stitch: https://amzn.to/3r4yLZ4
The machine Wambui is using is Bernette b77: https://amzn.to/3IViMTh
*. *. *. *. *. *. *. *.
🔸Wambui's Classes on Creative Fabrica:
https://www.creativefabrica.com/teacher/wambui-bahati/
- - - - - - -
🎶 Music:
https://www.epidemicsound.com/referral/2v01qt
- - - - - - -
☕️ Buy me a coffee ☕️: https://www.buymeacoffee.com/wambuibahati
◇ ◇ ◇ ◇ ◇
🏠 Wambui’s Home site: http://www.wambui-bahati.com/
#wambuimadeit #wambuibahati
44
views
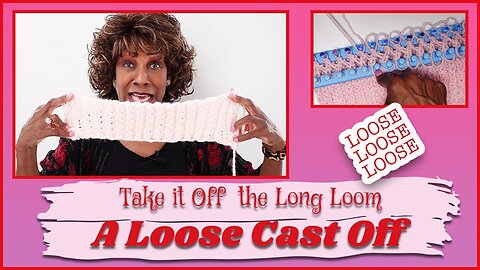
A Loose Cast Off - How to Cast Off The Loom Knit Long Loom - Wambui Made It Loom Knitting
Welcome to Wambui Made It! You will find several loom knitting projects on this channel. In this tutorial, Wambui Bahati addresses the issue of casting off from the Long Loom and having the cast OFF row being tighter than the cast ON row. In this video, Wambui walks you through a process that will allow you to cast your project off the Long Loom and have both ends be exactly even - the top end will be even with the bottom end - no tightness.
Category: Loom Knitting Stitches
This channel offers various crafting tutorials.
✦ ✦ ✦ ✦ ✦ ✦
Video Chapters
00:00 - Intro
01:50 - A look at What We Are Going For
02:11 - Comparing the Cast ON Row With The New Cast OFF Row
02:57 - The Main Issue - Tightness
03:39 - Refresher - Loom Knitting the Last Row On the Long Loom
05:23 - Answering the Concern: "It feels too loose when Loom Knitting the Rows."
06:49 - Preparing to Take Our Project Off the Long Loom
07:09 - The Loosening the Loops Technique
19:21 - Folding the Back Row of Loops Onto the Font Row of Loops
20:32 - The Chain Stitch Cast Off
26:18 - Taking the Project Off the Loom
27:03 - A Look at Our Finished Project With Even Beginning and End Rows
28:17 - Outro With Music
✦ ✦ ✦ ✦ ✦ ✦
How To Loom Knit On A Long Loom - Part One; https://youtu.be/MDzBAE0fRhw
Casting Off - or Getting Your Project OFF the Long Loom: https://youtu.be/FA66lU3uh80
✦ ✦ ✦ ✦ ✦ ✦
*. *. *. *. *. *. *. *.
🔸Wambui's Classes on Creative Fabrica:
https://www.creativefabrica.com/teacher/wambui-bahati/
- - - - - - -
🎶 Music:
https://www.epidemicsound.com/referral/2v01qt
- - - - - - -
☕️ Buy me a coffee ☕️: https://www.buymeacoffee.com/wambuibahati
◇ ◇ ◇ ◇ ◇
🏠 Wambui’s Home site: http://www.wambui-bahati.com/
#wambuimadeit #wambuibahati
78
views
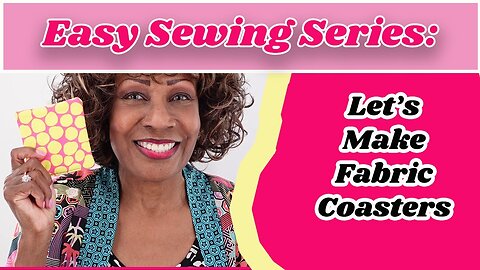
How to Make Fabric Coasters - How to Sew Coasters For Beginners - Easy DIY Fabric Coasters
This video tutorial discusses sewing a fabric coaster (DIY fabric coasters). I think this is a straightforward and quick project that makes a practical gift for someone else or yourself. Let's get started!
Download the Materials List and Pattern for this tutorial here for free:
https://www.buymeacoffee.com/wambuibahati/e/39662
Or here is what you will need:
Tools and Materials Needed:
* Enough fabric to cut two 5-inch x 5-inch squares for each coaster
* Enough batting to cut two 5-inch x 5-inch squares for each coaster
* Sewing Machine
* Sewing Machine Thread
* Clothes Iron
* Straight Edge Ruler
* Scissors
* Straight Pins
* Fabric Marker
The Pattern is a 5-inch x 5-inch Square.
⤳⤳⤳⤳⤳⤳⤳⤳⤳⤳⤳⤳⤳⤳⤳⤳⤳⤳
Video Chapters
00:00 - Intro
01:19 - What is Batting
03:37 - Materials List
05:38 - Getting Our Fabric Ready
07:54 - Getting Our Pattern Ready
09:34 - Pinning the Pattern to the Fabric
10:53 - Cutting the Fabric
12:40 - Pinning the Pattern to the Batting
13:48 - Cutting the Batting
15:04 - Layering or Making the Coaster 'Sandwich'
17:02 - Marking the Sewing Lines
22:00 - Sewing the layers Together
28:40 - Trimming Away the Bulk From Sides and Corners
30:54 - Turning the Coaster Inside Out
32:16 - Pushing the Corners Out
34:26 - Preparing to Close the Opening
34:37 - Sewing the Opening Closed
38:26 - Finished Fabric Coaster
38:45 - Musical Outro
✂️ ✂️ ✂️ ✂️ ✂️
Sewing Products🧵✂️🧵
The following links are affiliate links. This channel makes a small percentage of any products bought using these links.
Batting: https://amzn.to/3lzTKAw
Fabric / Fat Quarters: https://amzn.to/3kV15dB
Fabric Scissors: https://amzn.to/372EDaq
Sewing Thread: https://amzn.to/2TBoq91
Panasonic Cordless Iron: https://amzn.to/3iQKXY5
Straight Pins: https://amzn.to/370amJ7
Fabric Clips: https://amzn.to/3kRroBq
Sewing / Quilting Rulers: https://amzn.to/3kQ3wOC
Seam Rippers: https://amzn.to/3zwnP7R
Fabric Markers: https://amzn.to/3iPaYXp
Sewing Machines: https://amzn.to/3xuhnfW
✦ ✦ ✦ ✦ ✦ ✦
- - - - - - -
🔸Wambui's Classes on Creative Fabrica:
https://www.creativefabrica.com/teacher/wambui-bahati/
———————————————
🎶 Music:
https://www.epidemicsound.com/referral/2v01qt
- - - - - - -
☕️ Buy me a coffee ☕️: https://www.buymeacoffee.com/wambuibahati
◇ ◇ ◇ ◇ ◇
🏠 Wambui’s Home site: http://www.wambui-bahati.com/
#wambuimadeit #wambuibahati
25
views
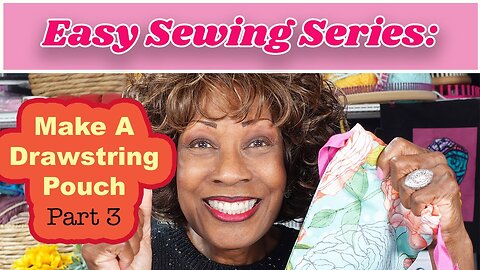
🧵Beginner Sewing Series - Making a Drawstring Bag - Part 3✂️
Beginner Sewing Series - Making A Drawstring Pouch
This is the first project in the Beginner Sewing Series. I will take you step-by-step through how to machine sew a Drawstring Pouch. This video is Part 3 of 3.
Part 1: https://youtu.be/rUkFgZOZsBg
Part 2: https://youtu.be/-k9jidwpaIA
- - - - - -- - - - - - - - - - - -
DRAWSTRING POUCH CUTTING GUIDE
Cut two (2) fabrics 11 X 8.5 inches
Or use a regular piece of 11 X 8.5 inches printer or copy paper
(Finished Pouch 8.25 X 7 inches)
- - - - - - - - - - - - - - - - - - -
Tools and Materials Needed:
* Sewing Machine Sewing Machine
* Thread
* 1/2 Yard of Fabric or 1 Fat Quarter Scissors
* Straight Pins
* Straight Edge Ruler
* Fabric Marker
* Clothes Iron
* 1 Yard of Ribbon between 1/4 to 1/2 inches in width
***** You can download the Materials List and the Cutting Guide / Pattern here for free:
https://www.buymeacoffee.com/wambuibahati/e/38775
* * * * * * * * * * * * * * *
Video Chapters -Part 3
00:00 - First Things To Do When Returning from Sewing Machine
00:52 - Clipping the Corners
02:07 - Pressing the Pouch Sections That Have Been Sewn Together
08:13 - Folding the Top Down To Form Ribbon Casing
10:44 - Sewing the Fold-over For the Ribbon Casing Down
16:53 - Turning the Pouch Inside Out
17:43 - Adding the Drawstring
23:00 - The Finished Drawstring Pouch
✂️ ✂️ ✂️ ✂️ ✂️
Sewing Products🧵✂️🧵
The following links are affiliate links. This channel makes a small percentage of any products bought using these links.
Fat Quarters: https://amzn.to/3kV15dB
Fabric Scissors: https://amzn.to/372EDaq
Sewing Thread: https://amzn.to/2TBoq91
Panasonic Cordless Iron: https://amzn.to/3iQKXY5
Straight Pins: https://amzn.to/370amJ7
Fabric Clips: https://amzn.to/3kRroBq
Sewing / Quilting Rulers: https://amzn.to/3kQ3wOC
Seam Rippers: https://amzn.to/3zwnP7R
Fabric Markers: https://amzn.to/3iPaYXp
✦ ✦ ✦ ✦ ✦ ✦
◇ ◇ ◇ ◇ ◇
🏠 Wambui’s Home site: http://www.wambui-bahati.com/
#wambuimadeit #wambuibahati
53
views
2
comments
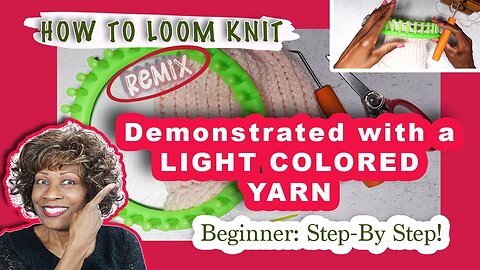
Beginner Step-by-Step How to Loom Knit (REMIX) Demonstrated with 'Light' Colored Yarn
Beginner Step-by-Step How to Loom Knit (REMIX) Demonstrated with Light Colored Yarn
I promised to make this video for those who had reached out to me to let me know that the dark grey yarn I used in the original Beginner Loom Knitting video was difficult to see because of some vision challenges. The general answer was light pink when I asked them what color would be best.
I hope that this helps and that anyone who found the dark yarn challenging to see will be able to see this tutorial better and start Loom Knitting!
✦ ✦ ✦ ✦ ✦ ✦
Guide For Number of Pegs Needed To Make Various Size Hats (Approximately):
• Preemie:
Loom size - 24 pegs. Hat length - 5 inches.
• Newborn:
Loom size - 24 pegs. Hat length – 6 inches.
• Baby to One Year:
Loom size - 31 pegs. Hat length -7 inches
• Toddler:
Loom size - 36 pegs. Hat Length - 7 inches
• Children to Young Teens:
Loom size - 36 pegs. Hat length - 8 inches
• Small Adult:
Loom size - 36 pegs. Hat length - 9 inches
• Adult Large:
Loom size - 41 pegs. Hat length - 10 inches
🏠 Wambui’s Home site: http://www.wambui-bahati.com/
#wambuimadeit #wambuibahati
53
views
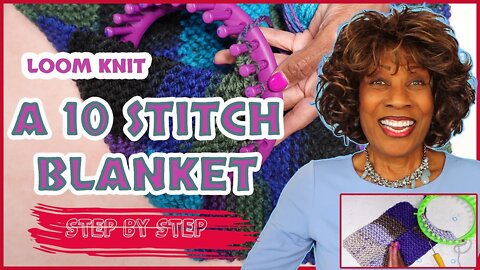
A Ten Stitch Blanket for Loom Knitters - Step By Step - Wambui Made It - 10 Stitch Blanket
In this video Wambui Bahati, with the permission of Frankie Brown, is demonstrating a version of the Loom Knit 10 stitch blanket. This is a Ten Stitch Blanket for Loom Knitters.
- - - - - - - - - - - - - -
⏰ Timestamp - 10 Stitch Blanket Tutorial
00:00 - Greetings and General Information About the Tutorial
01:30 - An Overview / Road Map - What the General Idea Is
03:36 - Marking Your Loom
05:34 - Casting On and Starting The First Section
10:11 - End of First Section - Making Sure Working Yarn Is On Tenth Peg
12:00 - Making the FIRST Triangle Of the First Square
28:02 - Making the SECOND Triangle of the First Square
40:17 - FIRST SQUARE COMPLETE
41:12 - Starting the SECOND SQUARE (Only For the Beginning of Blanket)
42:08 - Repeat of Making the First Triangle
52:35 - Repeat of Making the Second Second Triangle
1:03:07 - SECOND SQUARE COMPLETE
1:03:11 - Where We Go From Here
1:03:38 - HOW TO ATTACH / JOIN SECTIONS to the SQUARE
1:52:47 - Joining the Section is COMPLETE
1:52:54 - What it looks like so far . . .
NOTE: Amendment to the Video - 2 more things I want to mention:
1. About finding the first loop . . .
2. Binding Off . . .
https://rumble.com/vwgw2b-part-2-10-stitch-blanket-amendment-two-more-things-i-want-to-say.html
Repeat making a square with the two triangles and joining the sections until your blanket is the size you want.
✦ ✦ ✦ ✦ ✦ ✦
Donate to the Children's Liver Disease Foundation
Frankie Brown's Fundraising Page:
https://www.justgiving.com/fundraising/frankiesknittedstuff
- - - - - - - - - - - - - - - - - - - - - - - - - - - - - - - - -
✦ ✦ ✦ ✦ ✦ ✦
Beginner Loom Knit DVD:
https://tinyurl.com/3oxahydz
📀 🧶 📀 🧶 📀
- - - - - - -
🔸FONTS and DESIGNS for Crafts:
https://www.creativefabrica.com/ref/436707/
- - - - - - -
🎶 Music:
https://www.epidemicsound.com/referral/2v01qt/
Come Gimme Me Love - King Sis
- - - - - - -
🏠 Wambui’s Home site: http://www.wambui-bahati.com/
#wambuimadeit #wambuibahati
192
views

How to Add Fringe to Loom Knitted Projects 🧶 Add Fringe to Your Scarf🧣
How to create fringe add the fringe to a scarf or other projects.
How to Add Fringe to Loom Knitted Projects
Video Chapters
00:00 - Intro
01:07- Tools Needed
01:55 - Why I Use A CD Case
02:24 - Two Ways of Measuring the Strands of Yarn
03:44 - The Fasted Way to Make Lots of Strands of Yarn for the Fringe
06:08 - Things to Keep In Mind Before You Add The Fringe
08:23 - Preparing Your Strands
08:44 - Adding the Fringe
24:32 - Fringe On One End of Scarf Complete
24:35 - Things to Keep In Mind Before You Continue to Add Fringe to a project
25:25 - Trimming the Fringe
26:30 - Using the DVD Case to Help With Trimming
29:18 - Adding Fringe Clusters To A Hat
31:08 - Musical Outro
✦ ✦ ✦ ✦ ✦ ✦
Wambui Bahati
Wambui Made It
https://www.youtube.com/wambuimadeit
136
views
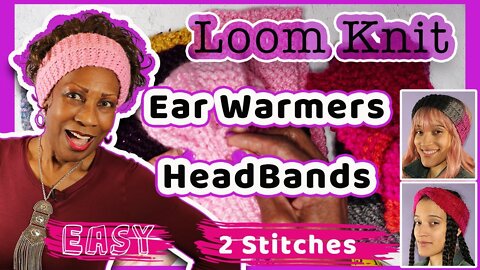
How To Loom Knit Ear Warmers and HeadBands - Easy - 2 Stitches 🧶👂🏼🧶
How To Loom Knit Ear Warmers and HeadBands - Easy - 2 Stitches
In this Video, I demonstrate one way to loom knit Headbands and Ear Warmers. Only two stitches are involved - the Loom Knit E-Wrap stitch and the Loom Knit Purl stitch. At least a # 5 weight Bulky yarn is recommended.
There are 2 different widths. There is the regular headband width is about 1 1/2 inches in width and the wide headband /Ear Warmer which measures about 4 inches wide.
In this video I demonstrate how to loom knit the wider headband / ear warmer.
To Loom Knit the 1 1/2 in the headband, everything is the same --except - instead of loom knitting on 12 pegs, you will loom knit on five pegs. And, instead of marking 2 pegs in the center as purl pegs, you will only mark 1 peg in the center as the purl peg. This will leave 2 pegs on either side that will be E-wrapped on the E-wrap rows.
✦ ✦ ✦ ✦ ✦ ✦ ✦
Timestamp
00:00 - Musical Intro With Headband / Ear Warmer Model
00:19 - Greetings From Wambui
00:59 - Sample of HeadBands and Ear Warmers
01:47 - Ideas for Decorating or Embellishing HeadBands and Ear Warmers
03:45 - The Size and Fit - One Size Fits Most
04:44 - Row Count and Measurements
05:48 - Tools Needed
10:43 - Marking The Loom For The Wide Headband / Ear Warmer
11:31 - Making The Loop And The First Row of E-Wrap Stitches
13:23 - The Second Row - A Row Of Purls
15:14 - Third Row - Row of E-Wraps With 2 Purl Stitches In The Center
19:26 - Repeating / Alternating The 2nd and 3rd Rows
25:23 - 2 Inches Done And A look At The Center Decorative Stitch Forming
26:30 - About 6 Inches Done - Loom Knitting / Repeating Rows
30:13 - About 10 Inches Done or 48 Rows - Loom Knitting / Repeating Rows
37:27 - Just Completed The Last Row 74 Rows / 15-16 Inches
38:06 - How To Close The HeadBand / Ear Warmer And Take It Off The Loom
50:19 - The Finished Headband / Ear Warmer Comes Off The Loom
50:55 - Hiding The End Yarns
53:51 - Musical Outro
Wambui Bahati
Wambui Made It
https://www.youtube.com/wambuimadeit
177
views
2
comments

Time for Crafts: How to Loom Knit A Velvet Hat with Wambui Made It
Today I am working with some luscious, soft velvet yarn. I demonstrate loom knitting a luxurious velvet hat using velvet yarn.
The ROYAL VELVET YARN I USED in the hats was purchased at Michale's Craft Store.
There is only ONE type of stitch used in the entire hat. Therefore, it is a good beginner project. The stitch that is used is the loom knit E wrap stitch. The hat is made a fold-over brim so we don't have to worry about the hat rolling up on the ends.
The cast off with the velvet yarn gets a little tricky. The velvet yarn was easy to work with while loom knitting. However, the velvet yarn was not easy to work with during the cast off. 'Sliding" the velvet yarn through loops was not easy. The yarn was causing friction and -- instead of sliding through the loops, the velvet yarn was getting stuck on itself.
However, I have come up with what I believe is a perfect solution to this challenge. The solution is this: When the hat is finished - just before threading the yarn needle for the cast-off, switch out the velvet working yarn to a regular knitting yarn of similar color and weight. The regular wool or acrylic yard will glide through the velvet loops easily.
Wambui Bahati
Wambui Made It
https://www.youtube.com/wambuimadeit
90
views
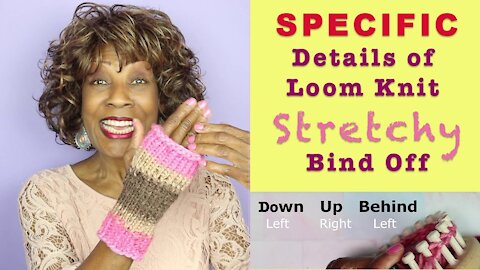
Specific Details of Loom Knit Stretchy Bind Off (Used In The Fingerless Mittens)
Wambui Bahati demonstrates and talks about various crafts and crafting techniques.
Specific Details of Loom Knit Stretchy Bind Off (Used In The Fingerless Mittens)
A few weeks ago, I posted a tutorial on how to Loom Knit Fingerless Mittens.
The feedback was good. However, there was one subscriber who asked if I could slow down the 'stretchy bind off'. I said I would be happy to. This is the video I promised. I break down the stretchy bind-off into specific steps in order to make it easier to understand.
Wambui Bahati
Wambui Made It
https://www.youtube.com/wambuimadeit
111
views

Let's Loom Knit Some Fingerless Mittens - Wambui Made It
Let's Loom Knit Some Fingerless Mittens! Wambui demonstrates - step-by-step how to loom knit a pair of fingerless mittens on a 20 Peg Round Loom. On this channel, Wambui Bahati demonstrates and talks about various crafts and crafting techniques - with an emphasis on Loom Knitting.
☞ If you need more detailed and even slower, step-by-step instructions for how to do the stretchy bind-off for these mittens, please see this video on this channel: Specific Details of Loom Knit Stretchy Bind Off (Used In The Fingerless Mittens)
Wambui Bahati
Wambui Made It
https://www.youtube.com/wambuimadeit
221
views

Let's Loom Knit A Scrunchie For the Hair
Let's Loom Knit A Scrunchie
In this video, I guide you step by step through the process of Loom Knitting a Scrunchie for the hair.
Wambui Bahati
Wambui Made It
https://www.youtube.com/wambuimadeit
181
views
How To Loom Knit a Pouch - Loom Knitting Projects
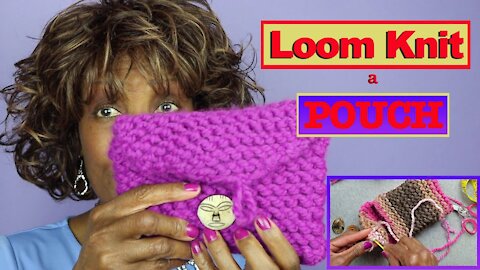
Let's Loom Knit a Pouch
Wambui demonstrates how to make a loom knitted pouch. This is one of the loom knitting projects that are considered for beginners. Wambui Bahati demonstrates and talks about various crafts and crafting techniques.
Wambui Bahati
Wambui Made It
https://www.youtube.com/wambuimadeit
87
views
Let's Loom Knit A Wash Cloth - Loom Knitting With Wambui Made It
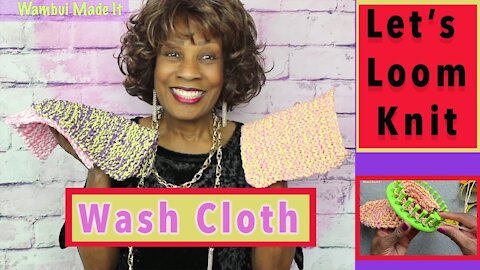
In this video I take you step by step and demonstrate how to loom Knit wash clothes.
Let's Loom Knit A Wash Cloth - Loom Knitting With Wambui Made It.
Wambui Bahati demonstrates and talks about various crafts and crafting techniques.
Wambui Bahati
Wambui Made It
https://www.youtube.com/wambuimadeit
489
views
How to Loom Knit A Cozy - Loom Knitting With Wambui Made It
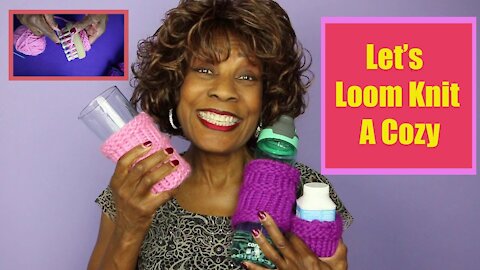
How to Loom Knit A Cozy: Wambui walks us through making a basic loom knitted cozy. A good beginner project. She guides you step by step.
On this channel, Wambui Bahati demonstrates and talks about various crafts and crafting techniques.
Wambui Bahati
Wambui Made It
https://www.youtube.com/wambuimadeit
91
views
Let's Loom Knit Some Scrubbies - Loom Knitting With Wambui Made It
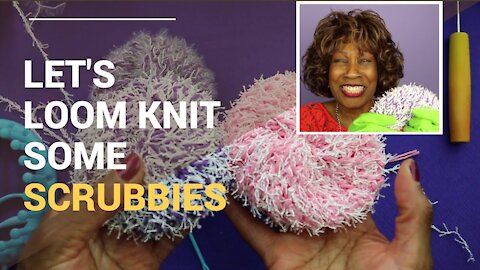
In this video, Wambui demonstrates how to loom knit a scrubby. These loom knitted scrubbies are easy to make - fun to make - a practical and useful item for your home - a great housewarming gift. This video also shows how to do the loom knit drawstring cast off. Wambui Bahati demonstrates and talks about various crafts and crafting techniques.
Wambui Bahati
Wambui Made It
https://www.youtube.com/wambuimadeit
125
views
2
comments
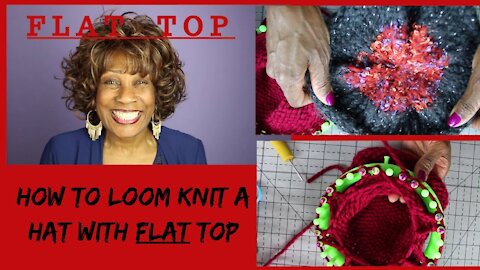
How To Loom Knit Flat Top Hat - Loom Knitting With Wambui Made It
How to bind off a loom knitted hat so that it has a flat top - How to Loom Knit Flat Top Hat.
Wambui Bahati demonstrates and talks about various crafts and crafting techniques.
Wambui Bahati
Wambui Made It
https://www.youtube.com/wambuimadeit
295
views