

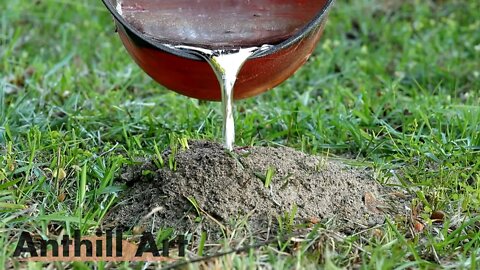
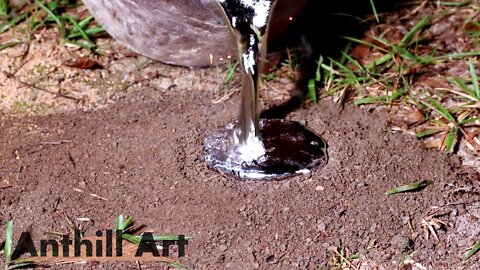
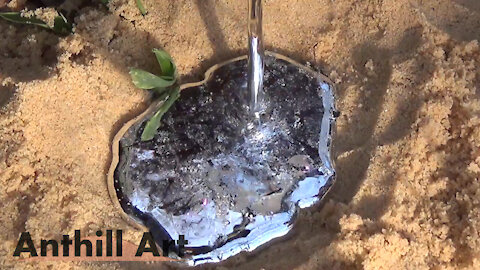
Casting a Fire Ant Colony with Aluminum (Cast #127)
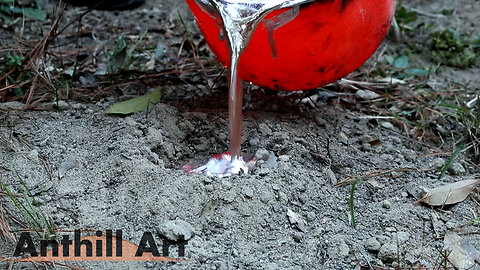
A fairly large fire ant colony is cast with molten aluminum. The surface mound of this colony was not built up very high, probably due to the recent cold weather, but from the area of it, it seemed to be a large colony. I melted around 25 lb of aluminum, lost a few pounds due to spillage in the furnace and ended up with a cast weighing 18.7 lb and a few pounds left over. The depth of the cast is 20 in, making it the 4th deepest of the fire ant colonies I’ve cast.
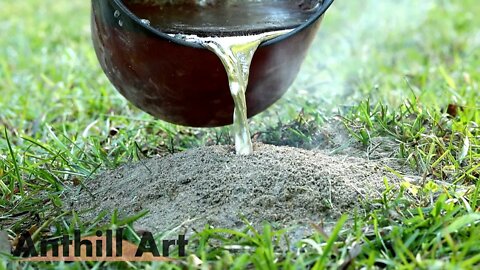
Casting an Ant Hill on a Log with Aluminum (Cast #126)
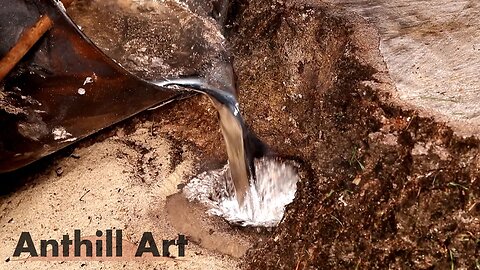
This is an aluminum casting of a fire ant colony which was built around a log. The log can be partially seen on the left side of the hill but most of it is covered by the dirt of the surface mound. Aluminum was poured into two holes made in the hill on each side of the log.
I anticipated removing the log, which is what I did on my other video involving a colony on a log, but I took an informal poll of my Facebook followers and 99.9% said “Keep the log!” This added quite a bit of work to finishing the cast but I do like how it turned out,
The log is around 4.75” in diameter at the biggest end. One end of the log is in decent shape while the other was showing a lot of rotting, I coated the log with an epoxy made by Totalboat which is said to help preserve rotting wood (we’ll see).
The cast turned out 10.9 lb in weight, a max width of 15” and a depth of 11”. The base board is a 12x9.5” oak with a medium brown stain and polyurethane finish.
13
views
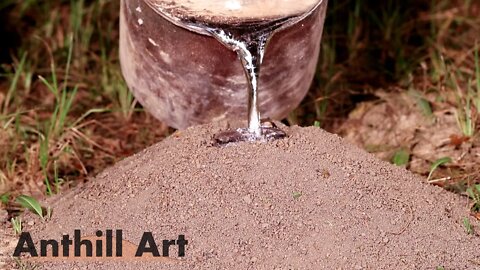
Craziest Cast Yet! – Casting an Ant Colony in a Stump with Molten Aluminum (Cast #121)
This is the possibly the craziest cast I’ve ever attempted and definitely the most challenging. This is a field ant colony (species Formica pallidefulva) with a single entrance tunnel right up against a large oak stump. Around 22 lb of aluminum was melted and it ended up taking around 10 lb to fill the colony. I didn’t know how exactly how to go about getting the cast out but I knew 1) I can cut wood and 2) I can dig dirt. So, how hard can it be? Turns out, it can be really hard.
I started to dig and cut initially, before deciding that doing that was going to be too difficult. Then I tried burning for two days and that seemed way too slow. I was posting my progress to my Facebook page (https://www.facebook.com/anthillart), and someone suggested drilling holes to make vents in the wood to target certain pieces, which I tried. Then it occurred to me that if I drilled into a section of wood from two angles, I could be fairly sure I wasn’t cutting into the cast if I cut down the line of the drill holes. These ants don’t tunnel in wood and the colony is only in the dirt pockets, so if I’m drilling and I hit dirt then I know not to cut to that depth. I don’t show the drilling much in the video but I’m doing that before most cuts. That’s why you see so many holes in the wood.
I actually didn’t plan on keeping the cast in the wood until the very end, which is why I wasn’t worrying too much about the damage I was doing to it. All for the better though because it would have taken much longer and probably wouldn’t have turned out as cool if I had planned to keep it in the wood. Toward the end, when I’m cutting on the back side of the cast, I still didn’t know if there would be a piece of cast sticking out on that side, once I saw that it was all contained well within the wood, I decided to keep it in the wood.
The cast has two main sections: the piece that comes out of the front and a more hidden piece that runs straight down in a vertical void in the wood. I only discovered that second piece after washing it.
It took ten days from the pour for the cast to be removed from the ground, around 40 hours worth of work. Some of that time was setting up cameras and even more of it was me scratching my head though.
Figuring out the mounting was a major task for me. I settled on drilling 3/4” holes on three sides of the wood and inserting oak dowels, as close to horizontal as I could. Then I built the base so that it catches those oak dowels and the cast can sit upright and be stable.
The colony is around 20” deep and the weight of the aluminum is around 10 lb. The total weight of the wood and the cast was 38 lb last I checked (it’s still drying and getting lighter).
I wasn’t quite sure to what extent I should clean up the wood but I sanded it a little bit and tried to remove any splinters. I started to plug some of the holes but didn’t like how that was working so I just left them. I may do more work on it as it dries. I’m not too sure what’s going to happen as the wood dries and splits but I used Pentacryl to help preserve the wood and have taken other measures. We’ll see!
More pics of the cast at: https://www.anthillart.com/castings/121/
35
views

Timelapse - Fire Ant Colony in the Rain #shorts
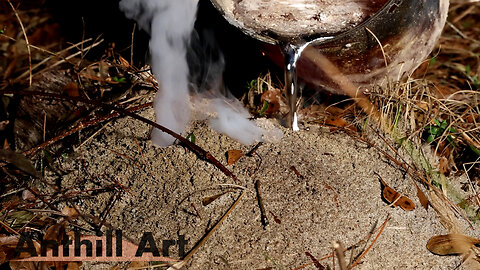
Timelapse of a fire ant colony being destroyed by rain then rebuilt. This one is built on the side of a drainage culvert that washed up and is just laying on top of the ground. The actual time is a day and a half. The rain started around 10pm, then they rebuilt some during the night when the rain stopped. They were fairly inactive during the day but then the next night they started building again until morning. I've noticed in doing these that the ants prefer to do their building at night and it seems that they only build up the surface mound after a rain. #anthillart
#nature #timelapse
5
views
Casting a Foam Pumpkin with Molten Bronze for Halloween #shorts
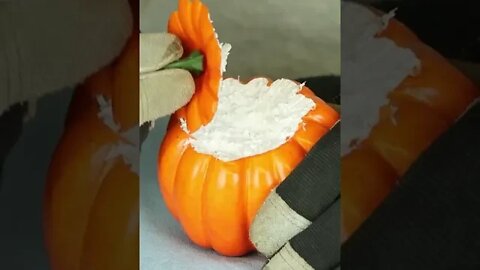
In this video, I carve a styro-foam pumpkin into a jack-o-lantern. Then, the foam is encased in plaster and burned out leaving a mold of the pumpkin. The void in the plaster is filled with molten bronze to create the final piece. This is an older video but I'm trying out YouTube Shorts and since Halloween is coming up I thought this would be a good one to test. #halloween #pumpkin #jackolantern
9
views
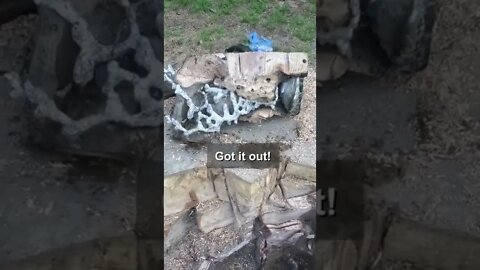
Finally Got the Cast out of the Stump, 10 Days of Cutting and Digging #shorts
Aluminum Ant Colony Cast in a Stump - Day 10. I've been digging and cutting to get this cast out for 10 days and it's finally free. Cleaning and mounting is going to take some time but I will eventually post a full video of the pour, dig/cut, and finished cast. Should be a great video! #anthillart #nature #shorts
7
views
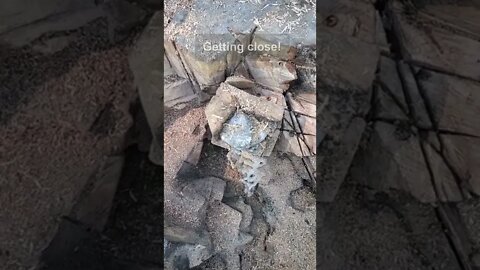
Removing an Aluminum Ant Colony Cast from a Stump - Day 10 #shorts
Aluminum Ant Colony Cast in a Stump - Day 10. Won't be long now! #anthillart #nature #shorts
5
views
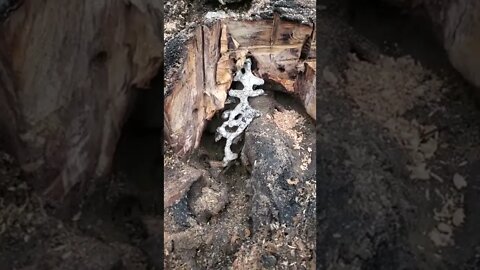
Removing an Aluminum Ant Colony Cast from a Stump #shorts
This colony was on the side of a large stump. I poured the aluminum on Friday and have been slowly getting it out ever since. Still a ton of work to do. I'll post a full video of the casting and uncovering when I'm done. #shorts #anthillart
5
views
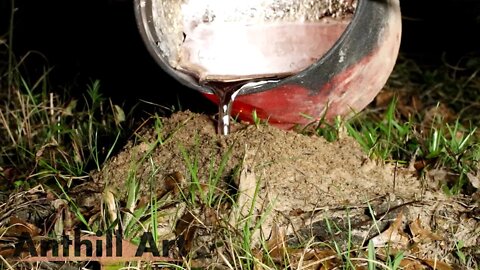
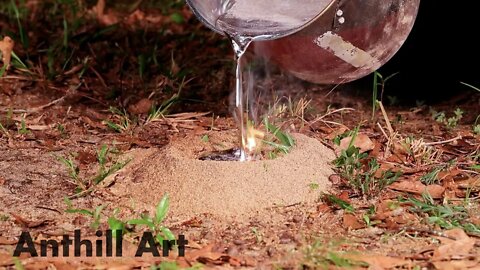
Three Fire Ant Colony Casting Session, Part 3: Fiery but Mostly Peaceful Colony Casting (Cast #119)
Part three of the three fire ant colony aluminum casting session. You may notice in some of the other videos, dirt is piled over the colony. This helps to prevent the aluminum from bursting through the side of the colony. You may have also noticed that this wasn’t done for the last few casts and they turned out alright. Well, it finally happened on this cast; the aluminum burst through the hill at 00:30. Luckily, it didn’t mess up the cast overall and I only missed a small portion of the above ground mound. The spilled aluminum started a small fire but no worries, there’s always a water hose close by when casting and the fire was promptly extinguished.
This is the last of a three part series.
Part 1 can be seen here: https://www.youtube.com/watch?v=4QANwRxvLoI
Part 2 can be seen here: https://www.youtube.com/watch?v=BieGs92yPn4
This is Anthill Art Cast #119 and reached a depth of 11” (28 cm) and weighed 6.7 lb (3 kg). More pictures can be seen here: https://www.anthillart.com/castings/119/
0:00 Introduction
0:03 Hills and Finished Casts 1&2
0:11 Pouring
0:45 Digging
1:45 Removing the Cast
2:06 Washing
2:33 Initial Wash Finished
2:39 Finished Cast Display/Stats
12
views
Three Fire Ant Colony Casting Session, Part 2: Casting in the Daylight for a Change
Part two of the three fire ant colony aluminum casting session. This one produced lots of smoke during the cast which made it difficult for me to see. Like a true professional I persevered and finished the cast with perfection (other than spilling a little bit of aluminum). It turned out pretty nice! Part 3 coming soon.
Part 1 can be seen here: https://www.youtube.com/watch?v=4QANwRxvLoI
This is Anthill Art Cast #118 and reached a depth of 12” (30 cm) and weighed 8.6 lb (3.9 kg). More pictures can be seen here: https://www.anthillart.com/castings/118/
0:00 Intro
0:03 Hills and Finished Casts
0:15 Pouring
0:52 Digging
1:38 Cast Removal
2:04 Washing
2:40 Mostly Cleaned Cast
2:53 Finished Cast Display/Stats
19
views
Three Fire Ant Colony Casting Session, Part 1: Big Colonies Hidden Under Small Hills
In this video I cast a cluster of three fire ant colonies with aluminum. This is the first cast of the three. I had expected these to be fairly small and was surprised by the size of all of them, especially this first one. To dig their colonies, the ants remove dirt while digging underground tunnels and use that dirt to build the surface mound. In general, larger fire ant colonies have larger surface mounds but this can be deceiving. Rain can wash away the dirt of the mound leaving a large colony with a smaller-than-expected mound.
This is Anthill Art Cast #117 and reached a depth of 14.5” (37 cm) and weighed 9.9 lb (4.5 kg). More pictures can be seen here: https://www.anthillart.com/castings/117/
19
views
Ant Colony Didn’t Fill Completely but I Make the Best of It (by Powder Coating it)
I melted about 24.6 lb of aluminum to cast this large fire ant colony; however, something went wrong and only about 4 lb went in before the aluminum backed up into the pour hole. I usually refer to these failed or partial casts and it can happen for multiple reasons. In this case, it hadn’t rained in quite a while and I think that the tunnel walls had become dry and crumbly, allowing dirt to fall away and block the tunnels. Even though the colony wasn’t completely filled, enough tunnels were filled that it made an interesting cast.
I usually don’t post videos of these partial/failed colony casts but I didn’t really want the footage to go to waste and thought the cast actually turned out pretty cool. I have been experimenting with powder coating recently so I thought it would add to the video to show that process. I don’t plan to powder coat many casts and can only do it to smaller ones for now due to the size of my lab oven. Since this cast was so small I thought it would be a good one to try powder coating.
After the pour I still had a massive amount of aluminum left in the crucible and the only other ant colony nearby was a carpenter ant colony. So, I casted that colony and the video can be seen here: https://www.youtube.com/watch?v=WyaWIKwuoWI . I still had a lot of aluminum left and didn’t have many ingot molds so I spent quite a while making ingots that night.
Pics/info of the cast at https://www.anthillart.com/castings/109/
0:00 Inro
0:04 Pouring Aluminum
0:21 Digging
1:03 Washing
1:24 Powder Coating
1:59 Powder Coat Curing
2:23 Completed Cast
23
views
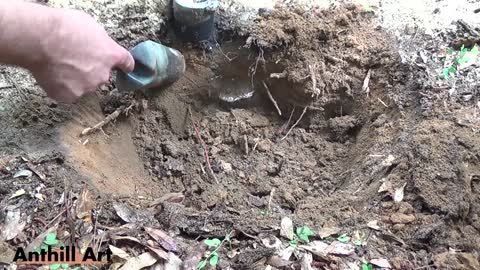
Casting a Fire Ant Colony Built Around a Log with Molten Aluminum (Cast #116)
This fire ant colony was built partially around a dead log that was lying partially below the ground surface. I had melted 31.1 lb for a larger cast nearby and had a decent amount leftover so I decided to use the excess to cast this smaller but potentially more interesting colony. The resulting cast has a very noticeable cylindrical cut-out area where the ants had built their colony tunnels around the log. It doesn’t appear as though they tunneled into the wood at all. The log was around 4 in (10 cm) in diameter.
I started digging on the log side of the cast (1:30) but quickly realized that the colony didn’t extend directly below the log and it would be better to start on the other side (2:17). In the end, it worked out well to have both sides dug out because the casted tunnels were tightly wrapped around the log and it gave me room to wiggle the cast free. My digging strategy is usually to find the edge of the cast so that’s what I’m doing during the initial digging.
The finished cast (Anthill Art Cast #116) weighs 11.1 lb (5 kg), has a depth of 15 in (38 cm) and a maximum width of 11.5 in (29 cm).
0:00 Intro
0:11 Pour
0:44 Uncovering the Hill
1:36 Digging for Tunnels
4:30 Removing Cast from the Ground
4:59 Washing the Cast
7:25 Initial Wash Done
7:51 Finished Cast Display/Stats
11
views
Carpenter Ant Colony Cast with Aluminum - Camponotus castaneus (Cast #110)
Casting a subterranean carpenter ant colony with molten aluminum. I haven’t done many casts of the colonies of this species and have only posted one video of these back in 2014. I started out planning to cast a fire ant colony and then using the leftover aluminum to cast this carpenter ant colony. The fire ant colony cast failed and I was left with way more aluminum than was needed for this colony, which only took about 3 lb. There were no other fire ant colonies in the area so I spent quite a bit of time pouring the remaining 20+ lb of aluminum into the few ingot molds I had available. It was getting pretty late into the night by the time I started digging so I was rushing and being sloppy with the digging and the filming. The attempted fire ant colony cast was for a university professor who wanted a few casts for research so I was a bit disappointed when that cast failed. All was not lost though, and I got a decent carpenter ant colony cast and a video worth posting.
I haven’t done many casts of the colonies of this species and have only posted one video of these back in 2014. My previous carpenter ant colony video can be seen here: https://www.youtube.com/watch?v=h1GKcpN1gjo
You can see that each species has a distinct method in which they build their colonies and this seems to be the case with all of the species found in the area. This type of carpenter ant builds colonies with a small number of surface openings (two in this case) with a few long flat chambers every couple of inches.
These ants are from the species Camponotus castaneus. There is another type of of carpenter ant here that builds underground nests, Camponotus socius, which have colonies that are similar to these but still have noticeable structural differences. I don’t have a video of those yet but plan to do one in the future.
At the start of the video, when I started building up the pour funnel around the main colony entrance, I noticed there was a second colony opening (to the left in the video). You can’t see this in the video, but I decided to simply close off the second entrance by placing a leaf over the hole and covering it with dirt. This worked out well because as it turns out, the second opening was closely connected to the main opening so I didn’t miss any of the structure by not pouring into both entrances.
Colony Depth: 17 in (43 cm)
Maximum Width: 14 in (36 cm)
Weight: 2 lb (0.9 kg)
0:00 Intro
0:07 Building the Pour Funnel
0:15 Pouring Aluminum
0:33 Shovel Digging
0:55 Uncovering the Colony
2:15 Removing Cast from the Ground
2:30 Finished Cast Display/Stats
26
views
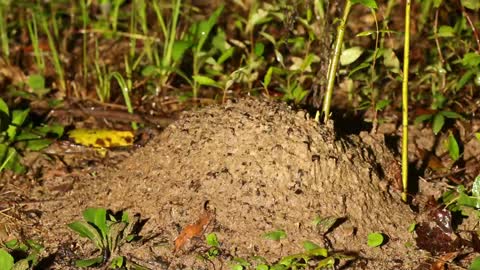
Timelapse of a Fire Ant Hill Destroyed by Rain Then Rebuilt
A timelapse captured over many hours showing a fire ant colony being collapsed by a storm, then the long rebuilding process by the ants.
33
views
Casting an Aphaenogaster Ant Colony with Molten Aluminum (Cast #066)
This is the first cast that I have made of a colony built by this species of ant, which I have identified as belonging to the species Aphaenogaster treatae. I usually prefer to identify ants by their common name for the videos but as far as I can tell there is no common name for this species. At first glance they look similar to other ant types. I had to use a microscope to view the smaller features on the ants and a taxonomic key in order to identify the ant species. Above ground, these ants generally make a single colony entrance which is easy to find early on by the small pile of discarded dirt surrounding the colony. Eventually, rain washes the dirt away and all that remains is the small hole of the colony entrance.
42
views
Casting Another Fire Ant Colony with Molten Aluminum (Cast #061)
Casting another fire ant colony with molten aluminum. This is a fairly small fire ant colony. The aluminum pouring got a little sloppy on this cast and the grass caught on fire, but the cast turned out amazing. Be sure to check out my other videos to see the casting of larger fire ant colonies as well as the casting of a few other types of ant colonies.
This is a medium sized cast compared to the other fire ant colonies that I have done. The final cast is 14.8 lbs., 13" at its widest, and 12.5" deep.
See more detailed pictures of the resulting display at http://www.anthillart.com/castings/061/
31
views
1
comment
Casting a Winter Ant Colony with Molten Zinc (Cast #058)
In this video I cast a winter ant colony with molten zinc. Winter Ants (Prenolepis imparis species) are very active in the winter and usually have a single colony entrance with a long thin tunnel leading to pad like chambers fairly deep in the ground. I was not aware of this type of ant until I started this project and they first caught my attention last winter, being the only ants that were actually active at near freezing temperatures. These are also known as false honey ants.
The tunnels are very narrow, being only around 3/16" in diameter on average. I used zinc on this cast because it tends to stay in a liquid state for longer than aluminum, so it can really flow deep through the deep and narrow tunnels.
The final cast is 40" (3'-4") deep, which is by far the deepest colony that I have cast so far. The chambers are fairly small being only around 3.5" at their widest. The final cast is mounted on an oak board with supports for the cast at various places along the cast. The narrow tunnels broke in several places when I was digging it up, so I had to mount it in a way that pieced it together and used glue at several places.
63
views
Casting a Fungus Farming Ant Colony with Molten Aluminum (Cast #107)
In this video, a cast is made of a fungus farming ant colony (Trachymyrmex septentrionalis) using an aluminum alloy. If you’ve seen my other videos, you may have noticed that each species of ant has a very distinct colony structure. Fire ant colonies have a dense network of tunnels with many small chambers whereas carpenter ants usually have a single tunnel leading to just a few large flat chambers. The fungus farming ant colonies have one of the most unique structures of all the colonies I’ve cast. These colonies have very large bulb-like chambers in which they actually farm fungus for food using plant matter as compost.
The colonies are easily identifiably here because they deposit the excavated dirt in a crescent-shaped mound a few inches from the colony entrance. There are a very large number of these colonies here. You could easily find 50 colonies per acre.
These colonies are very challenging to cast. They have very narrow (1/8 to 1/4” in diameter) tunnels leading to the large bulbs. During past attempts, the aluminum or zinc hardened in the tunnels before the chambers were filled. This time I used an aluminum alloy which maintains its temperature longer and has lower viscosity. That did the trick.
More pictures of this cast at: https://anthillart.com/castings/107/
00:00 Aluminum Pour
00:39 Shovel Digging
1:02 Trowel Digging
2:38 Cast Removed
3:16 Cast Display
25
views
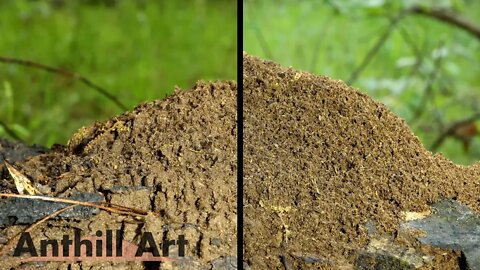
Timelapse: Fire Ant Hill on a Log in the Rain, Collapsing and Being Rebuilt
A timelapse of a fire ant hill on a log being collapsed by rain and then being rebuilt by the ants, twice. The playback speed varies throughout the video but it’s somewhere in the ballpark of a few 100x normal speed. The audio is normal speed recordings I made during the timelapse.
This is an interesting fire ant colony, being built directly on top of a large rotten log. I don’t see them built like this very often so I had to get a timelapse of it. It’s not as dramatic of a collapse/rebuild as my last timelapse video but it turned out pretty cool.
I setup the camera taking pictures at fixed intervals and waited for the rain. Shortly after they rebuilt, more rain was on the way. So, I setup for a side view shot of the next rain (0:24). After they seemed to be done rebuilding the second time, I left the camera running night to keep shooting, thinking they may build some more. Sure enough, after dark they came back and built some more (0:40).
1
view
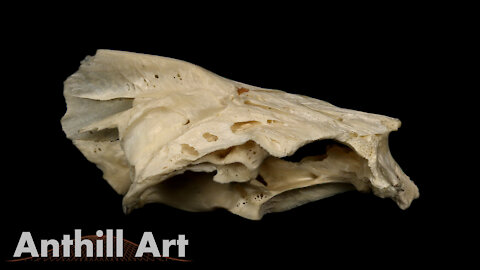
Casting the Inside of a Fish Skull with Aluminum Alloy
In this video, I make a cast of the inside of a fish skull with molten aluminum. I caught this 29 lb black drum a few years ago off the coast of Dauphin Island, Alabama in the Gulf of Mexico. I've had the skull displayed on a cabinet in my shop for a few years and recently thought it might be cool to cast it in molten aluminum.
Hopefully, it's clear in the video what I'm doing and why but if not, here is a detailed explanation:
I can't just pour aluminum into the skull without preparations because it would spill out of the eye sockets and other openings. In order to prevent that from happening, I'm going to encase the skull in plaster before casting. That presents a new problem, because the plaster would fill the skull and leave nothing to cast with aluminum.
To get around these problems, I sealed off all of the exterior openings with tape, except for the spinal cord opening which will be where the aluminum flows in. Then the skull is filled with wax. The solidified wax acts as a barrier to keep the plaster out of the skull.
Next, the tape is removed and the skull is encased in plaster which will keep the aluminum from bursting through the skull while the it hardens. The plaster mold is then placed into an oven to remove the wax, and as much moisture as possible. You can see in the video that there was still a bit of moisture in the plaster which is why it bubbles so much.
After the wax is removed the aluminum is poured in.
I was actually surprised that this worked so well. I wasn't sure if the skull would burn up too quickly and ruin the cast. It worked though. The coolest part is the brain cavity, which has two circular loops jutting out.
51
views
Casting a Mushroom with Molten Aluminum (Cast #091)
I've made a few of these mushroom casts and this one of the better ones that I've made so far. I've been waiting to post a video of this until I got a really good cast. This mushroom looked awesome and the casting went very well, but the back side of the mushroom was starting to decay and split on the back. It split even further during the plaster casting. Another problem was the small cracks that developed in the plaster after it was dry. I put tape around it to keep it from breaking open during aluminum casting but it wasn't cracked enough that it was coming apart. I doubt the tape was even needed, because the plaster was still very solid even after the aluminum pour. A small amount of aluminum did flow into a crack in the plaster near the top, which you can see when I break open the plaster cast. I grinded that part off later.
I set up my camera first and left it taking pictures of the mushroom while I got set up so that I could see how much it was still growing. The resulting time-lapse animation was so cool that I included it at the beginning of the video. The short animation is from pictures taken over 45 minutes, and shows that the cap is still opening fairly rapidly. The plaster pour was about 30 minutes after the last picture, and you can see in the video that it has opened even further by pour time. I also left out the long and tedious process of removing the mushroom debris from the plaster cast.
The detail captured in the cast is amazing and more than I ever expected to get using this method. The raised warts all over the cap, the gills under the cap, and even some of the ring on the stem (remnants of the veil that initially covers the gills) were all cast fairly well.
72
views
Fire Ant Hill Casting with Aluminum (Cast #070)
This is an older fire ant colony casting video that was never posted. More colony casting videos were planned for late last year but the weather would not cooperate when I had time. I'll definitely be doing colony casts this year plus a few more ideas I've been working on.
Captions were added to the video to answer two common questions:
1) Why does the hill look like you just piled up dirt?
There is a layer of dirt placed on and around the hill to stabilize it and plug any holes. It doesn't happen often but occasionally aluminum will burst through the hill or come out of a foraging tunnel near the hill.
2) Why does the aluminum look like it's not moving?
The air cools the outer layer of the aluminum, forming a film. The aluminum is still flowing beneath the film.
About 19.3 lb of aluminum went into this fire ant hill and the finished cast is about 12" in height. More info/pics here: https://www.anthillart.com/castings/070/
00:00 Aluminum Pour
00:41 Digging
01:31 Removing the cast
01:53 Cleaned Cast
22
views
1
comment
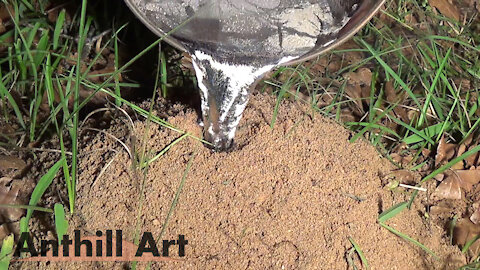
Casting a Bigger Fire Ant Colony with Molten Aluminum (Cast #057)
This is the second Anthill Art video showing the casting of a fire ant colony with molten aluminum. The colony in this video is much larger than the one from the first video (Cast #043), taking in 24.6 lbs. of aluminum which is 6.7 lbs. heavier than Cast #043. The final cast turned out 17" deep and 19" at its widest.
See the description on the first video for information on the red imported fire ant and you'll see why I prefer not to have these ant hills in my yard.
4
views
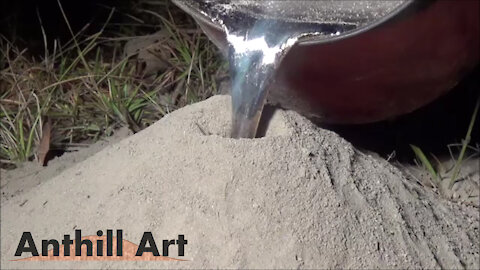
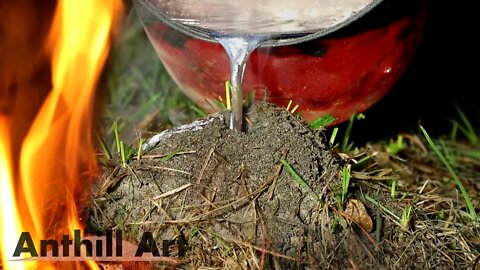
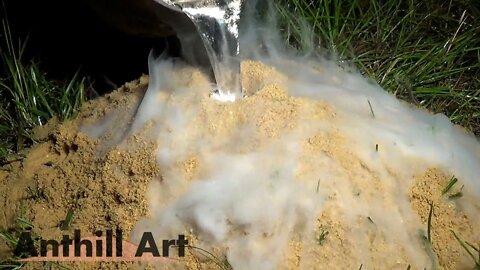
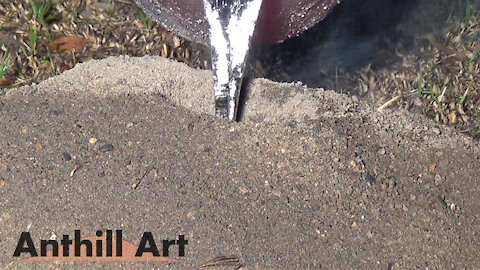
Casting a Fire Ant Colony with Molten Aluminum
An incredible metal structure is made by pouring molten aluminum into a fire ant colony. The resulting cast is huge, weighing 17.9 lbs. and reaching a depth of 18 inches.
These are the red imported fire ants (RIFA) which are harmful to the environment and their nests are exterminated by the millions in the United States using poisons, gasoline and fire, and boiling water.
From Wikipedia: "Researchers have also been experimenting with extreme temperature change to exterminate RIFAs [red imported fire ants], such as injecting liquid nitrogen or pressurized steam into RIFA nests. Besides using hot steam, pouring boiling water into ant mounds has been found effective in exterminating their nests."
113
views