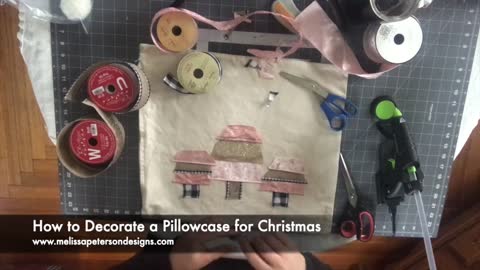
How to Decorate a Pillowcase for Christmas
Have you ever crafted a pillowcase? I've made pillow case covers from seasonal kitchen towels, but I've never taken a blank pillowcase and personalized it! Let me tell you, it's super easy! Let's do this!
For full blog post and supply list go to my website!
https://melissapetersondesigns.com/pillowcase/
#ChristmasCrafts #ChristmasDIY
402
views

How to Personalize Your Tumbler for Valentine's Day
What easier way to personalize a tumbler than with vinyl decals! I came across some new red Rae Dunn tumblers at TJ Maxx and grabbed three! One for my daughter, my son's girlfriend and me!
For full blog post and supply list go to my website!
https://melissapetersondesigns.com/tumbler/
#ValentineDIY #valentinecrafts
377
views
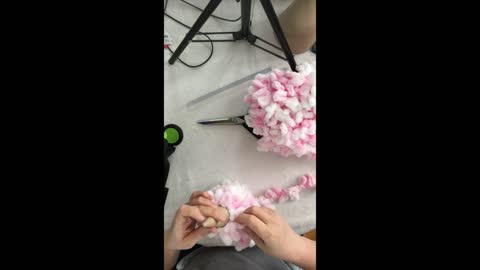
How I Made my Valentine Trees
Valentine trees? Heck yes! Let me show you how I turned paper mache cones into adorable White & Pink Valentine trees!
312
views
1
comment
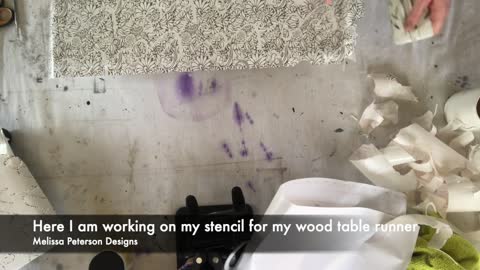
How to make a Wood Table Runner
Dressing up my dining room table with this wood table runner was a fun project to do! Adding a Valentine touch to this DIY decor makes it extra special! Let’s see if I can inspire you to make one of your own!
***FREE XOXO cut file when you join MPD Tribe! Info available in blog post, link below!
https://melissapetersondesigns.com/wood-table-runner/
203
views
Easy DIY Valentine Day Decor
I absolutely love these easy DIY Valentine’s Day decor! I can not wait to share with you and hope you will be inspired to make them yourself!
First things first
First we need to gather our supplies.
Supplies were purchased from various places including Michaels, Hobby Lobby, and Walmart
All of my supplies either came from Hobby Lobby, Michaels or Walmart. Overall I think this project cost less than $6!
Frame of your choice: for my first project I used a 4×6 black frame, for my second project I used an 4×6 unfinished frame I believe came from Michaels.
Paint: I used DecoArt Black Tie and Americana Primary Red
Scrapbook paper: I bought several sheets of scrapbook paper I purchased from Hobby Lobby when it was on sale 4 for $1
Wood Heart Cutouts: I think I purchased these from Hobby Lobby in the Valentine section, I think.
Word Wood Cutout: I purchased “love” from Hobby Lobby
Fat Quarters: I used my 40% off coupon from Hobby Lobby to purchase a pack of fat bundles with Valentine designs. I also found different patterns of fat quarters I liked at Walmart.
Ribbons: your choice (optional)
Jute Rope
Mod Podge
Hot glue and glue gun
Paint brushes
LETS CRAFT OUR DIY VALENTINE’S DAY FRAME!
To get the ball rolling I decided to paint the frame and heart first, that way they could start drying!
But before I did, I removed the backing from the frame and set it aside.
My two frames I used for this project had cardboard backing only.
That is ok!
Save this and we will reuse it!
I painted my heart red, of course, and my frame in black.
I used paint I already had, DecoArts Black Tie and Americana Primary Red
TIME TO EMBELLISH THE FRAMES BACKING
That backing we saved? We will use this as a template to cut out our scrapbook paper.
Place your frame backing on the backside of the scrapbook paper and draw around the edges.
Cut this out and save your scrapbook paper for a future project!
Paint the frame backing with Mod Podge, nice thin even layer and apply the scrapbook paper directly on it!
INTRODUCING MY MESSY BOW!
I think this is my most favorite part of this project!
Here I used a combination of fabric that I had ripped in approximately 1″ strips, ribbons and jute rope.
I found fat quarters at both Hobby Lobby and Walmart in patterns and colors that I liked.
I used red and pink fabric in addition to Christmas Ribbon I purchased on clearance that was a combination of burlap with buffalo plaid.
If you have fabric or ribbon on hand, consider using this for your bow.
ASSEMBLING MY MESSY BOW
I assembled all the fabric, ribbons and jute rope and cut them into approximately 5 inches in length for a small Messy Scraps Bow.
The fuller these bows are the cuter they look!
I stacked the materials on top of each other.
Cut jute rope approximately 5 inches or more.
We are going to use this jute rope to tie the bow, so use whatever length you can work with. You can always trim this and include this into the bow.
Place the jute rope perpendicular over your messy pile of fabric.
Carefully flip this bundle over and then tie everything off tight with the jute rope. I usually tie it again to keep this secure.
Trim your jute rope and fluff your new Messy Bow!
You can embellish your bow if you chose with a button or a smaller heart.
Click here to see more information on how to assemble my Messy Bows in small and larger sizes!
TIME TO ASSEMBLE OUR DIY VALENTINE’S DAY DECOR
Now it’s time to put everything together!
Carefully replace the backing into the frame.
Then use hot glue and glue the heart onto the backing of the frame.
I like my heart tilted, you can do yours straight up and down, it’s your choice.
My “love” word wood cutout, I left unpainted on purpose.
I added drops of glue to the backside at the bottom of the word.
I then placed the word cutout towards the bottom of the frame.
Be careful your cutout does not overlap the bottom of the frame.
If you plan to use your decor on a table top, this will prevent your frame from standing upright.
My love cutout overlapped the sides a little and that is ok!
Now to decide where you want to apply your Messy Bow?
I kept mine to a corner, and of course I had to tilt this a little too!
That’s how I roll.
And that is it!
I have a short 20 minute video tutorial so you can see how I completed this project!
I hope you enjoy it.
267
views
1
comment

A little Christmas decorating Fun!
Don't forget to Subscribe and follow me on my social media!
Join MPD Tribe: https://melissapetersondesigns.com/mpd-tribe/
TikTok: https://bit.ly/3fpY7ZO
MeWe: https://mewe.com/i/melissapeterson1
Parler: https://bit.ly/3ftTluu
Rumble: https://rumble.com/c/c-309345
Pinterest: https://pin.it/3Ka1fOI
Facebook: https://www.facebook.com/melissapetersondesigns/
Facebook: https://www.facebook.com/boutiquebymelissamarie
Instagram: https://www.instagram.com/melissapetersondesigns/
Instagram: https://www.instagram.com/boutique_by_melissa_marie/
Making the world a little more beautiful with a paintbrush, a laptop, and a creative spirit.
178
views
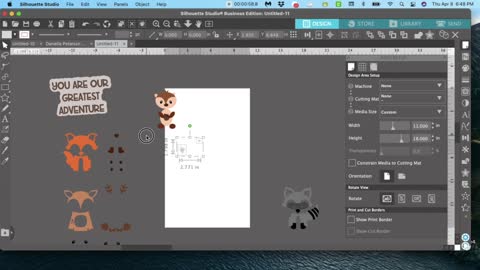
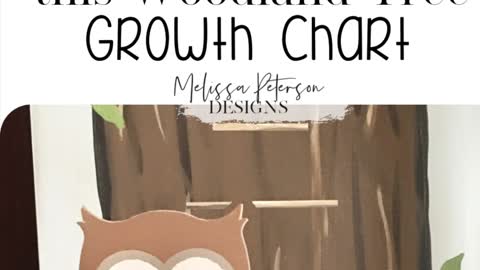
Part 2: How I Painted this Woodland Tree Growth Chart
I had a blast painting this Woodland Tree Growth Chart! Part stenciling, part free-hand, oh my! Let me show you how I, with the help of my daughter, put this all together!
Supplies I Used for the Woodland Growth Chart
1″ x 10″ x 72″ Pine Board, sanded and clean
Dixie Belle Paints: Haint Blue, Coffee Bean, Caviar, Putty, Fluff, Driftwood, Palmetto, Rebel Yellow, Terracotta, Rustic Red.
DIY Paints: Monets Garden, Fancy Farmgirl
Mod Podge
Sandpaper or sand block.
Paint brushes: I used regular artist brushes and my favorite large round watercolor brush.
acrylic ruler, pencil
Contact paper to make my stencils in my Silhouette Cameo 3
Growth Chart cut file (minus woodland animal): click here to join MPD tribe for access to this design on others in my free library.
Woodland Animals: set of four, owl.
PREPPING THE GROWTH CHART
My daughter and I came up with a vision of a woodland growth chart and she wanted a sky blue background.
For the sky like color, we went with Haint blue by Dixie Belle.
One of my idiosyncrasies, is to paint, seal and apply the hanger to the backside of my personalized signs, first.
I applied two coats and sealed the backside with Dixie Belle’s Flat sealer.
Before I was finished I added a special touch to the back, Psalm 91:11.
A few days later, I flipped her over and painted two coats of Haint blue to the front side.
DRAWING AND PLACEMENT OF THE WOODLAND TREE
Our woodland tree has a faux sign hanging on it, so I set up my design to cut the top of the overall design to help with the placement of this on the board.
My board is approximately 9″ x 72″ long, so in my Silhouette design program, I made a rectangle using one of the shape tools and with these same measurements.
After I had added the growth chart measurements to the design, I figured the placements of the tree sign, plus the five woodland animals.
I then figured out how to divide this into two separate stencils.
The first stencil is where the top of the tree is that includes the sign, the bottom stencil includes the growth measurements and woodland animal.
I cut my first stencil, weeded the outline of the sign and placed this on the top of my pine board, then I grabbed my pencil and traced around the inside of the tree sign.
Next I removed the stencil.
Now I’m ready to work on a rough draft of my tree.
I grabbed my acrylic ruler and measured 2″ in at the bottom but then moved my ruler in 1/8″ and used my pencil to draw and line along the ruler.
Repeat this process on the other side of the board and this will be the base or bottom or the tree.
Next, I grabbed my ruler and lined it up with the pencil marking, then brought the top of the ruler 1/8″ in and again marked it with the pencil I kept repeating this process until I reached my tree sign outline and also above the tree sign.
Finally, I marked where I wanted the woodland branches to be and penciled then in.
PAINTING MY WOODLAND TREE
I started painting the tree in Dixie Belle’s Coffee Bean.
When this was dry, I grabbed my round watercolor brush and some water and Dixie Belles Caviar.
In a disposable bowl, I watered the paint down a little and outlined the woodland tree, I also added some vertical lines, inside the tree.
Next i grabbed Dixie Belle’s Putty with a little water to use as highlights on the tree.
All these highlights and lowlights were random going vertically along the woodland tree to represent bark.
When this step was completed, I added two coats of sealer and let my project set until the next day.
STENCILING THE WOODLAND TREE MEASUREMENTS & ANIMALS
Now it’s time to cut the bottom portion of the long rectangle stencil that includes the growth measurements and the base of the woodland animals.
Each Woodland animal will be painted in layers, and this first stencil will only include the very bottom layer of each animal.
Once the stencil is prepped, cut and weeded, I use the hinge method to apply this to the pine board.
APPLYING THE WOODLAND STENCIL
Next I grab my transfer tape, which is about 12″ x 18″ and apply it to the very bottom part of the stencil,
I lay the stencil on top of the board where I want the stencil to be placed, grab two small strips of painters tape and tack the stencil to the board just above the transfer tape.
Then I removed the backing, only where the transfer tape is applied, cut the backing off and then apply it to the board.
I removed the transfer tape carefully and then worked my way up the stencil in the same manner until the stencil is all applied to the woodland growth chart.
Once the stencil is applied, I burnished with Mod Podge to help prevent any paint bleeds.
PAINTING THE WOODLAND ANIMALS
The raccoon base cutout, I painted in Dixie Belle’s Driftwood.
Next I painted the other four animal base cutouts in Dixie Belle’s Putty.
Then I painted the measurements and numbers in Putty also.
I decided before I removed the stencil to add some highlights and lowlights to the measurements with Dixie Belles Fluff and Caviar.
Once the paint was all dry, I lightly sanded the stencil with my 220 grit sand block before removing the stencil carefully to avoid pulling any paint.
LETTERING THE WOODLAND TREE SIGN USING PVPP METHOD
This method is very simple.
As you can see below in the pic how I weeded my stencil for this part of the Woodland tree sign.
Once I applied this with transfer tape, I grabbed my Dixie Belle Putty and painted in vertical strokes.
Before this layer was dry, I added some watered down Fluff to give it a streaky or aged wood look.
When this area was dry, I lightly sanded with a 220 grit sand block before slowly removing the stencils.
Click here and here for more examples of how I use the PVPP method.
ADDING LEAVES TO THE WOODLAND GROWTH CHART
These are so easy, especially with my large round watercoloring brush.
For the leaves I used Palmetto, Monets Garden and Fancy Farmgirl
I started with the dark greens first and then the light ones.
My leaves are basically oval shapes and I use the end of my brush to start the end of each leaf.
My daughter came over to help finish this growth chart and took over the task of painting the remaining leaves.
I had her practice on a plain sheet of paper first, the trick it to make sure your brush is loaded with enough paint.
After about four tries, she was good to go! And she did a GREAT job!
PAINTING THE WOODLAND ANIMALS
I like using contact paper for my stencil material with my Silhouette.
Before we get started, I have a quick video showing you how I set up my SVG designs in Silhouette to cut my stencils on 12″ x 18″.
To keep my stencils straight, or to help me from getting confused, I worked with two animals at a time, and I made sure to label each stencil with a pen, the animal names.
I have another blog post on how I layered the stencils to paint certain cartoon characters, click here to get a better idea of how it’s done.
Now you don’t have to use the color of paints I used, or even mix paint like I did.
PAINTING THE FOX
The fox’s head and body were approximately two parts Terracotta to one part Coffee Bean.
And the fox’s nose and feet were Coffee bean and the eyes were Caviar then Fluff.
PAINTING THE DEER
While baby deer’s body was Putty and the antlers were Coffee Bean, along with the eyes being the same as the fox, Caviar and Fluff.
PAINTING THE OWL
The Owl was two parts Coffee Bean and one part Terracotta. This leftover mixture was also used to paint the squirrel’s nut.
Back to the owl, the wings were equal parts Coffee bean and Caviar and the feet were Rebel Yellow.
PAINTING THE SQUIRREL
The squirrel was equal parts Terracotta and Coffee Bean, but the squirrels hands and feet were equal parts Rustic Red and Coffee bean.
For the nut, I used some of the leftover paint mixture from the Owl for the bottom portion and Coffee Bean for the top portion.
PAINTING THE RACCOON
Finally, the raccoon’s base was Driftwood, so I mixed equal parts Driftwood with Caviar to paint the body.
Then I added a little more Caviar to this same mixture to paint the raccoons mask, for his feet, stripes and nose I used straight Caviar.
The key to painting or stenciling in layers, is to make sure the previous layer is good and dry before adding the next stencil on top of it.
FINISHING OUR WOODLAND GROWTH CHART
When everything was all painted and dry I lightly sanded the woodland growth chart and added three coats of Dixie Belle’s Flat sealer.
295
views
Final: How I Painted this Woodland Tree Growth Chart
I had a blast painting this Woodland Tree Growth Chart! Part stenciling, part free-hand, oh my! Let me show you how I, with the help of my daughter, put this all together!
Supplies I Used for the Woodland Growth Chart
1″ x 10″ x 72″ Pine Board, sanded and clean
Dixie Belle Paints: Haint Blue, Coffee Bean, Caviar, Putty, Fluff, Driftwood, Palmetto, Rebel Yellow, Terracotta, Rustic Red.
DIY Paints: Monets Garden, Fancy Farmgirl
Mod Podge
Sandpaper or sand block.
Paint brushes: I used regular artist brushes and my favorite large round watercolor brush.
acrylic ruler, pencil
Contact paper to make my stencils in my Silhouette Cameo 3
Growth Chart cut file (minus woodland animal): click here to join MPD tribe for access to this design on others in my free library.
Woodland Animals: set of four, owl.
PREPPING THE GROWTH CHART
My daughter and I came up with a vision of a woodland growth chart and she wanted a sky blue background.
For the sky like color, we went with Haint blue by Dixie Belle.
One of my idiosyncrasies, is to paint, seal and apply the hanger to the backside of my personalized signs, first.
I applied two coats and sealed the backside with Dixie Belle’s Flat sealer.
Before I was finished I added a special touch to the back, Psalm 91:11.
A few days later, I flipped her over and painted two coats of Haint blue to the front side.
DRAWING AND PLACEMENT OF THE WOODLAND TREE
Our woodland tree has a faux sign hanging on it, so I set up my design to cut the top of the overall design to help with the placement of this on the board.
My board is approximately 9″ x 72″ long, so in my Silhouette design program, I made a rectangle using one of the shape tools and with these same measurements.
After I had added the growth chart measurements to the design, I figured the placements of the tree sign, plus the five woodland animals.
I then figured out how to divide this into two separate stencils.
The first stencil is where the top of the tree is that includes the sign, the bottom stencil includes the growth measurements and woodland animal.
I cut my first stencil, weeded the outline of the sign and placed this on the top of my pine board, then I grabbed my pencil and traced around the inside of the tree sign.
Next I removed the stencil.
Now I’m ready to work on a rough draft of my tree.
I grabbed my acrylic ruler and measured 2″ in at the bottom but then moved my ruler in 1/8″ and used my pencil to draw and line along the ruler.
Repeat this process on the other side of the board and this will be the base or bottom or the tree.
Next, I grabbed my ruler and lined it up with the pencil marking, then brought the top of the ruler 1/8″ in and again marked it with the pencil I kept repeating this process until I reached my tree sign outline and also above the tree sign.
Finally, I marked where I wanted the woodland branches to be and penciled then in.
PAINTING MY WOODLAND TREE
I started painting the tree in Dixie Belle’s Coffee Bean.
When this was dry, I grabbed my round watercolor brush and some water and Dixie Belles Caviar.
In a disposable bowl, I watered the paint down a little and outlined the woodland tree, I also added some vertical lines, inside the tree.
Next i grabbed Dixie Belle’s Putty with a little water to use as highlights on the tree.
All these highlights and lowlights were random going vertically along the woodland tree to represent bark.
When this step was completed, I added two coats of sealer and let my project set until the next day.
STENCILING THE WOODLAND TREE MEASUREMENTS & ANIMALS
Now it’s time to cut the bottom portion of the long rectangle stencil that includes the growth measurements and the base of the woodland animals.
Each Woodland animal will be painted in layers, and this first stencil will only include the very bottom layer of each animal.
Once the stencil is prepped, cut and weeded, I use the hinge method to apply this to the pine board.
APPLYING THE WOODLAND STENCIL
Next I grab my transfer tape, which is about 12″ x 18″ and apply it to the very bottom part of the stencil,
I lay the stencil on top of the board where I want the stencil to be placed, grab two small strips of painters tape and tack the stencil to the board just above the transfer tape.
Then I removed the backing, only where the transfer tape is applied, cut the backing off and then apply it to the board.
I removed the transfer tape carefully and then worked my way up the stencil in the same manner until the stencil is all applied to the woodland growth chart.
Once the stencil is applied, I burnished with Mod Podge to help prevent any paint bleeds.
PAINTING THE WOODLAND ANIMALS
The raccoon base cutout, I painted in Dixie Belle’s Driftwood.
Next I painted the other four animal base cutouts in Dixie Belle’s Putty.
Then I painted the measurements and numbers in Putty also.
I decided before I removed the stencil to add some highlights and lowlights to the measurements with Dixie Belles Fluff and Caviar.
Once the paint was all dry, I lightly sanded the stencil with my 220 grit sand block before removing the stencil carefully to avoid pulling any paint.
LETTERING THE WOODLAND TREE SIGN USING PVPP METHOD
This method is very simple.
As you can see below in the pic how I weeded my stencil for this part of the Woodland tree sign.
Once I applied this with transfer tape, I grabbed my Dixie Belle Putty and painted in vertical strokes.
Before this layer was dry, I added some watered down Fluff to give it a streaky or aged wood look.
When this area was dry, I lightly sanded with a 220 grit sand block before slowly removing the stencils.
Click here and here for more examples of how I use the PVPP method.
ADDING LEAVES TO THE WOODLAND GROWTH CHART
These are so easy, especially with my large round watercoloring brush.
For the leaves I used Palmetto, Monets Garden and Fancy Farmgirl
I started with the dark greens first and then the light ones.
My leaves are basically oval shapes and I use the end of my brush to start the end of each leaf.
My daughter came over to help finish this growth chart and took over the task of painting the remaining leaves.
I had her practice on a plain sheet of paper first, the trick it to make sure your brush is loaded with enough paint.
After about four tries, she was good to go! And she did a GREAT job!
PAINTING THE WOODLAND ANIMALS
I like using contact paper for my stencil material with my Silhouette.
Before we get started, I have a quick video showing you how I set up my SVG designs in Silhouette to cut my stencils on 12″ x 18″.
To keep my stencils straight, or to help me from getting confused, I worked with two animals at a time, and I made sure to label each stencil with a pen, the animal names.
I have another blog post on how I layered the stencils to paint certain cartoon characters, click here to get a better idea of how it’s done.
Now you don’t have to use the color of paints I used, or even mix paint like I did.
PAINTING THE FOX
The fox’s head and body were approximately two parts Terracotta to one part Coffee Bean.
And the fox’s nose and feet were Coffee bean and the eyes were Caviar then Fluff.
PAINTING THE DEER
While baby deer’s body was Putty and the antlers were Coffee Bean, along with the eyes being the same as the fox, Caviar and Fluff.
PAINTING THE OWL
The Owl was two parts Coffee Bean and one part Terracotta. This leftover mixture was also used to paint the squirrel’s nut.
Back to the owl, the wings were equal parts Coffee bean and Caviar and the feet were Rebel Yellow.
PAINTING THE SQUIRREL
The squirrel was equal parts Terracotta and Coffee Bean, but the squirrels hands and feet were equal parts Rustic Red and Coffee bean.
For the nut, I used some of the leftover paint mixture from the Owl for the bottom portion and Coffee Bean for the top portion.
PAINTING THE RACCOON
Finally, the raccoon’s base was Driftwood, so I mixed equal parts Driftwood with Caviar to paint the body.
Then I added a little more Caviar to this same mixture to paint the raccoons mask, for his feet, stripes and nose I used straight Caviar.
The key to painting or stenciling in layers, is to make sure the previous layer is good and dry before adding the next stencil on top of it.
FINISHING OUR WOODLAND GROWTH CHART
When everything was all painted and dry I lightly sanded the woodland growth chart and added three coats of Dixie Belle’s Flat sealer.
259
views

Part 1: How I Painted this Woodland Tree Growth Chart
I had a blast painting this Woodland Tree Growth Chart! Part stenciling, part free-hand, oh my! Let me show you how I, with the help of my daughter, put this all together!
Supplies I Used for the Woodland Growth Chart
1″ x 10″ x 72″ Pine Board, sanded and clean
Dixie Belle Paints: Haint Blue, Coffee Bean, Caviar, Putty, Fluff, Driftwood, Palmetto, Rebel Yellow, Terracotta, Rustic Red.
DIY Paints: Monets Garden, Fancy Farmgirl
Mod Podge
Sandpaper or sand block.
Paint brushes: I used regular artist brushes and my favorite large round watercolor brush.
acrylic ruler, pencil
Contact paper to make my stencils in my Silhouette Cameo 3
Growth Chart cut file (minus woodland animal): click here to join MPD tribe for access to this design on others in my free library.
Woodland Animals: set of four, owl.
PREPPING THE GROWTH CHART
My daughter and I came up with a vision of a woodland growth chart and she wanted a sky blue background.
For the sky like color, we went with Haint blue by Dixie Belle.
One of my idiosyncrasies, is to paint, seal and apply the hanger to the backside of my personalized signs, first.
I applied two coats and sealed the backside with Dixie Belle’s Flat sealer.
Before I was finished I added a special touch to the back, Psalm 91:11.
A few days later, I flipped her over and painted two coats of Haint blue to the front side.
DRAWING AND PLACEMENT OF THE WOODLAND TREE
Our woodland tree has a faux sign hanging on it, so I set up my design to cut the top of the overall design to help with the placement of this on the board.
My board is approximately 9″ x 72″ long, so in my Silhouette design program, I made a rectangle using one of the shape tools and with these same measurements.
After I had added the growth chart measurements to the design, I figured the placements of the tree sign, plus the five woodland animals.
I then figured out how to divide this into two separate stencils.
The first stencil is where the top of the tree is that includes the sign, the bottom stencil includes the growth measurements and woodland animal.
I cut my first stencil, weeded the outline of the sign and placed this on the top of my pine board, then I grabbed my pencil and traced around the inside of the tree sign.
Next I removed the stencil.
Now I’m ready to work on a rough draft of my tree.
I grabbed my acrylic ruler and measured 2″ in at the bottom but then moved my ruler in 1/8″ and used my pencil to draw and line along the ruler.
Repeat this process on the other side of the board and this will be the base or bottom or the tree.
Next, I grabbed my ruler and lined it up with the pencil marking, then brought the top of the ruler 1/8″ in and again marked it with the pencil I kept repeating this process until I reached my tree sign outline and also above the tree sign.
Finally, I marked where I wanted the woodland branches to be and penciled then in.
PAINTING MY WOODLAND TREE
I started painting the tree in Dixie Belle’s Coffee Bean.
When this was dry, I grabbed my round watercolor brush and some water and Dixie Belles Caviar.
In a disposable bowl, I watered the paint down a little and outlined the woodland tree, I also added some vertical lines, inside the tree.
Next i grabbed Dixie Belle’s Putty with a little water to use as highlights on the tree.
All these highlights and lowlights were random going vertically along the woodland tree to represent bark.
When this step was completed, I added two coats of sealer and let my project set until the next day.
STENCILING THE WOODLAND TREE MEASUREMENTS & ANIMALS
Now it’s time to cut the bottom portion of the long rectangle stencil that includes the growth measurements and the base of the woodland animals.
Each Woodland animal will be painted in layers, and this first stencil will only include the very bottom layer of each animal.
Once the stencil is prepped, cut and weeded, I use the hinge method to apply this to the pine board.
APPLYING THE WOODLAND STENCIL
Next I grab my transfer tape, which is about 12″ x 18″ and apply it to the very bottom part of the stencil,
I lay the stencil on top of the board where I want the stencil to be placed, grab two small strips of painters tape and tack the stencil to the board just above the transfer tape.
Then I removed the backing, only where the transfer tape is applied, cut the backing off and then apply it to the board.
I removed the transfer tape carefully and then worked my way up the stencil in the same manner until the stencil is all applied to the woodland growth chart.
Once the stencil is applied, I burnished with Mod Podge to help prevent any paint bleeds.
PAINTING THE WOODLAND ANIMALS
The raccoon base cutout, I painted in Dixie Belle’s Driftwood.
Next I painted the other four animal base cutouts in Dixie Belle’s Putty.
Then I painted the measurements and numbers in Putty also.
I decided before I removed the stencil to add some highlights and lowlights to the measurements with Dixie Belles Fluff and Caviar.
Once the paint was all dry, I lightly sanded the stencil with my 220 grit sand block before removing the stencil carefully to avoid pulling any paint.
LETTERING THE WOODLAND TREE SIGN USING PVPP METHOD
This method is very simple.
As you can see below in the pic how I weeded my stencil for this part of the Woodland tree sign.
Once I applied this with transfer tape, I grabbed my Dixie Belle Putty and painted in vertical strokes.
Before this layer was dry, I added some watered down Fluff to give it a streaky or aged wood look.
When this area was dry, I lightly sanded with a 220 grit sand block before slowly removing the stencils.
Click here and here for more examples of how I use the PVPP method.
ADDING LEAVES TO THE WOODLAND GROWTH CHART
These are so easy, especially with my large round watercoloring brush.
For the leaves I used Palmetto, Monets Garden and Fancy Farmgirl
I started with the dark greens first and then the light ones.
My leaves are basically oval shapes and I use the end of my brush to start the end of each leaf.
My daughter came over to help finish this growth chart and took over the task of painting the remaining leaves.
I had her practice on a plain sheet of paper first, the trick it to make sure your brush is loaded with enough paint.
After about four tries, she was good to go! And she did a GREAT job!
PAINTING THE WOODLAND ANIMALS
I like using contact paper for my stencil material with my Silhouette.
Before we get started, I have a quick video showing you how I set up my SVG designs in Silhouette to cut my stencils on 12″ x 18″.
To keep my stencils straight, or to help me from getting confused, I worked with two animals at a time, and I made sure to label each stencil with a pen, the animal names.
I have another blog post on how I layered the stencils to paint certain cartoon characters, click here to get a better idea of how it’s done.
Now you don’t have to use the color of paints I used, or even mix paint like I did.
PAINTING THE FOX
The fox’s head and body were approximately two parts Terracotta to one part Coffee Bean.
And the fox’s nose and feet were Coffee bean and the eyes were Caviar then Fluff.
PAINTING THE DEER
While baby deer’s body was Putty and the antlers were Coffee Bean, along with the eyes being the same as the fox, Caviar and Fluff.
PAINTING THE OWL
The Owl was two parts Coffee Bean and one part Terracotta. This leftover mixture was also used to paint the squirrel’s nut.
Back to the owl, the wings were equal parts Coffee bean and Caviar and the feet were Rebel Yellow.
PAINTING THE SQUIRREL
The squirrel was equal parts Terracotta and Coffee Bean, but the squirrels hands and feet were equal parts Rustic Red and Coffee bean.
For the nut, I used some of the leftover paint mixture from the Owl for the bottom portion and Coffee Bean for the top portion.
PAINTING THE RACCOON
Finally, the raccoon’s base was Driftwood, so I mixed equal parts Driftwood with Caviar to paint the body.
Then I added a little more Caviar to this same mixture to paint the raccoons mask, for his feet, stripes and nose I used straight Caviar.
The key to painting or stenciling in layers, is to make sure the previous layer is good and dry before adding the next stencil on top of it.
FINISHING OUR WOODLAND GROWTH CHART
When everything was all painted and dry I lightly sanded the woodland growth chart and added three coats of Dixie Belle’s Flat sealer.
285
views
My Valentines Tree Reveal
My first Valentines Tree reveal! I’ve been playing with bows, ribbons and swags and what better way to practice than decorating my tree! Let me show you what I did!
Valentines Gnomes
I found three gnomes during my recent shopping spree at TJ Maxx and Home Goods and I had to bring them home!
Today while decorating my tree I decided to add them into the decor!
I grabbed a couple of pipe cleaners, made a few small snips in the bag and threaded the pipe cleaners through my valentines gnome and I was able to use this to anchor them to my tree!
VALENTINES RIBBON
The Valentines Ribbon?
I purchased them through Decoexchange!
Recently I had made a Valentines wreath and I had some left over ribbons and what perfect use than to made a big bow and a couple of swags.
To make my bows, some time I use my EZ bow maker and sometimes I just use my hands.
I’m still working on my technique! 😉
Technically, I will probably keep adding and taking away from my tree over the next couple o weeks, depending on what I can craft or find when I go shopping!
Do you have a tree for Valentines day?
If so, I’d love to see it! You can follow me here and fee free to share your projects and crafts!
113
views
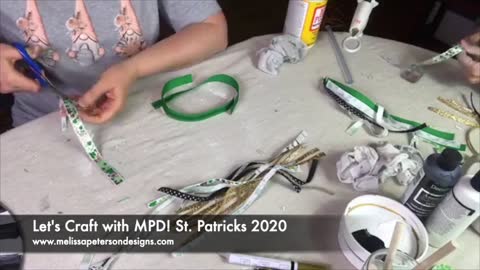
How to Make my St Patrick Door Hanger
St. Patricks Day will soon be here and I have an adorable craft to share with you! Super easy with a little whimsy touch!
Supplies I Used for my St. Patrick Door hanger
12″ Wood round: You can also find these at Hobby Lobby and the craft section at Menards
8″ Wood Shamrock: Your local craft store may have these also!
Piece of Scrapbook paper of your choice: I picked this one.
Ribbon and scrap fabric of your choice to make a Messy Bow
Leprechaun coins: I found mine at Hobby Lobby and the Dollar tree
Fiskar Self Healing Mat, Cricut craft knife, sandpaper or sand block.
1″ foam brush, paint brush
Mod Podge
White and Black paint of your choice
Scissors
Hot glue and glue gun
Gold Paint Pen (optional)
3M Command strips for hanging (optional)
PREPPING MY ST PATRICKS PROJECT
Ready to start crafting for St Patricks Day?
After gathering my supplies, I started with painting my 12″ round board first in white.
To get a good coverage you’ll probably need to do two coats of paint.
While the paint was drying, I decoupaged my shamrock with my scrapbook paper using Mod Podge.
Now when I did this project, I did not have my Cricut knife or mat so I used a piece of sandpaper to clean up the edges around the Shamrock when the Mod Podge was dry.
I’ve learned I love my Cricut knife but I can craft without it if I absolutely have too!
PAINTING MY ST PATRICKS STRIPES
How did I get those cute black whimsy stripes on my 12″ round board?
With my 2″ foam brush and painted it by hand without any painters tape!
I dipped the edge in black paint and I just brushed across the round board, with my first stripe in the middle.
What is the neat thing about this?
The stripes being less than perfect actually add to the whimsy character and I just added more stripes going up and then again going down the round board.
MAKING MY ST PATRICKS BOW
While my stripes were drying, I then worked on making my St Patricks bow.
Click here for easy instructions on how to make my Messy Bow.
What’s so nice about this, you can use ribbons, leftover fabric from other crafts or both!
ASSEMBLING MY ST PATRICKS DOOR HANGER
Oops!
One more thing and this is optional.
I added some gold highlights on my black stripes of my door hanger with a paint pen I found at Hobby Lobby!
These were just random stripes of gold, here and there!
When that was dry, I then grabbed my glue gun and started assembling!
I glued my shamrock in place, a little crooked and on purpose.
Then I glued my Messy Bow in place and added a Leprechaun coin in the middle of the bow.
Then I glued some more coins around the shamrock!
HANGING MY ST PATRICKS DOOR HANGER
I love using 3M command strips to hang my wall decor.
But you can always use left over strips of fabric for a makeshift hanger by stapling them on the backside if you wish.
Another idea, you can staple two pipe cleaners to the backside and use these to decorate a wreath or even a St. Patricks tree…
Hmm…
That is it! Make sure to check out my video below!
125
views
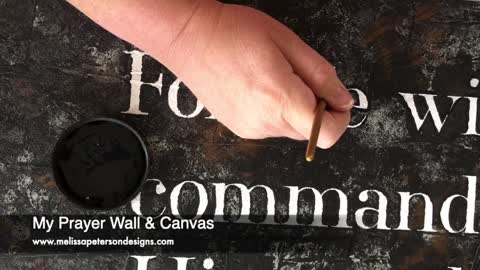
My Prayer Wall & Canvas
My Prayer Wall & Canvas was a project from the heart. I was sitting at my dining room table looking at my stairway and I was inspired to add prayers to my walls before starting my painting project! And then it morphed into an accent wall with the plans of stenciling Psalm 91:11 when I was done.
Supplies I Used
Sherwin Williams Poppy Seed: I used this as my base coat on my Prayer Wall. Really you can use any black or dark grey paint.
Dixie Belle’s Caviar, Hurricane Gray, Driftwood, Cotton, Bronze Patina Paint, Clear Coat in Flat
Brayer Roller
Paper plate, cheap chip brushes (optional)
24″ x 24″ Grandeur Collection Canvas
Joint Compound
Spatula or Putty Knife
220 Grit Sandblock
Paint brushes
Optional Wall Decor: natural rustic flower wood wall decor, white rustic flower wood wall decor, distressed white flower wood wall decor, white rustic flower wood wall decor, natural rustic flower wood wall decor
3M Command Strips
Pencil (preferably). I used a permanent marker on my wall to write my prayers requests on, I DO NOT recommend as this will normally bleed through your paint.
Prayer Canvas
Technically, this is two projects in one, BUT, they are done very similarly.
The Prayer Canvas has one extra step, and it starts at the beginning with joint compound.
For the prayer wall, no joint compound was used, so wait until the next step.
I apply a thin layer of joint compound over the entire canvas surface, pushing it into the weave of the fabric.
Once the entire surface is covered, I then make a “stair step” pattern.
When I have the pattern I like, I let this dry for a full 24 hours.
TAKE YOUR CANVAS OUTSIDE
I take the canvas outside and sand over the joint compound with my 220 grit sand block.
This essentially just knocks the peaks off of the dried joint compound and this step is VERY dusty, which is why we do this outside.
LET’S PAINT!
Clean off the dust with a dry rag and then grab your darkest paint color, I used Dixie Belle’s Caviar.
I paint the entire surface of the canvas including the sides.
Typically I do one coat, later I will do a second coat once I have the top side done.
HOW TO PAINT WITHOUT A PAINT BRUSH!
For my Prayer Wall & Canvas, I wanted to use my Distressed Technique.
I do not use a paint brush, but instead a brayer roller and a paper plate.
This technique is pretty much what I did on my Prayer Wall also.
For my Distressed canvases I have done so far, I tend to stick with similar colors and use a light, medium and dark color.
I love the looks of black, grays, and white.
For an added wow factor, I added touches of Dixie Belle’s Bronze Patina and I loved how this turned out!
Other combinations I’ve used and love is white, gray and blues.
LET’S GET STARTED ON OUR PRAYER CANVAS
Since we already have our Canvas painted in Caviar, I grabbed Hurricane Gray and poured about a tablespoon onto a paper plate.
Grab our brayer roller and roll it across the paint, I pretty much covered the entire roller.
Then, I roll this across my canvas.
I picked a pattern and criss crossed this going down and moved across the Canvas repeating this same pattern.
Then I flip the canvas so the sides, is now the bottom and top.
Once this layer of paint is dry, I pour a tablespoon of Driftwood on the same paper plate and repeat the same process, then flip the canvas again.
THE REASON WHY I FLIP MY CANVAS?
I do not want any noticeable patterns showing.
Next I go back to Caviar, flip my canvas again and repeat!
These steps on my Prayer Canvas can be repeated again until I get the look I like.
During this whole time, I do not wash my brayer brush.
The previous dried on paint, just adds more texture as we go through our steps.
ADDING PATINA TO MY PRAYER CANVAS AND PRAYER WALL
For the final touch, I then grabbed my cheap chip brush and Dixie Belle’s Bronze Patina.
This doesn’t take much paint at all either.
I use my paper plate to off load any patina paint that is on my chip brush and lightly dab in random place across my canvas.
Then I grab the brayer brush and roll over the Bronze Patina.
If I have an area that has too much patina, I can always go back once this is dry and lightly dab a little caviar over it and roll with the brayer brush to break up any areas.
Once this is all dry, I paint on a medium coat of Dixie Belle’s sealer in Flat.
Since there is a lot of texture, I tend to cross-hatch the sealer to get the sealer onto the entire surface and crevices.
When this is dry, we can move on to stenciling our canvas!
STENCILING OUR PRAYER CANVAS
I have a full blog post on how I make my stencils from contact paper and how I apply them to my signs.
For the full instructions click here.
But!
I have many other projects where I show you how to stencil, so if you want to get a better idea on how this is done, click here!
Once your stencil is applied, this is where I veer off a little from my normal stenciling routine.
I do not burnish my stencils on canvases, normally.
Especially when they have texture.
The purpose of burnishing is to help the stencil adhere to the surface but with this added texture, I think it will be too much of a headache.
Grab a couple of paint brushes, I prefer a small round and small flat square or angle brush.
PAINTING OUR PRAYER CANVAS
Since my canvas is a combination of black and grays, I picked Dixie Belle’s Cotton or white for the lettering.
Next I grabbed my paint, a damp paper towel, and two brushes.
Instead of pouncing our paint on over the stencil like we normally do, I go across each letter and outline inside the stencil with the round brush.
I save the round brush for the thinner letters and the flat brush for the bigger letters where I can paint more space without risking bleeds.
This step is a little time consuming but so worth it!
Once you have painted all the letters and remove the stencils, it’s time to do the clean up!
You will have some bleeds but we can fix them later after the paint is dry.
To fix my “boo-boo’s” or bleeds, I grab my caviar.
Or grab the same color as your base paint, and a clean small round brush and we will lightly brush the Caviar paint over the bleed areas only.
OUTLINING THE LETTERS
Now on mine, I had some areas, that didn’t have bleeds but because of the light background I went ahead and outlined part of the letter anyways to make it stand out better.
I really love how this turned out!
Once this is done, it’s time to clean up the sides of our canvas.
Remember, we only painted one coat on the sides in the beginning.
I didn’t do a second coat yet because of the all the layers of paint we were adding, in case any got along the sides and messed them up.
Once the second coat of caviar is painted around the sides and dry, we can add a final coat of Dixie Belle’s sealer in Flat on the canvas.
Just so you know, I did not seal the paint on my Prayer Wall.
Dixie Belle’s Chalk Mineral Paint has sealer in it and will cure in 30 days!
I now have my prayer canvas hanging on my prayer wall with two nails surrounded by my favorite wood flowers I found at Hobby Lobby!
Using 3M Command Strips, I hung my wood flowers around the Prayer Canvas.
There will be more flowers added in the future as I collect them!
Let me know what you think, and I hope I inspired you to get creative and plan an accent wall or even a prayer wall for your own home!
Speaking of accent walls, did you see my faux shiplap accent wall I did this Spring?
167
views
1
comment
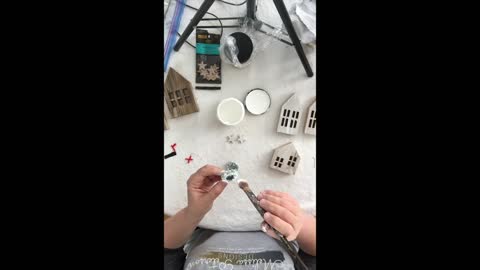
How I Decorated my Mini Houses for Valentines Decor
Recently my daughter returned home from a work trip and brought me these mini houses she found at Target as my souvenir! How cute are these? Let's see what I can do with them!
96
views
How I Personalized those Unfinished Wood Signs from Hobby Lobby
Do you ever check out those unfinished wood signs at Hobby Lobby and wonder what to do? When I first saw these beaded white signs, I was hoping these weren’t a short lived product and I bought a few on the spot. I’ve added transfers to them and stenciled them but this one I think really stands out. Check out how I deconstruct it and completely change the look!
Supplies I Used for my unfinished wood signs
White Beveled Beaded Wood Wall Decor from Hobby Lobby
Jute rope, scissors, 2 paper plates, scotch tape or large eyed needle
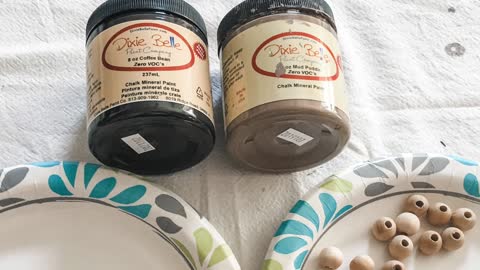
Dixie Belle Products: Caviar, Cotton, Coffee Bean, Mud Puddle and White Lightning
Join MPD Tribe and get access to my library of free cut files including Bless This Home from this project!
PREPPING MY UNFINISHED WOOD SIGNS
Before I get started, I remove the wooden beads from my unfinished wood sign.
I used scissors to cut the knots from behind and I place the beads in a safe place.
Normally I don’t use the same jute rope string since the rope is cut pretty tight and I have trouble retying a knot so I use new jute rope later.
As always, we need to start with a clean surface.
Any fingerprints or dirt will prevent any paint from sticking to the surface they are painted on.
My favorite product to use is Dixie Belle’s White Lightning. I mixed a small amount, approximately a tablespoon in a spray bottle and use this for small projects.
Once the project is clean, make sure to use a clean wet cloth to wipe off any White Lightning residue.
And now we are ready to start!
PAINTING MY UNFINISHED WOOD SIGNS
First I divided my wood beads into two groups and placed them on two different paper plates.
On one plate I added a very small amount of Coffee bean, maybe 2 teaspoons worth.
You can always add more paint as you go, once the paint was on the plate, I swirled my plate around to cover the beads.
I kept swirling until the paint was dry on the beads.
The next plate I added Mud Puddle and repeated the same process.
Check out my video short below to see my process.
This way of painting beads if very satisfying, my version of a fidget spinner.
If you check out my YouTube channel I have two more videos on painting wood beads also.
I choose to use Dixie Belle paint for these beads because the paint contains sealer in it.
This will provide extra protection for my painted beads, but we are not done yet!
When the beads were good and dry, I then placed all the beads on one plate and added a small amount of Cotton to the plate and repeated the process.
Why? Because I wanted a speckled look to my wooden beads!
STENCILING MY UNFINISHED WOOD SIGNS
I love these unfinished wood signs and I have been using them in other projects.
Check out my other White Beveled Beaded Wood Wall Decor to see how I personalized them.
I have several blog post and videos on how to stencil on different mediums, click here to check this out!
Once I have my design figured out on my Silhouette Cameo software and cut using contact paper, click here to see how, it’s time to start stenciling.
I used Caviar first to burnish the stencil to help prevent bleeds.
Once this was dry I then used Cotton over my stencil.
Before the Cotton was dry, I pulled my stencil up slowly and carefully to prevent the paint from being pulled up.
Usually I wait until the paint is dry and then lightly sand it before pulling up the stencil, but we have a lot of humidity here in Iowa so I’ve found pulling it up when still wet works best for me.
Once completely dry, you can use your favorite sealer, or you can leave unfinished for a chalkboard look, which is what I choose to do this time.
ASSEMBLING MY UNFINISHED WOOD SIGNS
Now it’s time to reassemble my unfinished wood sign.
I grabbed my role of jute rope, added scotch tape tightly to the end.
Then I threaded the just rope from the backside up, then I started adding the wood beads back onto the rope.
I alternated the dark brown/white and medium brown/white speckled beads until they were all threaded on the jute rope.
Then I pushed the jute rope down into he other side of the sign and tied two knots on each side and then cut the excess jute rope.
That is it!
139
views
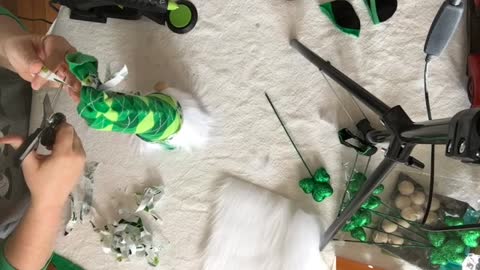
How I Made My St Patricks Gnome
I love Gnomes, but I do not have one for my St Patricks Day decor! So I gathered some of my supplies and in about 15 minutes I have this cute little shelf sitter!
Supplies I Used for my St Patricks Gnomes
Paper Mache Cone: I used a 12″ tall cone
White Faux Fur
Adult sized socks: I had unused St Patricks socks I purchased from Dollar Tree last year
Wood Beads
Optional: St Patrick picks and ribbon or fabric. I found my Shamrock picks at Dollar Tree and used ribbon and fabric I had on hand.
Hot glue and glue gun
Scissors
ASSEMBLING MY ST PATRICK GNOMES
Now to be honest, I wasn’t sure how I was going to craft my Gnomes.
Once I had my supplies gathered, I realized the fur fabric I had picked out was not going to wrap all the way around the bottom third of my paper mache cone.
I cut my sock so I had the long part, the part that goes over the calf in once piece, for my Gnomes hat.
Then I cut and disassembled the foot part of the sock for the backside of my Gnome.
I cut the toes section off, and then I cut the other side so this part of the sock was a rectangle shape.
It might be easier for you to check my video below to see how I did this!
Then I grabbed my favorite glue gun and glued the rectangle piece to the bottom third part of the cone.
This will be the backside.
Next I roughly measured my faux fur and started cutting the fur from the backside.
Cutting the faux fur from the back is a little less messy and you’re not cutting most of the fur that we are wanting for our gnome.
Then I hot glued the fur onto my Gnome, over lapping the sock fabric.
Next I placed the long part of the sock on my Gnomes “head”.
But before I did, I cut off the black end of the sock, since I didn’t really want that showing.
I kind of wish I left that alone, so I added some fabric ribbon over this area so the rough edges of the sock were hidden.
And it actually looks cute!
NOW I ADDED MY NOSE!
I parted the fur in the middle, the best I could, added some hot glue and placed my wood nose in the middle of the parted area.
I cute three small rectangle faux fur for eyebrows and mustache.
This step isn’t really necessary but I wanted to add a little more hair in these areas.
Next I added some fabric strips, leftover from my Messy Bows supplies and tied the top of my Gnomes hat.
For the final embellishment, I grabbed a Shamrock pick from a package I bought from Dollar Tree.
I broke off part of the pick, found a spot where I wanted to hot glue the pick, and also added a little more where I wanted the Shamrock to stay, up by the hat and that was it!
123
views
My 11 Favorite Christmas Tree Crafts By Some of My Favorite Crafters!
I've found some awesome DIY Christmas Tree decor from some of my favorite crafters and DIYers and some new ones too!
Full blog post available with links at https://melissapetersondesigns.com/tree/
81
views

DIY Painted Books & ReDesign with Prima Transfers
Check out how I updated my painted books AND added ReDesign with Prima Transfers for an extra special touch!
Supplies I Used
Books: used or new
Dixie Belle Caviar
ReDesign with Prima transfers: Midnight Floral
Dixie Belle’s white wax
paint brushes
220 grit sandblock
Embellishments of your choice. I used black jute rope, small wood key and heart.
let’s get started
I decided to re-paint my books from another project I completed before, click here to see that post!
PREPPING BEFORE PAINTING
The only prepping I needed to do with these three books was to sand lightly over the areas of the book-ends I had stenciled and then wipe the dust off.
That’s it!
TIME TO PAINT OUR BOOKS!
I went with Dixie Belle’s Caviar!
I knew I wanted to go with this dark, rich deep color because I planned on using Midnight Floral transfers from ReDesign with Prima.
Since these books were already painted before and I am going dark, it only took one coat of Caviar to cover the books completely!
MIDNIGHT FLORAL
I absolutely love this transfer by ReDesign with Prima!
You can see here, where I used sections of these transfers on my daughters tabletop jewelry armoire and storage box.
Because I am using pieces here and there, I am getting a lot of use from this one transfer.
Of course, you can always use the entire transfer on large project.
It’s up to you!
Transfers come in three pieces
Backing
Transfer design
Clear plastic on top of transfer
First decide which section of the transfer you want to use and then decide where you want to place it.
Then carefully cut out and around the part of the design you want to use.
When I picked out the rose, I had decide on placement where I thought was the top of the book.
But after I finished the Facebook live I realized it was at the bottom.
Everything worked out just fine!
Instead of this book being the top of the three piece set, it instead became the bottom piece.
Then I found a larger section of the Midnight floral transfer I wanted to incorporate and I managed to hold the three books together and apply the transfer across all three spines of the books!
This was actually easier than applying the rose on the book shown below when I didn’t have the right squeegee.
Each roll of transfers you purchase comes with a squeegee.
This squeegee works wonders.
It’s just the right fit and shape so you can hold it and apply the pressure you need to make applying transfers easy!
After finishing the spine of the books I moved to the front book.
I found the perfect section and applied this in the same fashion also!
SEALING YOUR PAINTED BOOKS WITH TRANSFERS
I have yet to apply sealant yet like clear coat to books.
But when I do I will let you know how it turns out!
To seal this set I used Dixie Belle’s Best Dang White Wax.
I actually applied this pretty liberally and then buffed back the excess with a lint free cloth.
If you don’t have a brush to apply your wax, you can use the same lint free cloth to both apply and buff your book set.
I use cloth diapers for my lint free cloths.
To apply the wax, just dip the end of you brush into the wax and start wiping your project.
I rub the wax in circles, side to side and up and down.
When you have a section waxed, take your lint free cloth and start wiping or buffing the area you just worked on.
I usually run my hand over the area, if it catches or sticks, keep buffing.
When it feels buttery soft, your section is done and you can move onto the next section.
EMBELLISHMENTS
You can leave your books just as is or dress them up a little bit more.
First I added black jute rope to my books, and I added enough to wrap it around about three times.
In addition to the jute rope, I also added a small heart and key wooden embellishments I had on hand.
I’m not positive, but I think I purchased these at Hobby Lobby.
When it comes to personalizing your set of books, the sky is the limit!
I’d love to see what you come up with!
PAINTING PAGES!
Yes, I went back and painted the pages with Dixie Belle’s Caviar and waxed them too!
It wasn’t that hard!
I held the book in my left hand, and held the book closed.
I ran my paint brush over the pages and painted them with Caviar until the pages were covered.
Once the paint had dried, I went back and fanned the pages and separated the ones that were still sticking together.
That was it!
After the pages of all three books were painted, I went back and used my white wax in the same manner and even buffed them with my lint free cloth!
Now that I know I can paint the pages of my books, I will be adding more decorate books to my home decor!
127
views
DIY Home Decor from a Salvaged Hobby Lobby Sign
I purchased this sign from Hobby Lobby on clearance years ago and I really liked it at the time! However, after the last time it fell and came apart is was time to turn this into a salvaged DIY Home Decor.
Supplies I Used
Hobby Lobby Sign: purchased on clearance years ago
Hot glue gun and glue sticks
Cooking oil or spray
Paper clay
Powder: I use what I have on hand and right now I use baking soda.
Plastic Putty Knifes: this is not the set I use but it’s very similar
Elmers wood glue
Dixie Belle’s Slick Stick, Caviar, and Clear coat.
ReDesign with Prima mould: the one I used may not be available anymore. I will keep looking!
ReDesign with Prima transfer: Love and Dreams. I purchased this transfer from my friend Anna at The Furniture Boutique
Dixie Belle’s white wax
paint brushes
220 grit sandblock
let’s get started
Before I started my project, I prepped by cleaning the sign.
While I was cleaning, I noticed for the first time a pretty large chipped area on the plastic frame.
And the large chipped area that was missing included some pretty details which is one of the reason why I wanted to salvage this sign.
I either ignore it or fix it.
REPAIRS
I saw a year a two ago someone making moulds from hot glue for repairs so I thought I would give it a try.
Why not? I had all the supplies on hand!
The area that needed repair was approximately 6″ long.
I should have measured but I didn’t.
HOW TO MAKE A MOULD
Once my glue gun was heated up, I picked a section of the frame that was longer than the area I needed to fix.
I rubbed this area generously with cooking oil.
Then I started applying the hot glue from the glue gun to this area.
Let this section cool and applied more where needed until I enough of the area was covered to make a mould.
Once it was cool, I started peeling the glue off of the frame.
Sure enough, I had made my very own mould!
REPAIRING THE FRAME
I really enjoyed this part.
It brings back memories of using Play-doh!
I used Paper-Clay and tried to grab enough of this material so I can roll it into one ball and then spread into the mould.
When making moulds, if we piece in the Paper-clay into the mould, it may make the embellishment weak and easy to break.
For this reason, it’s best to use a little too much and then remove the excess.
PREPPING THE MOULD
To prep the mould, first dust it with powder.
I use what I have on hand and right now that’s baking soda.
This will make removing the Paper Clay from the moulds easier.
I grab my chunk of Paper-Clay, roll it into a ball and then start pressing it into the mould.
Once I have the Paper-Clay formed into the mould, I use a putty knife and sometimes just my fingers to remove the excess.
Then to remove the material from the mould I “break the seal”.
HOW TO BREAK THE SEAL
To break the seal for my DIY home decor project, I just work my way around the mould and pull the mould away from the Paper-Clay.
It will bounce back to the Paper-Clay but the seal is mostly broken.
Then flip the mould upside down onto the table and slowly pull the mould up away from the formed Paper-Clay.
APPLYING THE PAPER CLAY TO MY DIY HOME DECOR
Here I just manually worked the moulded paper-clay into the areas of the frame I needed to repair.
It took me a couple of tries, I removed some of the excess and I used Elmer’s Wood glue to secure the paper clay until it dried.
Next, prepping the sign with Dixie Belle’s Slick Stick.
PRIMING MY DIY HOME DECOR SIGN
I decided to go back to the basics and cover my entire sign with Dixie Belle’s Slick Stick.
I realized after this sign fell apart was made from MDF-like material and plastic for the detailed frame.
Both surfaces are pretty slick so I decided to prep my sign with two coats of Dixie Belle’s Slick Stick.
Chalk paint is pretty adhesive but I wanted to have a little more security that my finished product would pass the scratch test.
Click here to see how I finished my salvaged DIY Home Decor sign!
118
views

How I Made These Patriotic Cupcakes!
Faux patriotic cupcakes? Yep! And maybe a few faux mug toppers for my mini Rae Dunn Mugs also! I found some cute embellishments in the Fourth of July section at Hobby Lobby and had some fun!
Supplies I Used for my PATRIOTIC CUPCAKES
Lightweight Spackling or Plaster
Optional 1.3″ Styrofoam balls
Disposable pastry bags
Optional: narrow drinking glass or glass jar
Plastic wrap
Tongue depressor to stir
Cupcake liners, cupcake pan, favorite coffee mug or mugs if you want to make mug toppers
Embellishments: straws, sprinkles, small decorative of your choice.
Molds (optional) for faux waffles or graham crackers and brown hot glue sticks and hot glue gun.
ASSEMBLING MY FAUX PATRIOTIC CUPCAKES
The main thing stressed when making this project, is sticking with the lightweight plaster.
If it’s not lightweight, the plaster will settle and flatten too much.
My last faux mug toppers, I added a little white paint to my plaster, this time I didn’t and I thought these looked great also!
Click here to see my Christmas Mug Toppers.
LET’S GET STARTED!
After cutting a small hole in my disposable pastry bag, I placed this inside an old measure cup.
Next I filled this pastry bag full of plaster and squeezed out the air.
Then I placed three cupcake liners in the cupcake pan.
Next time I won’t set these beside each other, this way I can be more generous with the plaster without worrying about them running into each other.
TOPPING OFF THE PATRIOTIC CUPCAKES
I placed a small dollop of plaster at the bottom of the cupcake liner, then placed my styrofoam ball in the dollop of plaster.
Then I started squeezing plaster around in side the cupcake liner.
I repeated this for all three faux cupcakes.
And then I ran out of time and plaster in my pastry bag, which wasn’t that big of a deal.
So at this point, my plaster was about level with the cupcake liners.
The next day, these were mostly hardened and with a new bag of plaster in a new disposable pastry bag, I then did my best “frosting” the cupcakes.
When I was in high school, I worked at the local ice cream hangout.
I prided myself on how well my ice cream cones looked, so I decided with these cupcakes, I would try the same “technique”.
Hmmmm.
This “technique” I just held the pastry bag over the top of the cupcake and squeezed while the plaster pushed down and made the first top layer.
When this was covered, I lifted my hand up a little and continued to squeeze for the second and third layer.
It was an interesting experiment.
The first two turned out pretty good, the third one, I swirled the plaster around in a circle.
Looking back, I probably should have added more plaster to my pastry bag, as I was running out, it got a little big awkward.
DECORATING MY PATRIOTIC CUPCAKES
Then I grabbed my embellishments, straws, flag and stars on picks, and sprinkles.
I tried “sealing” the sprinkles with hairspray so the colors wouldn’t bleed when they hit the semi-damp plaster.
This did not work as I intended but the colors on the cupcakes are pretty and patriotic!
MAKING MY PATRIOTIC FAUX MUG TOPPERS
I had some leftover plaster, so I made a few patriotic faux mug toppers.
First, I placed some saran plastic wrap loosely over the top of my favorite mini Rae Dunn mugs.
Then I placed a styrofoam ball onto the plastic wrap.
I wanted this styrofoam ball to be partially inside the mini mugs.
Later when they are dry, they will help keep my mug toppers in place and not slide off the mugs.
The plastic wrap also helps protect the mugs from the plaster while the plaster is damp.
I then started swirling the plaster in a circle until I had a nice dollop on top and then decorated with some leftover embellishments.
Once the plaster is dry, I removed the Saran plastic wrap.
Check out my video below, I’ll show you how I made some faux graham crackers and waffles with melted brown hot glue.
Also, the filling for those faux graham crackers? More plaster!
AND THAT IS IT!
139
views
A little Instagram Stories Fun!
A little Instagram stories fun!
Join MPD Tribe: https://melissapetersondesigns.com/mpd-tribe/
MeWe: https://mewe.com/i/melissapeterson1
Parler: https://bit.ly/3ftTluu
Rumble: https://rumble.com/c/c-309345
Pinterest: https://pin.it/3Ka1fOI
Facebook: https://www.facebook.com/melissapetersondesigns/
Facebook: https://www.facebook.com/boutiquebymelissamarie
Instagram: https://www.instagram.com/melissapetersondesigns/
Instagram: https://www.instagram.com/boutique_by_melissa_marie/
Making the world a little more beautiful with a paintbrush, a laptop, and a creative spirit..
74
views

How to Make a Chalkboard Sign
Making your own chalkboard sign from recycled frames or kitchen cabinet doors is super easy. Whenever I go to a thrift store I always search for used frames with the ideas on how I can up-cycle them.
Blog post contains written instructions and supply list.
https://melissapetersondesigns.com/chalkboard-sign/
https://melissapetersondesigns.com/stencil-your-chalkboard/
79
views
How to Make a Christmas Sign from Gift Bags
Check it out! I have a great new technique on how to stain wood without stain! Or paint!
Plus I just made an adorable Christmas Tree sign for my holiday decor that is super easy!
For full blog post and supply list go to my website!
https://melissapetersondesigns.com/christmas-sign/
60
views
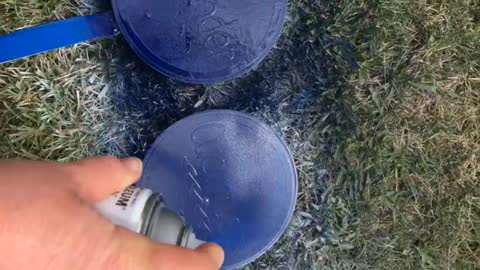
My Dollar Tree Garden Stakes
Garden Stakes! I love my new garden stakes. My only regret, I didn’t grab more of these when they were in stock! Just a little painters tape, spray paint and something to stencil with and we can personalize these however we want!
Supplies I Used for my Dollar Tree Garden STakes
4 Round Dollar Tree signs on a stake. These garden stakes measures 7″ diameter and were a dollar each!
Outdoor Spray Paint: Rust-oleum White and Navy Blue
Painters Tape, Dental pick
PREPPING MY GARDEN STAKES
Before I started I made sure the signs were clean and then I taped the jute rope loops to the back of the garden stakes so they were out of the way.
Then I taped the stakes to protect them from the spray paint and took them outside.
My favorite large piece of cardboard to spray paint on was missing, thanks to my hubby, so I found an out of the way place in my backyard.
Of course, my hubby spotted the area when he got home from work.
I sprayed two coats of white paint over the round garden stakes, letting them dry in between each coat.
Once dry, I brought them back in the house and started working on making my garden stake stencils.
STENCILING MY GARDEN STAKES
Did you know I have a free growing library for those who join my MPD Tribe?
I put these Garden Stake designs in the library in a new column, marked “Summertime”.
To join, click here.
I used the PVPP method to craft these garden stakes.
Paint, Vinyl, Paint, Peel. Click here to see my other projects I used this method with!
If you don’t have your own personal cutter, you could always use vinyl decals from the scrap book section also.
Once the stencils are in place on my four garden stakes, I took them back outside.
I picked Navy Blue, because that is the color I had on hand.
A few years ago, I turned two pallets into outdoor flags, so I keep this color on hand to freshening those signs up.
This color only took one coat, I went over them just enough to cover the entire surface.
As soon as my garden stakes were dry I took them back inside.
I grabbed my favorite dental pick and started pulling the stencils off.
Since I used outdoor spray paint for my Dollar Tree Garden Stakes I didn’t seal them, just took them outside the placed them in my garden!
And that’s it!
I image I’ll need to refresh these every year or two, so I’ll keep you updated on how long they last! Make sure to check out my Short YouTube video!
81
views
How I Made This Adorable Forrest Themed Growth Chart
I LOVE how this Forrest themed growth chart turned out! This is the second time I’ve done a mountain view in the background and this was even easier than the first time! All I needed was a pencil, a picture of mountains and a little imagination! Let’s get started!
Supplies I Used for my forrest Themed Growth Chart
1″ x 10″ x 72″ Pine Board, sanded and clean
Dixie Belle Paints: (from top of the forrest growth chart to bottom) Haint Blue, Cotton, Savannah Mist, Dusty Blue, Yankee Blue, Midnight Sky. I used Hurricane Gray mixed with Midnight Sky for the Forrest animals.
Dixie Belle Sealer in Flat
Sandpaper or sand block
Paint brushes: I used regular artist brushes, fan brush and my favorite large round watercolor brush.
acrylic ruler, pencil
Contact paper to make my stencils in my Silhouette Cameo 3
DESIGNING OUR FORREST GROWTH CHART
Grab a sharp pencil, maybe a picture of a mountain scene and lets get started!
I started towards the top, drawing a silhouette of mountains, and worked my way down the growth chart.
As I drew a jagged mountain shape, when I came down to the next level, my goal was to make sure the shape did not mimic the mountain shape above.
Also, as I worked my way down, the mountains shapes were getting spaced a little farther apart from the previously drawn mountains.
And yes, I used my eraser to go back and erase certain lines and add a hill there or adjust the hill elsewhere.
This is super forgiving!
Then I grabbed my favorite watercolor paint brush and start painting!
PAINTING THE FORREST GROWTH CHART
This is pretty much “painting within the lines”.
But much more forgiving, because I intentionally painted the lines here and there where I feel it may look best, or even when I messed up and just went over a little too far.
In the supply section, I listed the colors in order that I painted the background.
Haint Blue for the sky, Cotton for the top mountain tops and so on!
The last two rows were supposed to be more mountains but I decided to turn them into Evergreen trees with my fan brush.
Check out my short video below to see how I did this!
PAST GROWTH CHARTS
Each growth chart I do, is my favorite and this Forrest Growth Chart is no exception!
Technically, this growth chart would have looked great without the forrest animals too!
Just a thought!
For my first take on doing some free-hand painting, check out my Whimsy Growth Chart.
And my recent Woodland Growth Chart, click here!
Also, these blogs go into more detail on how I laid out the stencils for a long project and how I layer stencils to get a different look!
I hope you enjoy these examples and I hope I inspired you to create too!
76
views
Check Out My Patriotic Gnome
Are you ready to make a Patriotic Gnome? I am! I can not believe how easy these are to make! Let’s dig in!
Supplies I Used for my PATRIOTIC Gnome
Styrofoam cone: Dollar Tree is my source!
Fabric: I used one Patriotic sock I found at Hobby Lobby
Hot Glue gun and glue
Scissors
Wood bead: for nose, click here to see how I painted my wood beads.
Chunky yarn: I had some cream-white yarn on hand from Hobby Lobby
Medium birch discs: this is optional
Embellishments: I used Patriotic cupcake toppers (flag and stars) as embellishments
ASSEMBLING MY PATRIOTIC GNOME
To start with I grabbed one of my patriotic socks and used my good scissors to cut straight across at the ankle and then again straight across at the foot.
I have a short video below you can watch to see what I mean.
Next I choose the foot part of the sock to cover my base.
I inserted the cone in, I should have added some glue at the base of the cone to secure the sock.. Next time!
Then I glued on a birch disc to the bottom of the gnome to be the base of my Patriotic Gnome.
Next I estimated how long I wanted my Gnome beard and started cutting yarn strips.
I glued five pieces to the cone, then I glued the wood bead in the middle for the nose.
Then I roughly measured a piece of yarn to go over the nose and beard as the Gnomes eyebrows.
I then decided I wanted a fuller beard, so I cut a few more strips of yarn and glued them on top of the first layer of yarn.
Finally the hat!
I grabbed the other part of the sock and placed it on the gnome, and to cinch or close the top of the hat, I rolled it down once and then applied some glue inside and pressed the top of the hat together until the glue set.
Then I grabbed a cupcake flag on a pick and glued it so it looked the my Patriotic Gnome was holding it.
Finally I glued some metallic stars on the hat for a special touch.
AND THAT IS IT!
96
views