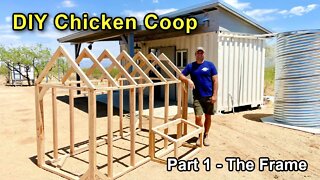
Building a DIY Chicken Coop - Part 2 (Sheathing, Windows/Doors, other details)
Part 2 of my 'Building a DIY Chicken Coop' series. In this video I will be adding the plywood sheathing, trim, doors/windows, roofing, hardware, paint and moving the coop to its home near the garden! I cover the general aspects of how I made the doors, windows, etc,..... but don't list all of the dimensions in the video itself. But I have listed those details below the links for the tools that I used!
Thanks for watching and let me know if you have any questions - Joe
And I also want to give a big thank you to the Home Depot Prospective and Ryobi Tools for sponsoring this build!
Here are links to the tools I used in this build:
RYOBI 18V ONE+™ HP Compact Brushless 2-Tool Kit:
https://www.homedepot.com/p/RYOBI-ONE-HP-18V-Brushless-Cordless-1-2-in-Drill-Driver-and-Impact-Driver-Kit-w-2-2-0-Ah-Batteries-Charger-and-Bag-PBLCK01K/314109290
Ryobi 7 ¼” Sliding Miter Saw
:
https://www.homedepot.com/p/RYOBI-7-1-4-in-Compound-Sliding-Miter-Saw-TSS702/306939255
Ryobi 16ga Finish Nailer:
https://www.homedepot.com/p/RYOBI-ONE-18V-Cordless-AirStrike-16-Gauge-2-1-2-in-Straight-Finish-Nailer-Tool-Only-with-Sample-Nails-P325/204667878
Ryobi HP Brushless 7 1/4" circular saw:
https://www.homedepot.com/p/RYOBI-ONE-HP-18V-Brushless-Cordless-7-1-4-in-Circular-Saw-Tool-Only-PBLCS300B/314109411
MATERIALS AND DIMENSIONS:
Plywood for coop:
4 - 4x8 sheets of 3/8 exterior grade plywood
2- 4x8 sheets of 1/2” or thicker OSB for roof deck
1x3’s for door/ window framing and corner trim
8-10 pieces of 1x3” x 8ft boards
Screws/nails used:
1 5/8” decking screws for plywood
16 ga 1.5” and 2.5” finish nails for nailer
1.5” washered roofing screws did roofing/flashing
1 1/4” pocket hole screws for door/window frames
3/4-7/8” screws to fasten from backside of plywood to 3/4” thickness of door and window frames.
Door/window dimensions:
Main door frame
27w x 32"h
Door
21.75w x 26.75"H
Window frame
15.5w x 12.5"h
Barn door
35w x 38"h
Poop door
44w x 14"h
Egg box lid
41 1/8”w x 22.25” deep
Egg box side door
23w x 7.5"h
Note: both the egg box lid and front plywood are 3/4” that I had on hand. I recommend a thicker plywood for those parts than the 3/8” used on the rest of the coop end doors.
Interior frames that serve as a weather seal of the end access door and the side egg box door have a lip of approx 1/2” on the bottom and 3/8” on the sides
Music sourced from EpidemicSound.com... credits as follows....
Alpha and Omega by Elwin
via Epidemic Sound subscription
Subscribe to homesteadonomics: http://bit.ly/2trs1Iz
Follow homesteadonomics:
Instagram: https://www.instagram.com/homesteadonomics/
Facebook: I DON'T use FB.... don't like it and I rarely check messages there. IG, email or here are the best places ;)
Business Inquiries: kangaroojoe@msn.com
----------- DIY, Random Projects, Rainwater Harvesting, Welding, woodworking, outdoors... and whatever else I find interesting :)
If you have any questions or business inquires feel free to email below or if you prefer, you can send old fashioned mail to this address:)
Homesteadonomics
HC 70 Box 4770
Sahuarita AZ 85629
-----------
#chickencoop #diychickencoop #backyardchickens
Tags: chicken coop, backyard chickens, diy chicken coop, homemade chicken coop, chicken coop plans, how to, build a chicken coop, make a chicken coop, hobby chickens, backyard farm, homesteading, chicken waterer, chicken feeder, egg box, solar, electric fence, rainwater harvesting
-
 14:07
14:07
Homesteadonomics
2 years ago $0.20 earnedBuilding a DIY Chicken Coop - Part 1 (The Frame)
1.3K3 -
 11:55
11:55
Homesteadonomics
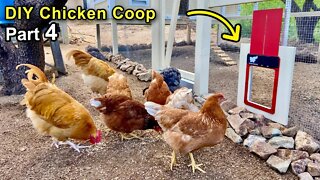
2 years ago $0.14 earnedBuilding a DIY Chicken Coop Part 4 - Automatic Door & The Coop Floor
1.19K2 -
 6:34
6:34
Up To Kode
3 years agoHow to Form a Window or Door Buck - ICF
30 -
 22:50
22:50
Pete B: East Texas Homesteading
3 years agoBaby chicks update and chicken run door install
82 -
 3:34
3:34
HappyHome
2 years ago $0.02 earnedRaising Poultry | Chicken Coop Layout | Chicken Coop Door
228 -
 4:04
4:04
David Maus Jr
1 year agoI’m Building a Duck Coop - DIY - But, I need Your Help!
23 -
 20:54
20:54
TheDoItYourselfWorld
8 years agoMaking A Chicken Coop From An Old Rabbit Hutch
43 -
 41:35
41:35
Smoky Mountain Outpost
3 years agoFinishing The Chicken House Doors, Roost & Nesting Boxes | Off Grid Timber Frame
4 -
 27:02
27:02
The Hard Way
10 months agoCustom Doors for the Under Bay! Skoolie Build Series Part 2
39 -
 13:41
13:41
The Do It Yourself World
7 years agoMaking Chicken Pen Door & Setting Up Chicken Coops
21