

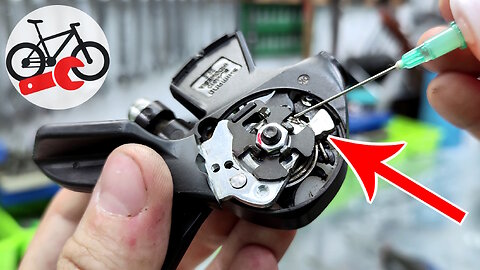
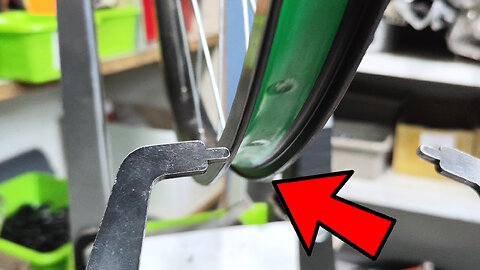
Bicycle shifter maintenance. How to open and cleaning bike shifter
Hello cyclist friends. This video tutorial is about the shifter on a bicycle.
It often happens that the speeds on the bike do not want to switch and in this video, we will look at the reasons why this happens.
I will show you all the steps, how to disassemble the shifter, how to clean and lubricate it.
I will also use a shimano sl-m310 derailleur.
Be sure to turn on subtitles for more information.
Video "DIY" and "ASMR" how to service shimano shifter mountainbike.
#mountainbike #shimano #shifter
00:00 Bicycle shifter wont shift
00:33 Shifter shimano sl-m310
00:41 How to open bike shifter
02:07 What does a bicycle shift look like from the inside
02:39 Why the bike slate doesn't want to work
03:10 How to cleaning bike shifter
03:45 Lubricate bicycle shifter
04:55 How to assemble bicycle gears
06:50 Fix the lower gearshift cover of the bike
07:06 Install the cable in the bike shifter
07:41 Testing bicycle shifter
07:52 Nice work
20
views
Bicycle repair. How to change mtb bike headset
This video is about repair bicycles. It will demonstrate how to replace a bicycle headset in a bike workshop.
00:00 Bicycle repair and mtb bike headset.
00:24 Old bicycle headset.
00:44 Unboxing new bike headset.
01:00 How to replace a bicycle headset.
01:20 How to remove bike headset.
04:28 How to install a bike headset.
06:58 Bicycle headset lubrication
07:42 Install a bicycle stem threadless.
08:29 Install a bicycle front wheel.
09:03 Install a bicycle front brake.
09:15 Adjusting the bicycle disc brake.
10:03 How to adjust bike headset.
16
views
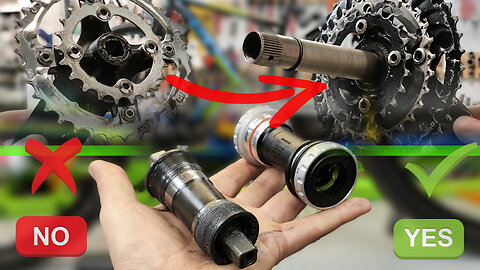
Bike Upgrades. Shimano Hollowtech II Bottom Bracket and cranks Replacement
Hello cyclists!
Bike upgrades. DIY with ASRM
Turn on the subtitles, sit back and let us begin.
In this video tutorial I will show you how to replace a Shimano Hollowtech II bottom bracket and cranks. How to remove bicycle cranks.
Be sure to lubricate the removal tool, all threaded connections must be lubricated. Your equipment will last longer and the disassembly of the assembly will be easier and faster.
Repeat after us and you will be able to replace cranks on a bike without difficulty. Now let's compare the difference in weight between old and new bike cranks. The difference is insignificant, but it lies in the weight.
How to remove a bicycle bottom bracket. The old bottom bracket under the square is heavier. Therefore, the whole rod system is lighter when using Hollowtech II. In the workshop I use long levers, large tubes so you can unwind each part. Come to our playlist, you will find many videos on the operation of the transmission. The old bottom bracket was dirty. All the dirt that flies into the frame falls on the bottom bracket. Then everything creaks and squeaks. New bottom bracket. Shimano Hollowtech II bottom bracket sm-bb52 out of the box. The manufacturer puts a lot of grease in the bottom bracket. This grease can be used to lubricate threaded connections.
Spacers, a very important detail. I'll show you clearly how, without instructions, individually for your carriage knot, you can pick up RINGS. First, we will weigh our new Hollowtech II bottom bracket. The old bottom bracket for the square and the new bottom bracket, as you can see, the difference is significant. Our bottom bracket is 68 - 73 mm. The frame is 73 mm wide at the bottom bracket shell. Spacers allow you to adjust the width of the bottom bracket. Pay attention to the spacer selection. Depending on the trimming, dobby glasses can be completely different.
This is the universal way to choose the right spacers. Replace the bottom bracket. Lubricate threaded connections well. The lubricant will repel water and your sled will live much longer. Subscribe to the channel and like) Bicycle cranks replacement. If you do not lubricate the splines, and they need to be lubricated, your cranks will creak and make an unpleasant creaking noise.
The left crank has a special pin. It must be lifted. It is necessary to tighten it so that the rod does not dangle and does not have to be pulled. The force should be moderate. Left connecting rod, it is important to tighten correctly with a force of 12 or 14 Newton per meter.
The rest of the knots in this video we tighten by hand, according to my experience, sensations. But this knot must be tightened according to the rules cross over the cross tighten the bolts in turn. All! Our bikes are ready.
00:00 Bike upgrades DIY
00:23 How to replace a Shimano Hollowtech II bottom bracket and crankset
00:35 How to remove bike cranks
02:30 How to remove a bicycle bottom bracket
04:34 Shimano hollowtech II bottom bracket sm-bb52 unboxing
06:53 Bottom bracket replacement
09:04 Replacing bicycle cranks
#cranks #bicycle #bikeoverhaul
26
views
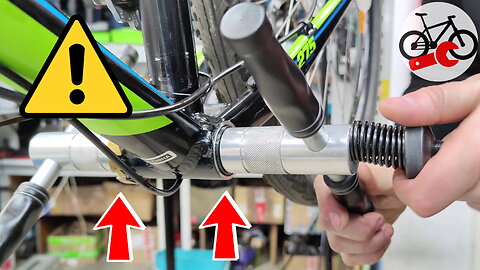
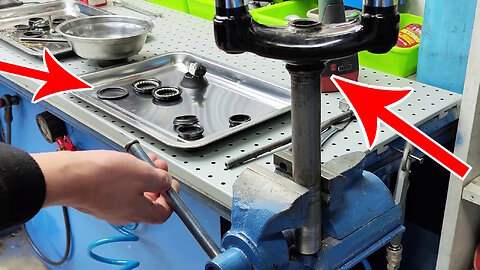
It needs to be fixed in your bicycle ! Creaking bicycle bottom bracket.
Hello everyone who loves biking!
What is important to fix on your bike?
Bottom bracket tapping & facing tool kit. When using this tool, it is very important to lubricate everything thoroughly. If you do not lubricate the tool, results may not be achieved. Install the tool in the bottom bracket of your bike. Mount the Facing Bottom Bracket. Most bicycle frames have a square carriage or a carriage with external bearings overlapping the sides on the right. Why do you need to do all this, you ask? If the bicycle bottom bracket is crooked, the butt will have its own paint, and uneven surface, then for this reason, your bicycle's carriage will be damaged much faster. Your bike will squeak. You will have to change the bottom bracket very often and spend extra money for it. Look how much paint we filmed! Lots of paint! After processing, the surface is even and smooth. But the paint can remain somewhere else. It is necessary to clean the cutter after processing and repeat until we get the result. There is more to do. Refill the tool in the bottom bracket shell and clean everything perfectly. From our practice we observe that on new bicycles there is usually no such processing of the frame. Perfect! Perfectly aligned bottom bracket after machining. We have to repair both sides. Lots of factory paint left where it shouldn't be! Buying this bike is of course not profitable. Therefore, it makes sense to contact the workshop to do it for you for a fee. It must be repaired in your bike. After the first cleaning, burrs remain. They must be removed! We clean our cutter again and run the tool again. As you can see, it takes a lot of time and effort to prepare a bike frame for use. This is not done in the factory, otherwise production can be very expensive. The price of the bike in the store will be very high if all these little things are eliminated first. Thanks for watching! Rate Our Like Video! Write Comments!
DIY with ASMR
00:00 Important things to fix on your bike
00:10 Tools for bottom bracket tapping & facing set
01:19 Installing tools in your bottom bracket
01:45 Fix facing bottom bracket
04:35 Perfect facing bottom bracket after processing
06:30 What needs to be fixed on your bike
#bikeservice #tutorial #bottombracket
17
views
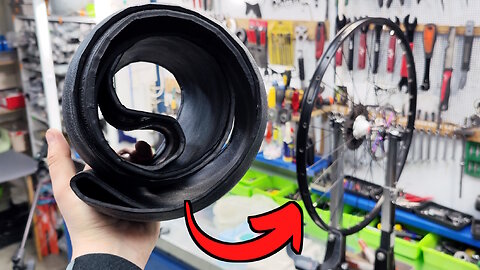
How to straighten bike wheel. Fix Rear bicycle Wheel
This new video falls under the category of bicycle wheel repair.
Today will be a video lesson on how to do a bike rear wheel alignment.
To be honest, the wheel is almost flat. There is a small frontal runout of the bicycle wheel rim.
The customer has very much requested that this small bump on his wheel be corrected by me.
The customer's wish is the law.
I will align the bicycle wheel so that the brake pads do not rub the rim of the bicycle wheel.
How to center a bicycle wheel rim.
#bikewheel #fixbicycle #bikeservice
00:00 Bicycle wheel is not straight and wobbles.
00:20 Removing the rear wheel of the bicycle.
00:37 How to quickly remove the tire from the bicycle wheel.
01:42 Truing stand for wheels.
04:01 Checking the tension of the bicycle wheel spokes.
04:25 How to true a bicycle wheel.
06:52 Checking the centering of the rim between the lock nuts of the hub, or "dish.".
08:24 Checking the performance of the wheel alignment.
30
views
Adjusting v-brake bike brakes. Brake pad burrs.
How to adjust V-brakes on a bike when the brake lever falls off but the brake does not apply.
Let's try to adjust the cable to the desired position.
The movement of the lever is correct, now look at the position of the blocks.
One of the disadvantages of brakes on a bicycle, V-brake type, these are pads that are manufactured.
They gradually go down and a step appears on the brake shoe.
This step prevents the brake from working properly!
To properly adjust your bike brake, you need to pull out the block and cut off this step.
If cycling is your thing, you won't want to miss this video.
Non-verbal video featuring mechanical sounds. Language barriers don't apply; internationally accessible. Presented as a DIY tutorial.
00:00 V-brake adjustment.
00:15 Tighten cable tension adjustment screw.
00:32 Tighten brake cable.
01:09 Brake pad is unevenly positioned.
01:19 Remove brake pads.
01:40 Brake pad has uneven wear.
01:50 Trim overhang on brake pad.
02:40 Remove and trim second pad.
03:37 Before installing the pads, it's important to get the shims in the correct order.
03:54 Install the pads.
04:38 Place the pad so that it makes full and even contact with the rim when the brakes are applied.
05:28 Repeat the same procedure for the second pad.
06:55 Hold the pad as it is pressed in to prevent it from rotating.
08:23 Attach the brake cable.
09:24 Observe the movement of the right and left brake arms while pressing the brake lever.
09:48 Adjusting the distance between the pad and the rim of the left and right v-shaped brake shoes.
10:53 Tighten all v-brake screws with a hex wrench.
11:16 Great job.
#vbrake #bicycle #tutorial
9
views
How to quickly change a wheel tube on a road bike
Hello, friends, cyclists. Today's video tutorial will be about how to quickly change the cranksets on a road bike. These cranksets are for a square-type bottom bracket. You will see how to do a crankset replacement on a bicycle with a bicycle mechanic in the workshop. All the nuances and the sequence of actions for the correct replacement of the cranksets will be covered.
00:00 Bicycle cranks need to be replaced.
00:53 How to remove the pedals from the bike.
01:39 How to remove the connecting rods of a bicycle with a square carriage.
03:49 What to do if the bicycle cranks do not come off.
05:30 Dismantling the left connecting rod.
07:13 Cleaning and tightening the bottom bracket before mounting the cranks.
09:07 Mounting the new cranksets on the bike.
11:50 How to put the pedals on the cranks of a bicycle.
#crankset #roadbike #bicyclemechanic
🔴🎥🚲 *Write in the comments, what you would like me to do in the new video.*
❓❔❓ *Ask your questions in the comments*
👇👇👇
7
views

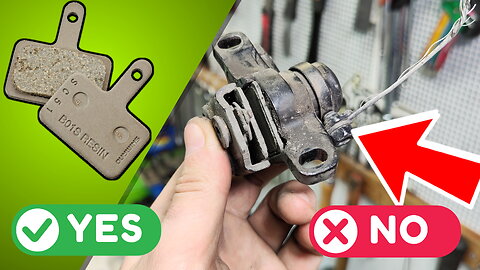
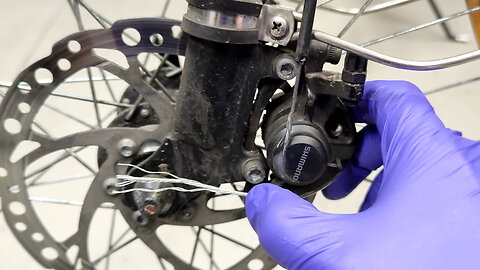
Bicycle disc brake pads replacement. Hydraulics Shimano BR MT200.
In this video tutorial, I will show you how to replace bicycle disc brake pads when the pads are worn out and the brakes stop working.
The brakes are constantly squeaking and making unpleasant noises.
Subscribe to the channel and watch this video lesson to the end.
You will learn all the tricks and useful tips on how to replace bicycle disc brake pads.
As you can see, our Shimano MT-201 BR MT200 brake pads are already worn out.
It brakes metal on metal and damages the brake disk.
First we need to remove the old Shimano MT201 caliper pads.
The pistons came out, the spring was destroyed, the pads just aren't there anymore.
Cleanliness is the key! Wipe down the fork and caliper thoroughly.
Degrease with isopropyl alcohol and wet wipes. When replacing pads on hydraulic brakes, be sure to bleed the hydraulics.
This video is tailor-made for those who love biking.
Language-independent video, utilizing only technical auditory elements. A universal experience in a DIY video style.
00:00 How to replace bicycle disc brake pads.
01:27 How to remove the pads from a Shimano caliper.
01:39 How to check brake pad wear on a bicycle.
03:13 Turning the funnel to bleed the Shimano hydraulic brake.
04:13 Squeezing the piston of the caliper.
07:08 Cleaning the brake disk.
07:59 How to bleed Shimano hydraulic disc brakes.
#bike #pads #shimano
6
views
How to quickly pump the hydraulic brake on a bicycle
In this video tutorial, I will show you how you can quickly pump the hydraulic brake on your mountain bike.
This procedure should be done regularly. The hydraulic fluid will gradually drain out of the brake. The brake on your bike starts to fail. The brake lever reservoir is leaking and needs to be filled with mineral oil.
In this video, we use a Shimano brand brake with mineral oil.
2
views
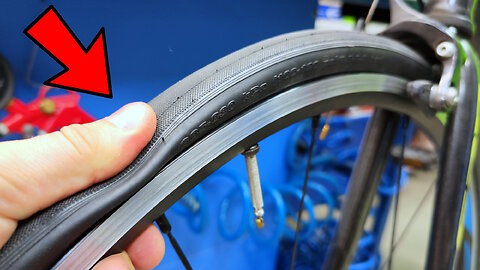
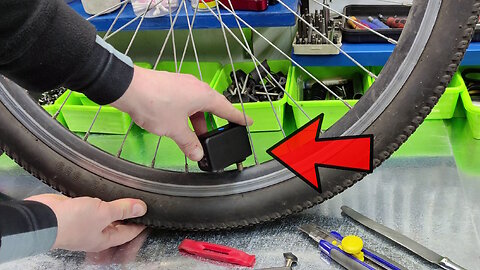
How to install a tubeless tire on a bike. Bicycle tubeless ready
In this video I will show you how to properly install a tubeless tire on a bicycle.
I will also put tubeless tape on the rim and install the valve.
For example, I will use a "Zefal" sealant and "Stans" tubeless tape.
This video tutorial"diy" in style "asmr" for people who love cycling.
Video episodes:
00:00 How to install a tubeless tire on a bike
00:12 Bike tubeless wheel kit
00:32 What is the difference between a tubeless bike rim and a tube rim
00:43 Cleanig bike rim
01:24 Bicycle tubeless slick tire
02:10 How to pick tubeless rim tape
04:51 Installation a tubeless rim tape
09:19 Trimming the edge of the tubeless tape of a bicycle wheel
09:51 Finding and marking the hole for the tubeless valve
10:40 Heating the awl to pierce the hole for the tubeless valve
11:08 Burning a hole in the tubeless tape
11:45 Installation a tubeless tape
13:11 Removing presta valve core
14:20 bicycle tubeless tire installation
18:36 Pouring sealant into the wheel
21:54 Final pumping of a wheel
23:11 It`s done)))
12
views
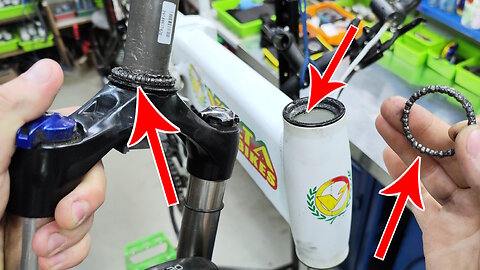
Why bicycle is hard to control. Bike headset maintenance | DIY
This video tutorial about bicycle. I show you why bicycle is hard to control. We will look at why the handlebars of a bicycle can jam. I will do a full maintenance bike headset.
Video be interesting for cyclists!
00:00 How to overhaul bike headset
00:29 Why bicycle is hard to control
01:29 Removing rear wheel
01:48 Removing rear disc brake
02:32 How to remove bike headset
04:47 How to remove bike fork
05:08 Dirty bike steering bearings
06:16 Bycycle headset service
06:39 Bike headset maintenance, cleaning all the details
08:28 Cleaning a bicycle fork
09:18 Start to assemble the bike headset
09:53 How to grease a mtb headset
14:18 Bike headset adjustment
#bike #maintenance #bikeworkshop
13
views
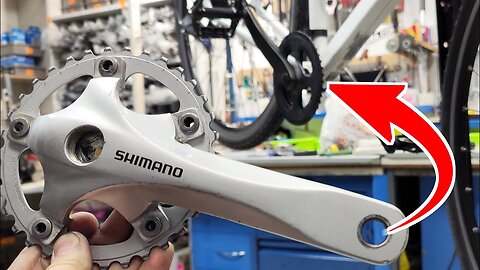
Bicycle front crank replacement. Pressing a new crank on a bike | DIY
Hello bikers!
In this video tutorial we will show you: How to replace a bicycle front chainring and press a new crank onto a bicycle. I will teach you how to use a bicycle crank puller. It's very easy!
It will be interesting for bikers!
Bike video format "DIY" with "ASMR".
*Main episodes of the video tutorial:*.
00:00 Bike front chainring replacement
00:28 New crank Shimano fc-2350
01:04 Removing the crank cap bike
01:15 Unscrewing the clamping bolt
01:44 Cleaning the crank thread
02:00 Lubricating the crank thread
02:18 Bicycle crank puller
02:36 Lubricating the crank puller
02:54 How to remove a crankset with a crank puller
03:52 Removing a crank on the right side of a bike
04:41 Bicycle crank square taper
05:01 Removing a pedal from a bicycle crank
06:48 Press right crank on a bicycle
07:47 Mounting the right pedal to the crank
08:24 Pressing left bicycle crank
09:21 Installing the left pedal onto the crank
10:00 Good job!
4
views
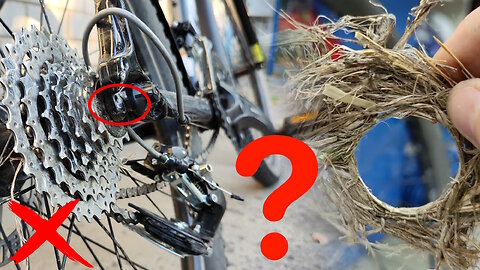
What can damage a bike? Bicycle rear derailleur repair
Hello my cyclist subscribers. This video is going to be unusual. Once again, a bike was brought to our bike shop that broke down for an unusual reason. As they say, there's always a first time for everything. I've never seen ordinary grass break a bike's shifter before. Because of the grass that was on the bike's shifter sprocket, the rear derailleur holder attachment was broken. I think it would be very useful for you to know which part will prevent a similar breakdown in the future. I'm going to show you how to fix the bike. This will be a short lesson on how to replace the bracket that secures the rear derailleur to the bike frame. Also, I will show you how to adjust the rear derailleur. I will perform the removal and installation of a bicycle's rear derailleur and fix a deformed derailleur frame.
#derailleur #bikedamage #bikeshop
6
views
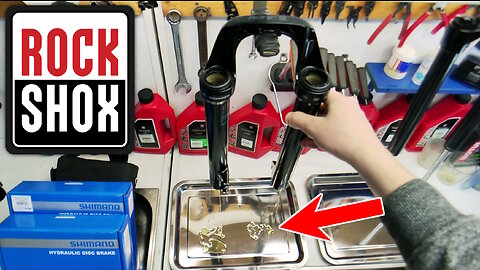
What's inside a new Rockshox Judy bike fork. Bicycle fork review and lubrication.
In this video I show you what's inside a new Rock Shox Judy fork.
When you buy a new bike fork, you should always do a first service to make sure everything is okay with the bike fork.
It happens that there are a lot of metal shavings inside the bicycle fork.
Many bike forks have a lack of oil inside.
In this video I'll show you how to take the Rock Shox Judy fork out of the box, do a superficial inspection of the bike fork, and perform the first maintenance.
This video instructions "DIY" for cyclists. Video tutorial in "ASMR" style.
It will be interesting and useful for cyclists!
00:00 Rock Shox Judy
00:19 Unpacking the rock shox judy fork
00:55 Rock Shox Judy bike fork review
02:37 How to disassemble a bike fork
05:03 What to look for in a new rock shox judy fork
06:19 Cleaning the inside of your fork
06:55 Lubricating the fork with grease
08:59 Lubricating the fork boots
10:42 Bike fork Rock Shox assembly
11:36 Filling liquid oil in a bicycle fork
13:11 Cleaning the outside of a bicycle fork
16:16 Testing a new Rock Shox Judy bicycle fork
#rockshox #bicyclefork #mountainbikes
8
views
Fix your bicycle. How to replace a bike bottle cage mount
Hello friends.
This video will be useful for cyclists who have a broken link in their bike frame.
This bracket can be used to attach a bottle bag, a bike pump, a bike rack or various bike bags.
I'll show you how to replace a bike bottle cage mount.
00:00 Bike bottle cage mount
00:28 Spool for a bottle cage on a bike is scrollable
00:39 Damaged thread
00:53 Installing the drill bit in a special angle nozzle
01:16 Drilling an old can out of a bike frame
01:44 Old bottle cage mounting rotates
01:55 Putting protective film on the bike frame
02:31 How to remove a bottle cage mount from a bike
03:35 Happened! It wasn't easy)
04:05 New bottle cage mount
05:19 Bike bottle cage mount installation tool
05:30 Installing a bottle cage mount
06:43 Fixing the bottle cage
07:29 Installing the bottle cage
08:22 Nice)
#fixbicycle #bikeworkshop #bike
6
views
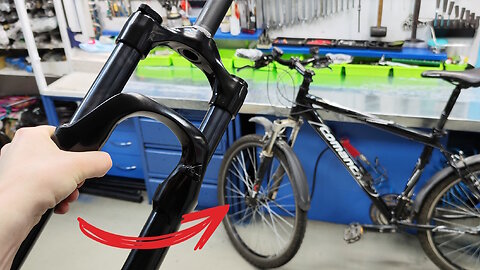
How to upgrade your bike. Replacing your bike fork RockShox | "ASMR"
In this video we will show you how to upgrade my bike.
You will see why replacing a bicycle fork.
For example, we will use a bicycle fork RockShox Judy.
This video instructions "diy" for cyclists. Video tutorial in the style of "asmr".
It will be interesting for cyclists!
Episodes in this video tutorial:
00:00 How to upgrade your bike
00:19 Old bike fork no longer pleases me
00:30 Replacing the Rockshox Judy fork
00:57 Removing the front brake and wheel from your bike
01:25 How to remove the handlebars from your bike
02:16 Removing the forks
02:44 Dirty bearings
03:40 Cleaning the headset cup bike
04:02 Cleaning the stem bike
04:25 How to remove the crown race on a bike fork
05:15 Cleaning the crown race
05:26 How to install a chainring on a bicycle fork
10:03 How to install a crown race on a bicycle fork
12:23 Lubricating the bottom bracket of a road bike
12:34 Replacing the rockshox on a bicycle fork
13:06 Lubricating the upper bearing of the headset bike
13:20 Assembling the headset
14:23 Cleaning the fork stem
14:37 Installing spacers on the bike fork
15:27 Adjusting the handlebars
17:17 Installing the wheel on the bicycle fork
18:14 Nice job!
#yourbike #bikeupgrade #rockshox
13
views
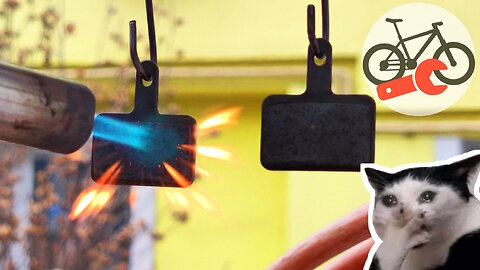
How to replace brake pads on a bicycle. Adjusting mechanical disc brakes.
Hello everyone, in this video we're going to take a look at how to replace pads on a bike.
and adjust Shimano BR-M375, BR-TX805 mechanical disc brakes.
Subscribe to the channel, put likes. And we continue.
This video is about mechanical brake caliper of Shimano brand model BR-M375.
Similar model Shimano BR-TX805. The caliper works on a mechanical cable.
Classic disc brake pads. As usual, the brakes are very dirty.
Before replacing the pads, it is essential to clean everything around them, the disk, the frame and the caliper itself. Must be treated with isopropyl alcohol with wet and dry cloths.
Must be perfectly clean. If not, you won't get results!
For everything to work, be sure to repeat after us.
This video will show you all the details. Just repeat after us and the bike will slow down very well.
We are going to change the cable to make the brake work better. The cable was beat up and needed to be replaced, so we just took a bite out of it and installed a new one.
As you can see the pads are worn out, there is very little material left. There are no decks.
We zangina the hairpin that holds the pads. Removal of the pads from the caliper The block was equal to the spring. This is a timely replacement.
If you continue to brake with such pads, then the spring will begin to wear and ruin your disk. New pads must be compatible with your caliper. Make sure they are the same!
Insert the new pads into a clean caliper. Be sure to put the pin back in to keep the pads from falling out. This is for your safety! Remember the dirty knot at the beginning of the video?
Now everything is clean, as it should be! We use isopropyl alcohol to degrease the rotor. It should not be greasy!
After degreasing, we use a gas burner to re-grease the disk. Install the brake caliper on the frame.
Now you will learn that the adjustment of the rear brakes is on the one hand just tedious work on the other hand.
You will see how a mechanic performs adjustments in workshop conditions.
Support the channel of our workshop. Put like write your questions in the comments.
Also, please indicate in the comments. What do you want us to shoot a video.
Shimano BR-m375 brake clit adjustment. Will have to tinker. We have a series of bolts and we need to adjust so that the pads do not hit the rotor.
Two bolts that adjust the fit of the caliper to the frame. One bolt is for the cable tension.
And the last bolt is responsible for the approach of the right pad to the rotor.
This is the end of our video tutorial. Thanks for watching. Rate the video with a Like.
Good luck to all cyclists!
No words, just mechanical sounds in this video. Language-neutral content, internationally accessible. Presented in a do-it-yourself video format.
If you're a biking enthusiast, you'll love this video.
#bikepads #bikemaster #mtb
00:00 How to adjust mechanical disc brakes.
00:41 Beginning to remove the shimano br-m375 caliper.
01:42 Brake system cleaner.
02:07 Replacing shimano brake cable.
03:39 Replacing the pads on a shimano br-tx805 mechanical disc brake.
05:20 Disk brake cleaner.
05:52 Adjusting mechanical disc brakes shimano br-m375, br-tx805.
32
views
How to quickly inflate a bicycle tire. Bicycle Compressor
Hello my fellow cyclists! 🙃
In this review video we will show you how a small bicycle compressor works, unboxing and testing.
Video format "ASMR" about bike.
It will be interesting for cyclists!
00:00 Small compressor inflates the bicycle tube
00:15 Bicycle compressor inflates bicycle tire
00:42 Unpacking bike compressor
02:17 Bicycle compressor review
02:33 Equipment
03:52 Nozzle for changing the type of nipple
04:22 Head for a Presta valve
05:32 Inflating a bicycle tube presta valve
06:40 Head for a Schrader valve
08:10 Pumps the bike tube schrader
3
views
Bicycle squeaks and creaks. How to fix bike brakes.
In this video you will learn why bicycle brakes make extra noise like squeaking or screeching.
I will show you the main causes of extra noise in a bicycle.
I will show you how to repair the brakes on a bicycle so that the squealing does not occur.
You will see the whole procedure of maintaining the hydraulic disc brake on a bicycle.
At the end of the video we will test the brakes after the service.
#bicycle #squeaks #bikefix
00:00 Bicycle squeaks and screeches
00:11 Bicycle squeals when braking
00:25 Removing the bike brake
00:53 Removing brake pads from a bicycle brake
01:12 Cleaning the brake
01:58 Installing a funnel to pump a bicycle brake
03:44 How to repair bicycle brake pads
04:33 Burning bike pads
04:59 How to clean a disc brake rotor
05:40 How to repair bike brakes
05:51 How to install new brake pads on a bicycle
07:17 How to install disc brakes on a bike
07:28 Adjusting bike brakes
08:24 Bike without squealing
32
views
How to remove a crank square on a bicycle. ASMR
Hello cyclists!
In this video tutorial we will show you how to How to remove a crank square on a bicycle.
Bike video format "DIY" with "ASMR".
*Main episodes of the video tutorial:*.
00:00 Shimano crank square taper
00:30 How to remove a crank on a bike
00:50 Cleaning the crank thread from sand and shavings
01:13 Lubricating the connections of a bicycle crank
01:23 Installing the tool for removing a bicycle crank
01:45 How to remove a right crank on a bicycle
02:47 How to remove a left-hand bicycle crank
03:14 Cleaning the thread of the left crank from sand and shavings
03:45 Removing a left-hand crank on a bicycle
22
views
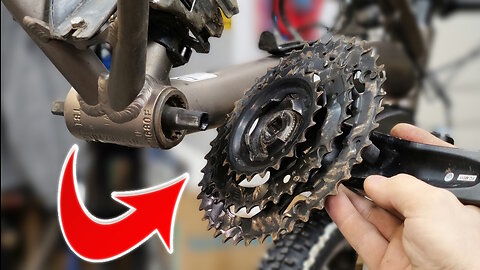
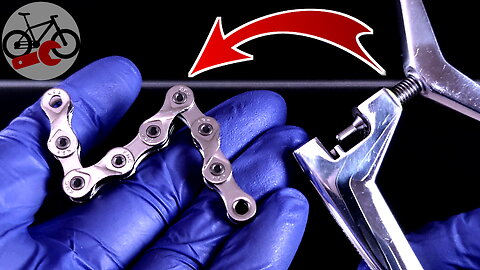
We shorten the chain on the bike. What happens when the chain is short?
What happens to my bike when the chain is short?
In this video, we delve into the consequences of shortening a bicycle chain. Watch as we begin by examining a stretched bicycle chain and proceed to test the behavior of the bike's shifters with the altered chain length. You'll learn a step-by-step process for shortening your bike's chain and witness our experiments to assess its performance. As we push the limits and attempt to further reduce the chain's length, you'll discover the surprising outcomes that arise when the chain is shortened. Join us on this journey of exploration and experimentation, culminating in a satisfying and unexpected conclusion. Whether you're a cycling enthusiast or simply curious, this video offers insights into the fascinating world of bicycle mechanics.
00:00 Bicycle chain stretched
00:12 We test the bike's shifters, we see how the chain behaves
01:10 How to shorten the chain on your bike
05:19 Testing the bicycle chain
05:43 Trying to shorten the chain even more
08:58 What happens when the chain is short
09:38 Happy ending =)
#bicycle #bikechain #bicyclechain
13
views
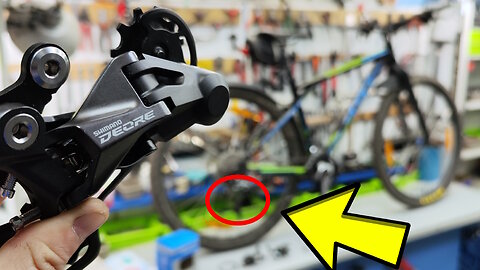
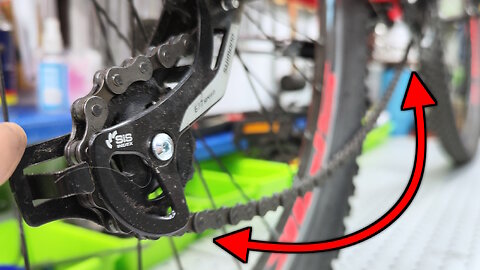
Bicycle Upgrade. Replacing and adjusting the Deore rear derailleur | DIY
Hello everyone who loves cycling 😉!
In this video, I will show you how to replace the right shifter shimano sl-m6000 and the rear derailleur shimano deore.
You will see how to adjust the rear derailleurdeore m4120.
For example, we will use a GT bike.
This video instructions "diy" for cyclists. Video tutorial in the style of "asmr".
It will be interesting for cyclists!
Episodes in this video tutorial:
00:00 Upgrade your bike
00:21 Broken rear derailleur
00:56 Unpacking shimano deore shadow rd-m4120-sgs 10/11 speed
02:06 Removing the chain from the bike
02:51 Removing the old rear derailleur
03:39 Comparing two rear derailleurs
04:21 Applying loctite to the spring tension screw
05:15 Aligning the rear derailleur hooks on the bike
05:58 Installing Shimano Deore Shadow RD-M4120-SGS rear derailleur
06:45 Installing a new chain on a bicycle
07:15 Connecting chain quick links bicycle
08:24 Removing handlebar grips
08:56 Removing the right rear derailleur from a bicycle
10:18 How to install a shimano sl-m6000 rear derailleur on a bike
13:17 How to easily and quickly install bicycle handlebar grips
14:34 Fixing the bicycle shift cable
16:39 Adjusting the shimano deore m4120 rear derailleur
23:15 Bike shifter well set up
23:30 Good job!
16
views
We change the brake cable of the bike if it bursts. Bike brake adjustment
Broken brake cable on a folding bike. The handlebars fall off. The cable broke near the brake caliper where it is bolted on. Unscrew the cable tension screw. Put it in the slot. Pull the cable out of the shirt. Remove the cable from the brake lever, it holds the cable tie. Take a new cable, it is longer and without defects. Put it back into the brake lever. Fix the link in the hand brake lever, making sure to turn the lamb clockwise until it stops so that the cut screws and nuts do not match. Insert the new cable into the cable housing. Make sure the cable runs smoothly. If the cable runs tight, the housing needs to be replaced. Next, adjust the caliper so that the pad does not touch the disc. The brake disk of a bicycle is also called the rotor. Reduce the play to a minimum. Insert the shirt into the caliper and fix the cable in the caliper screw must be tightened well! It is the screw that holds the cable! Check that the play is minimal and that the disk has not been struck. The adjusting screw moves the block or brings it closer to the disk. Everything works! Cut off the excess cable and attach the special trailer. Brake ready!
00:00 Brake lever feels spongy.
00:15 Brake cable has snapped.
00:25 Removing the old cable from the brake lever.
01:20 Installing the new brake cable.
01:51 Be sure to tighten the adjustment screw fully.
02:47 Adjusting the inner pad using an allen wrench closer to the brake rotor.
03:40 Securing the brake cable in the caliper.
04:40 Checking if the brake pads are not rubbing against the rotor.
04:48 Trimming the brake cable and securing the end cap.
54
views
How to use a bicycle chain tool.Bicycle chain for 8 speed
In this video tutorial you will see how to use the tool for shortening chain bike.
Join us in this in-depth tutorial as we explore the realm of bike chain care. Learn the ins and outs of using a chain tool to efficiently shorten an 8-speed KMC X8 bicycle chain. Dive into the mechanics as we guide you through the process of delicately pulling the chain pin, a critical skill for a seamless cycling experience. Observe as the chain pin dances and engages with the links, ensuring a ride free from interruptions. Stick around until the end to discover a clever trick involving a small ring that might just be your secret weapon during future rides. Wave goodbye to chain complications and embrace newfound confidence in upkeeping your bike's performance with this indispensable tool.
If you're a fan of cycling, this video will be right up your alley.
Language-agnostic video with technical audio components. International viewing; follows a DIY video format.
00:00 Bicycle chain for 8 speed brand kmc x8.
00:13 Bicycle chain shortening tool.
00:21 How does a bicycle chain tools work.
00:43 Pulling the chain pin.
01:15 The chain pin jumped out and the links broke apart.
02:36 Chain pin rolling.
02:49 Left a small ring.
5
views